My Astrophotography Processing Workflow in PixInsight & Photoshop
In this guide, I’m going to walk you through my current astrophotography processing workflow from start to finish. The biggest thing I want you to take away isn’t just what tools to use, but when to use them.
If you’re looking for a PixInsight processing tutorial that is actually easy to follow, this guide will walk you through my image processing workflow without making things feel overly technical or intimidating.
This tutorial is designed to help you understand the process step by step and feel more confident editing your astrophotography images by clearly giving you the order of steps I use, including:
- Noise Reduction
- Sharpening
- Star Removal
- Color and Contrast
- Final Tweaks
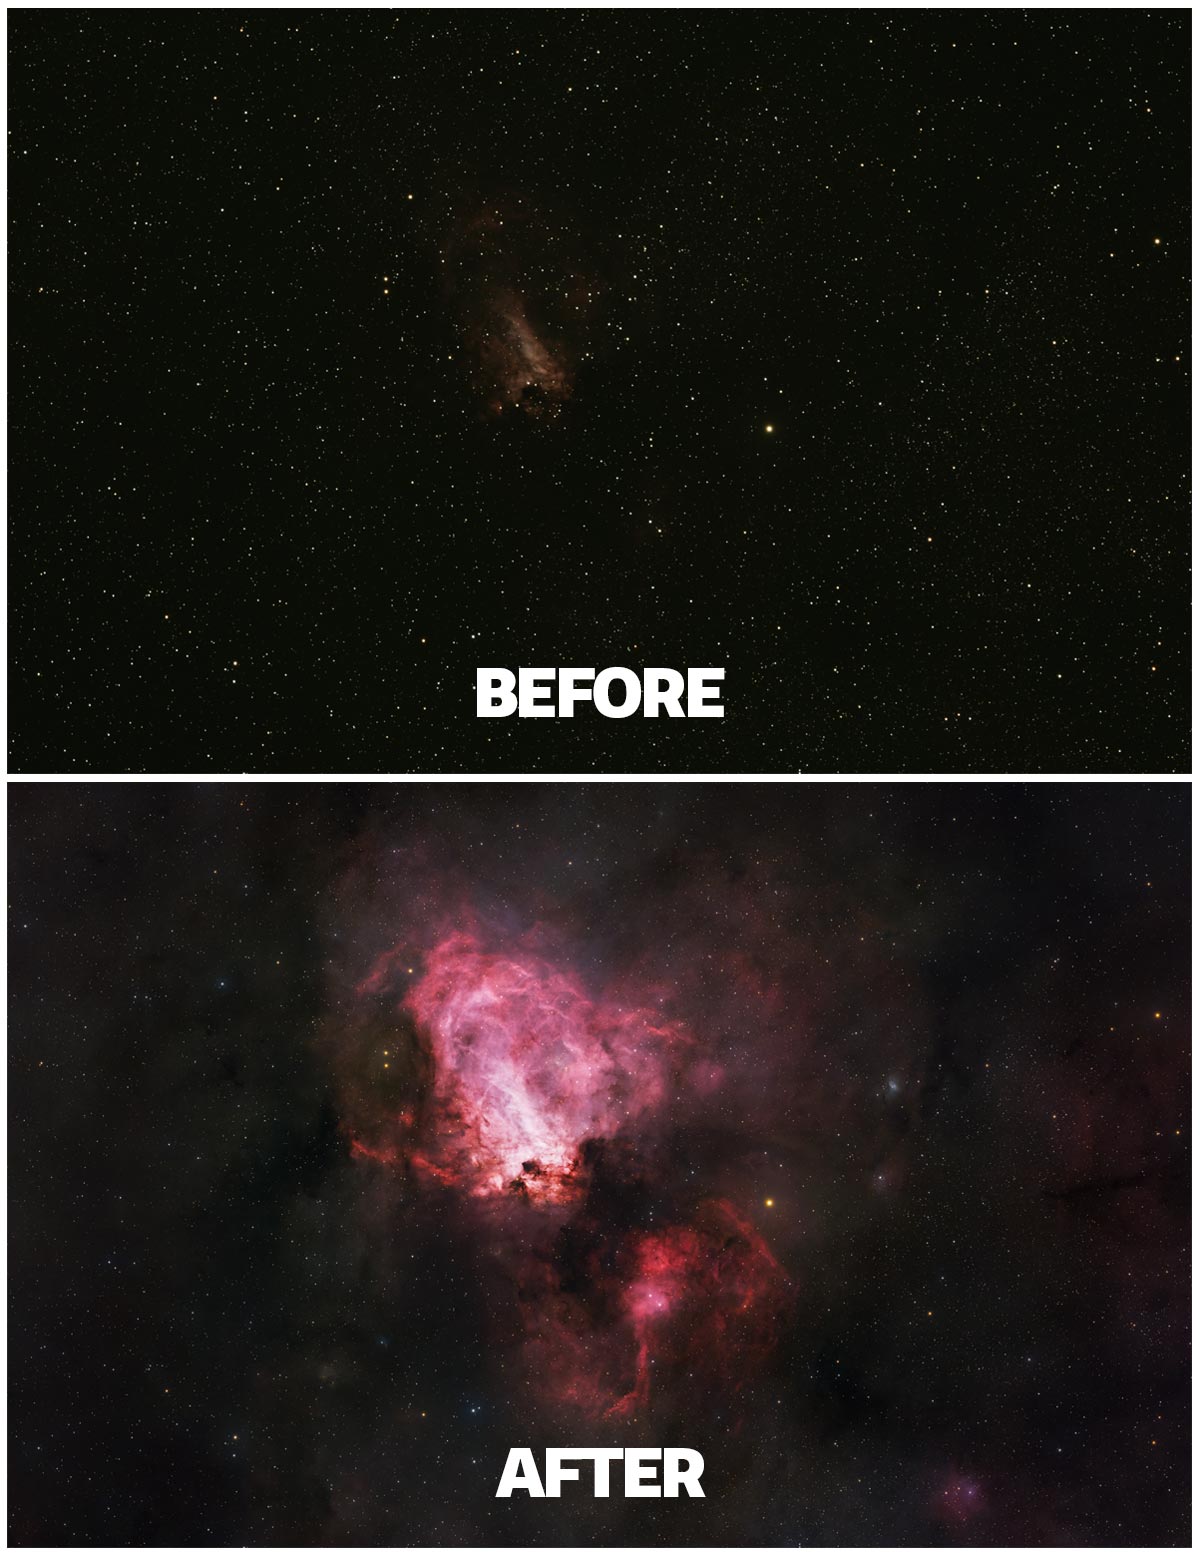
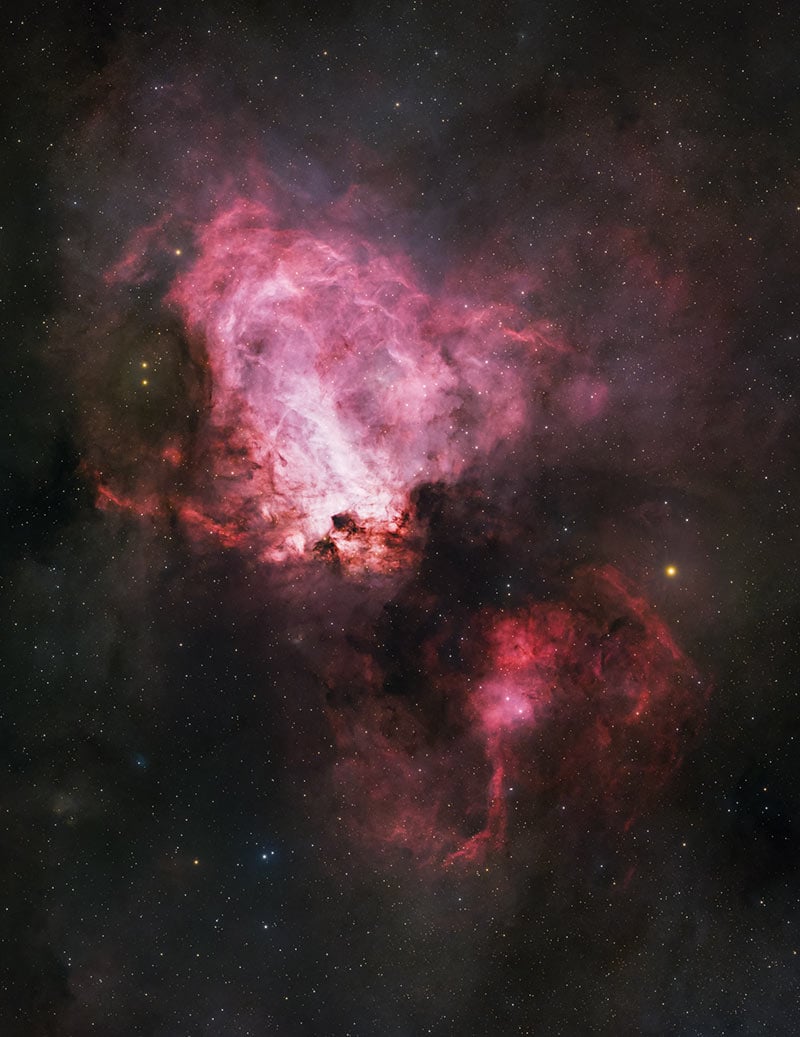
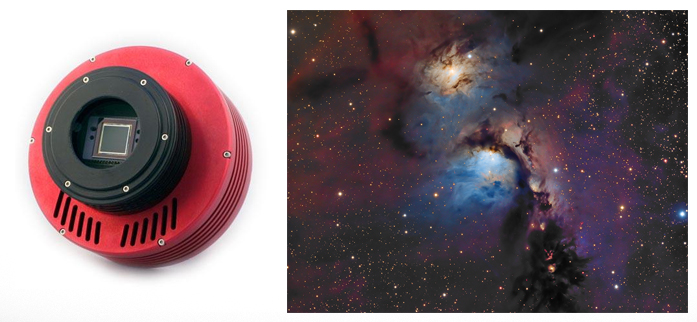
For this example, I’m working with an image of the Swan Nebula, captured under Bortle 1 skies using a dedicated astronomy camera. Let’s dive in. Feel free to watch the video version of this tutorial on YouTube and follow along.
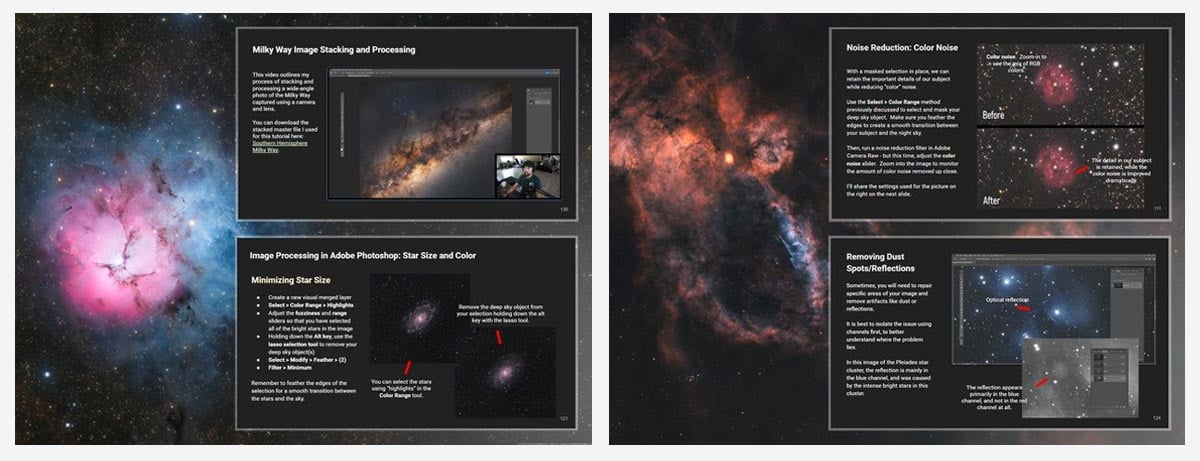
My premium astrophotography processing guide includes additional practice data to work with, along with a more detailed version of this workflow that walks through the key steps in greater depth.
Tools Used in This Workflow
For this workflow, I’m using a combination of PixInsight, Photoshop, and a few powerful plugins that have become staples in my processing routine.
You don’t necessarily need all of these tools to get started, but they help simplify the process and give you more control over your final image.
As you gain experience, you’ll likely develop your own workflow, but this setup is a great place to start.
Here’s a quick look at the tools used:
PixInsight (Core Processing)
PixInsight is especially powerful in the early stages of astrophotography image processing because it excels at handling the technical foundation of an image before the creative finishing work begins.
It is incredibly effective for tasks like gradient removal, background extraction, and deconvolution, where precision and control make a huge difference in the quality of the final result.
Most of the heavy lifting happens in PixInsight, including:
- Color Calibration
- Noise Reduction
- Sharpening (Deconvolution)
- Star Removal
- Gradient Removal
If you’re serious about astrophotography, PixInsight is one of the most powerful tools you can use.
RC-Astro Plugins (Highly Recommended)
RC-Astro’s plugins have become some of the most powerful tools in my astrophotography processing workflow because they solve real problems with remarkable precision and very little guesswork.
For me, they are well worth the cost because they save hours of processing, produce consistently impressive results, and help bring out the full potential of my data with a level of polish that is hard to match manually.
These plugins are used throughout the workflow and make a big difference in both quality and efficiency:
- NoiseXTerminator: Cleans up noise while preserving detail
- BlurXTerminator: Sharpens the image and reduces star bloat
- StarXTerminator: Separates stars from the nebula for independent processing
These tools are easy to use and deliver very consistent results, especially for beginners.
Adobe Photoshop (Final Touches)
Adobe Photoshop remains an incredibly powerful tool for astrophotography processing. What makes it especially valuable is the flexibility to combine precision adjustments with a layer-based workflow that lets me work non-destructively and refine an image exactly the way I want.
For me, it is well worth the subscription price because I use it constantly, it integrates smoothly with the rest of my workflow, and the creative control it offers helps me get the absolute most out of every image.
I move into Photoshop for:
- Stretching with curves
- Layer blending
- Masking and selective adjustments
- Final color and contrast tweaks
Photoshop is an excellent tool for putting the finishing touches on an astrophotography image, especially from a creative and artistic perspective. I find it especially valuable for bringing out the mood and character of an image, turning solid data into something that feels polished, expressive, and uniquely my own.
Software and Data Resources
Here is the exact image data I used in both tutorials, along with links to the processing software and plugins. You can also save the graphic I created below to help you remember the order of each processing step.
- Image Data 1: Swan Nebula Raw Image Data
- Image Data 2: Trifid Nebula Master Stack
- PixInsight: PixInsight Software
- Photoshop: Adobe Photoshop Software
- RC Astro Tools: Blur, Noise, and Star XTerminator
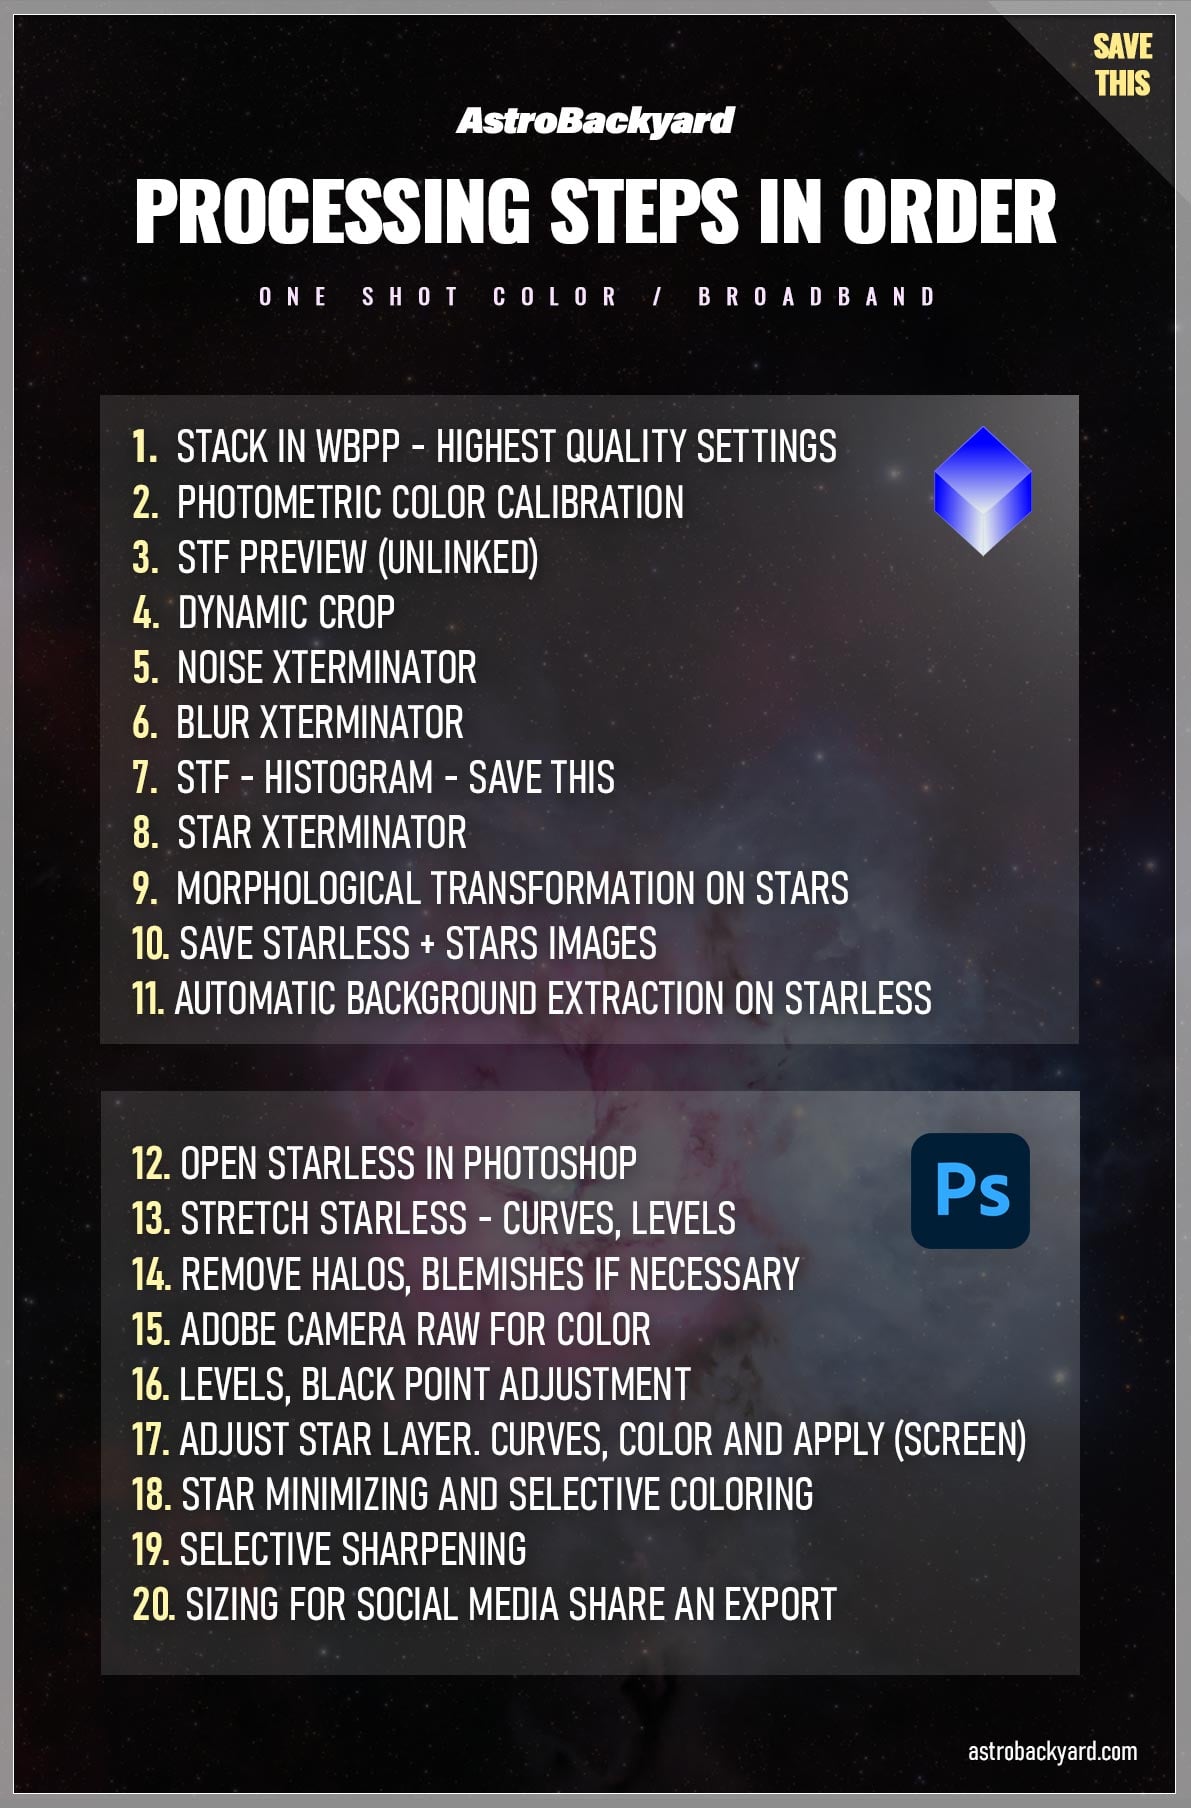
You Can Also Use My Printable Cheat Sheet of the Steps.
Why the Linear Stage Is So Important
Before we get too far, it’s important to understand something called the linear stage.
This is the original state of your image right after stacking:
- It looks dark, flat, and a bit underwhelming
- No stretching has been applied yet
- All of the raw data is still intact
At this point, your image might not look like much, but that’s actually a good thing. Think of the linear stage as your clean slate. This is where you want to do the heavy lifting, like noise reduction and sharpening, before you start brightening the image.
Once you stretch the image, you’re essentially revealing (and sometimes exaggerating) everything, including noise and imperfections. That’s why getting things right in the linear stage makes the rest of the process much smoother.
Most of the important work happens here, and if you take your time at this stage, everything that comes later becomes much easier, and your final image will look better because of it.
Stacking Your Images
Before jumping into processing, you’ll need a stacked image. In this workflow, the data was stacked in PixInsight using the Weighted Batch Preprocessing image stacking script.
PixInsight’s Weighted Batch PreProcessing script, or WBPP, streamlines the entire stacking process by calibrating, registering, weighting, and integrating your light frames using your darks, flats, and bias or flat-dark frames in one organized workflow.
What makes it so effective is that it gives you far more control over how your data is evaluated and combined, while also producing consistently clean, high-quality results.
WBPP takes care of:
- Calibration (bias, darks, flats)
- Registration (aligning your images)
- Integration (stacking everything together)
By the time you open your image for processing, all of that work is already done; you’re starting with a clean, combined dataset. While I still believe Deep Sky Stacker can produce equally impressive results, I have been using WBPP more often lately.
From here on out, everything happens in PixInsight (and later, Photoshop) as we begin processing the image.
Step 1: Photometric Color Calibration
The first thing I do is run Photometric Color Calibration. While this step isn’t absolutely necessary (I skipped it for years), it ensures the white balance of your astrophoto is accurate.
Remember that this is applicable to this image of the Swan Nebula because it was captured in broadband (no filters), with a one-shot-color camera. Narrowband imaging is a completely different animal.
This step:
- Uses real star data to balance colors
- Ensures accurate star color
- Sets a solid foundation for the rest of the process
You might not notice a big visual difference right away, but it matters.
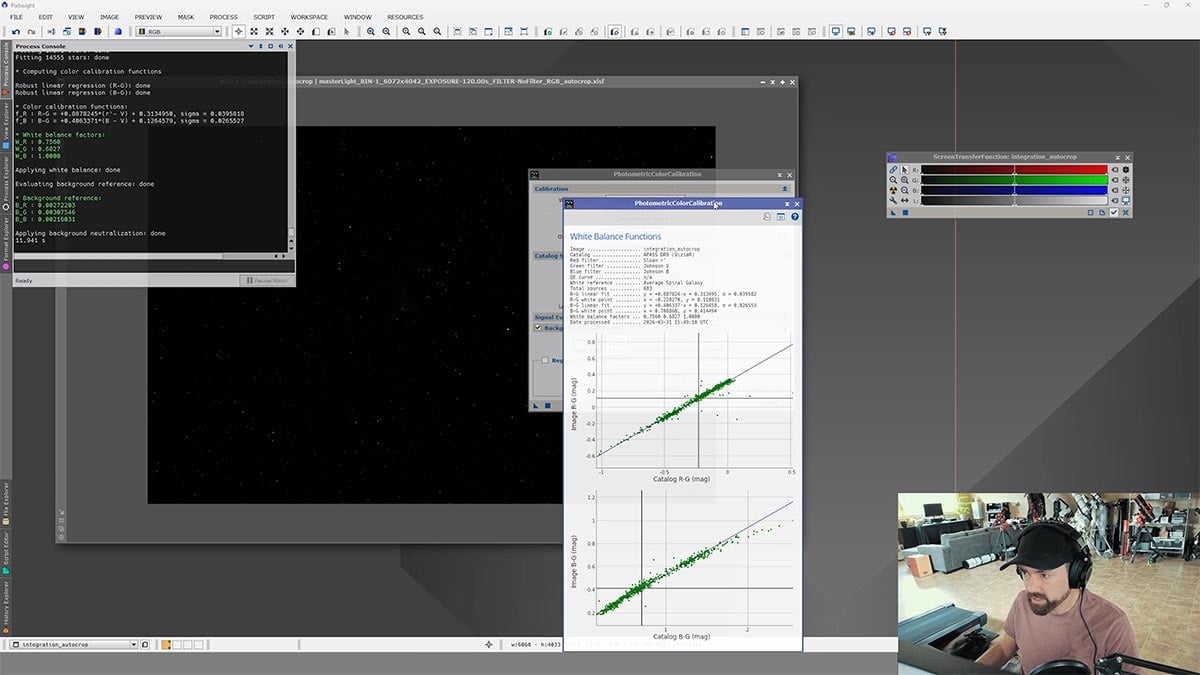
Photometric Color Calibration ensures that the white balance (star color) of the image is accurate.
Step 2: Crop the Image
Next, I crop the image to remove any unwanted edges. While it is unfortunate to lose any amount of your precious image, this is a common step for those shooting with a full-frame sensor camera.
This helps get rid of:
- Vignetting
- Uneven edges
- Artifacts from your setup
Even if you lose a bit of the frame, it’s worth cleaning things up early. By cropping off the extreme vignetting at the edges, processes like the STF stretch will perform better.

Depending on your imaging system, you may need to crop more or less of the edges. Ideally, you won’t need to crop much at all.
Step 3: Noise Reduction
Now we move on to noise reduction, still in the linear stage. This is one of the most important steps, and the timing here really matters.
I used NoiseXTerminator, which does an excellent job of cleaning up noise while preserving detail. Even a subtle pass here can make a noticeable difference later on.
Doing noise reduction early helps:
- Clean up the image before stretching
- Prevent noise from getting amplified later
- Keep fine details intact
Even if your data looks pretty clean, a subtle pass here can make a big difference in the final result.
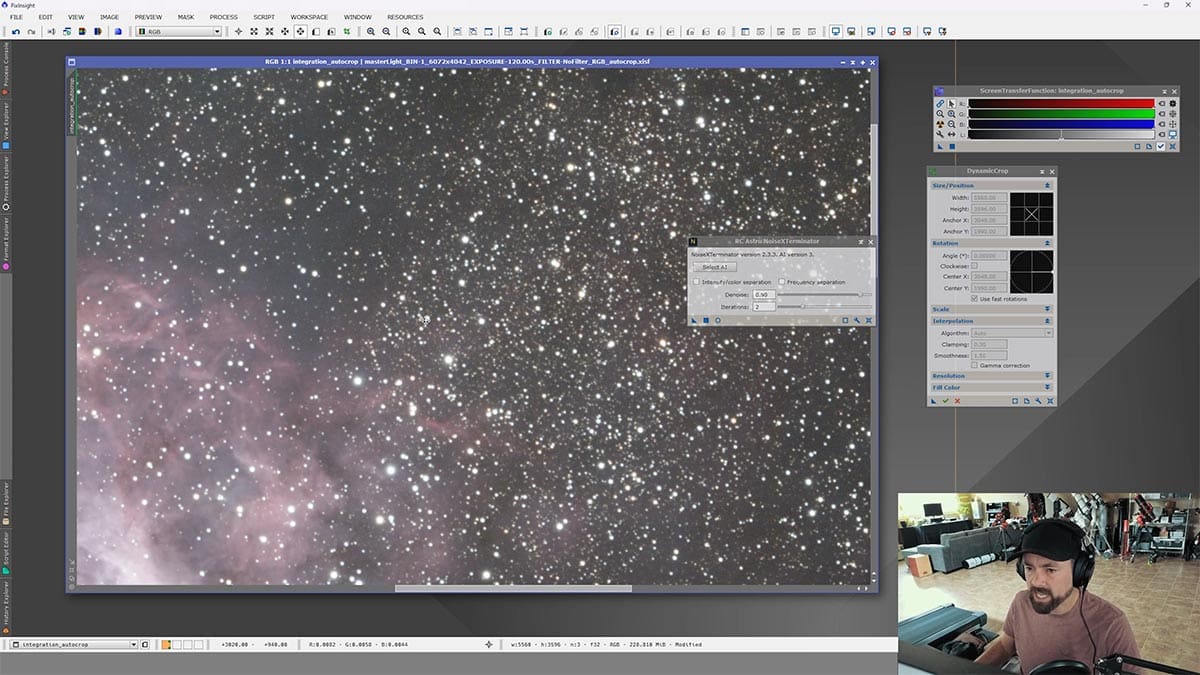
I usually run Noise XTerminator at a modest ‘Denoise’ setting of 0.5, for 2 iterations.
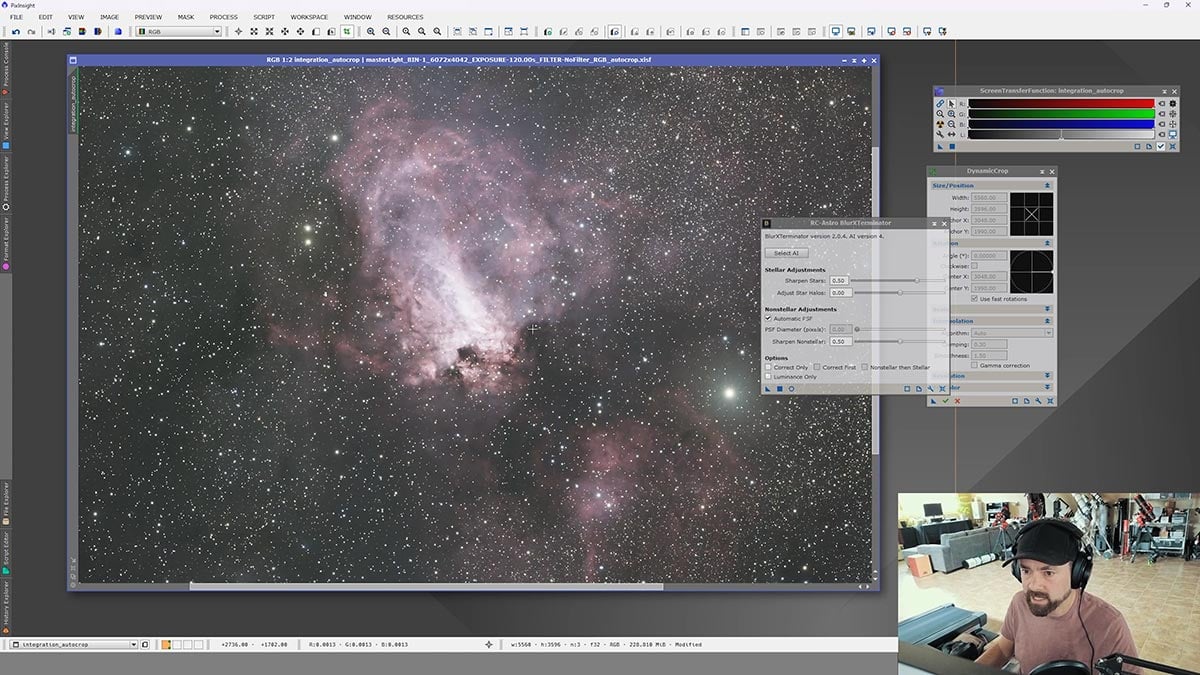
Step 4: Sharpening with BlurXTerminator
Next up is sharpening, using a process called deconvolution. For this step, I used BlurXTerminator, which has become a go-to tool for many astrophotographers.
If you have not yet tried the BlurXTerminator plugin from RC Astro, I highly recommend investing in it. Chances are, you will use it in every single astrophotography image you capture moving forward.
This step:
- Brings out fine details
- Sharpens the nebula
- Reduces star bloating
You’ll usually see an immediate improvement here, but it’s easy to overdo. If it starts to look crunchy or unnatural, dial it back.
It can be tempting to run Noise XTerminator aggressively, but oftentimes, less is more.
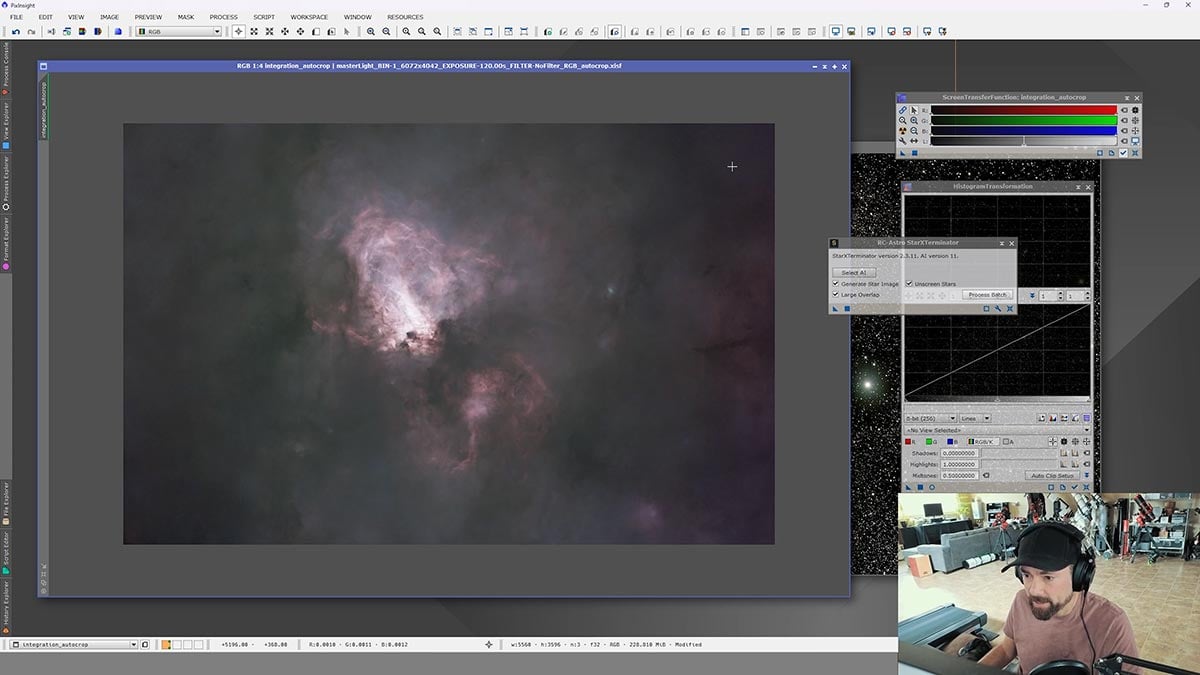
Step 5: Apply Your First Stretch
Once the image is cleaned up, it’s time to stretch it. This is where things start to get exciting. The Screen Transfer Function stretch is quite aggressive, so don’t be alarmed if the image looks a little wonky after applying the stretch.
The key to this step is to apply the extreme stretch as a layer in Photoshop later and adjust the opacity to taste. This way, we can use the exaggerated stretch to create powerful layer masks for specific edits.
Stretching:
- Brightens the image
- Reveals hidden detail
- Transforms the data into something visible
At this point, I like to save a version of the image so I can come back to it later if needed.

There are several powerful stretching tools in PixInsight, including third-party scripts like Generalized Hyperbolic Stretch (GHS) and the Veralux Suite.
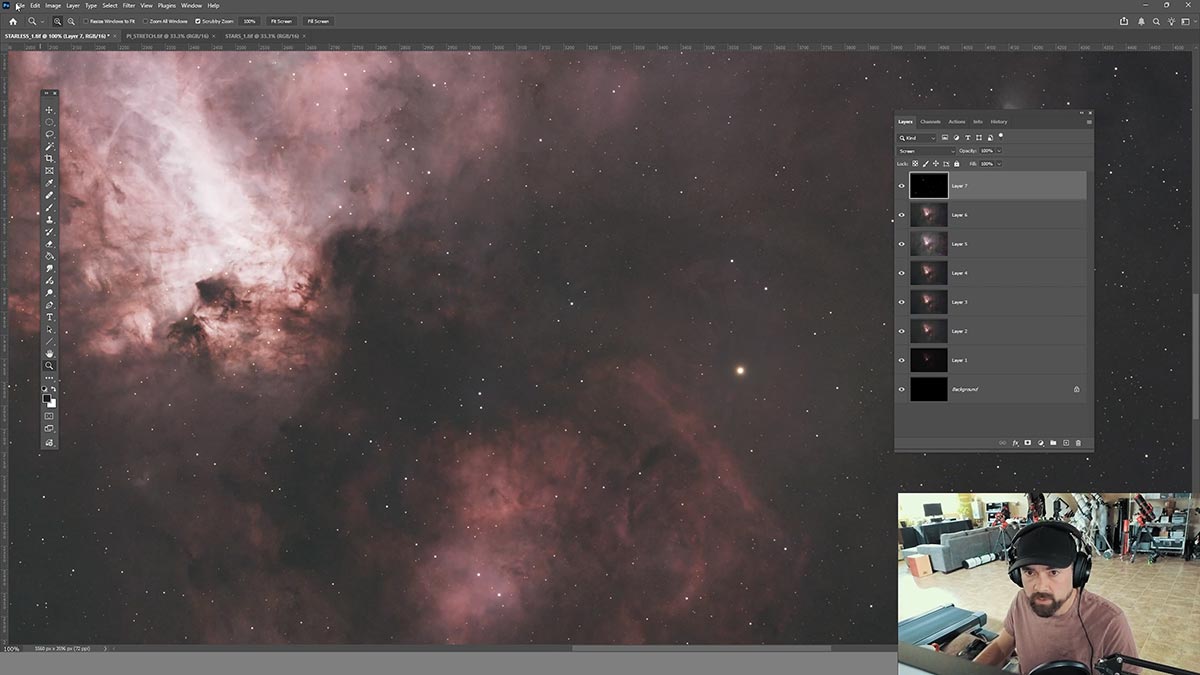
Step 6: Separate the Stars from the Nebula
This is one of my favorite steps. A starless image has a very dramatic look to it, and it often reveals a portion of the nebula you didn’t notice before.
By removing the stars, you can apply powerful edits like saturation and sharpening without worrying about destroying the stars in the process.
Using a tool like StarXTerminator, I split the image into:
- A starless version (just the nebula)
- A stars-only layer
This gives you way more control when processing.
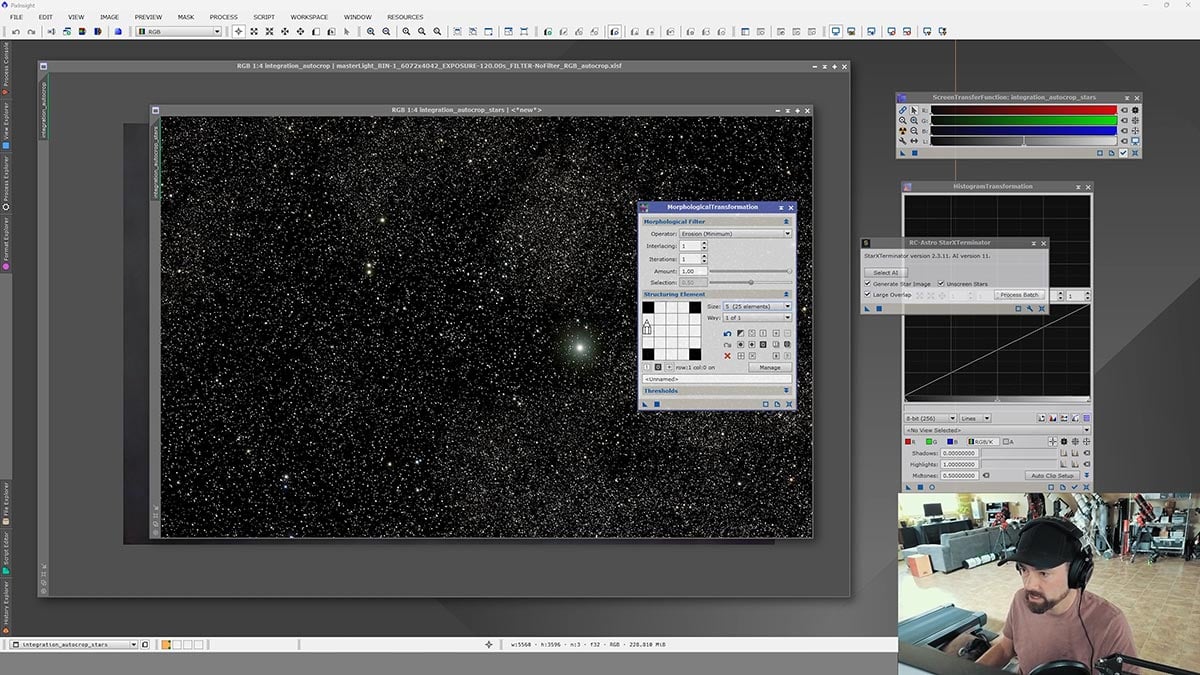
Step 7: Fine-Tune the Stars
Now that you’ve separated the stars, this is your chance to really dial them in. The goal is to keep the stars natural, not overpowering.
A few small adjustments here can make a big difference:
- Slight star size reduction (just a touch, not too aggressive)
- A gentle stretch so they don’t look too dim
- A small boost to color saturation to bring out the star color variation
If the stars are too bright or too large, they can distract from the nebula. But if you reduce them too much, the image can start to look unnatural.
A good way to approach this is to make a small adjustment, then zoom out and look at the whole image.
Once you’re happy with how the stars look on their own, they’ll blend much more naturally when you bring everything back together.
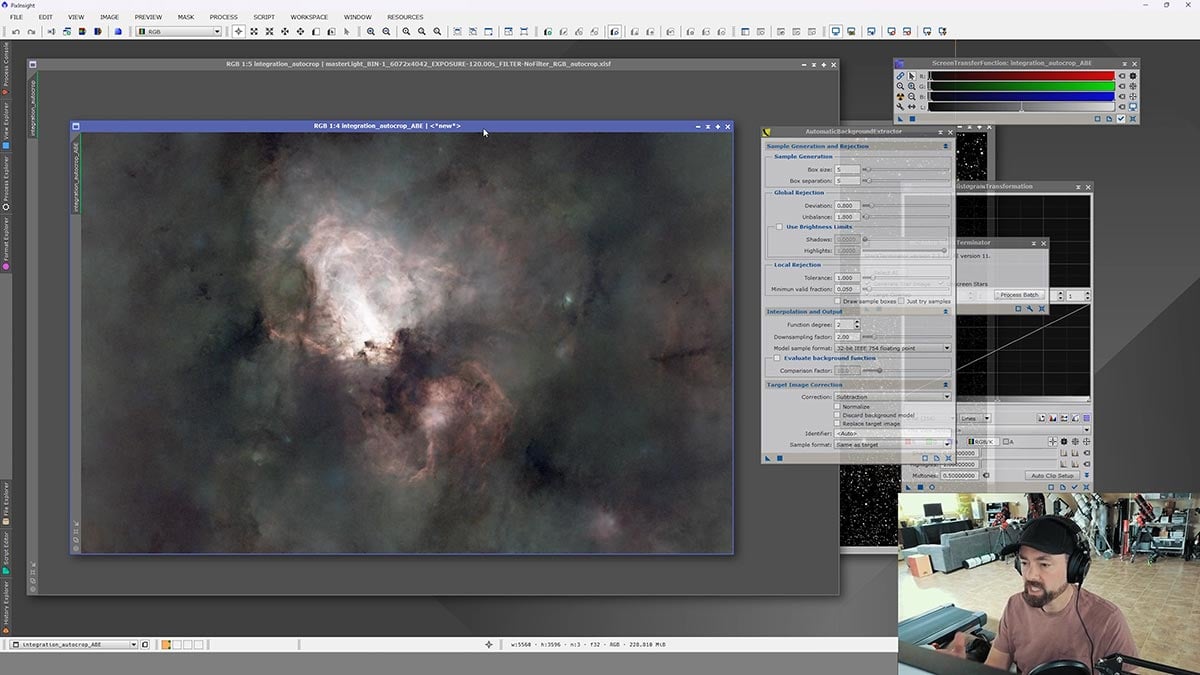
Step 8: Remove Background Gradients (PixInsight)
Now back to the starless image. This is where I remove gradients using a tool like Automatic Background Extraction.
This helps eliminate:
- Light pollution
- Uneven background brightness
It might look a bit strange at first, but it usually improves the image.
Step 9: Stretch the Nebula
Now we stretch the nebula further. Instead of one big adjustment, I use multiple small curve adjustments
Think of it as:
- Small adjustments
- Checking your histogram
- Gradually revealing detail
This gives you much more control and helps avoid blown-out highlights—especially in bright nebula regions.
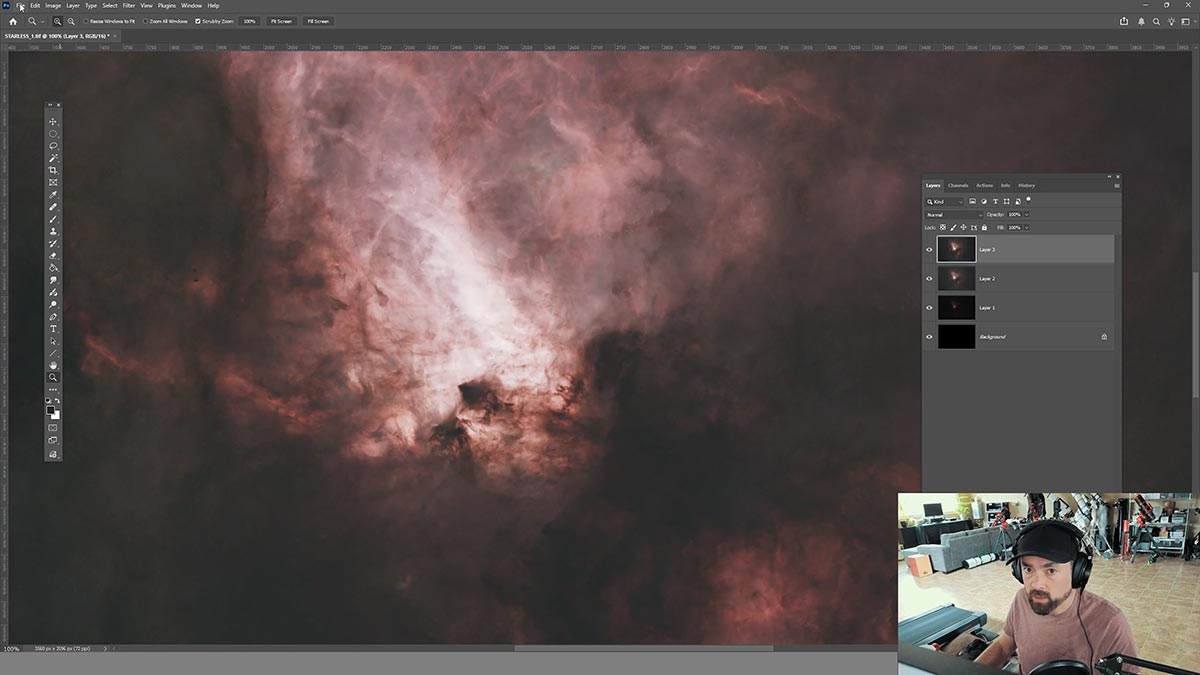
Step 10: Blend Everything Back Together
When you bring the stars back in, this is where the image really starts to come together. I find that this stage can reveal obvious issues with the image as a whole, such as too big a separation between the star size and the stretched nebula.
If something feels off, don’t be afraid to:
- Lower the opacity of the star layer
- Adjust the stretch slightly
- Go back to a previously saved version
This is where those saved files really come in handy.
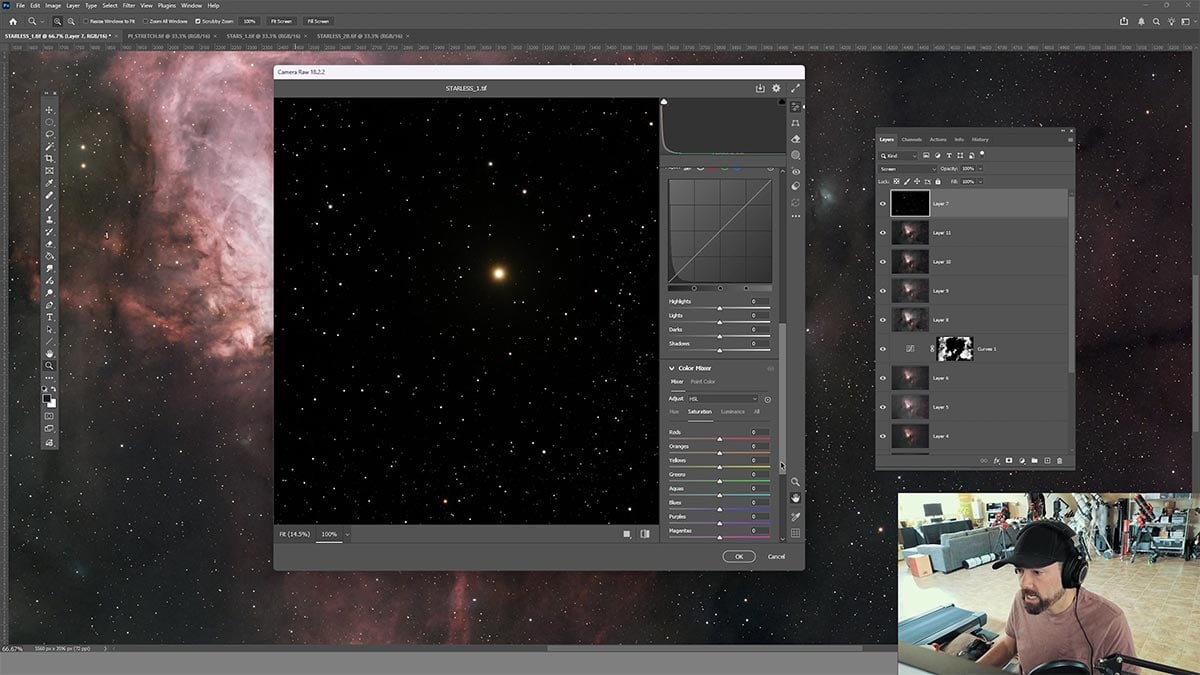
Step 11: Final Color and Contrast Adjustments
At this stage, I like to use tools like Camera Raw to dial things in. The camera raw filter is a very powerful tool, especially in the ‘color’ section with the hue, saturation, and luminance (HSL) sliders.
This includes:
- Boosting saturation and vibrance
- Tweaking colors (especially reds and blues)
- Adding a bit of clarity and contrast
You can also fine-tune individual color channels if needed.
Step 12: Final Touches and Export
Before finishing up:
- Check for artifacts
- Make small brightness or contrast tweaks
- Adjust star brightness if needed
Then:
- Flatten the image
- Resize for your platform (Instagram, etc.)
- Export as PNG or JPEG
Save Your Work Often
One thing I’ve learned the hard way over the years – save your image at key stages.
As you go through this workflow, try saving versions like:
- After your initial stretch
- After star removal
- Before and after gradient removal
- Before bringing everything into Photoshop
Why this helps:
- You can go back if something doesn’t look right
- It makes it easier to compare different approaches
- You can reuse earlier versions for blending and masking
It might feel like overkill at first, but once you get into more advanced processing, having these saved versions becomes incredibly valuable.
Final Thoughts + Next Steps
I hope that you have learned a few new tricks for processing astrophotography images, even if it was just a slight tweak to your order of operations. This workflow is working well for me now, but I am sure there will be some slight tweaks to each step in the future.
With the amazing software tools available now, it is a great time to be an amateur astrophotographer. To recap my process, here is a simple summary of the steps used:
- Work in the linear stage first
- Apply noise reduction and sharpening early
- Stretch gradually
- Separate stars and nebula for more control
- Finish with subtle, creative adjustments
From there, it really comes down to your personal taste and how far you want to push the image.
If you’re just getting started or want a deeper breakdown of each step, be sure to check out my complete image processing guide. It includes detailed tutorials, videos, and real examples to help you build confidence and improve your results faster.
 Trevor Jones is an astrophotographer and a valued member of the RASC. His passion is inspiring others to start their astrophotography journey on YouTube so they can appreciate the night sky as much as he does. His images have been featured in astronomy books & online publications, including the NASA Astronomy Picture of the Day (APOD).
Related Content
- Astrophotography with a Smart Telescope (Top Choices in 2026)
- Image Stacking Software for Astrophotography (Which One is Best?)
- Comparing Image Processing Software (Siril, PixInsight, Photoshop, and More)


Helpful, and thanks. One question: RC Astro doesn’t give much guidance on tool use order, except ….. “we can confidently state that noise reduction (of any sort) should not be applied before deconvolution (of any sort). Noise reduction tends to destroy the low-contrast information at fine scales that deconvolution needs to function well, and it gives the deconvolution algorithm a false sense of the signal-to-noise ratio in the image. Applying deconvolution after noise reduction may produce an image that “looks sharper,” but the accuracy of those sharper details would be highly questionable.”
Yet that is what you seem to suggest. Any particular reason?
H
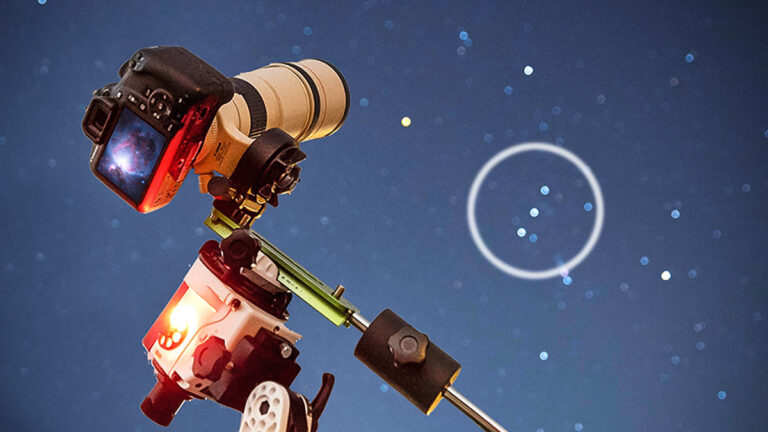
Thanks Trevor! I’ve been looking for something as informative as this for my processing stage because honestly, was a little lost! This helps a ton! A year ago, I went the usual uninformed beginner way and bought a bad mount and a big telescope, and that didn’t end well. But I found your YouTube channel and after that, your website. Now I have a Rokinon 135 and a Sky Watcher Star Adventurer 2i, which is much easier to use! I have so much more knowledge now that I’ve seen your YouTube videos and your website and it makes my Astrophotography journey easier and more fun! Keep making good material and thanks again for inspiring a new generation of Astrophotographers!
Clear skies, Eli
If I don’t buy the PI-plug-ins, would Mure-Denoise be a good substitute for noise reduction, and deconvolution for sharpening? Thanks for the great article!
Matt
I use Siril and GMP. So, I adapted your workflow to Siril. don’t have the computing power you have so, I can’t do all those layer masks. But this is the best I could do with my Dell laptop. But learned some new techniques I can do in my own workflow in Siril because of you tutorail. Plus it’s easy when it’s really clean data. Thanks for another great video, Trevor. Been following you since 2017 and I am still learning from you. https://drive.google.com/file/d/1JouwPqX12pZKUJF2vVZI2cgm8kklzmdb/view?usp=drive_link