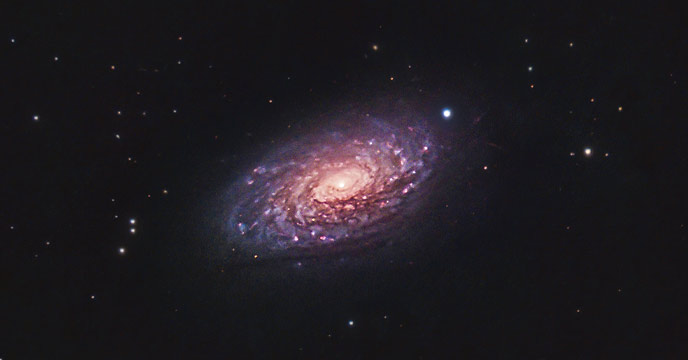
Photographing the Sunflower Galaxy
In this post, I will share the techniques and equipment I used to take a picture of the stunning Sunflower Galaxy. With the world largely shut down for me, deep-space astrophotography in the backyard has been a welcome escape.
Cataloged as Messier 63, this stunning galaxy is about 25 million light-years away from Earth in the constellation Canes Venatici. The months of April and May are the perfect time to photograph M63 from mid-northern latitudes.
You can also watch the video of this process on my YouTube channel:
Photographing the Sunflower Galaxy
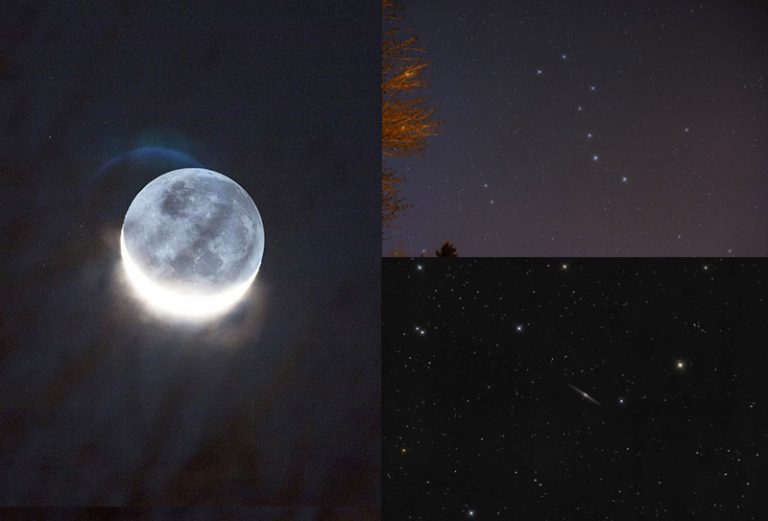
The spring season is nicknamed “Galaxy Season” for astrophotographers in the northern hemisphere because there are so many interesting deep-space galaxies up for grabs at this time of year.
If you’re typically a “nebula guy” like me, photographing galaxies is a nice change of pace, and the approach to the image is quite different than a large nebula.
Galaxies are typically much smaller in apparent size than nebulae, and emit light in the broad spectrum.
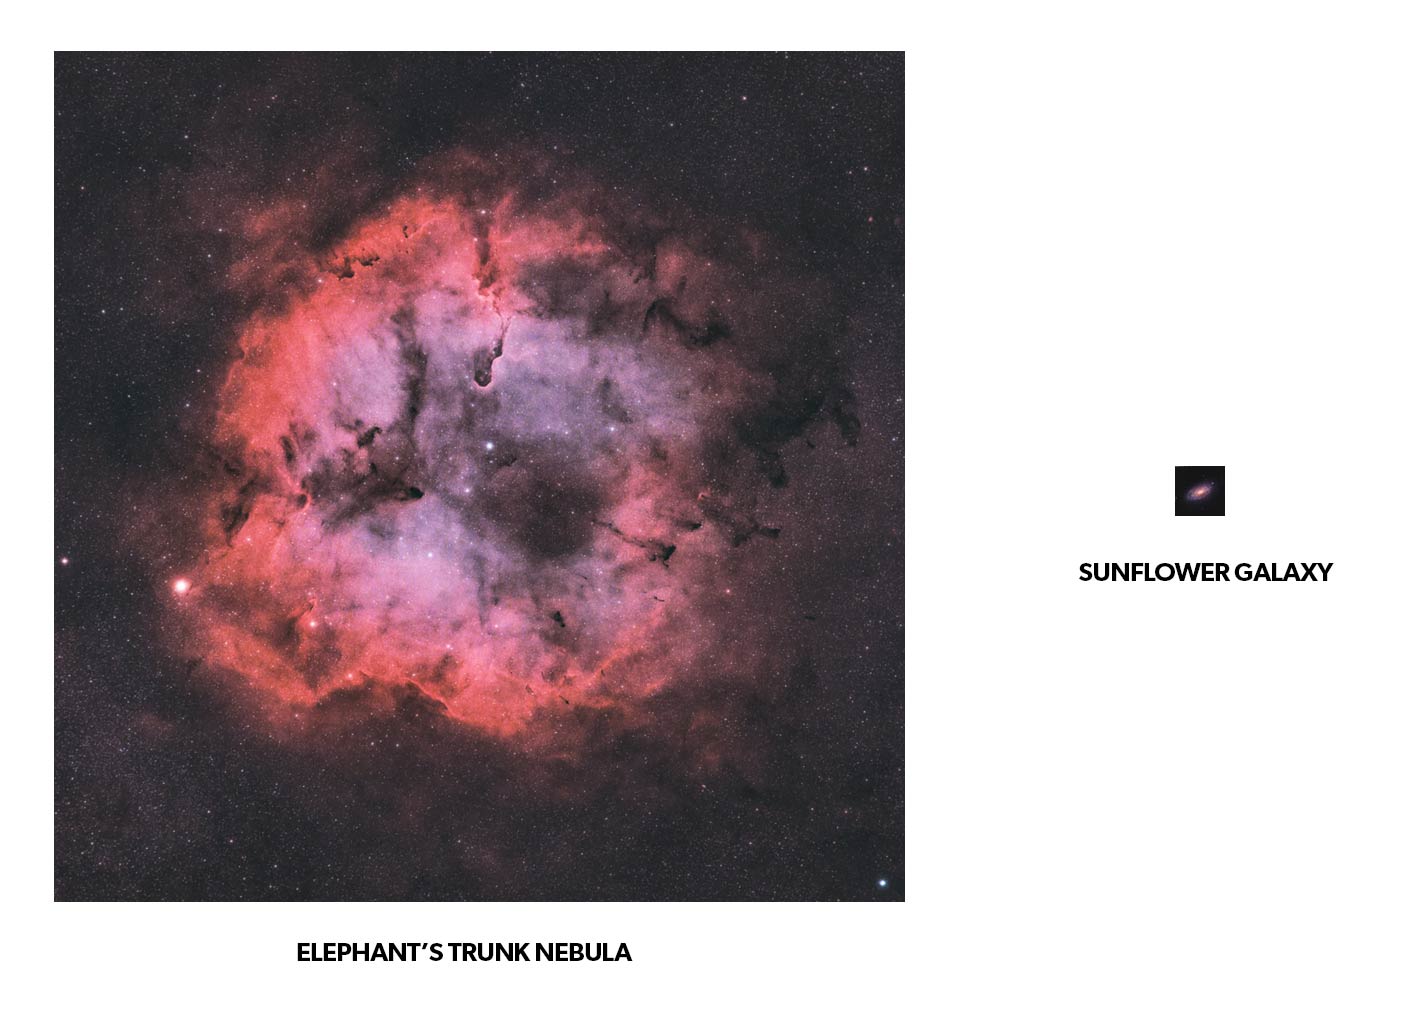
The size difference between a large nebula and the Sunflower Galaxy (to scale).
You can’t use narrowband filters to ignore the light pollution from the city the way you can with nebulae, and achieving a natural look to the galaxy and surrounding stars may take some time to get right.
Some people prefer to use a mild light pollution filter when imaging broadband targets with a color camera. I recommend the Optolong L-Pro filter for those looking to capture long exposure images with more contrast from the city.
After 3 years of use, this filter continues to provide the best results for one-shot-color, broadband astrophotography from my location. Shooting unfiltered is my only other option, and this method can be hit-or-miss depending on the target.
To photograph the Sunflower Galaxy, I used a sensitive monochrome CMOS astronomy camera with LRGB filters. This camera uses a motorized filter wheel that allows me to select the filter I want to use without touching the camera.

I use a ZWO 7-position (36mm) filter wheel with my dedicated astronomy camera.
Planning the Shoot
All of the photos I capture from the backyard are shot through heavy light pollution (Bortle Scale Class 7), and the seeing conditions are often poor as well. There is no substitute for dark skies, but backyard astrophotography in the city can be done, and the results may surprise you.
The moon (80% illuminated) was out during this session, which is not ideal for capturing true-color images of galaxies, but I’ll take what I can get. Generally, you’ll want to avoid capturing galaxies when the moon is full, as this light diminishes the contrast in your image and washes out faint details.
On the night of this imaging session, the forecast was cold and clear, and that’s enough for me to set up my telescope. Spring is a great time for astrophotography because the nights are still long, but the temperatures are a lot more tolerable.
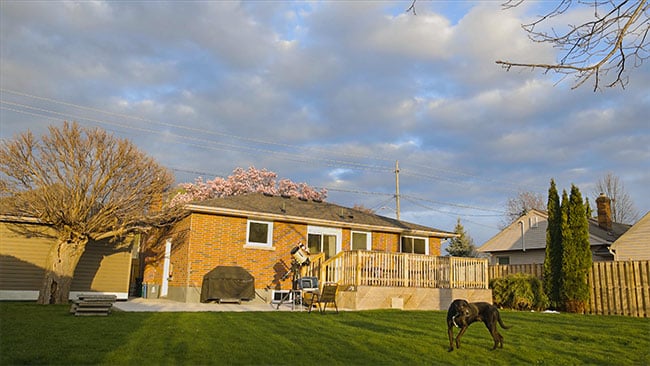
My humble backyard in the city (and Rudy).
I am getting better at planning my astrophotography sessions. The ‘old me’ would just see a clear forecast, start setting up, and ‘figure it out’ from there.
But without planning, you will always lose precious clear sky time googling examples of targets to image and potentially selecting something that isn’t a good fit for your skies or your gear.
I use Stellarium for isolating object types, size, and location. I even have a custom landscape (my backyard) loaded in so I can see when certain objects will clear the house or run into the tree.
Stellarium is great for filtering deep-space objects by apparent size, and magnitude, so you can isolate targets that are a perfect fit for your imaging setup.
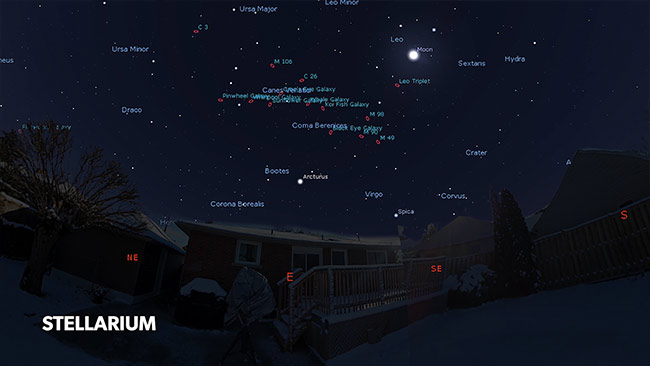
I imported a custom landscape into Stellarium to see where objects will appear in the night sky from my backyard.
Astrospheric is one of the more reliable weather apps out there, and it’s usually the one I can safely plan my imaging sessions around. I actually use a mixture of weather forecasting apps, but I enjoy the level of detail and layering of Astrospheric best.
I also like to hop on AstroBin to see examples of the exact object I’m about to shoot and filter the images down to ones using the same telescope I have. Not only will you get a better idea of the size and image scale of your target, but a detailed breakdown of the exposure lengths and filters used.
It is a truly remarkable resource. You can register for AstroBin using this link for 20% off a subscription. It is well worth it!
Filter it down even more to a “top pick” version, and get inspired by some of the most amazing amateur astrophotos you’ve ever seen.
Related Article: The 19 Best Astronomy and Stargazing Apps for You Mobile Phone
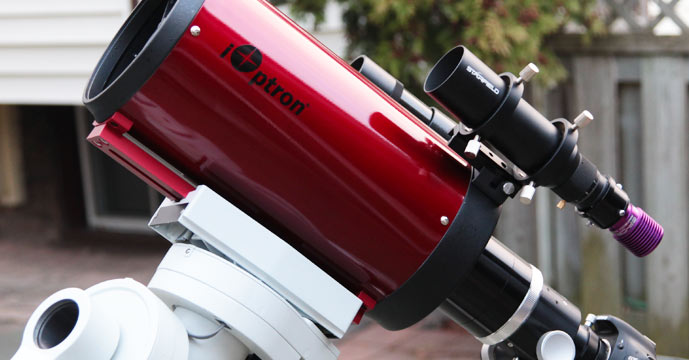
My Telescope
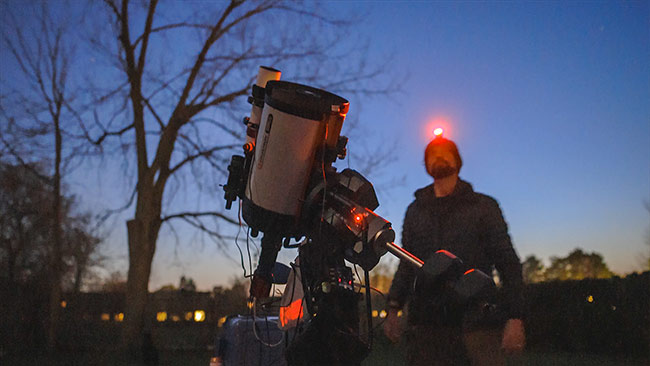
I’ve been getting a lot of use out of my Celestron Edge HD 11 Schmidt-Cassegrain telescope this galaxy season, and it’s currently the scope with the highest native magnification I own right now.
Normally I love a nice fast apochromatic refractor, but the object is only 10 x 6 arc-minutes in size. I appreciate nearly 2000mm of focal length with this telescope (when the reducer lens is used).

My Celestron Edge HD 11 telescope.
It’s been nice to use the Edge HD 11 this galaxy season, last year a lot of people were excited about this telescope and I am glad to come through on my promise to get some impressive images with it.
Flat frames have been a little challenging with the scope. There is no getting around not taking flats for a broadband image in this much light pollution.
I’ve had to do lots of tests to get it right, including experimenting with different exposure lengths and using different materials to filter the objective. I do not own a dew shield yet for this telescope yet, which is not ideal

I use a 0.7X reducer lens on my SCT for faster more light-gathering power and a practical focal length.
I am using a ZWO ASI2600MM Pro camera to capture the Sunflower Galaxy, which requires a set of LRGB filters to create a full-color image.
This camera has been an absolute dream thus far, and I know it will be a popular choice for amateur astrophotographers moving forward.
My Approach
I am trying a new approach to galaxies and LRGB imaging in general. I’ve decided to capture much shorter exposures through each RGB filter than I typically would.
In contrast, I’ll take longer exposures through the luminance filter, in an attempt to collect the important details of the Sunflower galaxy structure.
I notice that a lot of great astrophotographers will capture galaxies using shorter exposures in RGB, and longer for the luminance (LUM), and that’s exactly the approach I used to photograph the Sunflower Galaxy.
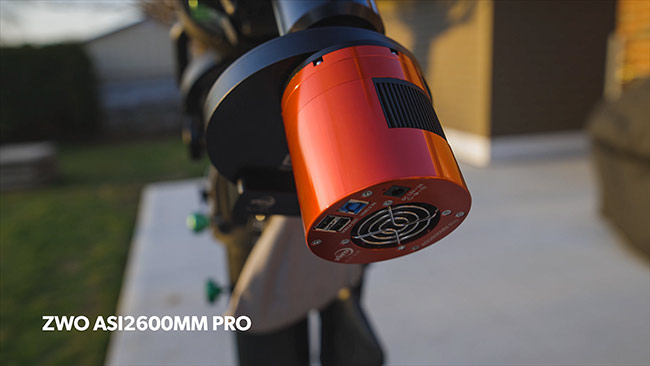
The camera is a ZWO ASI2600MM Pro monochrome CMOS camera.
I collected an hour through each color filter and 1.5 hours in luminance data. The RGB exposures were 90-seconds each, and the luminance were 3-minutes each.
The idea was to capture enough quality color data to provide the overall natural color of the object and use the grayscale luminance data for the details.
I run the ZWO ASI2600MM Pro camera at Unity Gain, and Bin the Images 1 x 1. I have been advised to capture my images Binned 2 x 2 with this setup, and drizzle the data (during the integration/calibration stage) to retain the native image resolution.
The idea is to capture more data in a shorter amount of time by increasing the pixel size (using software binning). It sounds too good to be true, but I’ll test this method out over the coming weeks and see how it goes.
My telescope pointed towards the Sunflower Galaxy.
This telescope shoots at F/7, so I’m not sold on going as short as 30-60-seconds. If your telescope is in the F/4 range, a 30-second exposure is likely all you’ll need for RGB.
Image Acquisition and Autoguiding
My little autoguiding system with the ZWO ASI290mm Mini and 72mm refractor has been working fantastic on this rig. Guiding with PHD2 has been extremely accurate, and I simply don’t have to worry about it whatsoever.
The ASI290MM mini is one of the best-selling guide cameras on the market, and it happens to be an incredible planetary camera as well (I used it to photograph Mars and Saturn last summer).
The guide scope has a focal length of 420mm, which I am happy to say has been more than adequate to effectively guide this big SCT.

I use a 72 doublet refractor (420mm) mounted to the upper rail of the SCT for autoguiding.
I have it clipped onto the top rail of the Edge HD 11, and I really like that I can easily shift the system back and forth on top of the OTA to achieve balance.
With the telescope accurately polar aligned (using the QHY PoleMaster) and balanced, a quick star alignment routine was all that was needed for precise pointing accuracy.
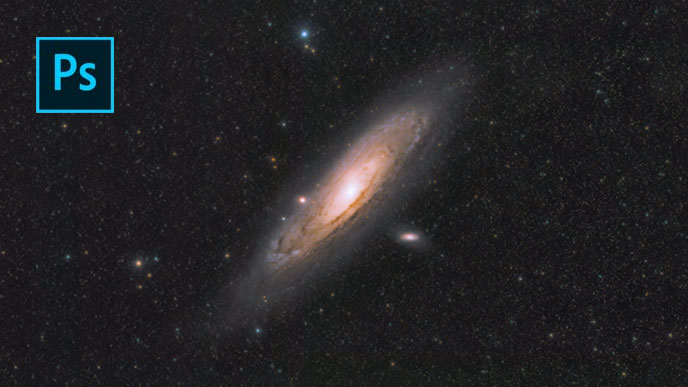
Results
Overall, I am happy with the image of the Sunflower Galaxy I was able to capture. The new (proper) approach to LRGB imaging seems to be paying off, and I will certainly employ this technique again in the future.
The image is a little soft, in my opinion, but that is largely due to the heavy cropping from the original image frame, as well as my personal processing style for this target.
To create a stronger image, I believe collecting data under a dark, moonless sky is required. Unfortunately, a big galaxy rig like this is tough to travel with.
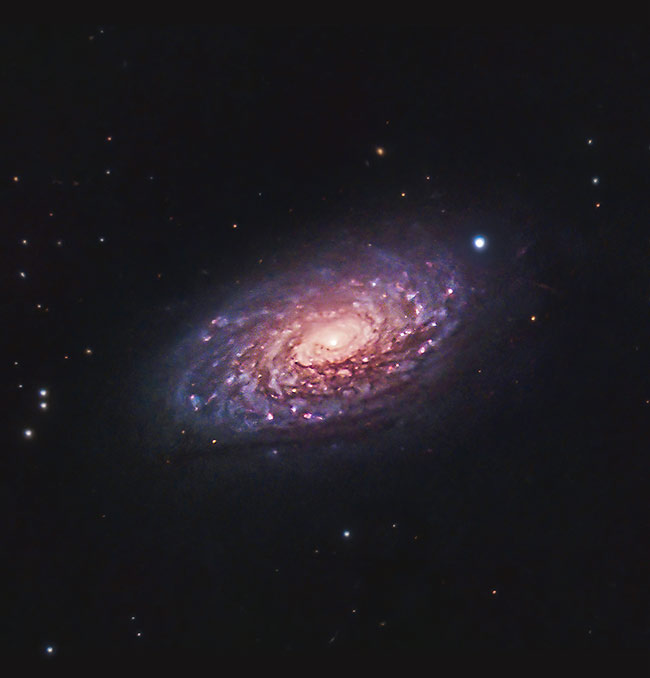
The Sunflower Galaxy. 4.5 Hour Exposure.
- Total Exposure Time: 4 Hours, 30-Minutes
- Details: 40 x 90s R, 40 x 90s G, 40 x 90s B, 30 x 180s L
- Integration/Calibration: DeepSkyStacker
- Processing: Adobe Photoshop 2021
- Camera: ZWO ASI2600MM Pro
- Telescope: Celestron Edge HD 11
- Guide Camera: ZWO ASI290MM Mini
- Guide Scope: William Optics Zenithstar 73 (similar)
- Mount: Sky-Watcher EQ8-R Pro
Processing the image was time-consuming, but also a lot of fun. I stacked each set of LRGB image exposures separately in DeepSkyStacker, and built the image in Adobe Photoshop using channels.
I outline this process in a video found in my premium image processing guide.
The Sunflower Galaxy is a deep-space object that can take your breath away when you see that first exposure appear on the screen.
Whichever galaxies you’ve been photographing this spring, I hope you take a moment to soak in the experience.
In terms of hobbies, astrophotography is like nothing else. I sincerely hope it brings you as much joy as it does to me. Until next time, clear skies!

Great Job Trevor! A little soft though, not quite the same “clear & crisp” look of an apo refractor, but that’s to be expected. Regardless, It’s really cool & inspiring to see your work, especially to beginners like myself who are just getting started in the hobby.
Thanks Chris! I know what you mean – I’ve had a lot of comments about the resolution of my latest images. I know that the extreme focal length is a factor, but I also need to tap into some techniques (binning color 2×2?) to help correct this. Always learning! I really appreciate the kind words, man. Clear skies!
Hey Trevor, thanks for the inspiration! I’m going to try my hand at mono camera soon…going to buy the ZWO 2 inch filter wheel…picking the right filters is tricky, and realize a whole topic in itself. Just wondering what filters you use with you ZWO? Thanks.
Love the way you present your videos, you do it with passion. I have to say your videos have taught me so much in a short space of time and the explanations you give are just simply in every way Continue to do what you do with passion and continue to make such good simply videos. On a different note how are you attaching the guidescope to the top rail. I have been asking in many forums on how to have a mount as shown in your video. Can I ask what the rail is and the clips your using. I have a Edge 8HD.