M8 – The Lagoon Nebula
The following image is of the Lagoon Nebula in the constellation Sagittarius. Ever since I got into Astrophotography, I’ve wanted to image this nebula because it is so big and colorful. Emission nebulae are some of the most beautiful and colorful objects in the night sky.
I photographed this deep-sky target using my 80mm refractor telescope, the Explore Scientific ED80 Triplet APO. My DSLR camera (stock Canon Rebel Xsi) was attached to the telescope using a t-ring adapter and mount. I also used a 2″ William Optics 0.8X Field Flattener/Reducer that was designed for use with F/6 telescopes.
 M8 – The Lagoon Nebula
I have been having some focus issues as of late, but luckily this night the stars were sharp through each sub. If you are having trouble focusing your camera for astrophotography, I have put together some tips for beginners.
This is a stack of 4-minute exposures totaling just under 2 hours. To integrate the exposures into a single image, I use a free software called DeepSkyStacker (see my DeepSkyStacker tutorial). I was able to capture a wider field of view thanks to my new William Optics Field Flattener.
Progress on the Lagoon Nebula
Since the photograph of Messier 8 at the top of this page was taken, I have photographed this area of the night sky many times. Here are a handful of tries on this target so you can see my personal progress.
The biggest lesson I have learned when processing astrophotography images in Adobe Photoshop is to take a look at the image on a per-channel basis. This makes it much easier to control individual elements of the image such as:
- minimizing stars
- boosting color and saturation
- sharpening details
- reducing noise
- balancing colors
If you want to learn everything I have learned about processing astrophotos over the past 10 years, please consider downloading my premium astrophotography image processing guide. You can also get a better understanding of the equipment I use for deep sky astrophotography by visiting this section of the website.
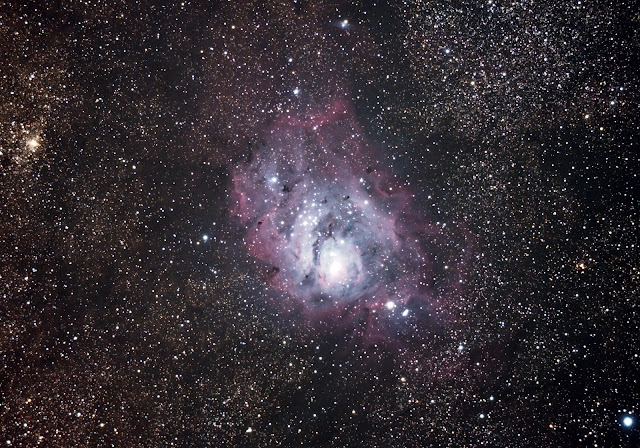 M8 – The Lagoon Nebula
