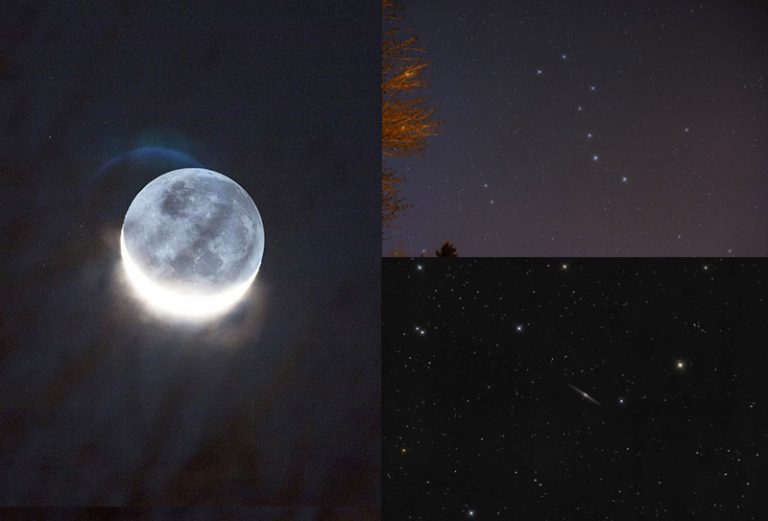
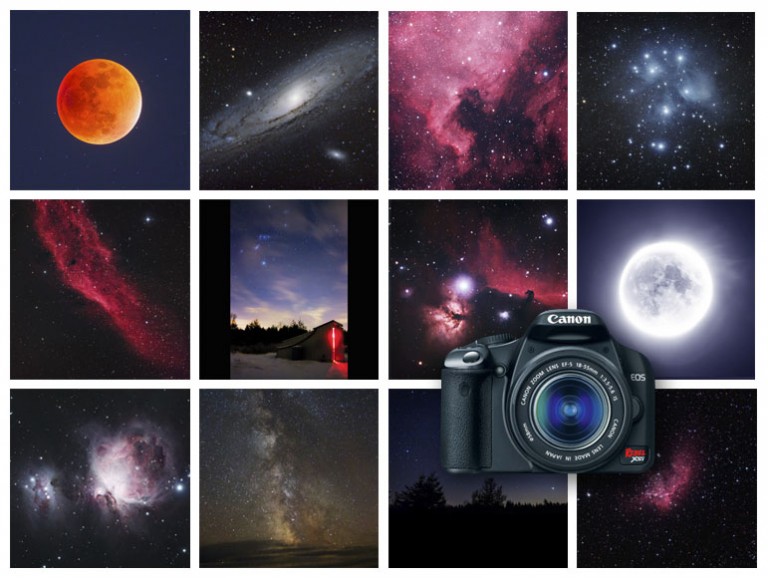
Skip to Content

DSLR

Use a DSLR Ha Filter for Astrophotography

|H-Alpha|27 Comments

After almost a decade of taking pictures of space with a DSLR camera, I have come to the realization that a DSLR Ha filter is quite possibly the most important astrophotography filter in your kit. Traditional light pollution filters designed to help you photograph deep sky objects in broadband (true-color) are useful, but a hydrogen-alpha filter makes the single greatest impact on your astrophotography overall.

Beginners often ask me which narrowband filter (line filter) I recommend buying first, and it’s always a Ha (or “Hα”) filter. H-alpha is a specific deep-red visible spectral line with a wavelength of 656nm. Many nebulae in the night sky (and even some galaxies)  emit a strong signal of light in this wavelength and a hydrogen-alpha filter helps to isolate and record this signal with your DSLR camera.

Astronomik 12nm Ha filter Canon EOS

In this post, I’ll explain why a clip-in DSLR h-alpha filter is not only the most powerful filter in your kit, but the one you’ll probably use the most. The DSLR Ha filter I use and recommend is the Astronomik 12nm Ha filter (Canon EOS). There are several versions of this clip-in DSLR filter available, including models for Canon full-frame bodies like the popular Canon EOS 6D and 5D Mark III.

hydrogen alpha astrophotography

All of these images were captured with a Canon DSLR and an Astronomik 12nm Ha filter.

Not a fan of black and white images? No problem, use the data you collect in Ha as a powerful luminance layer to your color images. As with other narrowband filters, such as O III and S II, capturing data from a precise bandpass offers many creative opportunities to improve your existing images.

I’ve previously covered narrowband filters that collect multiple wavelengths (dual bandpass, quad bandpass, etc.). This time, I’m focusing on the most important emission line of them all, hydrogen-alpha.

The Effectiveness of a DSLR Ha Filter

Before I share my 7 reasons why I think everyone who shoots with a DSLR camera should have an h-alpha filter, I want to highlight what I believe is the most important feature of all. You can use a clip-in hydrogen-alpha filter with a camera lens, and images collected in h-alpha through a short focal length are absolutely breathtaking. 

I’ve reviewed many astrophotography filters in the past, including broadband (or “broad spectrum”) filters that help to achieve a natural-looking image from a light-polluted sky. With so many incredible types of filters out there, how can one filter possibly be any more useful than the rest?

Here are 7 compelling reasons:

benefits of ha filter

    1. You can capture images during any moon phase
    2. You can add dynamic details to existing color images
    3. Stars are recorded smaller and sharper
    4. Fast f-ratios (F/2.8) can be used without star bloat
    5. A clip-in Ha filter can be used with a camera lens 
    6. You can use an h-alpha filter on a stock DSLR (signal is much weaker)
    7. Single bandpass filters are usually more affordable than a multi-bandpass version

Have you ever seen your backyard sky through an h-alpha filter? It’s pretty astonishing. You can finally see the hidden structure of the Milky Way behind the veil of light pollution in the city. Here is a photo of the constellation Cygnus from my Bortle Scale Class 8 backyard using a 17mm camera lens. 

wide angle photography

Although the 48mm (2″) filter format can be utilized in more imaging configurations (such as a dedicated astronomy camera) a DSLR clip-in filter fits underneath your camera lens.

Taking wide-field astrophotography images using a camera lens in place of a telescope is one of the most rewarding experiences in this hobby. For example, I captured this image of the North America Nebula under a nearly full moon using the Rokinon 135mm F/2.0 ED UMC lens. 

135mm lens

The North America Nebula (& Pelican Nebula) captured using an h-alpha filter and a 135mm camera lens.

You can use a clip-in DSLR filter with a telescope as well, making it a practical solution for amateur astrophotographers looking to collect narrowband data. The key to the image acquisition stage is to expose the images long enough so that the histogram shows that the data is separated from “the wall”. 

Optical systems with faster f-ratios, whether it’s a telescope or a camera lens, are better suited for narrowband astrophotography with a DSLR. The slower the focal ratio of your lens, the longer the exposure will need to be to adequately expose the image in h-alpha.

For reference, here is a look at a single, unstretched (linear) sub-exposure of the DSLR image captured in Ha. The data observed in the red channel is the most important, as this is where all of the useful image data lies. 

red channel

A single 3-minute exposure from a DSLR camera using an H-Alpha filter.

Notice how the entire image has a red cast over it? If you look at the histogram, you’ll see that the majority of the signal (light) has been captured in the red channel. The signal in the blue and green channels is almost non-existent.

Narrowband H-alpha with a DSLR

You may be asking yourself, is it worth it to use an h-alpha filter with a DSLR? After all, the experts in the astrophotography forums will tell you that you can’t use a narrowband filter with a color camera and if you do, you’re crazy. 

Perhaps I am crazy, but I have personally enjoyed shooting narrowband images with a color camera for many years and I’ve been thrilled with the results (…maybe my standards are too low?)

The truth is, you can capture and stack narrowband images taken with your one-shot-color DSLR, RGB Bayer filter and all, in DeepSkyStacker. Once the images have been registered and stacked using calibration frames, you should end up with an intermediate file that looks a little something like this:

Ha filter with a DSLR camera

The stacked result of 51 exposures using a DSLR camera and h-alpha filter.

From here, you can bring the stacked TIF file into Adobe Photoshop to extract the red channel and process in the monochrome image. 

Use a Clip-In Filter with a Camera Lens

One of the most understated benefits of a clip-in Ha filter is the ability to capture h-alpha images with a camera lens attached. This opens the door to impressive, wide-field projects revealing the hidden H II gases in the night sky. Combining the Astronomik 12nm Ha filter with a 135mm lens is an incredibly effective combination. 

ha filter with camera lens

A clip-in filter is a convenient solution when using a camera lens for astrophotography.

Some telescopes, like the William Optics RedCat 51, include an internally threaded slot for a 48mm filter in the imaging train. However, the only possible spot for an h-alpha filter with a camera lens attached to your DSLR is inside the camera body.

Narrowband filters designed to thread externally to the large lens objective are not common, are a filter of that size (77mm) would be very costly. The Astronomik clip-in filters snap into the body of the DSLR securely, and most lenses will fit on top (be sure to check the compatibility of the lens you intend to use). 

I’ve used the Astronomik 12nm clip-in Ha filter with several cameras lenses including the “nifty fifty” (Canon EF 50mm F/1.8), and the ultra-wide-angle Rokinon 14mm F/2.8. Here is a look at Barnard’s Loop captured using the clip-in Ha filter in my Canon EOS Rebel T3i.

Barnard’s Loop in Orion. Canon EF 50mm F/1.8 with the clip-in Ha filter beneath the lens. 

How To Process the Images

Capturing images using a clip-in hydrogen-alpha filter with your DLSR is a lot of fun. No matter how light-polluted your skies are, and how bright the moon is, you should see the distinct features of your deep-sky object that are emitting light at the 656nm bandpass. Since DSLR cameras collect light through a Bayer filter, the signal is divided up into RGB channels that would normally build a full-color image.

However, the h-alpha emission line is very specific, and will only record useful data in the red channel of your images (the other channels will be almost 100% noise). Knowing this, we need to extract the data from the red channel only, and process that channel as a monochrome image of its own.

Stack, Register and Calibrate the Image

The first step is to stack, register, and calibrate your raw images the way you normally would with a color image taken with your DSLR camera. This includes using darks, flats and bias frames to help produce a calibrated image with a healthy signal to noise ratio.

The sub-exposures will look extremely red as shown in the example above, and so will the intermediate file that DeepSkyStacker spits out.

Extract the Red Channel in Adobe Photoshop 

After opening your stacked TIF file in Adobe Photoshop, open up the Channels Tab (If you do not see this tab, click on Window > Channels from the main menu), and have a look at the data. You should see that almost all of the pixel information resides in the red channel. 

Photoshop channels

Simply select the red channel from the “Channels” tab, and copy the information (On a Windows computer, CTRL-A (select all), CTRL-C (Copy). Then, select File > New, and Paste (CTRL-V) the information saved on the clipboard (the red channel layer). 

Process the Grayscale Image

The image pasted should default to grayscale mode, with only one channel (gray) in the Channels Tab. You can process this image the same way you would a color image, including adjusting the levels, curves, and even using dedicated astronomy actions.

From here, you can either save and share the image as a black and white hydrogen-alpha photo (which are beautiful, by the way), or you can apply this image to an existing color image to give it a dramatic punch. (See my HaRGB Tutorial). 

The Difference H-Alpha Makes

Some of the most incredible DSLR deep-sky images ever produced were created using narrowband filters to isolate specific emission lines in the visible spectrum. You can use the same signal isolating techniques to enhance your existing RGB data.

A narrowband filter lets the h-alpha light of emission nebulae pass through to the camera sensor, and blocks almost all of the other wavelengths of light in the visible spectrum.

To be more specific, the Astronomik 12nm Ha filter allows 97%+ transmission of the H-Alpha line and blocks nearly the entire remainder of the visible spectrum. This includes blocking unwanted wavelengths in IR (infrared).

For objects like the Bubble Nebula (shown below), you can collect impactful signal that can be applied to your broadband images. 

adding ha with a DSLR

What does this mean?

It means that city light pollution and moonlight are largely ignored. This opens up the doors to imaging during the full moon, and from a city backyard. You no longer have to wait for the full moon/nearly full moon phases to pass to capture deep-sky astrophotography images.

Adding Ha to RGB

Emission Nebulae and Hydrogen-Alpha

Emission nebulae are clouds of glowing H II gas, and they emit light at a very specific wavelength. This information is beneficial to astrophotographers, as we are able to isolate this wavelength for photography. The light from an emission nebula is created when the atoms in the gas are ionized by the formation of hot young stars.

The dominant wavelength in a hydrogen nebula is the deep red portion of the spectrum known as the hydrogen-alpha line (656nm to be exact).

visible spectrum - wavelengths in nm

The Visible Spectrum – Wavelengths in Nanometers

Why this is important for DSLR astrophotography

By using a Ha filter in your DSLR, it is possible to increase the contrast between objects in the h-alpha emission line and the skyglow background. The filter completely suppresses the emission lines of artificial lighting such as mercury (Hg) and sodium (Na).

The particulars of the Astronomik ha filter can be understood in the transmission graph below. The chart shows that the Astronomik filter allows 97% transmission of the h-alpha wavelength

Ha Filter Wavelengths

Images captured using a narrowband Ha filter have some pleasing characteristics.

At the top of the list is reduced star size. This further emphasizes the detail and contrast of a deep-sky image by allowing it to stand out from the surrounding sea of stars.

Filtering out skyglow and light pollution means that longer exposure times of 5 minutes and beyond from the city are possible from the city. You will likely capture more detail in your emission nebula targets than ever before. 

Soul Nebula in Ha

Challenges and Best Practices in the Field

Earlier in the post, I mentioned that you’ll want to shoot exposures that capture enough signal to produce a quality image. Specifically, you’ll need to make sure that the red channel data is not being clipped in the shadows portion (left-hand side) of the histogram. 

Slower optical systems will demand longer exposures to reach this value, and that puts added importance on tracking accuracy and the need for autoguiding. If your telescope is in the F/6-F/7 range or slower, expect to collect images that are at least 3-minutes or more to create a useful sub exposure.

This is one of the many reasons I recommend using a DSLR Ha filter with a camera lens like the Rokinon 135mm F/2.0. A fast aperture lens will collect more light in a single shot, and suddenly only a 2-minute exposure is enough to collect a healthy SNR.

Ha filter for Canon

Framing and Focusing Targets

The light-blocking qualities of narrowband filters means that you will no longer see faint stars through the viewfinder of your DSLR, or when using the live-view function. This can make finding targets and focusing your camera lens or telescope difficult.

In the image below, you’ll see an example of what a single test exposure of about 30-seconds may look like at ISO 1600. There is really only one bright star and a very faint indication of nebulosity in a 30-second image.

can't see anything through camera

To frame up my image of the North America Nebula, I used a bright star (Deneb) as a reference. 

I find that the most practical solution to this challenge is to find the closest, bright star to your intended deep sky object as a point of reference. Even using a 7nm Ha filter (which is stronger and more targeted than the 12nm version), the brightest stars in the night sky will still show up in live-view.

The camera settings must be set to expose as bright an image as possible, which is typical of any framing and focusing routine with a DSLR. Use ISO 6400 or greater, with the maximum aperture of the camera lens. Make sure the camera is set to bulb exposure mode, so let it is letting as much light as possible.

Once you have located a bright star (you can use the Moon, too), take your time focusing the star using the 10X zoom in live-view. If you are using a camera lens, you may want to use tape to secure the focus adjustment ring to avoid knocking it out of position in the next step. 

Use a planetarium mobile app or a physical star map to locate the rough position of your target. If you’re lucky, there will be a bright star near your nebula to use as a reference like my example of NGC 7000 above. If not, you may need to take as many as 10+ test shots before you are happy with the framing of your target. 

A 30-second exposure at ISO 6400 should be more than enough time to indicate where the areas of hydrogen gas are concentrated. 

Choices – 12nm or 6nm versions

The 6nm version of the Astronomik Ha filter has an extremely narrow emission-line filter. This version targets an even narrower portion of the visible spectrum, blocking nearly the whole remainder of the spectrum. So wouldn’t the 6nm version the obvious choice?

6nm vs. 12nm

Despite the increase in contrast and more light-blocking power of the 6nm version, there were a few reasons I went with the 12nm. For starters, the 6nm version is more expensive, and that was a big reason why I decided to invest in the 12nm filter.

A major step in my pre-imaging routine includes framing my deep-sky target to include as much of the object and surrounding elements as possible. BackyardEOS or Astro Photography Tool can streamline this task with the frame and focus feature.

It’s not the end of the world, but it does take longer to get up and running that it would using a broadband filter that allows more light to reach the sensor. The 6nm would double these impacts, and increase this setup time.

Many backyard astrophotographers would disagree, wishing they had gone with the 6nm instead. I’ve shot images using a 7nm Ha filter (Optolong 7nm Ha), and the results are not drastically different. There is more contrast in the images that used a 6nm filter, but the exposures also need to be longer.

DSLR camera bodies

List of Compatible Canon EOS Cameras:

Here is the official camera compatibility list for the Astronomik clip-in Canon EOS Ha filter directly from the High Point Scientific website. I have personally used this Hα filter on a number of Canon camera bodies including full-spectrum modified Canon EOS Rebel Xsi and T3i’s, and a stock Canon EOS 7D.

  • 7D
  • 7D Mark II
  • 20D
  • 20Da
  • 30D
  • 40D
  • 50D
  • 60D
  • 60Da
  • 70D
  • 77D
  • 80D
  • 300D (Rebel)
  • 350D (Rebel XT)
  • 400D (Rebel XTi)
  • 450D (Rebel XSi)
  • 500D (Rebel T1i)
  • 600D (Rebel T3i)
  • 700D (Rebel T5i)
  • 750D (Rebel T6i)
  • 760D (Rebel T7i)
  • 1000D (Rebel XS)
  • 1100D (Rebel T3)
  • 1200D
  • 1300D
  • 100D
  • 200D

Lens Compatibility

The Astronomik clip-in hydrogen-alpha filter is not compatible with Canon EF-S mount lenses. The EF-S series of Canon lenses were designed to be used solely with Canon APS-C (crop) sensor DSLR’s, and have a smaller image circle. 

They fit deeper inside of the camera body, which means that they’ll run into the height of the filter if you try to attach the lens. In the photo below, you can see how the base of the lens mount is protruding too far to be compatible with a clip-in DSLR ha filter.

EF-S lens compatibility

Stick to full-frame lenses on your crop sensor DSLR. The EF-S lens mount won’t work with a clip-in filter!

On the other hand, Canon EF series lenses were designed to be used with both full-frame camera bodies and crop sensor models. I’d recommend sticking with EF lenses for astrophotography in general, from a quality perspective.

I enjoy Canon’s L-series lenses, which is why several years ago I began purchasing used l-series lenses to cover every possible photography situation. Third-party full-frame lenses with the EF mount design such as the Rokinon 135mm F/2.0 ED UMC I mentioned earlier are compatible with DSLR clip filters like this. 


Canon EF lens mount

Clip-in filters like the Astronomik 12nm Ha (and similar clip filters) are compatible with Canon EF lenses.

Stick to full-frame lenses such as the Canon EF lineup and the many third party lenses that mount to Canon cameras from Rokinon, Samyang, Sigma, etc. One way to tell if your lens is a suitable design for Canon clip-in DSLR filters is the small red indicator at the base of the lens. 

Does my camera need to be modified for astrophotography?

No. The same benefits of an H-alpha filter can be realized with a stock DSLR. However, the amount of red light your camera will be able to record will be reduced.  

If you are serious about your astrophotography, it is worth thinking about modifying your camera either yourself or by a professional. Here is a shot of the Eagle nebula using the Astronomik Ha filter and a stock Canon EOS 7D.

Using a ha filter with a stock DSLR

Example of using a Ha filter with a stock (unmodified) DSLR camera (Canon EOS 7D).

This is typically what a frame looks like taken using a Ha filter through an unmodified DSLR. This emission nebula could have been captured in greater detail using a modified camera, but the skyglow and wavelength suppression capabilities of the filter are still present.

I am a huge promoter of DSLR astro-mods. If your camera is used for astrophotography exclusively, why not modify your camera yourself? That’s exactly what I did to my Canon EOS 450D (Rebel Xsi) camera in 2014.

Modified camera for astrophotography

I carefully removed the IR cut filter on my Canon Rebel 450D by watching this video from Gary Honis. If you have either a light pollution or h-alpha filter covering your DSLR sensor at all times, you are not required to install any extra replacement filters. 

This is known as a full spectrum “naked sensor” mod, and it made a huge impact on my astrophotography images.

The Bottom Line

If you own a DSLR camera that has been modified for astrophotography, a clip-in Ha filter should be on your shopping list. I waited far too long before making this decision.

Combining H-alpha exposures to your existing RGB data can greatly increase the amount of detail and contrast in your nebula images, and even add dramatic details to certain galaxies. 

The ability to image during the full moon and surrounding week results in much more time under the stars. No more wasted moonlit clear nights.

If you live in the city, a Ha filter cuts through even the most severe light pollution. My Astronomik 12nm Ha filter cuts through my red-zone (Bortle Class 8) skies to reveal beautiful structures of hydrogen gas in the emission nebulae I photograph.

Narrowband filters allow you to collect impressive deep sky images from a light-polluted backyard, and that’s a beautiful thing.

The clip-in versions offered by Astronomik are a perfect fit for several Canon and Sony cameras.

Heart and Soul Nebula


Related Tags

DSLR Photography Tips: Shooting the Milky Way on a Tripod

|Tutorials|0 Comments

It’s time for another Photoshop tutorial, along with some night sky DSLR photography tips.  This time, the subject is our glorious Milky Way galaxy.  There is nothing more humbling than spending a night under the band of stars seen from within our barred spiral galaxy.

The true beauty of our universe is displayed in the arching collection of stars known as the Milky Way.

In the image processing video below, I’ll show you how to use Adobe Camera Raw to get the most out of your DSLR image. I’ll also cover some online photography schools available for those who wish to learn more.

DSLR photography tips

The Milky Way from Cherry Springs State Park (2014)

Milky Way Photography with a DSLR

I’ve recently put together a resource for anyone interested in photography the Milky Way with their DSLR this Spring.  This includes everything from the best times to set up – to the recommended camera settings.  The Milky Way photography page found under Tutorials includes more information than on this post.

Night photography has become quite popular among all types of photographers, thanks to some inspiring photos of the milky way taken over the past few years.  Now, there are some incredible online photography courses dedicated to creating nightscapes. More on this below.

How to Photograph the Milky Way with a DSLR

Milky Way Processing in Photoshop

The photo above shows the difference a few simple edits in Adobe Camera Raw can make to your astrophotography image.  Click the link above for the full tutorial, or watch the video below.

No Star Tracker Needed

Photographing the Milky Way without a star tracker is an attractive idea to beginner astrophotography enthusiasts. Due to the limited equipment needed, it is often one of the first types of astrophotography attempted.

Modern DSLR Camera’s are well suited for Milky Way photography. For the best results, you can’t beat a location well away from city light pollution.

DSLR astrophotography

The Milky Way as seen from Cherry Springs State Park

The image above was captured using a Canon EOS 7D and an 18-200mm Zoom Lens.

Long exposure Milky Way photography is not this camera’s specialty. The Canon 7D (Mark 1) is an excellent camera for nature/bird photography, but the amount of noise present at ISO 3200 and above leave much to be desired.

If you are new to photography, and in the market for a DSLR camera, a Canon EOS Rebel T6i would be a better choice. The Canon 7D has been replaced with the 7D Mark II, an excellent camera but an expensive choice for a beginner.

The example photo used in the tutorial was taken under the dark skies of Cherry Springs State Park. This is home to the Cherry Springs Star Party, which I will be attending this year!

Cherry Springs Star Party

Setting up my astrophotography gear at Cherry Springs in 2014


With some simple preparation and a bit of luck (weather wise), an incredible photo of the Milky Way is possible using a basic DSLR on a tripod.  This type of photography uses a stationary tripod, with no star tracking or autoguiding is needed.

An astrophoto of the Milky Way reveals our galaxy as a bright swath of light and color across the sky.  For all of the images of the Milky Way in this post, ISO 3200 and ISO 6400 were used.  This can create a lot of noise, which is why stacking exposures in Photoshop can help.

 
DSLR photography - The Milky Way

Looking towards Cygnus in the Milky Way

The brighter nebulae and star clusters near the core will stand out. The colorful red emission nebulas in Sagittarius are the easiest to identify, with M8 being the most noticeable. The Summer Triangle is also located in this region of the Milky Way, featuring bright stars Vega, Deneb, and Altair.

Collecting a series of exposures is encouraged, as this will lead to a finished product with a much-improved signal to noise ratio.

Limited exposures of 30 seconds on a tripod are all you need to produce an image like the one below.

30 Second Exposure of the Milky Way

6 exposures of 30-seconds each were used for this photo

By utilizing the powerful features of Adobe Camera Raw, you can make “game-changing” adjustments such as the all important – perfect white balance.

Photographing the Milky Way using a Star Tracker

Using a small star tracker camera mount such as the iOptron SkyTracker Pro will allow you to capture long exposures without star trailing. With the right lens and ISO setting, exposures of 1-2 minutes can reveal an impressive amount of detail in the Milky Way.
 
The following image was captured using a Canon EOS Rebel T3i with a wide-angle Rokinon 14mm F/2.8 lens attached. Each image exposure was 2-minutes in length at ISO 1600. The data was stacked together for a grand total of 3 hours of total integrated exposure time.
 
The Milky Way
 
Related:
 

Online Photography Schools

The overwhelming popularity of night photography has led to the availability of many online courses on the subject.  These photography schools offer instructional material on everything from starry nightscapes to light painting techniques.

online photography school

Nightscapes: Landscape Astrophotography by Ian Norman

Skillshare Online Course: Landscape Astrophotography by Ian Norman

Everything I have learned about photography up to this point has been self-taught. However, the idea of completing a structured online course is an appealing option in the future.

The training programs usually list the required skill level before enrolling, although most courses cater to all levels.  No matter what stage of this hobby you are at, building a portfolio of images and learning new skills is always a good idea.

Canadian Astrophotography School (CAPS)

There are some new courses available on astrophotography, that deal with some of the image processing techniques used by the pros.  Canadian Astrophotography School features industry legends such as Ron Brecher as instructors.

Astro Photography School

Canadian Astrophotography School – Instructor Ron Brecher

These instructional courses focus on everything from astrophotography basics to advanced processing in PixInsight. I hope to attend CAPS in the near future.  You can visit CAPS on Facebook page for more information.

I hope that you find these DSLR photography tips useful when planning a Milky Way shot. If you’re looking for some more in-depth lessons on nightscapes and Milky Way photography, I’ve given you some of the options available to you.

Personally, I plan on developing my skills further both in terms of the acquisition process and image processing.

To stay up to date with my latest astrophotography tips and tutorials, please follow AstroBackyard on Facebook.

Related Posts:

Astrophotography Cameras

Astrophotography Resources – Recommended Software

Resources:

Online Photography Course: Star Trails and Night Photography

How to Capture the Milky Way Using your DSLR (Video)

How to Photograph the Milky Way using a DSLR camera – WikiHow

Related Tags

The ultimate astrophotography target for your DSLR and telescope

|Nebulae|7 Comments

It’s very exciting to know that the night sky is full of galaxies, nebulae and star clusters to observe and photograph.  The great Andromeda Galaxy, the glimmering Pleiades, and the vibrant red California Nebula are all jaw-dropping astrophotography subjects.

Astrophotography with a DSLR and telescopeBut what is the best way to capture these amazing deep-sky objects?

The followers of this blog know that I am all about astrophotography with a DSLR and telescope.  This is a popular deep-sky imaging setup and is capable of some incredible results using affordable equipment that can often be purchased used.

A DSLR camera is a perfect option for beginners as they are much more user-friendly than a dedicated CCD astronomy camera.  In the post below, I’ll give you the ultimate astrophotography target for your DSLR and telescope.

I use a Canon 600D DSLR and an Explore Scientific ED102 CF telescope.  View my complete setup.

An amazing year of Astrophotography

As we approach the end of 2016, I would like to thank everyone who has connected with AstroBackyard this year. Whether it was a YouTube comment, retweet, or Facebook like, I really appreciate the support.  I’ve connected with beginners, seasoned veterans, and everyone in between this year. I hope you were able to get outside and partake in some astrophotography with your DSLR and telescope this year.

AstroBackyard - DSLR Astrophotography


As you learn more about astrophotography, it’s almost certain that you will want to revisit previous imaging projects.  The lessons learned during each and every night out with your DSLR and telescope make you a more efficient and organized astrophotographer. As a beginner, my goal was to photograph as many galaxies and nebulae as possible.  Equipped with more tools and knowledge, I am now taking a second look at some of best deep-sky objects the Universe has to offer.

Orion constellation

The Orion constellation from my backyard

As for my latest astrophotography project, I’ve moved on from my Horsehead nebula photo for the year.  Not that it couldn’t benefit from more time and processing, it’s just that I shared the photo so much that I thought it would be best to shelve the project for now and complete it next winter.  This project helped me hone my skills of combining narrowband data with color images, as seen in my latest video tutorial.

I have now started pointing my telescope towards the alluring diffuse nebula known as Messier 42.  The glowing Orion Nebula is in prime position for imaging over the next month or two.  I have photographed M42 many times over the years, but since then I have made many advancements I made in terms of both equipment and technique.

With my telescope’s relatively wide focal length (714mm), I can include the Running man nebula (NGC 1973, NGC 1975 and NGC 1977) in the same frame. I added a modest amount of data using my old DSLR and telescope (Canon Xsi and ED80) to an earlier version of Orion last year, but not nearly enough to do it justice.

Why I’m photographing the Orion Nebula all over again

My previous version of the Orion nebula was shot with an 80mm telescope (Explore Scientific ED80) and a Canon Rebel Xsi (stock).  The image I produced consisted of RGB data only (No H-Alpha), and was lacking the rich color that astro-modified DSLR cameras can produce.

Orion nebula using a DSLR through and telescope

My 2015 version of the Orion Nebula

Ways to improve my Orion Nebula image:

  • The Canon T3i has a higher resolution than the Xsi
  • The Canon T3i camera is modified (IR cut filter removed)
  • I can add narrowband h-alpha data and combine it with RGB
  • The ED102 telescope has an increased focal length and light gathering ability

A new astrophotography project begins


On Thursday, December 22nd, I began my latest astrophotography project with my DSLR and telescope.  I have a new favorite spot in the backyard that offers the widest possible window to the sky when aiming at M42.  Stellarium was helpful in planning this position for this particular time of year.

From my location, clear nights are few and far between in the winter months.  Obtaining enough data (5 hours+) to process the image to its full potential will be a challenge.  The final image will likely have much more Ha data than RGB.  The nights leading up to, and during the full moon are more commonly clear.

AstroBackyard on Facebook

M42 – A rewarding astrophotography target for beginners

New to using a DSLR and telescope? Try Orion!

Beginners are drawn towards the Orion nebula as an astrophotography target, and for good reason.  The bright color and intense details of this object can be captured even in very short exposures.  When shooting with a DSLR and telescope for the first time, focus and proper tracking are some of the biggest hurdles to overcome.  Fortunately, M42 is very forgiving in terms of both focus and tracking.

Focus

The bright stars that populate the area in and around the Orion nebula are perfect for adjusting focus and framing.  Many deep-sky objects are very dim, with no bright stars within the same field of view.  This can make focusing and framing the target a nightmare.  I like to use the stars in the Trapezium to achieve the best possible focus while using my Cameras live-view mode, or on BackyardEOS.

Framing

The stars in the Sword of Orion are a great help when it comes to aligning your image.  Even better than that is the fact that the overall size and shape of the nebula is revealed in short exposures (5 seconds).  This makes capturing test frames and making adjustments much easier.  This is not the case when shooting a faint reflection nebula such as the Witch Head nebula!

Tracking/Guiding

Beginners usually need time to fully utilize their telescope mount’s tracking and autoguiding abilities.  The longer the exposures, the more evident poor tracking becomes.  Luckily for beginners, an impressive photograph of M42 is possible using multiple exposures of 1 minute or less!  This target is just begging you to capture it!

Multiple exposures for more detail

The bright core of the Orion Nebula requires very short exposures to properly document the area.  To capture the Trapezium without over-exposing the image, I shot several 5-second subs at ISO 800.  I also set BackyardEOS to shoot a series of 30-second subs to capture the mid-tones and slightly less-bright areas surrounding the core.

Here are the totals from each series of shots at lengths of 5, 30, and 180 seconds at ISO 800.

  • 180″ – ISO 800 – 1 hour 9 minutes (23 frames)
  • 5″ – ISO 800 – 1 min 40 sec. (20 frames)
  • 30″ – ISO 800 – 5 min. (10 frames)

I registered and stacked each of the image sets in Deep Sky Stacker, and processed each of the files separately.  Once each image file was processed to maximize the intended level of detail, I blended the images together in Adobe Photoshop using layer masks.  This can be a difficult process, as this can sometimes lead to unnatural looking and/or flat looking deep-sky objects.

Here is the current state of my Orion Nebula image, using the short exposures in the core:

Orion Nebula with a DSLR and Telescope

The Orion Nebula – Early version using layer masks

As you can see, some of the faint outer nebulosity has been captured, yet the core of nebula is still well exposed without clipping any of the data.  In comparison, have a look at the stack of 5-second exposures at the exact same scale from the same imaging session:

Orion short exposures

A stack of 5-second exposures on the Orion Nebula

Using layer-masking in Adobe Photoshop, we can merge the data from all 3 image sets to reveal all of the details of the Orion Nebula in a single image. As I said earlier, this process can be difficult to master and takes time and patience to utilize properly.  If done properly, the nebula will look natural and full of detail.  I’ll provide updates along the way as I tackle this winter astrophotography project from the backyard.

Cold, long nights with my DSLR and telescope

Despite what the frigid winter temperatures do to our bodies, your DSLR will produce images with less noise in the cold!  The nights are also extra long, which means the potential of longer imaging sessions.  So fill your thermos will a hot drink, it’s going to be a long night. If you need me, I’ll be in the backyard.

Cheers, and all the best in 2017!

Related Tags

Delta Aquarid Meteor Shower 2016

|Meteor Shower|3 Comments

The Delta Aquarid meteor shower is heading towards it’s peak at the end of this month.  But let me make one thing clear right away, this is not going to be a dazzling show of constant meteors that light up the night sky.  This meteor shower is not known to be  a great performer, although these celestial events have been known to be somewhat unpredictable.  July 28th and 29th offer the best chance at catching a few “fireballs” in the night sky.  The Delta Aquarid meteor shower begins on July 12, and runs until August 23rd.  If you are watching the Perseid meteor shower in early August (peaking August 11, 12), you may see a few Delta Aquarids then as well.  This meteor shower can produce up to 20 meteors per hour at it’s peak, as the debris from comets Marsden and Kracht enter our atmosphere.

Expect between 10-20 meteors per hour under dark skies, away from city light pollution.

Delta Aquarid meteor shower

A photograph of a meteor I took in 2013 during the Perseid meteor shower


Moon vs. Meteor Showers

Just like the moon washes out the stars and deep-sky objects during astrophotography, the moon also hides the dim meteors produced from the Delta Aquarid meteor shower, and the others.  This year, the moon will be in it’s waning crescent phase during the peak time for this meteor shower.  The best time to view the Delta Aquarid meteor shower is after around midnight on Thursday, July 28th into the morning of the 29th.  If you are in the city, you may only see 1 or 2 meteors per hour.  If you are blessed with darker skies away from light pollution, you can expect to see as many as 10-20 per hour.

Meteor Definition (Graphic)

There seems to be some misunderstanding when it comes to what a meteor actually is, and what you are actually seeing during a meteor shower.  Please see the definition of a meteor in the simple graphic below:


What is a meteor?


Photographing the Delta Aquarid meteor shower


[adrotate banner=”27″]
 

The best way to find the radiant point for this meteor shower is to find the bright star, Fomalhaut.  Moving North from Fomalhaut, look for the star named Skat, or Delta Aquarii.  This is the radiant point for the Delta Aquarids, and where you will want to aim your camera lens.  A planetarium app for your phone will make the whole process a lot easier!  I prefer to use Stellarium for my Android Galaxy phone.  This is especially helpful because you can hold your phone up the sky from your desired location (In my case the backyard) and make sure that your camera has a clear view of the radiant point. By moving your phone around in the air, you can get a clear picture of the other elements you would like to include/exclude from the shot.

Observing this Meteor Shower in the Northern hemisphere

From my latitude in Ontario, Canada, the radiant point is below the horizon.  This means that I will set my sights low to the horizon in the direction of this meteor shower.  It is still possible to see many meteors over the course of a night from mid-northern latitudes.  If Fomalhaut is below the horizon, I would focus on the area of sky consisting of the constellations Pegasus and Aquarius.  This is where you are most likely to see a Delta Aquarid meteor.


Constellations Pegasus and Aquarius

Pegasus and Aquarius from Mid-Northern Latitudes


The radiant point for the Delta Aquarids is the star “Skat”


Delta Aquarid meteor shower radiant point

The radiant point for the Delta Aquarid meteor shower – Astronomy Magazine


You will want attach your camera to a sturdy tripod and aim it roughly towards Fomalhaut/Skat.  Try to frame the photo to include an interesting foreground object such as a tree to make the image more interesting.  A wide-field lens will increase the amount of sky you can include in your shot, and your chances of capturing a meteor!   I prefer to use my Canon 17-40mm F/4 L for the widest view of the sky possible.

Wide field camera lens

My wide field camera lens – Canon 17-40mm f/4 L

Camera settings for meteor showers

I would suggest using a low to medium aperture (f/4 – 4/8) and an exposure time of about 20-30 seconds.  The fast aperture will allow a significant amount of light onto your camera sensor, to soak in the stars (and hopefully a meteor or two!) throughout the night.  The longer exposure lengths of 20-30 seconds will give you a good shot at collecting a passing meteor in the sky, as your camera will be “recording” the action for a full 30 seconds.  You can either set your camera to continue taking 30 second exposures on it’s own by using an intervalometer, or by connecting it to your laptop and using a program like BackyardEOS.


[adrotate banner=”38″]
 

Your ISO setting will depend on the amount of light pollution in your area, as darker skies will allow you to bump the ISO up, and capture more stars and less sky-glow.  Pay attention to your histogram, and make sure your data (the mountain) is situated near the center, or just to the right.  This will give you a fair shot at a successful processing session when you pull the image in Adobe Photoshop later.  Take time at the begging of your session to

Spend time at the beginning of your astrophotography session to make sure that your focus is spot-on. Using manual focus, adjust your focus ring using a distant street-light or tree top as a point of reference.  Then take a few test exposures to to get those stars as sharp as possible.   Depending on your focal length, the stars may begin to trail after about 15-20 seconds.  This may not be apparent in your final image, but its worth pointing out if it is something you want to avoid.


My Camera Settings:

Mode: Manual

Aperture: f/4

ISO: 800

Exposure: 25 Seconds

White Balance: Auto


The next meteor shower

Example of photographing a meteor shower – Perseid meteor shower


If you are lucky enough to have captured a meteor streaking across the sky in one or more of your exposures, you can stack them together using Adobe Photoshop to create a composite image.   This creates a captivating image that better represents the glorious spectacle that meteor showers provide.  Let’s hope that the Delta Aquarid meteor shower produces a decent show this year despite the waning crescent moon, and less frequent meteors compared to other meteor showers.  And hey, the best meteor shower of the year will be here in just a few short weeks:)

Related Tags

Canon Rebel Astrophotography

|Camera|11 Comments

The very first camera I used for astrophotography was an old Canon Rebel Xsi (450D) DSLR. Even though the production of this camera was discontinued many years ago, I still use and enjoy this camera today.

A DSLR camera like the Canon Rebel 450D is a versatile choice as it can easily be attached to a telescope for deep sky imaging using a T-Ring and adapter. You can also use this camera with fantastic camera lenses such as the Rokinon 14mm F/2.8 for wide-angle nightscapes and Milky Way photography.

I’ve used many types of cameras for astrophotography from monochrome CMOS imaging cameras to cooled one-shot-color models. My Canon Rebel DSLR’s continue to produce amazing images, and they are one of the best ways to get started in the hobby.

The Milky Way

The Milky Way captured with a Canon Rebel T3i on a SkyTracker Pro Mount

Astrophotography with a Canon Rebel DSLR

I eventually upgraded my DSLR camera to a (slightly) newer Canon EOS Rebel T3i (600D), and it came pre-modified for astrophotography. The modification that was made to this camera is known as the “full spectrum modification”, which involved removing the stock IR cut filter inside the camera body.

Although there are many choices to consider when it comes to choosing a camera for astrophotography, an entry-level Canon Rebel series DSLR offers a unique combination of value and performance.

In this post, I’ll share my personal results using the Canon Xsi DSLR for astrophotography, and give you my recommendations for a beginner DSLR camera.

Canon Rebel Xsi for astrophotography

The Canon Rebel XSi a popular DSLR camera for amateur astrophotographers

If you don’t own a telescope yet, but want to get into astrophotography using a DSLR, have a look at the following resource page: Astrophotography Tips You Can Try Tonight

Capturing Deep-Sky Targets with a DSLR

The moon’s glaring presence has subsided, and it is now time to gather more RGB (color) light frames on my coveted summer deep-sky milky way objects. This is now my 5th summer as an amateur astrophotographer, and I don’t like to waste time when choosing my target for the night.

During the months of May-July, the Messier objects located near the core of the Milky Way have my full attention. My favorite summer deep-sky objects lie within the Sagittarius region of the Milky Way Core. Many of them are bright and colorful such as the Lagoon Nebula, Eagle Nebula, and the Swan Nebula.

The Lagoon Nebula is one of my all-time favorite targets and a worthy photo opportunity for any DSLR camera and telescope. The summer emission nebulae in Sagittarius are so bright, it is possible to photograph them from a light=polluted area such as your backyard in the city. My backyard skies are rated a Class 8 on the Bortle Scale.

From my latitude in the Northern Hemisphere (Ontario, Canada), the main aspect to consider is having a clear window of sky to the South, as most of the summer Milky Way targets travel Southeast to Southwest throughout the night.

Canon rebel astrophotography


The Lagoon Nebula using a Canon EOS Rebel Xsi

The photo of the Lagoon Nebula above was imaged over several nights last week. I set up my telescope gear on June 30th, July 2nd, and July 3rd over the Canada-Day long weekend in my backyard. It’s rare that we have such a long stretch of clear nights, especially on a long weekend.

This colorful nebula does not rise very high in the sky from my latitude in Southern Ontario. In fact, it just barely clears the height of my backyard fence. When planning a deep sky imaging session, it’s important to have a clear view of your target for an extended period of time.

I consider myself very lucky to be able to photograph such a glorious night-sky treasure from home.  You can view the specific photography details for my final image on my Flickr profile. I also managed to squeeze in some more imaging time on the Eagle Nebula, as well as the Elephant’s Trunk Nebula over the weekend, as you will see further down the post.

Capturing Galaxies

I have photographed many galaxies with my Canon EOS Rebel Xsi from the backyard. One of my most successful images was the Triangulum Galaxy. A long stretch of clear nights allowed me to collect over 7 hours of exposure time on M33.

This is a diffuse deep-sky object which can make it difficult to observe visually, but through photography, we can reveal the beautiful structure and color of this galaxy. The telescope used to capture the image below was an Explore Scientific ED80 with a focal length of 480mm.

Triangulum Galaxy

The Triangulum Galaxy using a modified Canon EOS Rebel Xsi

For Beginners / Newbies

You can view the equipment I use to take images like the ones on this website here or watch this video as I take you through my complete setup for astrophotography.

If you already own a DSLR and telescope and have started taking your own astrophotos – you may benefit from my astrophotography tutorials about image processing.

I connect my Canon Rebel DSLR to my laptop computer using a USB cable and control the camera through a software application known as BackyardEOS.  With this application, I can tell my DSLR to take multiple exposures of varying lengths and ISO settings.

Backyard Telescope

My Canon Rebel Xsi attached to an astrophotography telescope

I can also use this program to focus the stars, and make sure that my astrophotography subject is in the center of the frame. A typical session in my backyard will last all night long and have my Canon Xsi set to take anywhere from 30-60 three to four-minute exposures on a nebula or galaxy.

Dark frames of the same temperature are also captured during the night to reduce noise in the final image. As a general rule of thumb, the colder your digital camera is while imaging, the better!  Long-exposures taken during a hot summer night will produce even more noise than usual.

The Canon Rebel series DSLR cameras are also well-suited for Moon photography. If you connect the DSLR camera to a telescope, you benefit from its long focal length (compared to most lenses) for an up-close look at our nearest celestial neighbor.  

Moon through a telescope

If you are interested in this aspect of solar system astrophotography, be sure to have a look at my Moon photography tutorial. The Moon is an excellent target for your DSLR camera at any focal length. 

Hot Summer Nights

On a recent attempt to gather some H-alpha data on the Elephant’s Trunk Nebula, I discovered the limits of my DSLR when imaging in the hot summer heat.  On this particular night in Mid-June, the temperature remained over 30° well after midnight.

This was just too hot for my Canon 7D to capture any useful data on my deep-sky target.  (I use a different DSLR for my H-Alpha captures, as my Canon Rebel Xsi has the LP filter fitted to it at all times)

The hot hazy skies, combined with a dangerously hot sensor produced a red, noisy mess of an image.  An exposure of 30 seconds to a minute may be fine in this heat, but I was shooting 7-minute subs at ISO 1600 to pick up faint nebulosity through a narrowband 12nm Ha filter.  Lesson learned!

I have since returned to the Elephant’s trunk nebula in the constellation Cepheus, and let me tell you – it is faint!  Photographing IC 1396 from a light-polluted backyard in the city has proved to be quite the challenge.  I was able to capture about 2 hours of exposure on this nebula last week, which is not enough to produce a pleasing image.

By stretching the data far enough (using curves in Adobe Photoshop) to show the rim of the nebula, the background stars become blown out and noisy.  It takes many hours worth of imaging to produce a decent portrait of this DSO.  Here is my early result with limited exposure time:

IC 1396 - Elephant's Trunk Nebula

The Elephant’s Trunk Nebula in Cepheus

Best Beginner DSLR for Astrophotography

I have stood behind the Canon brand of DSLR’s from the beginning. Based on the advice I read in the Backyard Astronomers Guide back in 2010, I chose to start my photography adventure using Canon digital cameras.

At the time, they were the clear choice for astrophotographers, offering the only DSLR built for astrophotography (They later released the Canon 60Da)  Nikon has come a long way since then in the way of astrophotography, but my heart still belongs to Canon.

The Nikon D810A is a camera intended for astrophotography, as you may have gathered with the “a” designation in the title. This is Nikon’s first DSLR dedicated to long-exposure astrophotography. This camera body was based on the original D810, but include a sensor that is four times more sensitive to H-Alpha red tones than an ordinary DSLR.

Canon EOS Rebel T3i

In 2015 I upgraded to Canon EOS Rebel T3i camera for astrophotography. The T3i (600D) came pre-modified by an astro-modification service known as “Astro-Mod Canada”. I have used this camera to capture many deep-sky objects using various clip-in filters.

This is the DSLR I always recommend to beginners. First of all, it is the successor to the Canon Xsi which I use now and can provide actual results (my photo gallery) of the astrophotography performance of this camera. Second, it is a great value.

Canon Rebel T3i

You will find used models of this camera body at online retailers (such as Henry’s in Canada) for a fraction of the price of a new CCD Astronomy Camera.  You can no longer purchase this camera new, so if you can’t find a used body at camera retailers, you will have to search online forums such as Canada Wide Astronomy Buy and Sell, or Astromart.

This camera can also quite easily be modified for astrophotography by yourself or a professional.  The features of the camera itself are quite standard of all models these days, but this DSLR is capable of taking astonishing deep-sky and landscape astrophotography images.

My favorite feature of the T3i is the flip-out LCD screen. This comes in very handy when shooting deep-sky astrophotography images because the camera is often in an awkward position when connected to a telescope.

Tilting the screen to a more accessible angle allows me to focus the telescope using the 10X live-view function of the camera. I can also review the histogram, make changes to the exposure time, and review my light frames as they are being captured.

The Canon T4i and T5i are also excellent choices but are a little more expensive.  The Canon T5i can be purchased in a kit including an 18-55mm lens.

Recommended Clip-in Filters

I have used a wide variety of clip-in light pollution filters with my Canon Rebel DSLR cameras. For deep-sky targets containing hydrogen-alpha emission data such as the Eagle Nebula, a narrowband filter like the 12nm Astronomik Ha is an excellent choice.

For capturing broadband RGB data on my targets, the SkyTech CLS-CCD filter allows me to block a healthy amount of city glow. This filter creates an impressive amount of contrast between your object and a light-polluted sky.

For broad-spectrum targets such as galaxies or reflection nebulae, I recommend trying the Optolong L-Pro filter. This multi-bandpass filter is less aggressive and helps retain the natural colors of the stars in your image.

DSLR camera filter

The Optolong L-Pro filter in My Canon Rebel 600D

Why use a DSLR?

There are many different types of astrophotography cameras available, other than Digital SLR’s. Dedicated thermal-cooled CCD cameras are much better at producing deep-sky images with less noise, but are much more expensive and less user-friendly.

Webcams can produce stunning images of Solar System planets and the moon and can be inexpensive and easier to use. The Altair Hypercam 183C is an example of a dedicated astronomy camera that can bridge the gap between a DSLR and a CCD.

I still enjoy using a DSLR because it’s an enjoyable experience. You can’t beat the value and versatility of the Canon Rebel series cameras.

Light Pollution Map

I often speak of the light pollution from my backyard in the city.  I love to get away from home to image under dark skies at my astronomy club’s observatory (RASC Niagara Center) – but I rarely have time to drive 40 minutes with all of my equipment to this special place.

To maximize my time under the stars, it makes more sense for me to get as much astrophotography in at home, in the backyard. (Hence the name of this website) The light pollution produced by the city I live in is quite heavy, especially in certain areas.  My house is in the worst of it, being located in the central area of town.

I found this helpful Light Pollution Map that shows just how bad it really is:

Light Pollution Map

Light Pollution Map for my Backyard

The Bortle Scale

Do you see that?  I am in a Red Zone!  I would estimate that my location is either a class 7 or 8 on the Bortle Scale, although I have not yet taken an accurate light pollution measurement.  The Bortle Scale states that a class 6 zone (NELM 5.1-5.5) will have your surroundings easily visible and that the Milky Way is visible only at the Zenith.  

These characteristics are true of my backyard and is referred to as a bright suburban sky. How much light pollution is in your backyard?  You can use this nifty interactive map to find out: Light Pollution Map

To view all of my best images captured with a Canon Rebel Xsi and T3i, check out my photo gallery.  I wish you all the best in your future astrophotography endeavors, clear skies.

Helpful Resource: Getting Started with Deep Sky Astrophotography

Related Tags

HaRGB Astrophotography

|HaRGB|6 Comments

Right now is the absolute best time of the year for backyard astrophotography.  The days are warm and the nights are clear, summer star gazing is here!  The core of our Milky Way galaxy has returned to our night sky here in the Northern Hemisphere, and with it comes many celestial delights such as the colorful nebulae located in and around the constellation Sagittarius.  For me, Summer astrophotography means pointing my telescope right where the action is – in the core of the Milky Way, soaking in as much exposure time as possible.  These days do not last long!  We have but a brief window to capture glorious deep-sky objects such as the Lagoon Nebula, Trifid Nebula, Swan Nebula, and Eagle Nebula.  All four of these glorious Messier Objects are worthy of several sleepless nights in the backyard.

Camping and Star Gazing

The warmer weather also means astronomy camping, to seek out darker skies and spend all night under the stars.  Spending time with family and friends around the campfire with my telescope collecting photons in the background is my idea of a good time!  My camping gear would not be complete without all of my astrophotography equipment coming along with me.  This includes everything from my tracking mount to my laptop!  I always book my camping trips on or around the new moon phase, and with a campsite that has a clear view to the South.  Luckily for me, there are many fantastic campgrounds located on the North shore of Lake Erie, which creates a vast dark area directly south of our location.  I recently spent a night at Selkirk Provincial Park for some astronomy camping on a warm, clear night in early June.


Camping and Star Gazing

The Big Dipper from our Campsite


Photography with the New APO

I am excited to announce that I am the proud new owner of an Explore Scientific ED102 CF astrophotography telescope.  This is a portable, light weight triplet apochromatic refractor – built for deep-sky imaging.  The increase in aperture is a welcome change from my now departed ED80 telescope I enjoyed for the past 5 years.  I have now had this refractor out a few times, and could not be more pleased with it.  I am thrilled with the fact that I can produce images with deeper, and more detailed results due to the increased size.  Going from 80mm to 102mm may not seem like a large increase, but when it comes to astrophotography, 22mm makes a BIG difference!


Explore Scientific ED102 CF

My new Explore Scientific ED102 CF Telescope


My first imaging session with the new Explore Scientific 102mm CF was on June 8th.  My deep-sky target of choice was the beautiful Eagle Nebula, an emission nebula in  the constellation Serpens.  I managed to capture just over 2 hours on this object from the backyard.  It was a weeknight, and I got about 2 hours of sleep before work the next morning.  WORTH IT!  I made a video about the dedication to this hobby, a small pep-talk if you will.  Despite the videos mixed reviews, I am still proud of this wacky, short little astrophotography video.

Speaking of YouTube, my channel has over 500 subscribers!  I cannot believe the response generated from my astrophotography videos.  It turns out that I am not the only one obsessed with photographing stars in the night sky.  If you haven’t subscribed yet, please do!  I can promise you many more useful astrophotography tutorials, vlogs, and equipment reviews in the future!

Astronomik 12nm Ha Filter

To add to the excitement, I have also added a new Astronomik 12nm Ha filter to my growing list of astrophotography equipment.  This is my first time diving into narrowband imaging, something I’ve been interested in for years.  This clip-in filter blocks out almost all wavelengths of light and only allows the light produced from emission nebulae and starlight to pass through.  What makes this feature so powerful t astrophotographers is the fact that it allows to image under heavy moonlight and light-pollution.  For a backyard astrophotographer such as myself, it is an absolute game-changer.  This means I can image twice as often, and produce more vivid and detailed deep-sky photos by adding Ha (Hydrogen Alpha) data to my existing RGB images.


Astronomik Ha Filter

Filter Purchased (For use with my Canon DSLR)
Clip-Filter (EOS) with ASTRONOMIK H-Alpha-CCD 12nm

Bought online from OPT Telescopes and shipped to Canada


HaRGB Astrophotography

Combining the RGB data with Ha for a stronger image

HaRGB Astrophotography

M16 – The Eagle Nebula in HaRGB

Anyways – about the Eagle Nebula.  I noticed the increased detail in M16 using the new telescope right away.  The super-sharp, high contrast images I have come to expect using a triplet apo were also evident right away.  I captured my RGB data of the Eagle Nebula on June 8th (About 2 hours), and returned to the subject on June 14th to photograph it using the Astronomik Ha Filter.  Because I use the filter ring adapter for my IDAS LPS filter on my Canon Xsi, the Astronomik 12nm Ha clip-in filter would not fit into the camera without the stock interior.  To make life easier – I captured the Ha data by clipping the Astronomik filter into my Canon 7D body.  This is the first time I have used the Canon 7D for deep-sky astrophotography.  I must say that I was impressed with the increased image resolution.  This makes me want to upgrade my aging 450D.  It never ends!  Here is my image of the Eagle Nebula combining the RGB data with the Ha:


Eagle Nebula in Ha + RGB

M16 – The Eagle Nebula in HaRGB

Photo Details

RGB:

Total Exposure: 2 Hours, 9 Minutes (43 frames) 
Exposure Length:  3 Minutes
ISO: 1600
Telescope: Explore Scientific ED102 CF
Camera: Canon Rebel Xsi (modified)
Filter:  IDAS Lps 


Ha:

Total Exposure: 1 Hours, 40 Minutes (20 frames) 
Exposure Length:  5 Minutes
ISO: 1600
Telescope: Explore Scientific ED102 CF
Camera: Canon EOS 7D
Filter: Astronomik 12nm Ha


Using H-Alpha as a Luminance Channel

Creating a HaRGB image in Photoshop

I still have a lot to learn about processing HaRGB images using a DSLR.  However, my early results are very promising!  I really love the way the H-Alpha data brings out the nebulosity without bloating the surrounding stars.  The common processing method of combining the Hydrogen Alpha data is to add it to your existing RGB data as a luminosity layer in Adobe Photoshop.  This is the method I have chosen to use, although I am still learning how to best accomplish this task.  You can read a simple tutorial on the process from Starizona.com.


Ha luminance layer

The H-Alpha (Ha) Layer of my image

Dark Sky Camping Trip

Camping Trip with Telescope

Our campsite at Selkirk PP

I wanted to take advantage of the dark skies at Selkirk Provincial park by imaging the Swan nebula from my campsite.  I had everything all ready to go including a perfect polar alignment, and my autoguiding system with PHD running smoothly.  The only problem – MY BATTERY DIED!  I captured one amazing 5 minute frame on the Swan Nebula before my battery pack’s low-power alarm sounded off.  What a heart breaker.  Normally this battery is enough to power my astrophotography equipment all night long, but I didn’t charge it long enough before we left.  Lesson learned!

To make the most of a bad situation, I decided to turn my attention to some wide-filed landscape astrophotography using my Canon 70D and tripod.  The moon finally set, and the sky was incredibly dark after midnight.  The milky way could easily be seen with the naked eye as it stretched across the sky.  This is something everyone should witness at some point in there life.  There is something about it that makes me feel connected with our universe.


Camping Milky Way

The Milky Way from Selkirk Provincial Park


As always, thank you for your interest my website, and this incredible hobby.  I’ll do my best to answer your questions so we can continue our journey together.  Please follow my Facebook Page for the most up-to-date astrophotography information.  It’s a great way to connect with me and other backyard astrophotographers chasing the same feeling.

AstroBackyard is on Facebook

Related Tags

Forgotten Light Frames

|Nebulae|0 Comments

While digging though some old folders on Adobe Bridge, I stumbled across some unprocessed, 300 second light frames of the Flaming Star Nebula from November 2013!  When you are desperate to get out and image a new target, this is like hitting gold.  

I was originally looking for my raw files of the Pacman Nebula, which I feel is in desperate need a new process. (Those stars look pretty rough)  I found a folder labeled “Flaming Star – 5 Min Lights”.  I never processed this image!  The Flaming Star Nebula is a colorful collection of glowing gas and dust lit up by the bright star AE Aurigae. 

The tough part about this process will be the limited exposure time.  1 hour of data is really not ideal for a quality astrophotography image.  I find that out the hard way below:

IC 405 – The Flaming Star Nebula

IC 405 - Flaming Star Nebula

Photo Details

Photographed on: November 29, 2013

Telescope: Explore Scientific ED80 with WO Flat III 0.8x FR/FF
Guiding: Meade DSI Pro II and PHD Guiding
Guide Scope: Orion Mini 50mm
Camera: Canon EOS 450D (Stock)
ISO: 1600
Exposure: 1 hour (12 x 300s)
Processing Software: Deep Sky Stacker, Photoshop CC
Support Files: 15 darks

Guided with PHD Guiding
Stacked in Deep Sky Stacker
Processed in Adobe Photoshop CC

This image was acquired using Canon EOS Utilities, and not BackyardEOS as I use now.  This was photo was also shot before I modified my Canon 450D for astrophotography.

Now you might be thinking “how could you spend hours imaging a nebula and forget to process it?”  It’s simple – life is busy!  I likely had a busy week following the imaging session and began I new session before I even looked at the precious data collected on that cold November night.  I don’t see any dark frames to support the image.  

This may have been another reason I held off.  I bet that I wanted to take 5-minute darks of the same temperature before stacking but never got around to it.  This could be a problem.

But first, let’s get this cleared up

This is budget Astrophotography. Most of my gear was purchased used from online forums and astronomy classifieds.  The total value of the equipment used to photograph this nebula was purchased for under $3,000.  It’s not top-of-the line gear by any stretch of the imagination.  My astrophotography image processing skills were self-taught.  I am no scientist, that’s for sure. Just like you, I have a strong desire to capture beautiful images of the night sky.  I always appreciate constructive criticism and enjoy helping others learn through my mistakes.

Stacking without Dark Frames?

First of all, I’ll have to use dark frames from a different night to stack with the Flaming Star light frames.  This means that it is very important to match the temperature of my light frames from that night of imaging.

I have done a poor job of creating a master dark library, so finding matching dark’s may be tough.  I usually try to record the temperature of my dark frames in the file folder, for this very situation.  There are external software applications available that can help create a dark frame library, such as Dark Library.  

I remember using this years ago, but their website appears to be down right now.  I will use the 5-minute dark frames from my Pacman Nebula image taken earlier that month, labeled 4 degrees.

Another option is to just stack the light frames without any darks. I’ll try both and compare the two.

Here is the version stacked with no dark frames:

Deep Sky Stacker with No Darks

Here is the version using dark frames from a previous night:

Deep Sky Stacker with Darks

As you can see, stacking with the dark frames produced a better result.  Even though the temperature of dark frames did not match perfectly, the dark frames removed some of the dead pixels and noise from the image.  Notice the red streak of dead pixels on the “no-darks” version.  All of these imperfections would become intensified after processing!  

I performed a few basic edits to the examples above to have a better look at the differences. (Levels, Gradient Xterminator, and Curves)  Now that we have registered and stacked our 1 hour’s worth of data, let’s start stretching the data in Photoshop.

How to take proper Dark Frames for Deep Sky Stacker

The answer to this and more in the FAQ section

Processing the Image in Photoshop

If you have followed any of my astrophotography tutorials on my website, or video tutorials on YouTube, you already know the basics of my processing workflow.  This process has evolved over the years as I learn new tricks.  However, processing the Flaming Star Nebula was particularly tough because of the limited exposure time on the subject.  

Add in the fact that this nebula is quite faint, with many bright stars surrounding it, and you’ve got an astrophotography challenge for even the most experienced astrophotographer.

Quick Astrophotography Tip

Try to frame your deep-sky object in an interesting way.  Include nearby star clusters, nebulae, or galaxies.  For inspiration, search for your target on APOD, and see how the professionals have framed the object.  This may spark your creativity to photograph an existing target in a different way.

HLVG – Green Noise Remover

The entire image had a noticeable green cast over it, perhaps because of the extreme amount of noise, or the miss-matched dark frames.  I ran Deep Sky Colors HLVG on medium, which helped a lot.  HLVG was created by Rogelio Bernal Andreo of RBA Premium Astrophotography. 

It is a chromatic noise reduction tool that attempts to remove green noise and the green casts this noise may cause in your astrophotography image.  It is based on PixInsight’s SCNR Average Neutral algorithm.  If you don’t already have this useful filter for Photoshop, I highly recommend it, it’s free!  You can download the plugin here:

Hasta La Vista, Green!

HLVG Filter for astrophotography

Results and Thoughts

I must admit, this post became a bit of a nightmare.  I began to document my processing steps one by one, taking screenshots of progress along the way.  I wanted to provide a detailed tutorial of how I turned this forgotten data into a masterpiece, despite having no associated dark frames, and only an hour’s worth of exposure time.  As I experimented using different methods of noise reduction, and various orders of operations, I became very discouraged with my final image results.  

I spent hours taking different roads with all of my trusted astrophotography tools at my disposal, and the results continued to be unimpressive.  By adjusting the curves enough to show any substantial detail on the nebula, I introduced a frightening amount of noise into the background space.  No amount of noise reduction could remove it, without turning the entire image into a blurry mess.

I just couldn’t bring myself to post a tutorial with the end result turning out as it did.  So I scrapped the idea and settled for a forgettable image of the Flaming Star Nebula.  Surely this gorgeous nebula that spans 5 light-years across deserves more than that.

Astrophotography Processing Tutorial

My unused processing tutorial screenshots

At the end of the day:

No amount of processing can make up for lack of exposure time!

I guess you could say I was doomed from the start.  I am not going to spend any more time on this image until I am able to capture at least another 2 hours of data on it.  I hope you can learn from my experiences in astrophotography, in both victories and failures.  But I guess that’s why you’re here 🙂  Please follow AstroBackyard on Facebook for the latest updates.

Related Tags

Astrophotography in the City

|Backyard|2 Comments

Saturday Night Under the Stars

Astrophotography in the City

Last weekend I posted a new video to my YouTube channel titled DSLR Astrophotography – A Night in the Backyard with my Camera. It is now Early-April, and we are in what amateur astrophotographers call “Galaxy Season”, as we transition from the Winter Constellations like Orion and Taurus, to the Summer Milky Way objects.  In between, there are some fantastic deep-sky objects to observe in the Spring Constellations Leo, Coma Berenices, and Bootes.

The forecast called for clear skies on that crisp, cold Saturday night in Southern Ontario, and I was ready to image some deep-sky objects with my camera and telescope.  After a late dinner, it was a race against the clock to photograph my first subject of the evening, the Waxing Crescent Moon. If you want to jump straight to the video, you can find it at the bottom of this post.

Live-View DSLR Through a Telescope

Using the Canon 70D’s live view screen for telescope observing

Crescent Moon Astrophotography


I barely had time to get the beautiful Waxing Crescent moon into my telescope’s eyepiece before it became obscured by the surrounding trees in my neighborhood!  I shot a live-view video of the moon (with Earthshine visible) with my Canon EOS 70D DSLR through the telescope.  This may be of interest to anyone wondering what the view is like through an 80mm refractor telescope.  You need an adapter to attach the camera to the telescope, which you can buy online here.

After I focused the Moon and experimented with different ISO settings and exposure lengths, I snapped a couple of shots before moving on with the rest of my night.  You can have a look at the equipment I use for astrophotography here.


Earthshine Moon

The sky from my backyard

Next, I wanted to provide some examples of the dark-sky quality from my backyard.  Living in the central part of town has its advantages, but dark skies are not one of them!  I experience heavy light pollution from all directions.  This makes using a light-pollution filter on my camera necessary for long exposures.  Currently, I use the IDAS LPS clip-in filter on my Canon Rebel Xsi DSLR.  This allows me to capture exposures of up to 5 minutes from my backyard.


Astrophotography in the City

The night sky from my backyard on April 9, 2016


The Big Dipper Asterism

Looking towards the Big Dipper in Ursa Major

Deep-Sky Target: Edge-On Spiral Galaxy in Coma Berenices

NGC 4565 – The Needle Galaxy

Once the moon had set, I promptly prepared my deep-sky astrophotography rig for a night’s worth of photons on my photography subject.  I settled on NGC 4565 – The Needle Galaxy because of it’s size, magnitude, and current location in our night sky.  The Needle Galaxy is an edge-on spiral galaxy that resides about 30-50 million lights years from Earth.  This handsome galaxy is the current photo in my 2016 RASC Observer’s Calendar hanging in my office at work, perhaps that is what gave me the idea!

Astrophotography in the City - Needle Galaxy from my backyard

NGC 4565 – The Needle Galaxy

Photographed on: April 9/10, 2016

Total Exposure Time: 54 Minutes (18 x 3 Min. Subs @ ISO 1600)
Mount: Sky-Watcher HEQ-5 Pro
Camera: Canon 450D (modified)
Telescope: Explore Scientific ED80 Triplet Apo

Guided with PHD Guiding
Stacked in Deep Sky Stacker
Processed in Adobe Photoshop CC

This interesting NGC object shows up rather small in my 80mm telescope, as many galaxies do.  A larger telescope with a focal length of 1000mm or more would be a better choice for this DSO.  I also had a bit of a challenging evening out the background colour of this image.  Flat frames would have made this issue much easier to deal with in post-processing.  With just under an hour of exposure time, it is safe to say that I will need to add more time to this image to bring out the colour and detail.


AstroBackyard on Youtube

I am completely blown away with the response to my YouTube Channel has received.  Thank you to everyone who has subscribed, I look forward to many new astrophotography videos in the future!

Beginner Advice:

Related Tags