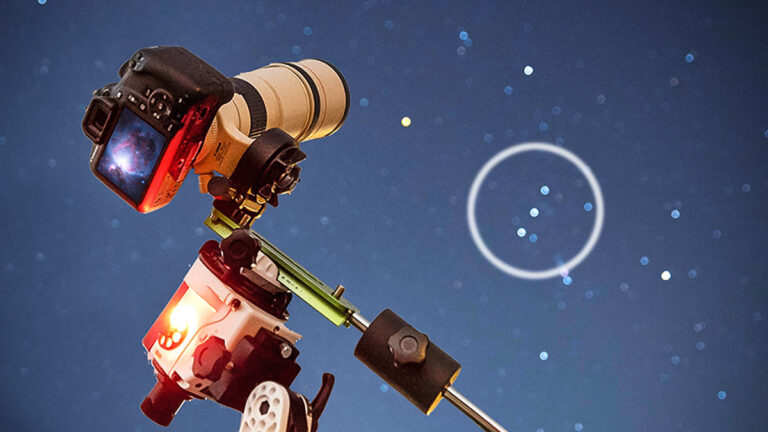
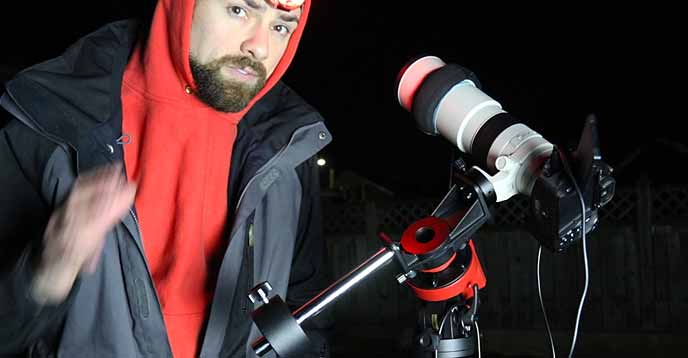
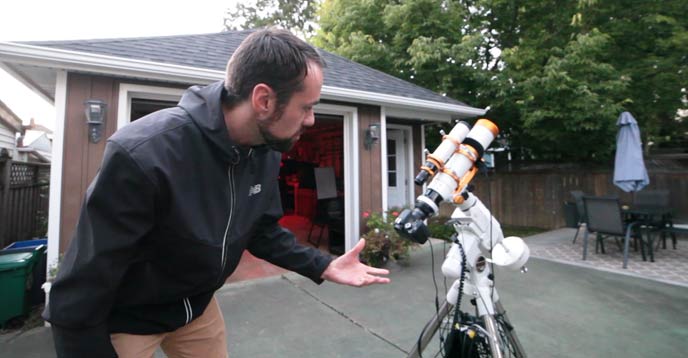
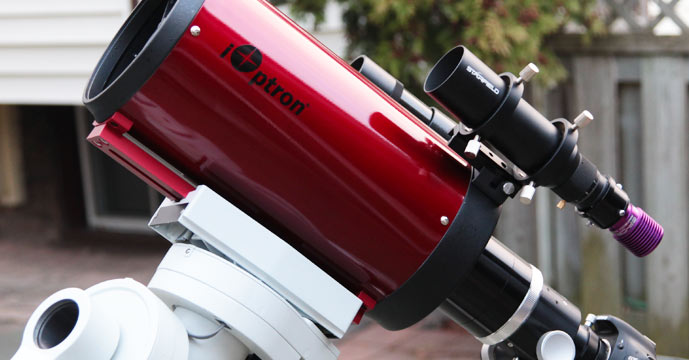
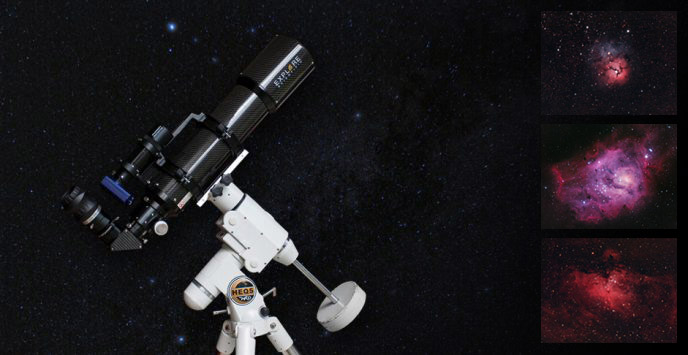
Sky-Watcher Star Adventurer Pro Review
The Sky-Watcher Star Adventurer Pro is an extremely popular portable star tracker designed for astrophotography. After using iOptron star trackers for deep-sky astrophotography exclusively, it was time to see what all the fuss was about.
In this post, I’ll share my unbiased opinion about the Sky-Watcher Star Adventurer Pro, and actual images I was able to capture using it. The setup I used was the Pro Pack version, that comes with the counterweight kit, latitude EQ base, and fine-tuning mounting assembly.
Sky-Watcher Star Adventurer Pro Review
If you would like to get a good look at the Star Adventurer Pro Pack in action, please enjoy my video review on YouTube:
In the beginner stages of astrophotography, one of the most daunting challenges is choosing a reliable tracking mount for long exposure photography at night. Affordable, portable camera tracker mounts are a fantastic way to start, because they are not overly complex, and can provide promising results in a short period of time.
If you’re new to the world of star trackers for astrophotography, this article should help clear things up. Essentially, a tracking camera mount allows you to shoot sharp, long exposure images of deep-sky objects in space. For me, this is often a large nebula or galaxy, but it could be anything from a star cluster to a comet.
The star trackers in this category have many names, from “tracking camera mounts”, to “multi-function mounts”. Whatever you call it, mounts like the Star Adventurer Pro (and Star Adventurer Mini) were designed to be portable, quick to set up, and take sharp images at varying focal lengths.
This mount can be used in a staggering number of configurations for astrophotography, from dual-camera and telescope setups to a versatile time-lapse photography/video mode. Whichever type of astrophotography/videography you’re into, you’ll be able to enjoy up to 11-lbs of gear in more orientations that you thought were possible. (I never thought of using the mount in horizontal rotation time-lapse mode before!)
The Sky-Watcher Star Adventurer Pro sits in an increasingly crowded space of portable astrophotography mounts. If you’re familiar with my work, you’ll know that I am no stranger to Sky-Watcher products, with my primary imaging rig consisting of an EQ6-R Pro equatorial mount and an Esprit 100 APO refractor.
Does the fact that the Star Adventurer Pro matches my existing Sky-Watcher gear (lime green and white) affect my opinion of the mount? A little. The previous version of this mount was black and red, which would have matched the RedCat a lot better!
The outrage from the audience of my YouTube video (because I did not review the Star Adventurer mount) resulted in Sky-Watcher USA reaching out to me to test the Sky-Watcher Star Adventurer Pro Pro Pack. (Thanks!)
The Star Adventurer Pro with the fine-tuning mounting assembly and counterweight attached.
The Pro Pack
The Sky-Watcher Star Adventurer Pro comes in 3 packages. If you are interested in maximizing the full potential of this mount and would like to use it with a small telescope (like the William Optics RedCat 51) or heavy telephoto lens, I suggest investing in the Pro Pack.
What’s Included:
- Star Adventurer Pro Mount Head
- Dovetail L-Bracket with DEC Fine Adjustment
- Built-in Polar Scope
- Ball Head adaptor
- Polar Scope Illuminator
- Latitude EQ Wedge
- Counterweight Shaft
- 1kg Counterweight
The Pro Pack includes the multi-function mount, a polar scope with an external, switch-on illuminator, a counterweight kit, a ball-head adapter, the latitude (EQ) base, and a declination bracket. The build quality and finish of the mount are impressive. The main body of the mount is metal, and the core components like the mode dial, adjustment knobs, and polar scope are solid and secure.
As I’ll discuss further later on, the fine adjustment declination mount on the L-bracket was a pleasant and much-appreciated surprise.
Another option to consider is the Sky-Watcher Star Adventurer Mini (SAM). This version is the smallest of the bunch and can handle a maximum payload of 6.6 pounds. This miniature tracking platform was designed for landscape astrophotographers looking to capture long-exposure nightscapes using a DSLR or mirrorless camera and lens.
If keeping weight to a minimum, and ultra-portability is important to you, perhaps the SAM is worth looking into. I find the full-size Star Adventurer Pro to be extremely compact and portable and can easily handle some of the heavier lenses I use for astrophotography like the Rokinon 135mm F/2.
Thus far, I have enjoyed using the Star Adventurer Pro with my 250mm RedCat 51 refractor most. With my Canon 60Da camera, this provides an advantageous 40omm focal length. The image of the Orion Nebula below was captured using 16 x 90-second exposures @ ISO 3200 on the Star Adventurer Pro mount.
The Orion Nebula. Captured using a Canon 60Da DSLR camera and small telescope on the Star Adventurer Pro.
Complete Specifications (Pro Pack)
The Pro Pack includes absolutely everything you need to fully enjoy this mount, including the latitude EQ base and the counterweight kit. As with all of the gear I review on AstroBackyard, I was not paid to endorse this mount or any other Sky-Watcher product. Here are the core details of this star tracker:
- Mount Type: Equatorial Camera Tracking System
- Mount Weight: 3.63 lbs.
- Built-In Illuminated Polar Scope: Yes
- Autoguide Port: Yes
- Maximum Payload Capacity: 11 lbs.
- Type of Mount Electronics: Motorized (Non-Computerized)
- Built-in Battery: Requires 4 “AA” Batteries
- Motor Type: DC Servo, 144 teeth
- Tracking Rates: Celestial, 1/2 Celestial, Solar, Lunar
- Saddle Type: Vixen
- Hand Controller: None
Here is a look at the body of the mount. This helpful diagram can be found in the Sky-Watcher Star Adventurer Pro manual (PDF). I have listed all of the numbered areas of the mount below.
- Celestial Tracking Mode Dial
- Mode Index
- Polar Scope Cap
- Battery Base Cover
- Polar Scope Cover
- Mini USB Port
- RJ-12 Autoguider Port (6-pins)
- DSLR Shutter Control Port
- 3-Position Slide Switch
- Right Button and LED Indication
- Left Button and LED Indication
- Clutch Knob
- Mounting Platform
- Locking Knob
- Polar Scope Focus Ring
- Polar Scope
- Date Graduation Circle
- Time Meridian Indicator
- 4 X AA Battery Case
- Time Graduation Circle
- Time Meridian Indicator Calibration Screw
- Polar Scope Calibration Screw
- Worm Gear Meshing Adjustment Screw
- Sockey for 3/8″ Thread Screw
- 1/4″ to 3/8″ Convert Screw Adapter
Most users will most certainly power the mount using 4 X AA batteries, which will last for up to 72 hours worth of tracking. You also have to option of powering the mount using DC 5V with a Mini USB cable (Type mini-b) from your computer.
The power of a star tracker lies in the freedom and portability of the mount, so do yourself and power the Star Adventurer using batteries.
The mode dial includes 8 positions. This gives you 7 possible tracking speeds (position 1 is “off”).
Tracking Speeds:
- Celestial Tracking
- Solar Tracking
- Lunar Tracking
- 0.5X Speed (48-hour Rotation)
- 2X Speed (12-Hour Rotation)
- 6X Speed (4-Hour Rotation)
- 12X Speed (2-Hour Rotation)
The mode dial lets you select the tracking rate of the mount.
How the Star Adventurer Pro Works
If you own a DSLR camera and a sturdy tripod, the Star Adventurer Pro opens up the world of astrophotography to you. That’s because this tracking camera mount will compensate for Earth’s rotation, and allow to capture long exposure images of deep-sky objects without star trailing.
You could actually use the Star Adventurer for visual astronomy, too, if you wanted. The mount can handle up to 11 pounds of gear, which means a small refractor telescope with a diagonal and eyepiece are an option.
If you have never used an equatorial mount for astrophotography before, the first thing you need to know is that polar alignment is critical.
The built-in polar scope on the Sky-Watcher Star Adventurer Pro.
To polar align the Star Adventurer Pro, you need to align the latitude wedge with the north or south celestial pole from your geographic location. For me, that means adjusting the altitude control knob so that 43 degrees north is set.
Then, it’s a matter of moving the azimuth controls from side to side to place the north star in the correct position.
I use an app on my smartphone called Polar Finder to identify the exact position Polaris must be in from my location and time. Adjusting the Star Adventurer’s (or any other EQ mounts) Alt/Az controls is a quick and easy process once you get used to it.
Once you are polar aligned, you can dial the mode dial to 1X celestial tracking rate, which will match the apparent motion of the night sky. Images of 1-minute in length or more will no longer show star trailing, and deep-sky astrophotography is now possible.
Using a Ball Head vs. Fine-Tuning Mount Assembly
If your interests lie in wide-angle nightscapes or Milky Way photography, chances are a ball head is your best option. A DSLR or mirrorless camera and wide-angle lens are relatively lightweight when compared to a telephoto lens or telescope. In this scenario, a ball-head will easily support your camera and lens, and you’ll have the freedom to point the camera in whichever direction you like.
To use a ball head (not included with the mount) on the Star Adventurer, you can use the green 3/8″ ball head adapter. This attaches to the mounting platform, and then you can thread the base of your ball head to it.
When using the mount with a DSLR camera and lens, the ball head and adapter is a handy configuration.
If you are using a longer lens in the 200-300mm range (or a telescope), you’ll probably want to use the fine-tuning mount assembly. The dovetail bar and declination bracket that comes with the Star Adventurer is probably my favorite feature of the mount overall.
You can mount your camera to the declination bracket of the Star Adventurer using the 1/4″ thread screw on the base of your lens collar or telescope mount. Then, just screw the counterweight bar into the bottom of the fine-tuning mount assembly, and adjust the height of the weight to achieve balance.
Between adjusting the height of the dovetail bar on the mounting platform, and the counterweight itself, you should be able to really balance your load evenly.
How to Find and Frame Deep-Sky Objects
The mount does not include a computerized GoTo system, so you’ll need to find and frame objects yourself. A lot of people ask me how to accomplish this, and it’s really not that hard.
Just use a planetarium app on your phone, or desktop computer to get an idea of where the object you wish to photograph lies. That means finding the location of the object and the constellation that it is in, so you have a point of reference when your outside.
The brightest objects make this experience much easier. For example, in the northern hemisphere, the Pleiades star cluster is very easy to locate in the night sky, even in a light-polluted area. Once you’ve spotted its location, you simply use the RA and DEC controls of the Star Adventurer to “frame-up” the object using your camera lens or telescope.
If the object is bright enough, you can use the viewfinder on your camera to center it in the frame. You can also focus the image at this time, as long as their is at least one bright star in the field.
To focus your camera lens or telescope, you can use the live-view mode on your camera, and zoom in 10X. You could also try using a Bahtinov mask, which will create a useful star pattern as a reference.
Set up under dark skies for astrophotography with the Star Adventurer Pro.
Helpful Tips and Advice
One thing I wanted to mention to new owners of the Star Adventurer Pro Pack is to remember to remove the 1/4″ to ⅜” convert screw adapter on the base of the wedge before installing it on your tripod.
The adapter is inside of the wedge base from the factory, but you’ll need to use a slotted screwdriver to remove it so it will thread onto your tripod.
The included adapter is handy to have but I feel that some owners will wonder why the wedge will not fit on their ¼” thread tripod if they haven’t removed it.
The Star Adventurer includes a DSLR shutter control cable to directly control your cameras shutter release with pre-programmed shutter intervals. I must admit, I have not used this feature because I am rather comfortable with my own intervalometer I’ve been using for years. However, if you don’t already own a remote shutter release cable, this is likely a nice bonus for you.
Which Tripod to Use?
If you already own a sturdy photography tripod, you can thread the altitude base of the Star Adventurer on top. Due to the added weight of your camera equipment (which may include a small telescope) a star tracker needs to be much more secure than a traditional panning tripod head does.
If you find that the configuration including your original photographic tripod is unstable, you should look into the Sky-Watcher Star Adventurer Tripod. This is an adjustable-height tripod that is also compatible with AZ-GT series and AZ5 Sky-Watcher mounts.
As an added benefit to amateur astrophotographers, this tripod includes a spreader for added stability and a handy eyepiece tray.
What I Like
The mount feels very stable and adjusting the altitude and azimuth controls of the base are precise. I find that I can polar align the Star Adventurer quickly and accurately without the need for an electronic polar scope like the PoleMaster or iPolar.
My favorite thing about the Sky-Watcher Star Adventurer is the declination bracket and controls. The DEC bracket makes it very easy to attach your camera or telescope to the mount. By releasing the clutch and turning the declination adjustment knob, you can point your camera or lens in any direction in the sky. When you have framed up your target, you can lock the RA clutch and begin tracking the object for an extended period of time.
I really like the smooth, secure declination bracket on the fine-tuning mount assembly.
The included Sky-Watcher Star Adventurer Dec Bracket lets you attach a camera or small telescope, which can then be pointed to different Declination angles as you wish. The Dec bracket includes a motion control knob and a Dec axis locking knob. With the Dec Bracket installed, the Star Adventurer becomes a functional equatorial mount including Dec angle adjustments operating with manual control.
The fine-tuning mounting assembly with the ¼” screw is absolutely fantastic. I love the locking mechanism underneath, the precision declination angle control, and the overall secure and balanced nature of the design. If you plan on using the Star Adventurer with a small telescope, this will likely be your favorite aspect of the mount too.
The decision to power the mount using AA batteries rather than a rechargeable lithium-ion style battery is a little surprising to me. However, I honestly don’t think this is a negative aspect of the design, because it’s actually quite a practical and handy feature. You can buy AA batteries almost anywhere, which means there is no excuse to be without power in the field.
Tracking Accuracy
As amateur deep-sky astrophotographers will tell you, tracking accuracy becomes extremely important when shooting through a long lens or telescope. I tested the Star Adventurer Pro with an equivalent focal length of 400mm (Crop Sensor DSLR + 250mm telescope), and the Star Adventurer held up exceptionally well.
Here is a single 1.5-minute exposure @ ISO 3200 using my Canon DSLR and RedCat 51 refractor on the Orion Nebula. I’d say those stars look pretty round, wouldn’t you?
This means that anyone shooting with focal lengths of 400mm or less can expect similar results when the mount is accurately polar aligned and balanced. These results are very impressive for a portable star tracker.
What Could Be Improved
As mentioned in Peter Zelinka’s detailed review of the mount, the mode dial can be easily switched on in your camera bag by mistake. Although I always bring a spare set of AA batteries with me when traveling with the mount, it would be a shame to run the batteries dry by accidentally turning the mount on. Perhaps a way to lock the position of the dial with a simple switch could be introduced for the next design.
The polar scope illumination is accomplished by clipping in a small red LED light on the front of the polar axis. The simple device runs on a small battery and can be switched on and off. I would have preferred the light to be inside of the mount at all times because it would be very easy to misplace such a small item when traveling.
The azimuth screws on either side of the wedge base are simple and easy to adjust. However, to “lock” the azimuth position down, you’ll need to use an Allen key to tighten the bolts down all the way. In reality, you could probably get away with tightening these screws by hand.
Astrophotography Results
I have used the Star Adventurer Pro for a number of deep-sky imaging sessions from my backyard, and from a dark sky site. Many people will use this portable mount with a DSLR camera and lens, but the real test of its tracking capabilities are realized when a telescope is in use.
Here are some of the images I’ve managed to collect using the Sky-Watcher Star Adventurer Pro using a telescope with a demanding equivalent focal length of 400mm.
The Pleiades Star Cluster. Star Adventurer Pro + William Optics RedCat 51.
The Andromeda Galaxy. Star Adventurer Pro + William Optics RedCat 51.
Sky-Watcher Star Adventurer Pro vs. iOptron SkyGuider Pro
If you’ve followed this blog for some time, you’ll know that I’ve been using my beloved iOptron SkyGuider Pro for a long time, and loving every minute of it. So how does the Star Adventurer Pro compare the SkyGuider?
First off, I’ll say that I found it easy to collect impressive images using both mounts. They share many positive similarities including the handy polar alignment scope and reliable celestial tracking performance.
The differences between the two mounts lie in the hardware, fit and finish, and overall user experience in the dark.
For example, I found the latitude EQ base on the Star Adventurer Pro to be slightly better than the stock version on the iOptron. If you remember, I upgraded to the William Optics wedge base for the SkyGuider, and that evened the playing field. But you shouldn’t have to upgrade the base for reliable results.
I know that iOptron received a lot of valuable feedback about the included base, and I expect that they will improve upon the design in the future. It works fine, it’s just a bit finicky to get right. As you know, when it comes to astrophotography, your tripod and mount must be extremely secure and solid for successful results.
The iOptron SkyGuider Pro wins in the polar scope department. The Star Adventurer Pro has a beautiful little scope in it, and it works great, but you need to attach an external clip to illuminate it. Don’t get me wrong, it’s a great design and it works fine. The problem is, it would be very easy to misplace and/or lose the tiny illumination device for the polar scope. The SkyGuider Pro’s light is built inside of the mount and you’ll never forget to pack it or leave it on.
The declination bracket on the SkyGuider is notoriously unimpressive and users often upgrade this element. Again, William Optics came to the rescue and manufactured a gorgeous declination bracket design that feels like it should have been there from the start. In comparison, the smooth control knob and stable base on the Star Adventurer is my absolute favorite feature of the mount.
I love that I can slide the dovetail bar up or down on the mounting platform on the Star Adventurer. This ensures that I achieve the perfect balance when mounting a small refractor and DSLR camera on top.
Final Thoughts
I must say, I now realize why everyone was so upset that I did not mention the Sky-Watcher Star Adventurer Pro when I discussed the topic of star trackers as a whole. Not only did the Star Adventurer Pro meet my demanding expectations of a portable tracking mount, but exceeded them in terms of enjoyment of the setup process.
You may have noticed that I did not test the autoguiding performance of this mount, despite the fact that it includes a built-in autoguide port. Adding this element to the acquisition process can generate worthwhile results, but I tend to avoid this type of imaging when using a star tracker and save autoguiding for my advanced setups.
Although the Star Adventurer has some quirks like a dial that’s easy to turn on by mistake, and an “add-on” polar scope illuminator, I think it’s an exceptional value and a great product.
The fine-tuning mounting assembly and secure declination bracket is the most impressive design aspect of the Star Adventurer, and anyone who’s previously used an iOptron SkyGuider Pro will know why. If you’ve already invested in a competing model like the iOptron SkyGuider Pro, I see no reason to switch to the Star Adventurer Pro Pack.
However, if you’re in the market for your first star tracker, I think you’ll be absolutely thrilled with the Sky-Watcher Star Adventurer Pro – just make sure you get the complete package (Pro Pack!)
Related Posts:
- Choosing a Telescope for Astrophotography (My Top 5 Choices)
- iOptron SkyGuider Pro Review
- Sky-Watcher EQ6-R Pro GoTo Mount Review
Helpful Resources:
- Sky-Watcher Star Adventurer Pro First Impressions (Video by Dylan O’Donnell)
- Star Adventurer User Discussion and Setup Photos (Cloudy Nights Forum)
- Sky-Watcher Star Adventurer Pro Photo Gallery (Flickr Group)