How to Choose the Best Location for Astrophotography

Astrophotography is all about capturing the beauty of the night sky, but choosing the right location is just as important as your gear.
So, how do you find the best places to shoot the stars when you don’t have the benefit of living under dark skies?
Here’s everything you need to know to choose the perfect spot for your next astrophotography adventure.
Summary
- Dark skies make all the difference—they give you better contrast, reveal faint deep-sky details, reduce light pollution artifacts like gradients and color casts, and make editing easier. Plus, shooting under a truly dark sky is just an unforgettable experience.
- Use the Light Pollution Map to scout dark sky locations—it shows levels of artificial light using color gradients tied to the Bortle scale, helping you find areas with the best skies for stargazing or astrophotography.
- Look for remote rentals, campsites, or certified Dark Sky Places after checking the light pollution map—Airbnb and VRBO often have off-grid or stargazing-friendly listings. National and provincial parks are great for camping under the stars. Certified DarkSky Parks, Reserves, and Sanctuaries offer the best skies.
- Plan around the new moon and Milky Way season for the darkest skies and the best shots—no bright moonlight to wash out faint stars, and longer, warmer nights make capturing the stunning galactic core easier (and more comfortable) from March to October.
- Take your pictures without using a filter to reveal the natural star colors and subtle broadband details of the night sky.
- Choose deep-sky objects that require dark, moonless skies to capture (such as reflection nebulae and dark nebulae), rather than bright emission nebulae that can be captured from the city using narrowband filters.

Importance of Dark Skies
Light pollution can severely impact your astrophotography by washing out faint objects in the sky, such as galaxies, nebulae, and even stars.
When it comes to capturing the night sky, dark skies make all the difference. Here’s why astrophotographers seek out the darkest places on Earth to shoot:
- Better Contrast and More Detail: In a truly dark location, the sky background is black, allowing stars, nebulae, and galaxies to pop with clarity and contrast. Faint details that would be washed out by light pollution become visible.
- Capture Fainter Deep-Sky Objects: Under a dark sky, your sensor can pick up the faint glow of distant galaxies, nebulae, and the intricate dust lanes of the Milky Way. No matter how good your gear is, these features often get lost or diminished in light-polluted skies.
- Cleaner Data, Less Post-Processing: Shooting in a dark location gives you better data right out of the camera, reducing the need for aggressive noise reduction or color correction. While light pollution filters can help, they don’t replace a clean, dark sky.
- Avoid Gradients and Color Casts: A dark sky keeps your colors accurate and your background consistent. Artificial lights add unwanted color gradients and tints, which can be tricky to remove and make your image look unnatural.
- Enjoyable Experience: Astrophotography is more than the image—it’s also about the adventure. Being under a truly dark sky is awe-inspiring. You can see the Milky Way with your naked eye, and a peaceful stillness you’ll never find in the city.
The good news is that there are tools you can use to help find some of these dark sky sites – the darker the better!

Comparison between data captured in the city vs under dark skies
Where to Plan Your Visit?
Light Pollution Map
The light pollution map is a free interactive online tool that helps you find dark skies by showing how much artificial light is in any given area.
Another
When you open the map, you’ll see a world map overlaid with colored gradients representing light pollution levels. These colors correlate with the zenith sky brightness, ranking night sky brightness from heavily light-polluted (17.5 mag/arcsec²) to relatively pristine conditions (22.0 mag/arcsec²).
This also correlates with the Bortle scale, which uses these values to assign a number from 1 (pristine dark sky) to 9 (inner city sky).
- Black/Gray = Bortle 1–2 (Excellent dark skies)
- Blue/Green = Bortle 3–4 (Good rural skies)
- Yellow/Orange = Bortle 5–6 (Suburban glow)
- Red/White = Bortle 7–9 (Urban and inner city light pollution)
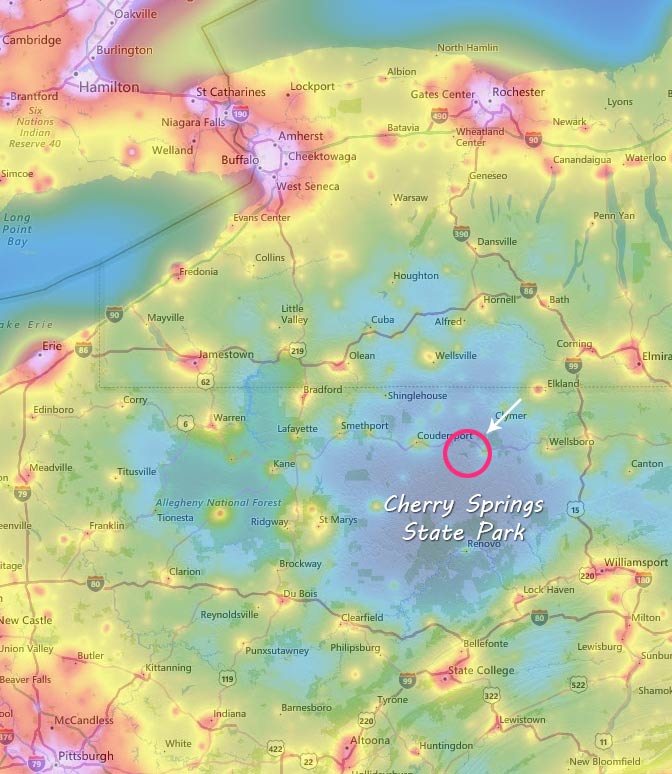
Light pollution map showing patches of darks skies in black, blue or grey.
We use this tool when planning rental stays, camping trips, or scouting out a new travel location. It uses data from NOAA/EOG VIIRS (Visible Infrared Imaging Radiometer Suite) to accurately display city light pollution.
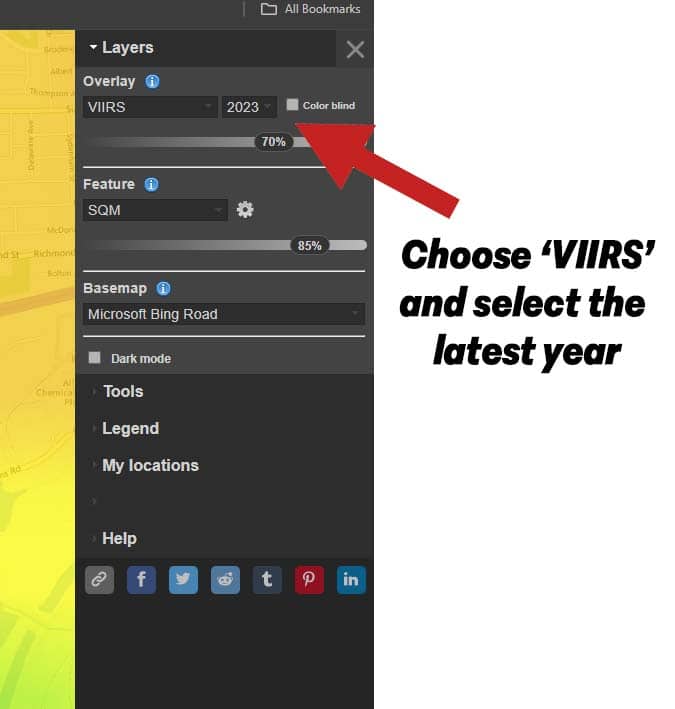
You can use the search bar to enter a location, address, or coordinates and toggle to see satellite view, landscapes, and terrain to help you decide where to stay.
The Night Map
Another fantastic light pollution tool is ‘The Nightmap‘. It is a free, community-driven project promoting the best spots for stargazing, astrophotography, and even astro-tourism.
You can use the layers control to toggle between different activities and light pollution overlays. My favorite layer to watch is the current position of the International Space Station in real time.
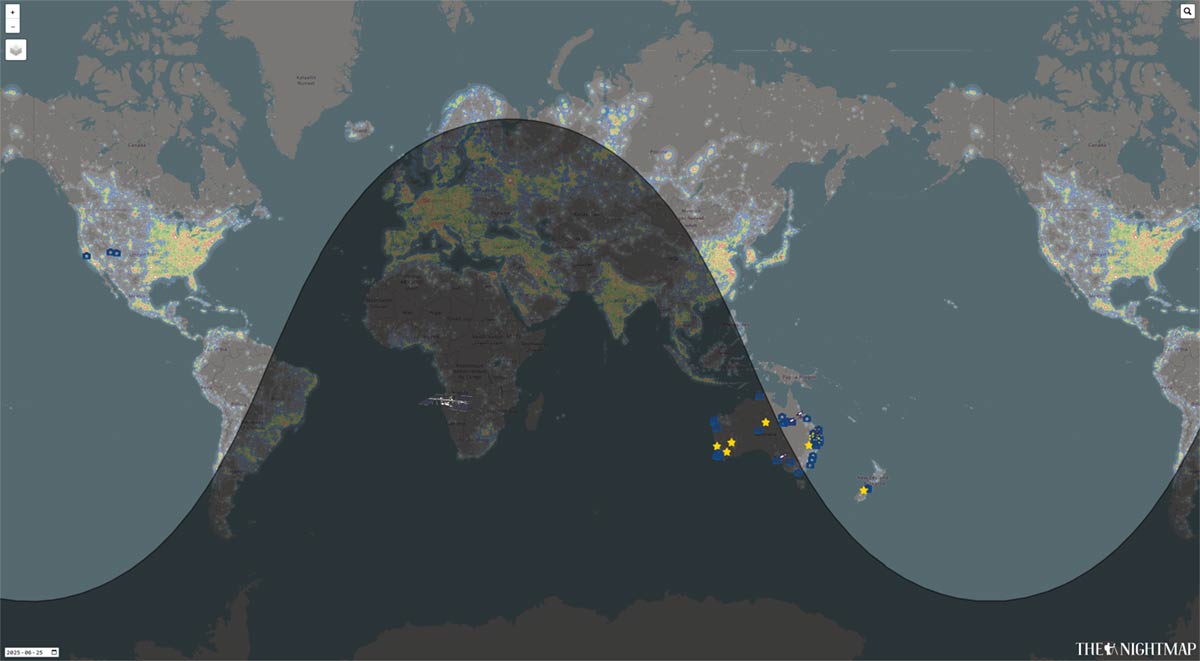
The Nightmap.
Remote Rentals & Lodges
After we have consulted the light pollution map to find dark sky locations, we look for rental properties (i.e., Airbnb/Vrbo) in that area.
With astrotourism increasing in popularity, some platforms have listings that mention or allow you to filter by: dark sky, off-grid, or stargazing.
An Airbnb we rented on a rural 85 acre property
While looking at the property listing, I will look for signs that it is a dark sky property. This could be information in the description, presence/absence of exterior lights on the house or nearby streetlights. If ever there is a question about exterior lights, we will simply message the owner to ask about it, and whether we can unplug them while there.
I will also look at what is around the approximate location of the property and determine which direction the outdoor space is facing.
Dark Sky-Friendly Campsites
You can also use a light pollution map to find great dark-sky spots for camping—whether that’s in National Parks, Provincial Parks, private campgrounds, or more remote off-grid sites.
In addition to parks, platforms like Hipcamp and Campspot can be great resources for finding unique stays that might be more light-conscious or even astronomy-friendly.
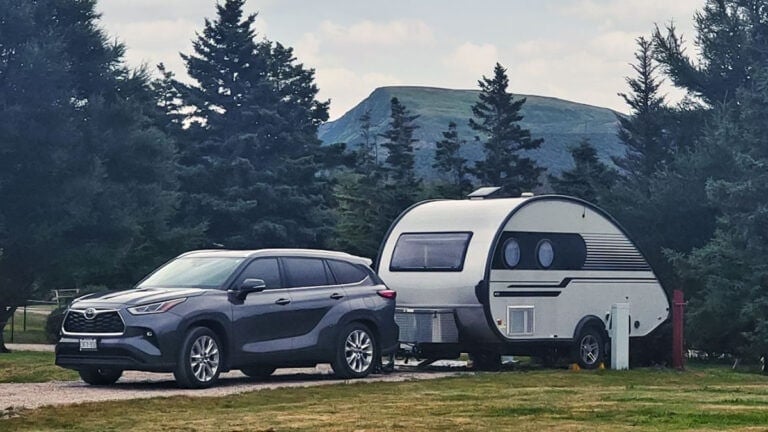
Personally, we tend to camp in Provincial Parks rather than off-grid locations because we like having access to electricity for our 18-foot trailer, along with other amenities like water hookups and dump stations. That said, we always choose parks that are farther from major cities to improve our odds of dark skies.
Of course, there’s a bit of a trade-off. Even in darker areas, you might still run into localized light pollution from other campers or campground infrastructure. It can be frustrating when someone’s porch light or floodlight ruins the vibe, and some people believe that if you’re serious about dark skies, you should be boondocking off-grid. Personally, I don’t subscribe to that idea—camping should be about reconnecting with nature, wherever you are.

Localized light pollution from a Provincial Park bathroom facility.
When we do encounter light issues, we try to approach our neighbours with kindness and explain why we’re there. Most people are understanding, but others might not get it—but there is a level of lighting etiquette expected in camping environments.
A perk of staying overnight is the ability to find a better spot or horizon away from light pollution, or hang out with your gear by the campfire. I don’t recommend leaving your equipment unattended—theft can happen, depending on the location. Always trust your instincts and secure your gear when you’re not using it.
Certified DarkSky Places
DarkSky International recognizes and designates places around the world that are committed to preserving natural darkness and reducing light pollution.
There are a few different types of dark sky designations, each with its own unique focus:
-
Dark Sky Parks: Protected public lands (often national or state/provincial parks) with exceptional starry skies and actively engage in public education and outreach
-
Dark Sky Communities – Towns, cities, or municipalities that adopt responsible lighting policies and promote night sky awareness
-
Dark Sky Reserves: Large, protected core zones surrounded by supportive buffer communities. These are often the most pristine dark sky environments
-
Dark Sky Sanctuaries: Ultra-remote and often hard-to-access areas with minimal to no nearby development. Some of the darkest places on Earth.
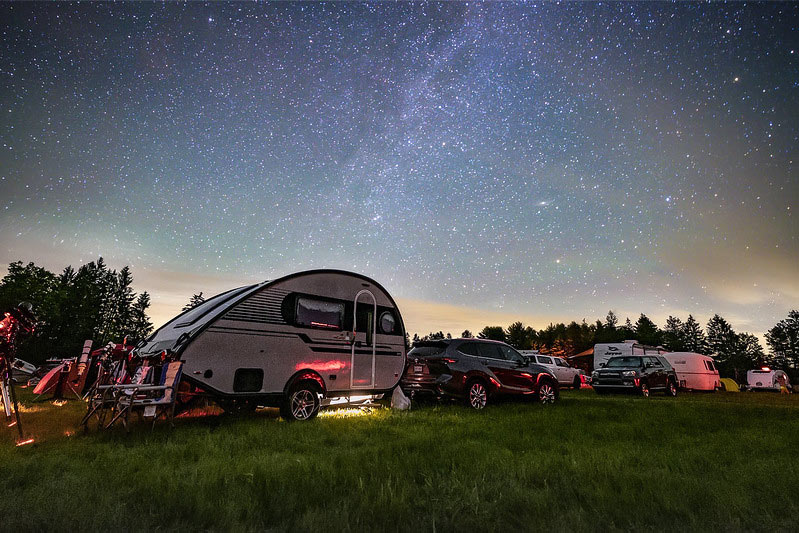
Camping at Cherry Springs State Park – an International DarkSky Park
Though these locations will offer some of the best stargazing and astrophotography conditions by actively reducing light pollution, visiting these sites may involve more experience, planning, and/or an extended trip.
You can explore designated sites near you (or dream about future travel), using DarkSky International’s interactive map tool on their website.
When to Plan Your Visit?
Plan During New Moon
If you’re putting in the effort to travel for dark skies and capture the night sky at its best, timing your visit around new moon is key.
The Moon is incredibly bright – bright enough to wash out faint stars, galaxies, and nebulae. Under a full moon, the night sky can appear almost as bright as twilight in your photos. but during new moon, there’s no moonlight to compete with your subject, giving you the darkest possible skies.
This timing is especially ideal if you’re aiming to photograph the Milky Way, since you’ll be able to pull out more contrast and detail. That said, if you’re planning to shoot landscapes, star trails, or want to include the Moon in your shots, having some moonlight in the sky can actually help illuminate your scene beautifully.
To plan your sessions, you can use astronomy apps, like PhotoPills or Clear Outside, or a moon phase calendar to track moon phases and line up your trips with the darkiest nights of the month.
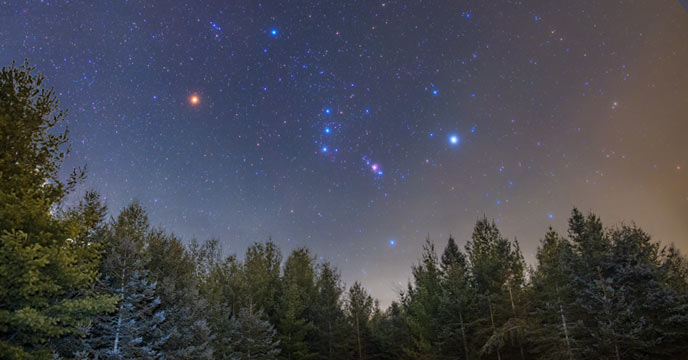
Milky Way Season
Milky Way season is the sweet spot for astrophotographers because it’s when the brightest, most photogenic part of our galaxy—the galactic core—is visible in the night sky.
This core has star clusters, glowing nebulae, and intricate dust lanes that make for stunning wide-field images. It’s only above the horizon during certain months (roughly March to October in the Northern Hemisphere), so you have a limited window to capture it.

Texas Star Party under Bortle 2 skies
This season is even better because it lines up with longer, warmer nights, which means more comfortable shooting conditions and more time to photograph under dark skies.
Combining this with a new moon and a dark location gives you the perfect recipe for some of the most jaw-dropping night sky photos you can take all year.
Astrophotography Tips & Approach
Shoot Unfiltered
To take full advantage of dark skies, don’t use any filters with your camera. While light pollution filters are very handy in the city, they reduce the amount of natural starlight your camera collects.
This is especially important if you capture faint, broadband objects like dark nebulae and reflection nebulae. These objects are very difficult to capture from a bright city sky, so use your dark sky excursions to go after these ones.
Capturing the Witch Head Nebula (a reflection nebula) from a Bortle Scale class 3 location.
Gear Choices
The best choice is a straightforward setup when you’re off the beaten path. You need to think about powering your gear and lugging it to your secluded spot.
A DSLR camera in situations like this is great, paired with a remote shutter release cable to operate the session. It’s a lot less automated, but it feels like just the right amount of involvement for these trips.
A camera lens is a great choice when visiting these spots, and you can take some amazing starry sky images that just aren’t obtainable from the city. It can help to have a wide-field Milky Way setup to shoot alongside your full-blown deep-sky telescope rig.

A camera lens or wide-field refractor telescope is a great choice when shooting under a dark sky.
Important Tip: You’ll want to make sure you are fully set up and polar-aligned before it gets completely dark outside. From a truly dark sky site, it can be hard to pick out Polaris in a sea of stars, so the hour between dusk and astronomical darkness is important.
As for telescopes, your time is best spent shooting with a mid-range focal length telescope. Go for a wider field of view in the 250-500 range, rather than capturing something with a long focal length (2000mm or more).
This will showcase a more diverse field of stars and uncover interesting areas of dark dust, nebulosity, and clusters of stars. There are more options at this focal length for pairings, and interesting framing of regions of sky.
Travel Tips
Be Prepared
When travelling for astrophotography, it’s essential that you remember each piece of gear. It would really ruin your trip if you forgot to bring a certain cable and only realized it after you were miles from civilization.
It can be helpful to dismantle your setup after a night of imaging to pack it away for your trip. This ensures that all the pieces of your setup are there and that you don’t forget anything. Another option is to create a checklist (I am the checklist queen) to ensure that you have everything needed and then some.
Be sure to also pack the appropriate clothing to be outside all night. Though it may have been sunny and warm during the day, temperatures drop at night, so make sure you have jackets, sweaters, and shoes/boots.
You’ll also want to bring a chair or something to sit on and your red light to see where you are going and maintain your night vision.
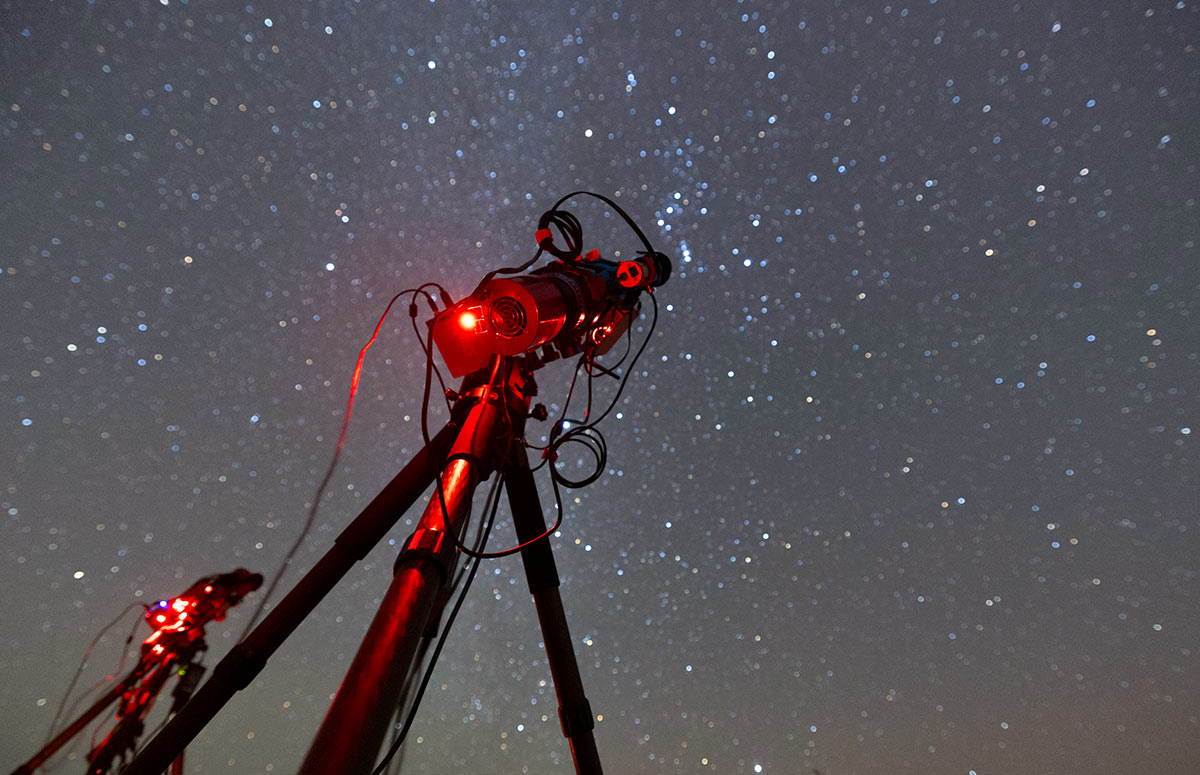
The Bortle 1 skies of the Texas Star Party (2023).
Consider Accessibility and Safety
While you may be eager to get to remote dark sky locations, safety and accessibility should always be your top priorities.
Avoid areas that are difficult to reach or unsafe after dark. You (and your gear) are valuable, and you’ll want to be in a place where you can easily set up and shoot without worrying about your safety.
You may want to consider locations that are close to roads or popular campsites, but still far enough from city lights to minimize light pollution.
Many state parks and nature reserves offer secluded spots that are easy to access and safe.
Respect Local Communities and Conservation Efforts
When choosing a location, always respect the local community and the environment.
Many dark sky areas are protected by conservation laws, and it’s important to follow any guidelines to preserve the beauty of the night sky.
Tip: Consider reaching out to local astronomy clubs or organizations to get advice on lesser-known dark sky spots. They may offer recommendations on how to enjoy the skies responsibly while minimizing your impact.

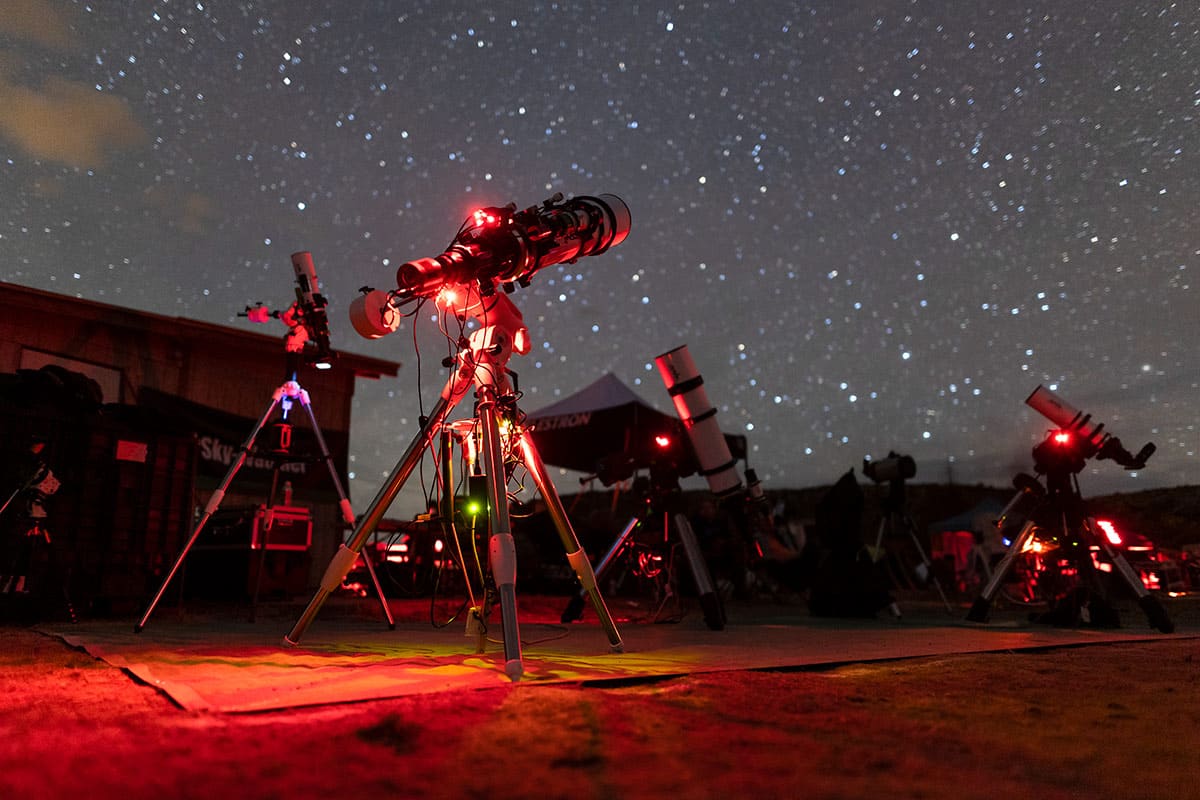
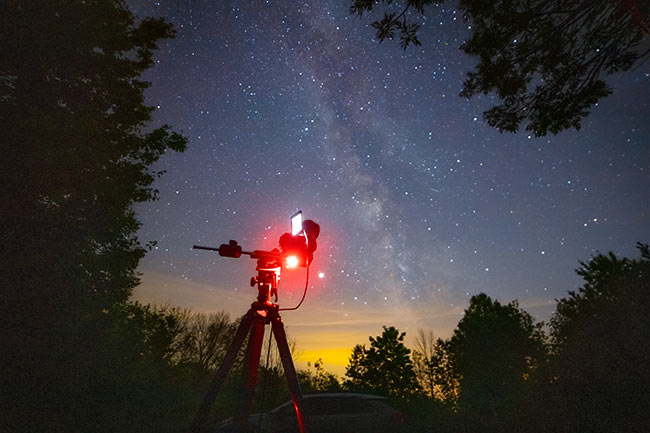
Setting up for a night of astrophotography under the Bortle 3 skies of the Winter Star Party (2024).
Final Thoughts
Experiencing a dark sky is truly magical, and though it takes extra effort to plan these trips, the reward is always worth it.
I cherish the memories I have from camping under dark skies, staying at remote Airbnbs, or attending star parties in Bortle 1 areas.
As astrophotographers, we know these pristine skies are becoming rare. This makes every moment spent under the Milky Way even more special.
I hope this guide helps you get out under a dark sky, offering both a refreshing escape and a chance to connect with the cosmos.
Clear skies.

Ashley is an environmental educator, communication professional, and astrophotographer. She has extensive experience writing for diverse audiences to increase public awareness and engagement. Ashley is an active Advocate and Delegate with DarkSky International, helping to protect the nighttime environment from the harmful effects of light pollution through advocacy and outreach.


Hi Ashley, check out our night map, started by the Tired photographers club. Totally self updatable for the user. shows spots for astro. Any one can add locations and anyone can access it. Clear skies.
https://thenightmap.com/?map=natgeo&layers=tourism&fbclid=IwY2xjawJ45T5leHRuA2FlbQIxMQABHgbAYdJoJtukAJ2hDW5tfioG6U92xu1tB4H-dzD6ougkSkos1qBcRntR3xbl_aem_qs373BSaeOp5VeDoR7pyyQ#zoom=11&lat=-26.187513&lon=152.671051
I think this is the best light pollution map ever.