What Should Your Images Look Like?
You’ve taken your first 5-minute long exposure with your new astrophotography camera. You open it in Photoshop to see what you captured and you see a black image with a few dots. Does this sound familiar?
This article is for the beginners out there, who are severely underwhelmed when that first sub-exposure of a galaxy comes through.
The process of capturing a random patch of the seemingly black sky, and revealing an intense nebula from within, is an involved one.
Sure, the brightest galaxies and nebulae show up right away – but for others, you wouldn’t even know if you’ve captured anything or not.
In this article, I am going to show you what your pictures should look like after you take them, so you can confidently progress further into this hobby.
Linear vs. Non-Linear
The first thing I want to explain is the idea of stretching an image. There are many ways to pull your image data out of the shadows, from a simple curves stretch in Adobe Photoshop, to Siril’s advanced Generalized Hyperbolic Stretch Transformation.
A single image exposure (or stack of image frames) that is straight out of the camera without any processing is known as a linear image. It will look much darker than a ‘finished’ astrophoto, and it’s completely normal.
The histogram probably looks something like the image below, which just means that all of that essential data we want to reveal is crammed into this little wedge of information.
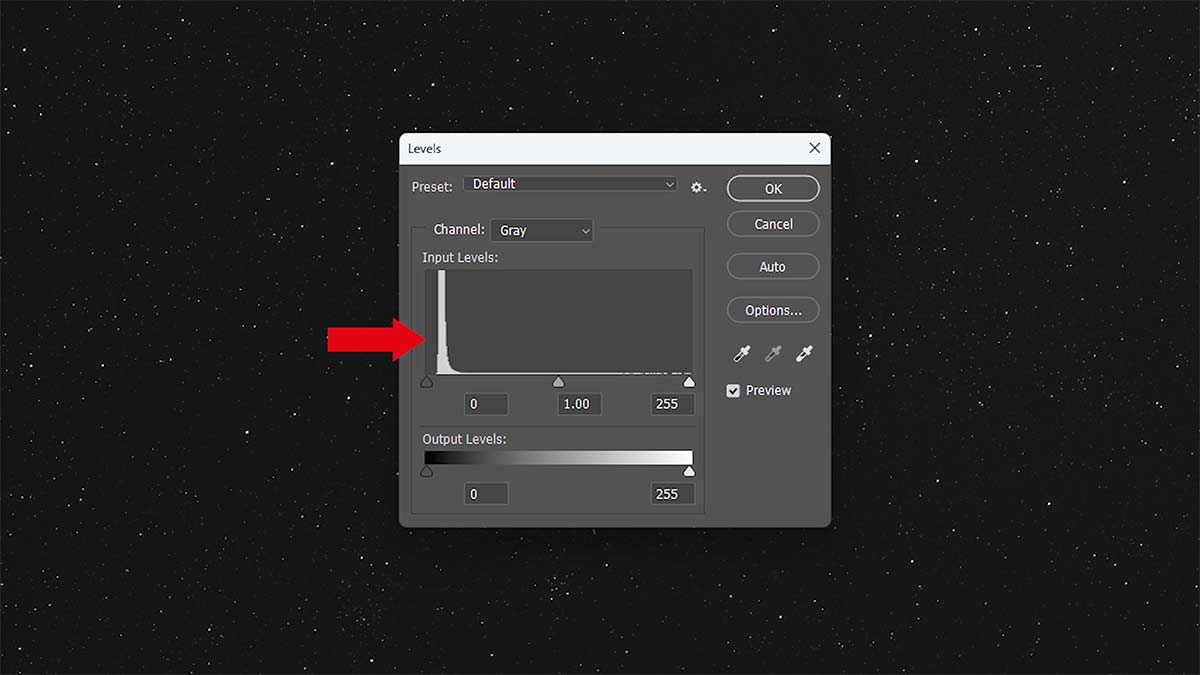
Because the image is so dark, all of the core image information lies in the ‘shadows’ region of the histogram on the left-hand side. There are three main parts of the histogram: shadows, mid tones, and highlights.
A non-linear image is one that has had a “stretch” applied to it, or for the photoshop users out there- curves. Even a slight curve will brighten the image up significantly, and you may realize there is more information in that image than you thought.
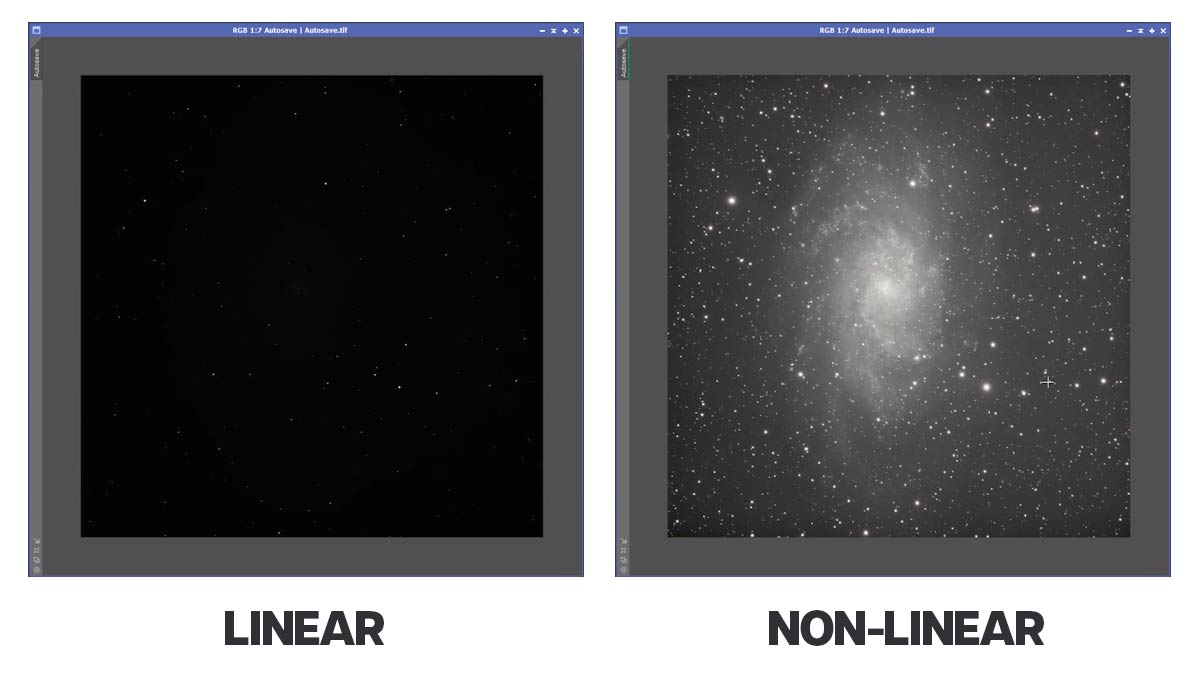
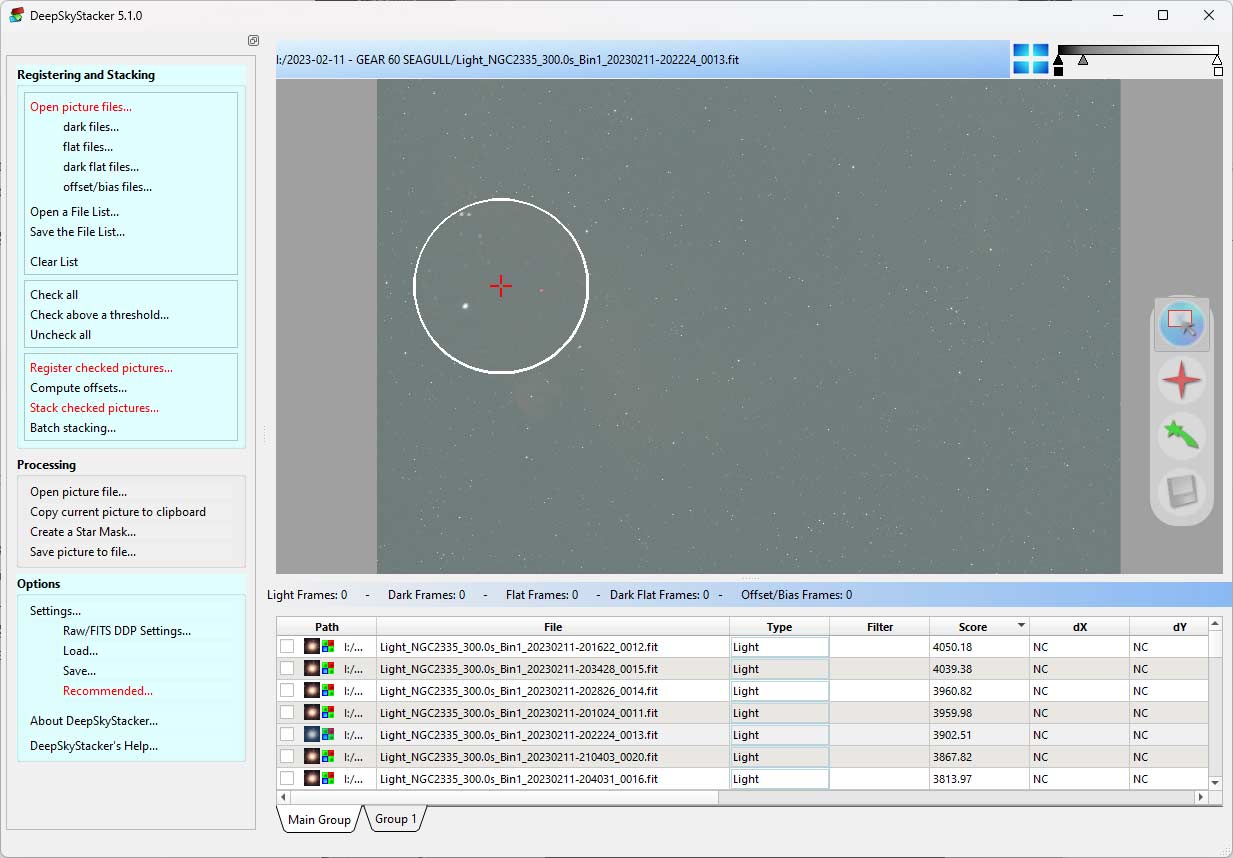
A “black” image, like the one shown below, is completely normal. All my images captured on a dedicated astronomy camera look this way.
An image captured with a DSLR/Mirrorless camera is a little brighter in its raw state, but they are often still quite dark. The example below shows a wide-field image captured with my Canon EOS Ra, before and after applying an auto-stretch.
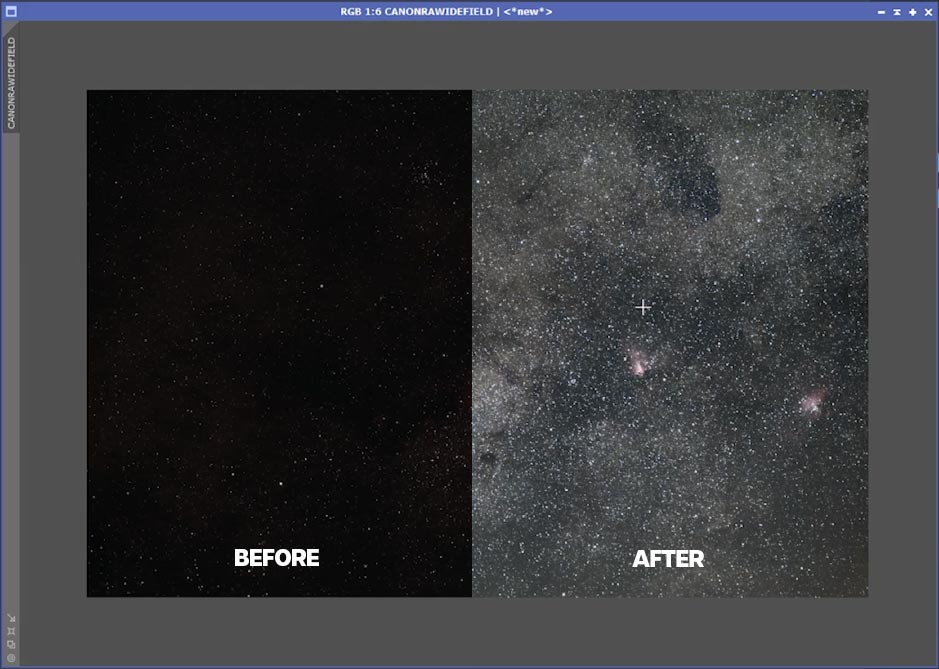
Before/after image taken with a DSLR/Mirrorless camera.
The point is, a single image frame is just a starting point for a much longer project. The final images I share in my videos include hours of exposure time and have gone through many hours of processing as well.
Let’s talk about what you can expect your images to look like taken through specific cameras and filters because they’re all different.
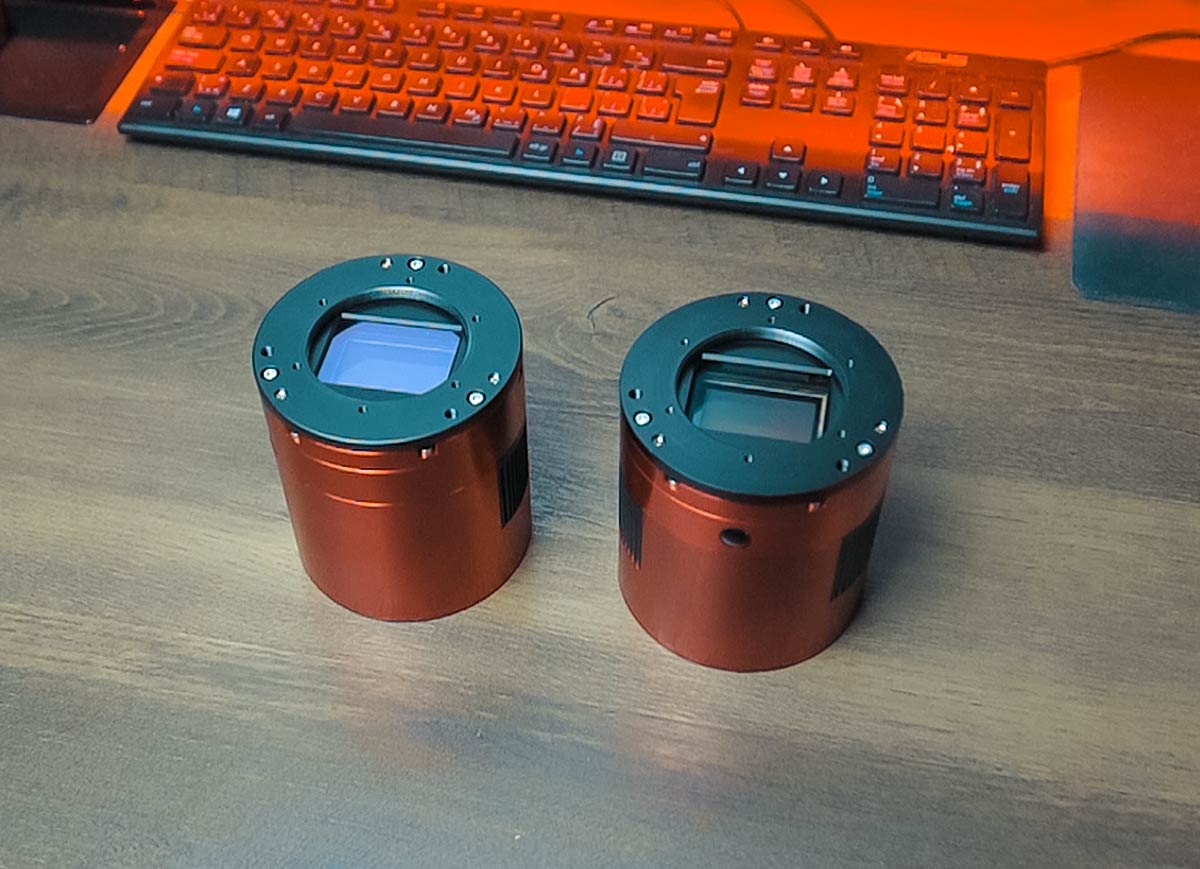
DSLR vs. Dedicated Astronomy Camera
There’s a pretty drastic difference in the way a single picture taken through a DSLR or mirrorless camera looks versus a dedicated astronomy camera.
The DSLR outputs a raw image format that can be adjusted in Lightroom or Photoshop. While the astronomy camera gives you .FIT file formats that will not open in regular photo editing software.
To see what you’ve captured with one of these cameras, you need to use astrophotography-specific software meant for handling these files. I use DeepSkyStacker but there are many great, free tools for opening and debayering astronomy image files.
These images usually look almost completely black in their linear state – depending on which filters you’re using.
Related Post: Recommended Image Stacking Software
RAW vs. FIT File Format
DSLR and mirrorless cameras like my Canon EOS Ra produce a brighter image, in a raw format like CR3 that you can open in a photo editing software. Although it seems like a much better starting point, more often than not, a single image exposure captured with a cooled astronomy camera will have cleaner, more detailed data.
However, just like a FIT file, you can stack these raw images frames together to produce an image with a much stronger signal-to-noise ratio. The single frame might not look overly noisy now, but after 3 curve stretches, the deep, dark, unexplored areas of the frame will be exposed.
Astrophotography image pre-processing is all about creating that perfect master file that you can comfortably play with without having to hide anything.
Types of Astrophotography
Certain types of astrophotography need less stretching than others. For example, a wide-angle nightscape image taken with an F/2.8 lens may look very bright in its linear state.
When capturing a wide-angle photo of the night sky using a camera lens with a low f-stop, you may even choose to bring the light levels down, rather than up. This is because it is a much brighter subject than a dim galaxy surrounded by the blackness of space.
The amount of light pollution present in the sky will dramatically change the brightness level of the sky. The current moon phase can also change the overall brightness of the scene, with a full moon being the absolute brightest.
In the image below, you’ll notice that only a slight curves stretch was needed to reveal more constellations and stars in the night sky. This photo was captured during the new moon phase, from a dark sky site (Bortle 2).

A single exposure captured under dark skies. Black Forest Star Party 2019.
Examining Images in Stages
Let’s take a look at an example image in all three stages – the single exposure, stacked master (with an auto stretch), and the final processed version.
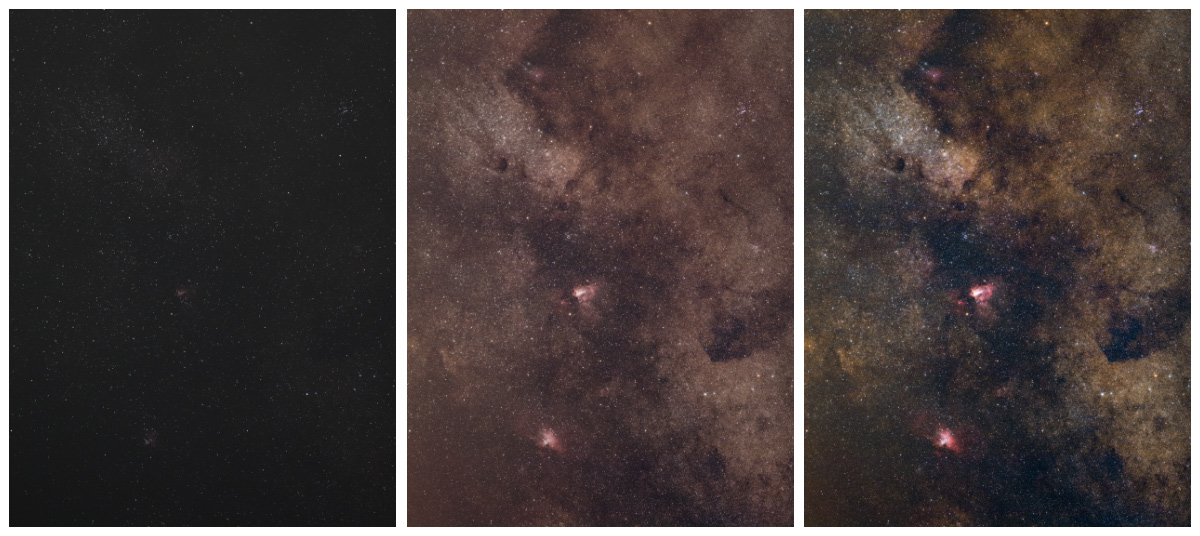
A single exposure, stacked and calibrated master file, and processed final.
The single exposure is boring, dull, and dim. This is completely normal. The linear master file (of several stacked single exposures) isn’t much more interesting, but an auto stretch reveals much more information.
To perform this initial stretch, you can do so manually in Adobe Photoshop, or use an astrophotography software such as Siril or PixInisght. PixInsight has a great auto stretch tool to do this in an instant, and its a great way to see the difference between a linear and non-linear image in an instant.
Calibration and Stacking
To get the best possible master file, there are a few extra things you need to do. Calibration frames are not the most fun thing to capture, but they make a huge difference.
I have covered calibration frames on this website many times before, but the bottom line is dark and bias frames help to reduce noise, and flat frames remove dust spots and vignetting.

Related Post: How to Take Flat Frames
Many amateur astrophotographers prefer to build a library of calibration frames, mainly bias frames and dark frames for future use. I often shoot new dark and bias frames at the end of my imaging session, as I can go to sleep while they are being produced.
Flat frames are a little more labor-intensive, and you need to capture them more often. New flat frames should be applied if you have changed imaging configurations to properly calibrate your master file.
Do yourself a favor and capture these helpful files. Processing your stacked master image will be a lot more enjoyable.
Conclusion
I hope this article has given you a better understanding of what your images should look like after you take them, and more importantly, put your mind at ease when you see those black with white dot pictures on your screen.
You didn’t waste an entire night, your camera is not broken, and the process of astrophotography just requires that you pull every ounce of information out of your image data.
There is a mountain of information hiding in that histogram and it just needs a little finessing.
If you want to learn more about image processing, be sure to check out the following resources:
- Your Astrophoto Skills: Free Image Data to Practice On
- Deep-Sky Image Processing in Adobe Photoshop
- My Premium Astrophotography Image Processing Guide
