ASIAIR Sky Atlas: The Ultimate Guide
If you use a ZWO ASIAIR for imaging, the ASIAIR Sky Atlas feature quickly becomes one of the most powerful tools in your entire workflow. It is more than just a digital star map. It is a precision-targeting system, a framing assistant, a comet tracker, and a project-continuity tool built directly into the ASIAIR ecosystem.
For backyard astrophotographers, the ASIAIR Sky Atlas transforms what used to be a slow, trial-and-error process into a fast, accurate, and repeatable one. In this guide, I’ll explain exactly what the ASIAIR Sky Atlas is, how it works, and why it is so useful when imaging deep-sky objects from home.
What Is the ASIAIR Sky Atlas?
The ASIAIR Sky Atlas is an interactive planetarium and target selection interface built into the ASIAIR app. It allows you to browse the night sky, search for deep-sky objects, preview framing, and command your mount to slew directly to a selected target.
Unlike a traditional star atlas or planetarium app (such as Stallarium), the ASIAIR Sky Atlas is directly connected to your imaging system. When you tap on a galaxy, nebula, or star cluster, the ASIAIR:
- Slews the mount to the target
- Takes an image
- Plate solves it
- Precisely centers the object in your frame
This integration between visualization and real-world positioning is what makes the ASIAIR Sky Atlas so powerful. Gone are the days of three-star alignments, using the hand controller!
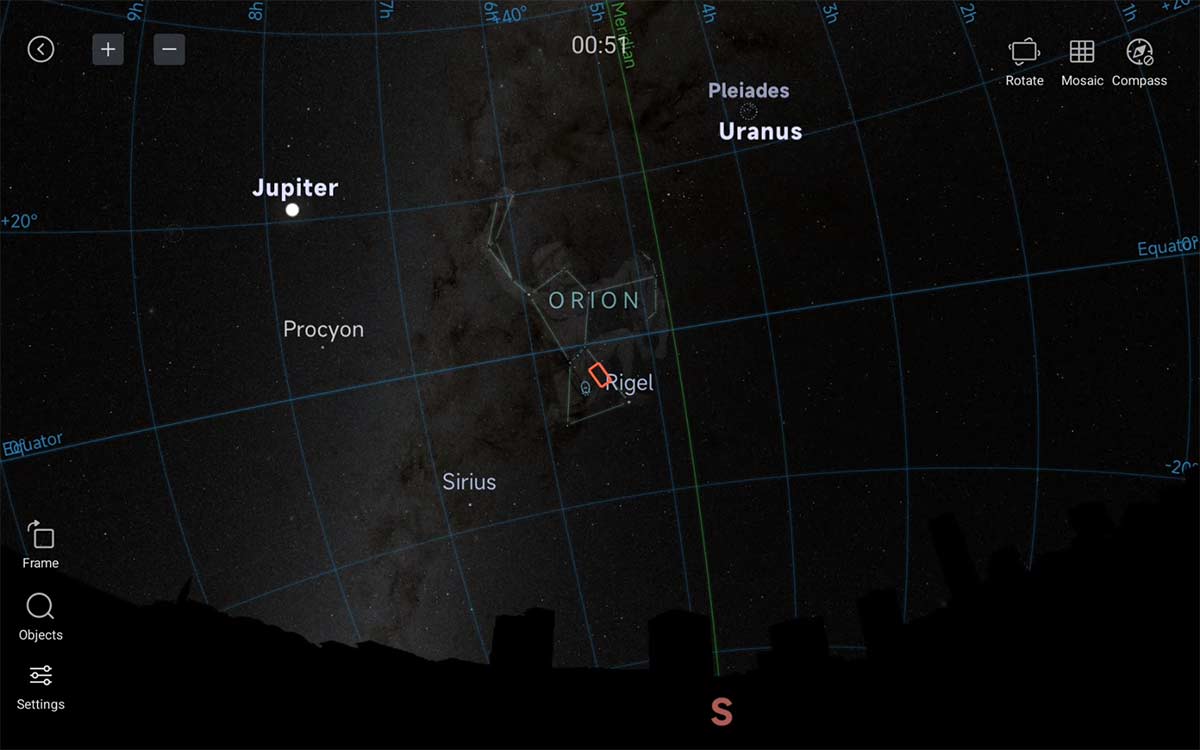
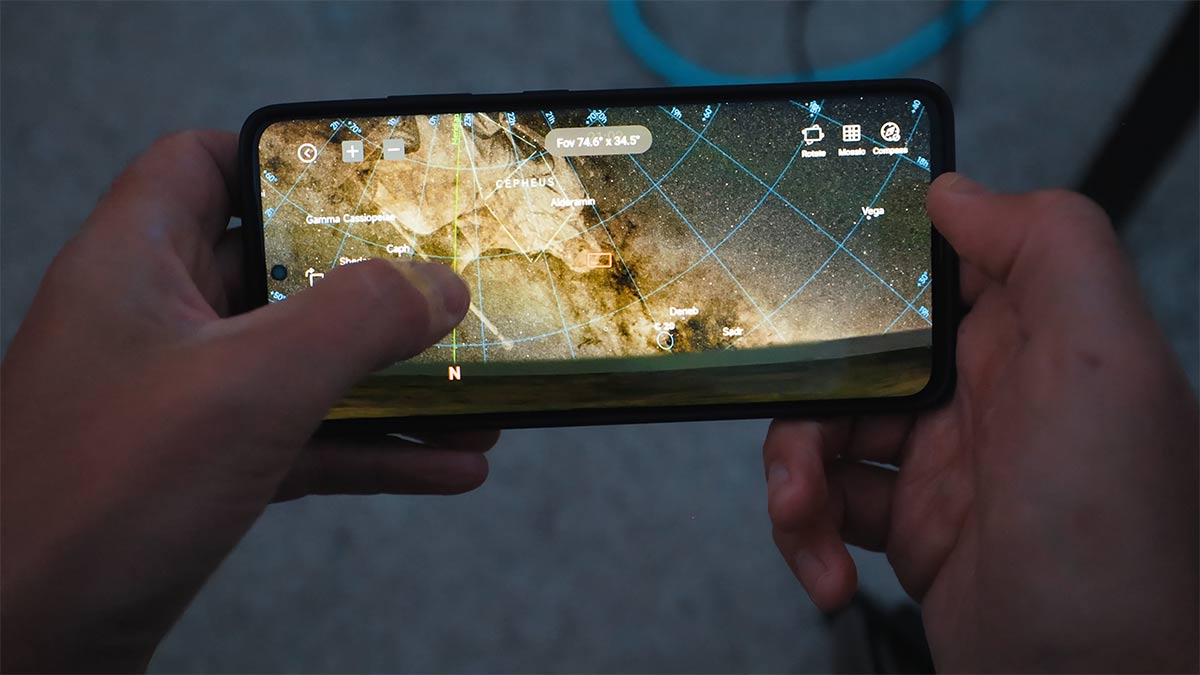
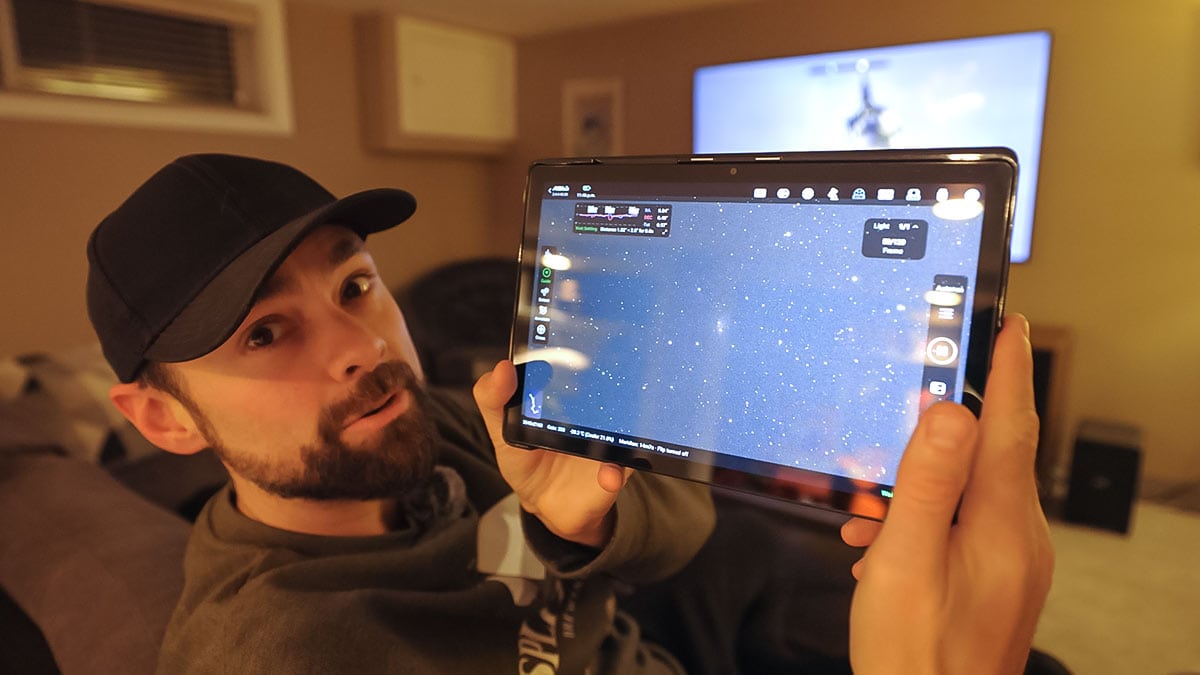
The Sky Atlas mode on the ASIAIR shows the current night sky from your location.
How the ASIAIR Sky Atlas Works
At its core, the ASIAIR Sky Atlas uses plate solving to identify star patterns and determine your exact position in the sky.
Here’s what happens behind the scenes:
- You select a target in the Sky Atlas.
- The mount slews to the approximate coordinates.
- The ASIAIR takes a short exposure.
- It analyzes the star field and matches the pattern against a database.
- It calculates the exact pointing error.
- It corrects the mount position automatically.
Plate solving is the key technology here. By identifying the unique arrangement of stars in your image, the ASIAIR knows exactly where your telescope is pointing, down to arcminute precision. That’s why the ASIAIR Sky Atlas can center objects reliably, even if your initial alignment is slightly off.
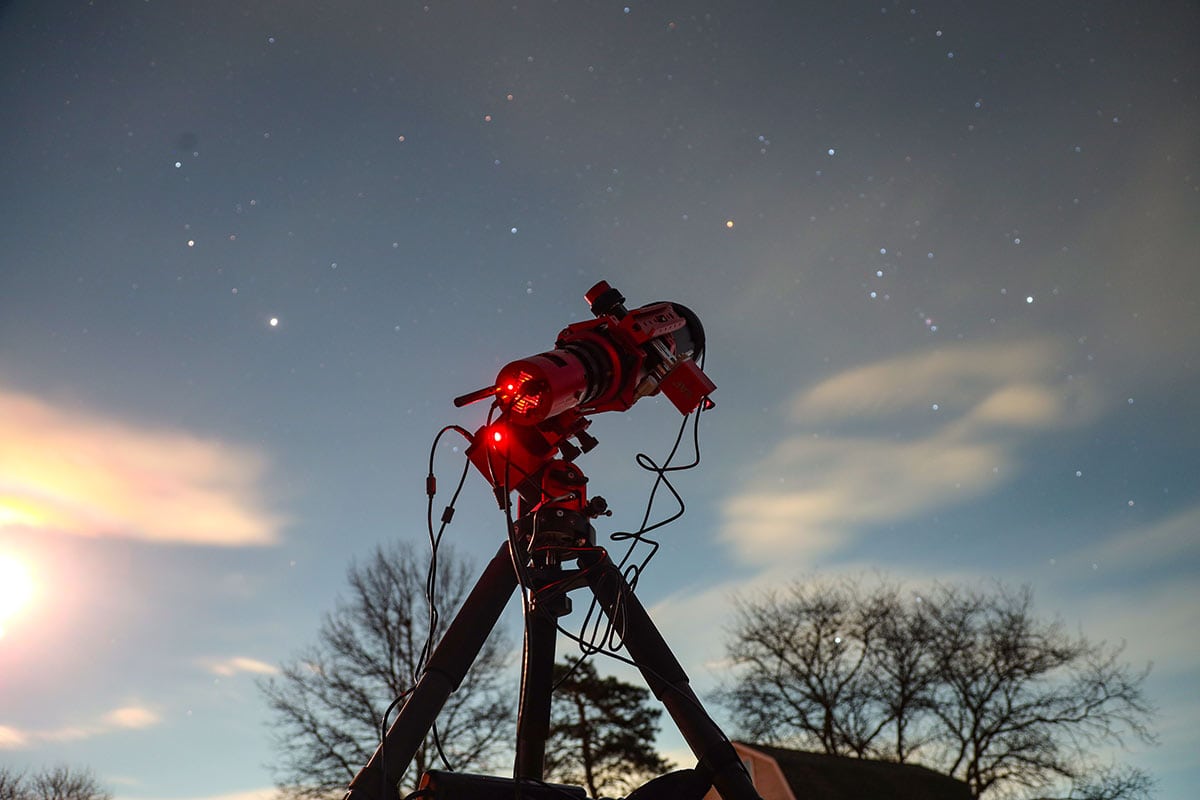
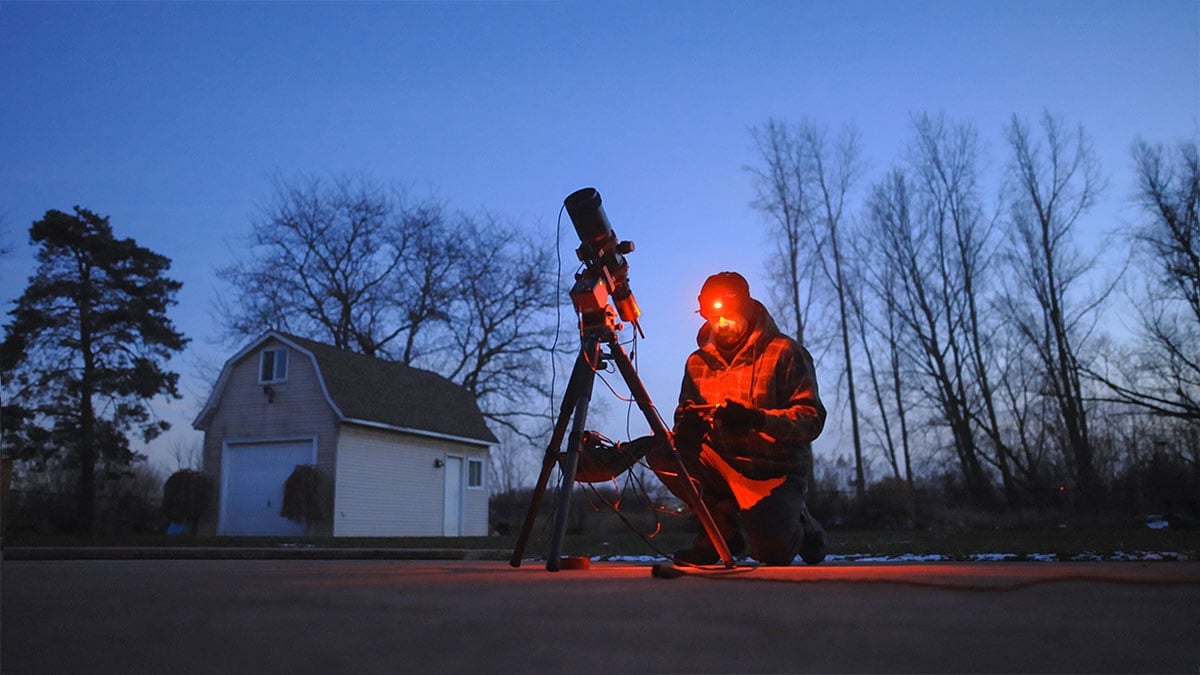
The ASIAIR must be connected to your telescope mount via a USB cable.
Connecting Your Mount to the ASIAIR
To take full advantage of the ASIAIR Sky Atlas, your telescope mount must be properly connected to the ASIAIR using a USB cable. Most modern GoTo mounts can be controlled directly through a USB-to-serial or USB-B connection, allowing the ASIAIR to send precise slew and tracking commands.
Inside the ASIAIR app, you’ll need to select your specific telescope mount from the dropdown menu in the mount settings section before connecting. Once selected and connected, the Sky Atlas can communicate seamlessly with your mount for accurate GoTo and plate-solving corrections.
I’ve personally controlled several different mounts using the ASIAIR, and the setup process has been straightforward across multiple brands and models.
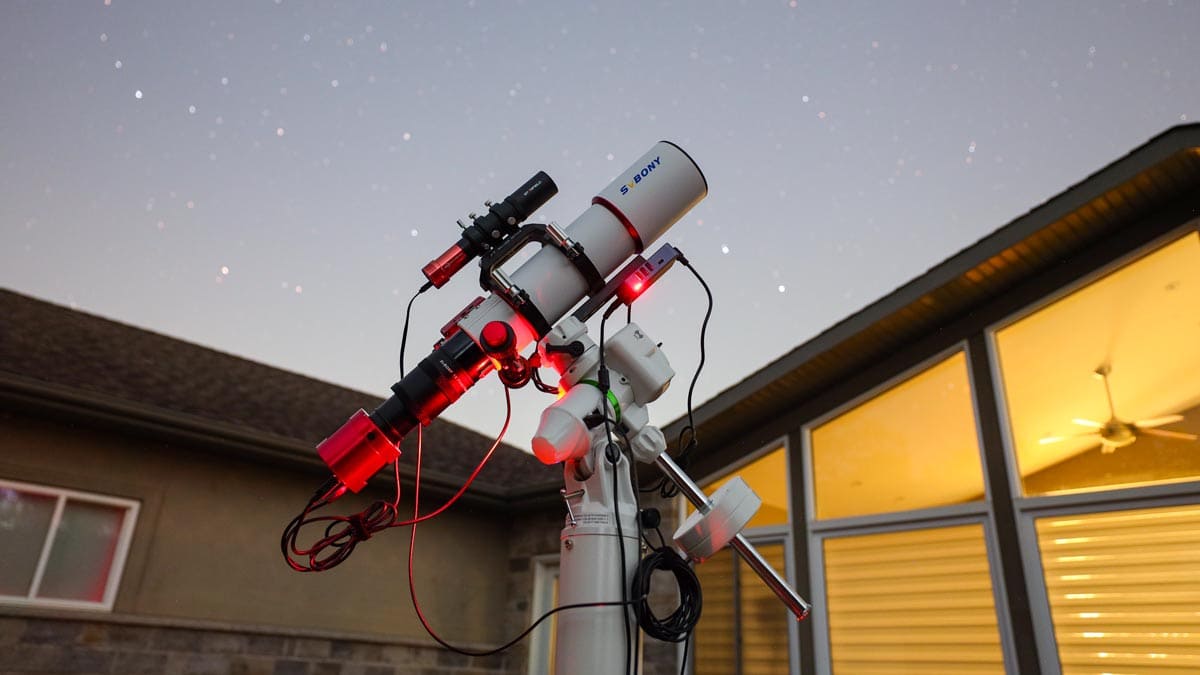
I’ve used the ASIAIR to control my imaging sessions on several different telescope mounts.
Why It’s Useful for Backyard Astrophotography
Backyard imaging often means dealing with light pollution, limited time windows, and obstructions like trees or rooftops blocking parts of the sky. With narrow, clear-sky opportunities, you don’t want to waste valuable time manually hunting for a target.
I rely on the sky atlas to quickly locate and center my deep-sky targets. Instead of star hopping or guessing at coordinates, I tap the object, let the ASIAIR slew and plate solve, and I’m ready to image within minutes.
That efficiency adds up, especially on short summer nights or during narrow weather windows.
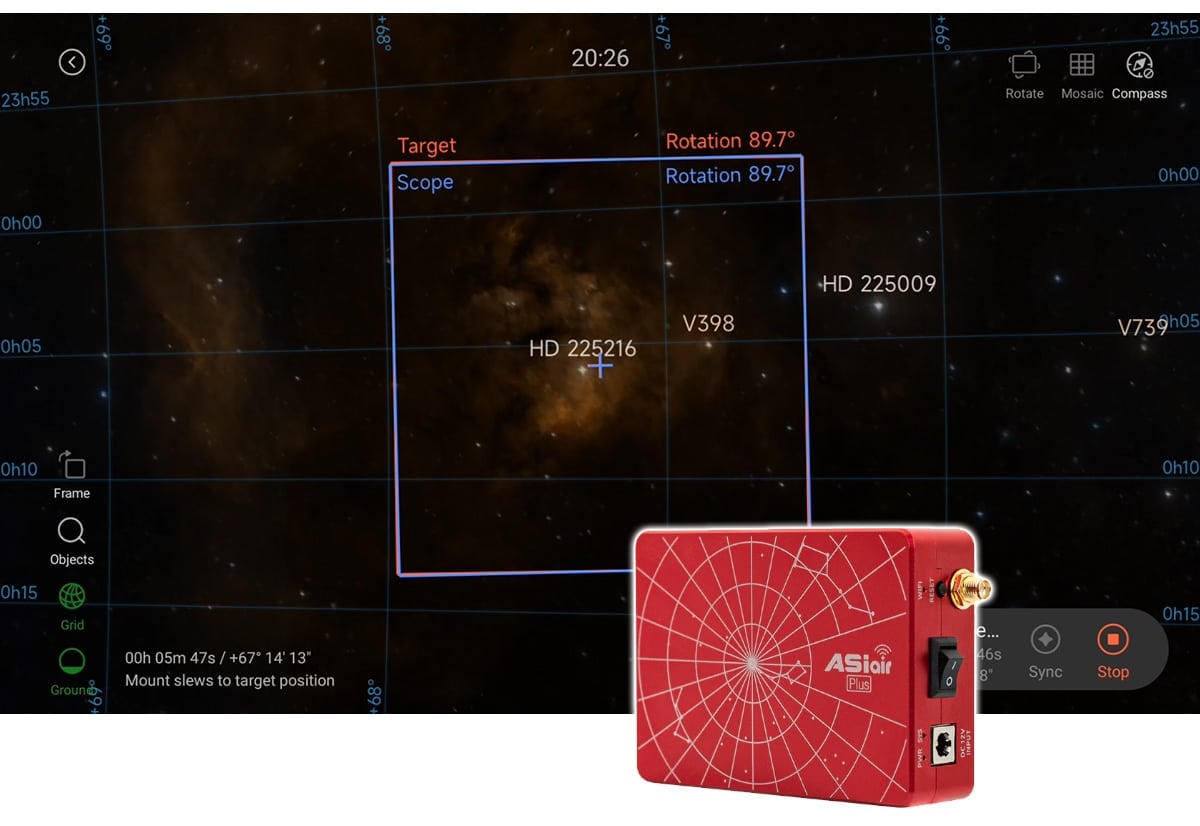
The Sky Atlas uses plate solving to locate and center your desired target.
Essential for Multiple Night Projects
One of the most powerful aspects of the ASIAIR Sky Atlas is its support for multi-night imaging projects.
Many deep-sky objects require 20+ hours of total exposure time to do justice. When you return on night two or three, matching your exact framing is critical.
Because the ASIAIR uses plate solving and precise coordinate correction, it can return your telescope to the exact same framing from a previous session. This consistency makes stacking data seamless and preserves composition.
For long-term imaging projects, the ASIAIR Sky Atlas isn’t just helpful, it’s essential.

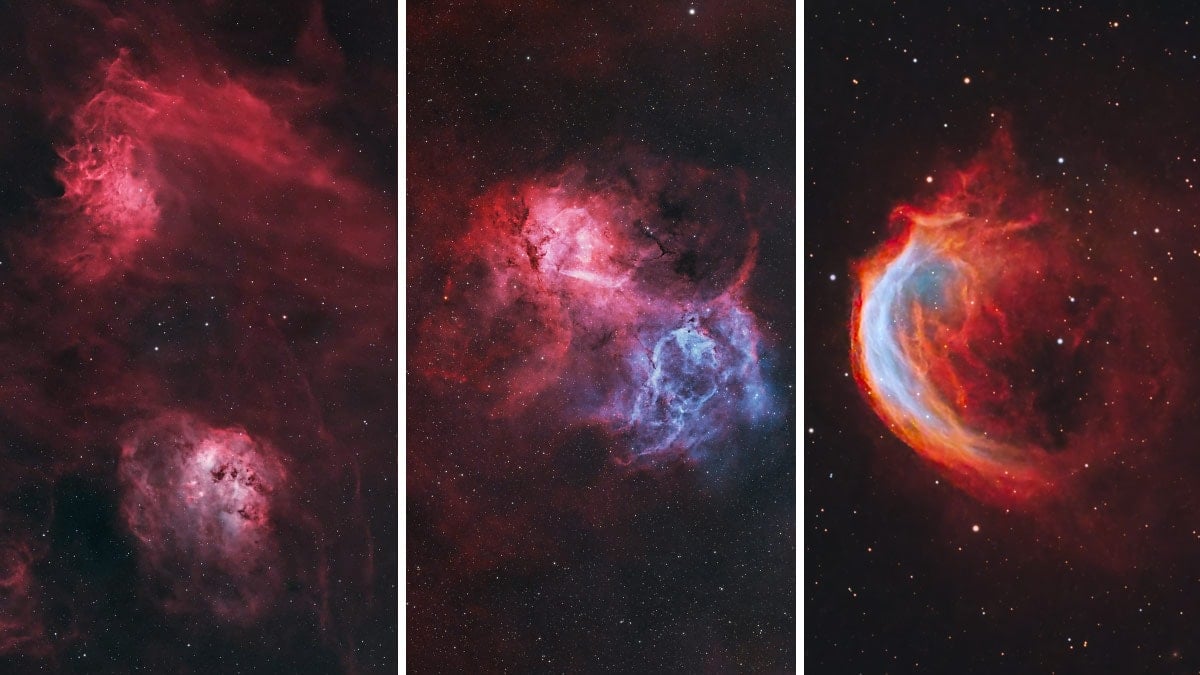
I captured the Witch Head Nebula over 3 nights using the ASIAIR to control my telescope, and match the framing from the previous night.
Accurate Framing Depends on Correct Focal Length
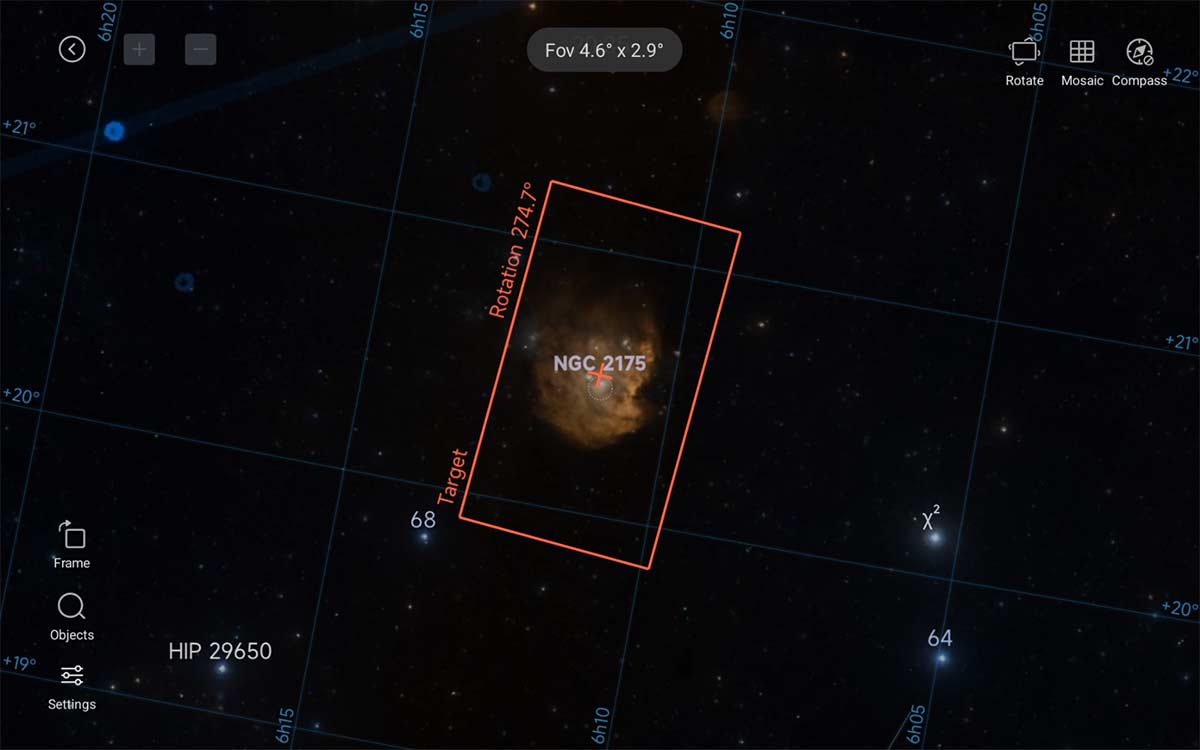
One important detail: you must ensure that the focal length of your telescope has been entered correctly in the ASIAIR settings.
The Sky Atlas framing preview is calculated using your telescope’s focal length and your camera’s sensor dimensions. Accurate entry of these values ensures the on-screen composition closely matches your actual field of view.
If the focal length is entered incorrectly, the framing preview will not match reality. This can lead to misaligned compositions or cropped objects.
Once properly configured, however, the Sky Atlas becomes a precise planning tool. What you see on screen closely reflects what will land on your sensor.
The Seestar uses Sky Atlas

The Seestar S30 Pro smart telescope uses a built-in sky atlas-style target catalog within the Seestar app to help you quickly locate objects in the night sky.
You can browse galaxies, nebulae, star clusters, and even current comets, then simply tap your selection to automatically slew and center the target using plate solving. This streamlined system makes finding objects fast and beginner-friendly.
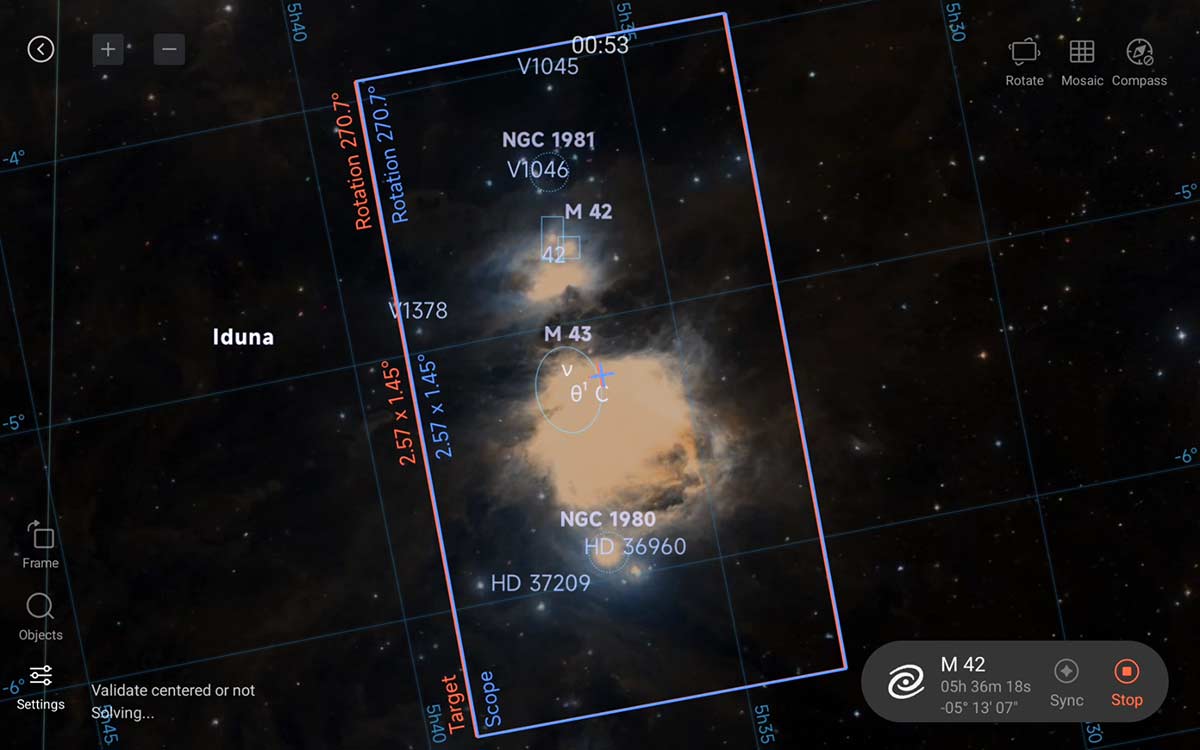
Finding the Perfect Camera Rotation
One underrated feature of the ASIAIR Sky Atlas is its help with determining camera orientation (rotation). Certain objects( especially large nebulae) look dramatically different depending on how they’re framed.
With the Sky Atlas:
- You can preview how the object fits within your field of view.
- You can rotate your camera to better align with the target’s shape.
- You can avoid awkward cropping.
Instead of guessing camera rotation and taking test shots, the Sky Atlas helps you dial in orientation before committing to a long imaging session.
For certain camera sensors (like the ZWO ASI585MC Air), framing and rotation require precision.
Creative Framing of Multiple Targets
The ASIAIR Sky Atlas is also fantastic for creative compositions. Sometimes the goal isn’t just to center a single object; it’s to capture multiple objects in the same frame.
For example:
- A nebula plus a nearby open cluster
- A galaxy pair
- A large emission region with embedded reflection nebulae
Using the atlas preview, you can shift the framing slightly to include secondary objects. This is especially powerful with wide-field setups.
Creative framing used to require external planetarium software and careful coordinate planning. Now, it’s built directly into your imaging workflow.
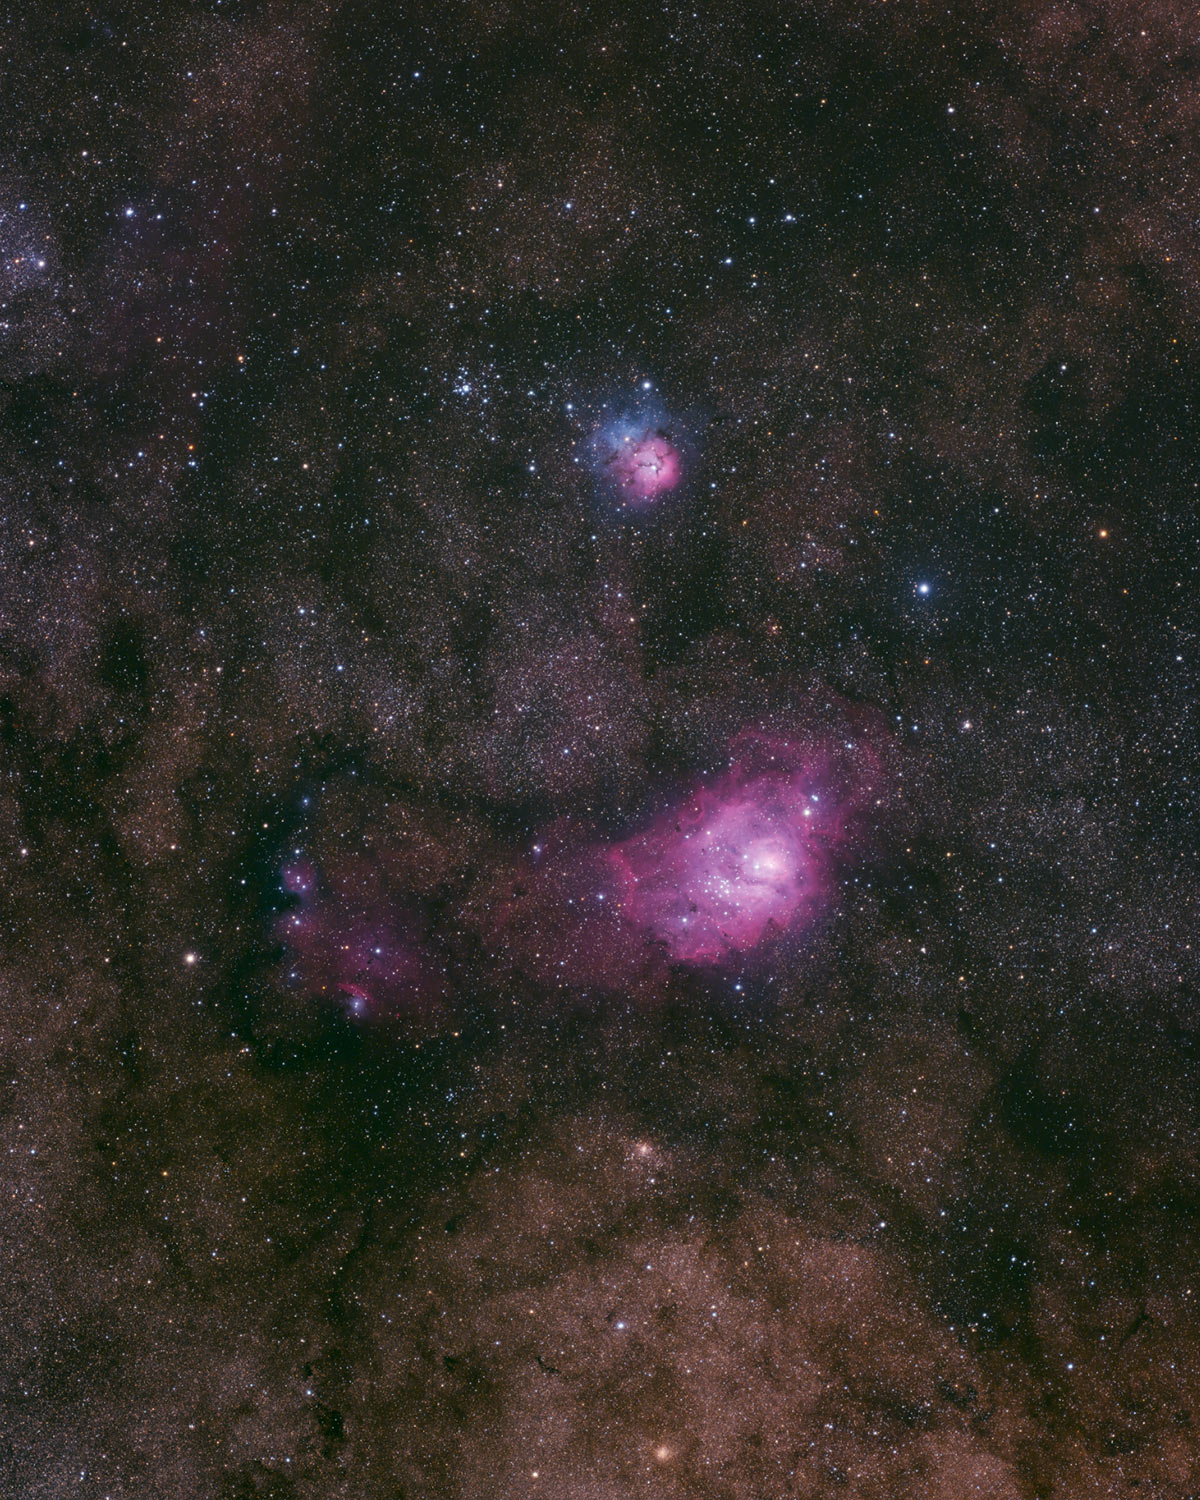
The framing of the M8 and M20 in my camera’s field of view wasn’t accidental. I used the Sky Atlas to get the exact framing and rotation I wanted.
Speed and Simplicity for Beginners
For beginners using the ASIAIR, the Sky Atlas dramatically reduces the intimidation factor of finding deep-sky objects. Without it, you would typically rely on printed star charts, manually enter coordinates, and perform alignment corrections to ensure accurate GoTo performance.
That process can feel overwhelming when you’re just starting out. With the ASIAIR Sky Atlas, however, the workflow is simplified to searching for an object, tapping on it, and letting the system automatically slew and center the target using plate solving.
This streamlined approach is a major reason the ASIAIR ecosystem is so popular among backyard astrophotographers.

I use a tablet in place of my smartphone to run the ASIAIR mobile app whenever possible.
Using the Mosaic Tool in SkyAtlas
If you’ve ever opened SkyAtlas, tapped a big target, and realized “there’s no way this fits in my field of view”, the Mosaic tool is the feature you’re looking for. It’s designed to help you frame oversized targets (or create a wider, more dramatic composition) by splitting the scene into multiple overlapping panels, then turning those panels into an Autorun Plan you can actually shoot.
In this video, Peter Zelinka shares the process of building a mosaic created with the ASIAIR in PixInsight.
When the Mosaic tool is most useful
Large targets that don’t fit your setup
This is the obvious one. Wide nebulae, large galaxies, and sprawling star fields often don’t fit when you’re using a longer focal length telescope. A simple 2-panel or 2×2 mosaic can solve that without changing your gear.
Adding context around a target
Even if the subject fits, mosaics are a great way to include the surrounding dust and structure. A little extra “breathing room” around an object can make your final image feel much more complete.
Keeping high resolution while going wider
Instead of swapping to a shorter scope, you can keep the detail of your current focal length and build out the wider scene panel by panel.
Multi-night projects where you want repeatable framing
Because ASIAIR can use plate solving to lock onto each panel’s exact position, mosaics are ideal when you’re collecting data over several nights and want everything to line up consistently.
Practical tips to make mosaics go smoothly
1) Plate solve first, always
Before you get serious about framing a mosaic, do a quick plate solve so ASIAIR knows your true camera angle and field of view. This is what makes the mosaic preview match reality.
2) Use a generous overlap (start around 20 to 25 percent)
Overlap is what saves you later during stitching. If your optics show vignetting, tilt, or messy corners, bump the overlap higher so you’ve got plenty of shared stars and structure between panels.
3) Treat camera rotation as non-negotiable
A lot of mosaic frustration comes from a rotation mismatch. If your camera angle changes between sessions, you can end up with gaps or odd-shaped coverage. If you can keep rotation consistent, your mosaics become far more predictable.
4) Keep the panel layout simple at first
If you’re new to mosaics, start with a 2-panel mosaic (1×2 or 2×1). It’s the fastest way to learn the process without turning the project into a week-long marathon.
5) Build the mosaic in SkyAtlas, then let it generate your Plan
The best workflow is: frame it in SkyAtlas using Mosaic, choose your grid size and overlap, rotate and position it exactly how you want, then generate the Autorun Plan. From there, you’re basically imaging multiple “targets” in sequence, one per panel.
6) Copy the exact same capture settings to every panel
Consistency matters. Same exposure length, same gain, same filters, same dithering. If one panel is shot differently, it can stand out in the final stitched image.
7) Autofocus before each panel change if you can
If you’re using an EAF, it’s worth enabling autofocus at the start of each panel (or at least on a regular schedule). Consistent star size and focus across panels make stitching and blending much cleaner.
8) Plan for unattended imaging
A mosaic is often a longer project, so it’s worth double-checking the “boring” stuff: meridian flip behavior, re-centering, guiding recovery, and any safety limits you rely on. The goal is to let it run without babysitting it.
You still have to put the time in to capture multiple panels, but the setup and execution can be surprisingly smooth once you’ve dialed in overlap and rotation. If everything goes to plan, you’ll have enough panels to create a detailed image with super-high resolution (great for prints!).
Light Pollution Makes This Even More Valuable
In light-polluted skies, star hopping is nearly impossible. Many guide stars are washed out, constellations are faint, and familiar reference points simply disappear.
My eastern sky is especially washed out, which makes manually locating deep-sky targets frustrating, particularly during narrowband projects when precision framing matters most.
I rely on the ASIAIR Sky Atlas to get centered on the target quickly and accurately. Because it uses plate solving to recognize star patterns, it doesn’t depend on visible constellations, making it incredibly reliable for suburban and urban backyard imaging.
The Sky Atlas works well through strong filters and heavy light pollution, though you may need to adjust the exposure settings.
Integration With the Full ASIAIR Workflow
The ASIAIR Sky Atlas isn’t a standalone tool; it connects seamlessly with GoTo mount control, plate solving, polar alignment, autorun sequences, and guiding, all within the same ecosystem. That level of integration means you don’t need separate software for planning, slewing, centering, and framing your targets.
One of the biggest advantages for me is that I can see how my entire imaging plan is progressing on my tablet while I’m hanging out in the basement watching TV or gaming. For backyard astrophotography, that convenience means more time imaging and less time troubleshooting.
Once I’ve polar aligned the mount, I can control my entire deep-sky astrophotography session (start to finish) from inside the house.
Why the ASIAIR Sky Atlas Is so Handy
The reason the ASIAIR Sky Atlas stands out isn’t that it’s flashy or overly technical, but because it removes friction from nearly every stage of the imaging process.
It eliminates guesswork when locating targets, dramatically reduces setup time, improves framing precision through plate solving, supports creative composition, makes multi-night imaging practical, and even simplifies comet tracking.
For backyard astrophotography, those advantages compound night after night. Instead of spending 30 to 45 minutes acquiring and re-centering a target, I can begin capturing sub-exposures much faster.
Since I started using the Sky Atlas feature, my astrophotography projects have gained many additional hours of total integration time simply because I’m collecting data sooner each session.
Over the course of a multi-night project, that efficiency adds up to a meaningful increase in usable data and better final images as a result.
Final Thoughts
If you are serious about deep-sky astrophotography using the ZWO ecosystem, the ASIAIR Sky Atlas is one of the most valuable features in the entire platform.
The ASIAIR Sky Atlas combines interactive sky browsing with plate-solving precision to accurately locate and center deep-sky targets. It also provides framing previews, camera rotation planning, comet tracking, and reliable multi-night repeatability for consistent results.
I have been using the ASIAIR and the Sky Atlas tool to capture all of my astrophotos for the last 4 years.
From my experience, I rely on the sky atlas every single imaging session. It is how I quickly locate and center my deep-sky targets, maintain framing across multiple nights, and creatively compose wide-field images.
Just remember one critical detail: make sure your telescope’s focal length is entered correctly. That one setting ensures the framing preview matches reality and allows the ASIAIR Sky Atlas to function at its full potential.
For backyard astrophotographers looking to streamline their workflow and improve accuracy, the ASIAIR Sky Atlas is an absolute game-changer.

Trevor Jones is an astrophotographer and a valued member of the RASC. His passion is inspiring others to start their astrophotography journey on YouTube so they can enjoy the night sky as much as he does. His images can be seen in astronomy books & online publications, including the NASA Astronomy Picture of the Day.