The 500 Rule for Astrophotography

One of the first challenges beginners face when getting into astrophotography is taking a photo that is in focus and has round stars. Because the night sky appears to move from our vantage point on Earth, capturing a long-exposure starry-sky image on a fixed tripod may reveal star trailing.
One of the best ways to combat star-trailing when capturing astrophotography images on a stationary (non-tracking) tripod mount is to use the 500 Rule.
Quick Answer: Divide 500 by your lens focal length and crop factor to estimate the longest exposure you can use on a fixed tripod. With modern high-resolution cameras, begin one or two shutter-speed steps faster than the result and inspect your stars at 100% magnification.
What is the 500 Rule?
The 500 rule is used to determine the maximum exposure time you can use before stars become blurry or star trails appear. Setting the shutter speed longer than this rule allows will result in images without sharp stars.
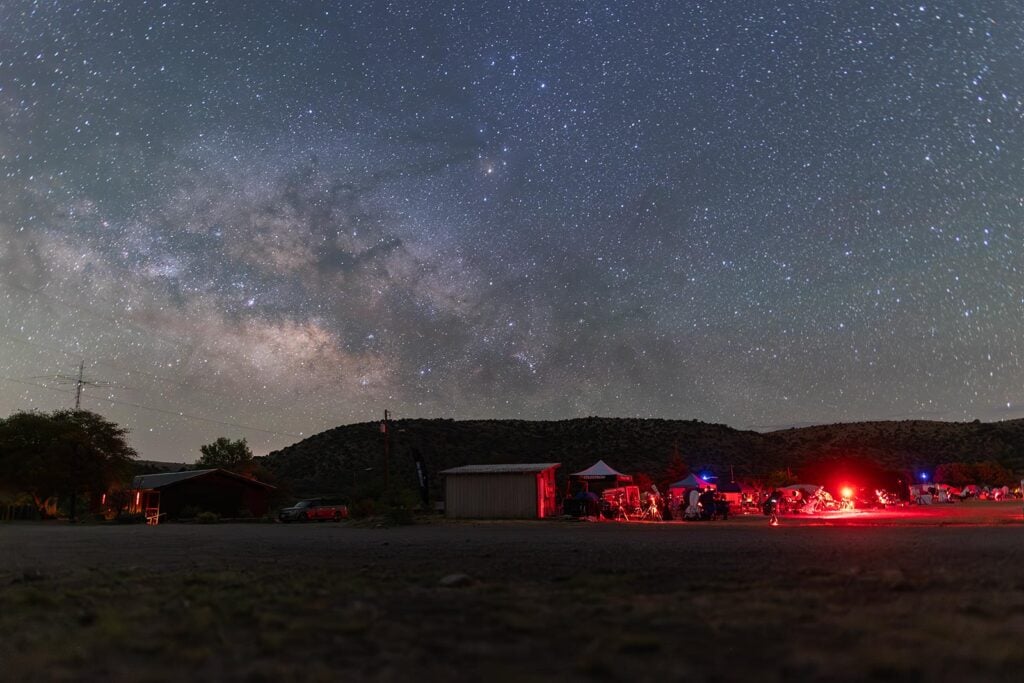
The 500 rule can be useful when photographing the night sky on a fixed tripod. It can be especially effective when photographing the Milky Way with a wide-angle camera lens.
The 500 Rule can be applied mathematically to many focal lengths, but it is most practical with wide-angle lenses. At longer focal lengths, the allowable exposure becomes extremely short, and a star tracker is usually the better solution.

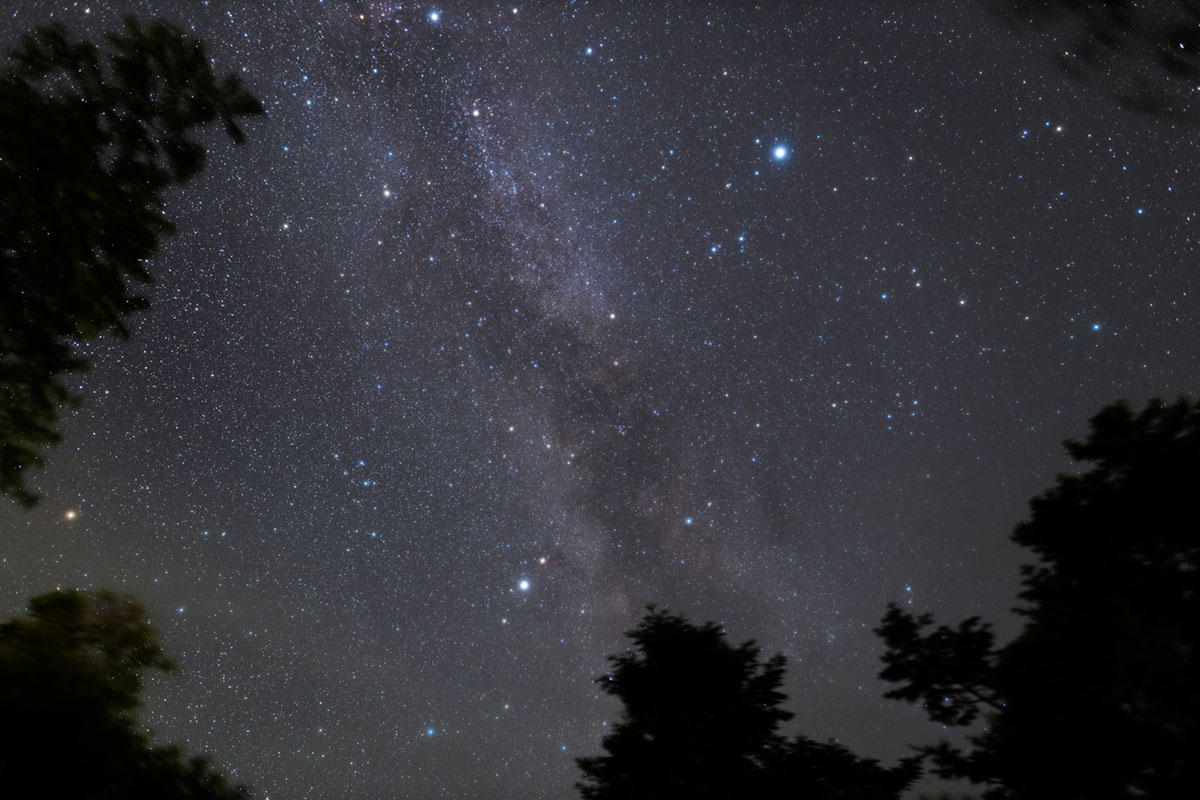
Brian Drourr used the 500 Rule to capture this stunning portrait of the Milky Way above Lake Moxie in Maine.
Whether you consider the 500 Rule an outdated technique (after all, it was designed for 35mm film grain) or you’ve personally had great success with it, I had to cover this controversial topic on a website that focuses on astrophotography. I believe that the 500 Rule is still very relevant to today’s digital cameras, as long as you treat the guidelines as a rough approximation rather than gospel.
Related Post: Looking for an affordable wide-angle camera lens? See my review of the Rokinon 14mm F/2.8.
Introduction
Astrophotography has been gaining in popularity over the past few years thanks to more affordable equipment and helpful online resources. Taking a photo of the night sky is a wonderful experience for both the photographer and the ones who get to enjoy the finished product.
However, the process of creating such an incredible photograph is not always easy. It is a very delicate task that requires a specific set of skills and knowledge that must be applied while capturing images in the field.
In the image below, you’ll see how the stars begin to “trail” after just 30-seconds of exposure time using a wide-angle camera lens. This should give you an idea of just how fast the sky appears to move from Earth.
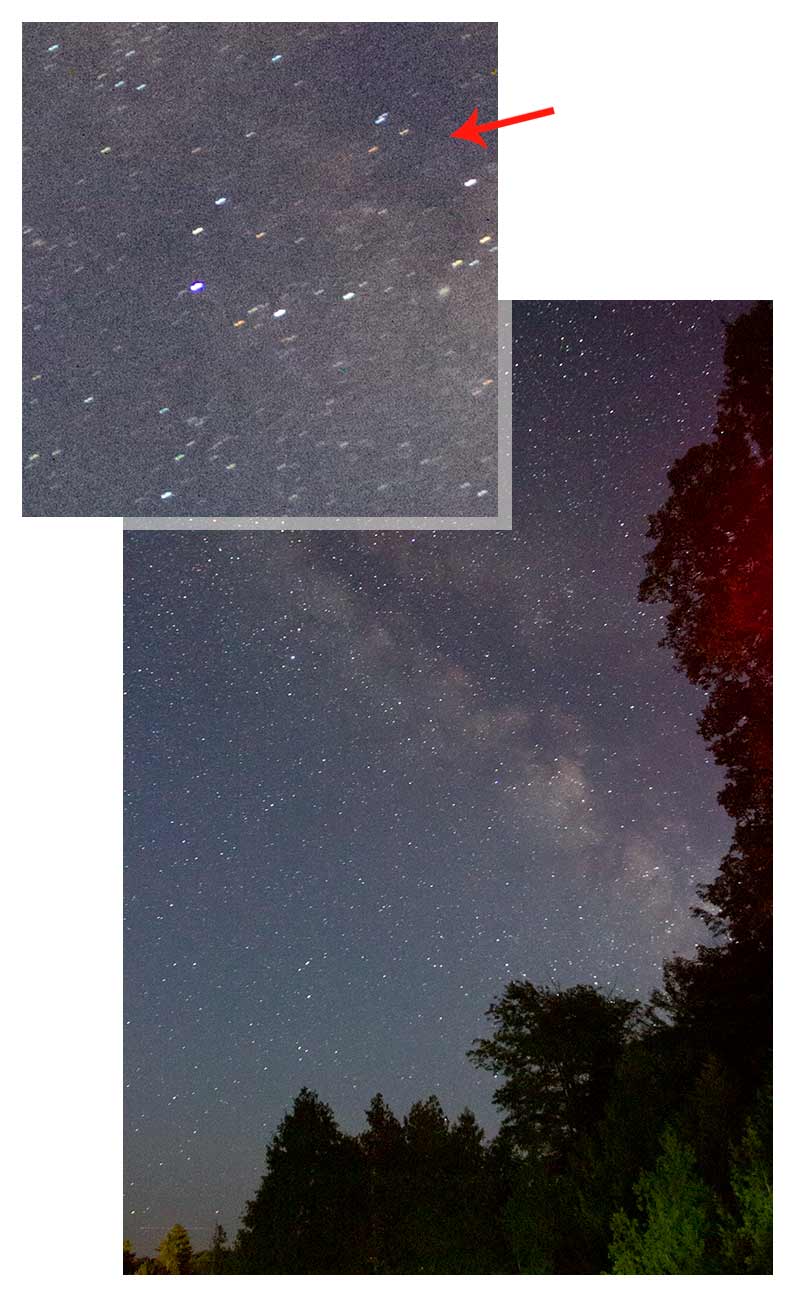
A single, 30-second image captured using a DSLR camera and 18mm lens.
In a hobby like this, a variety of things can go wrong when trying to capture the perfect shot. One of those things is star trails, which could make the stars in your image blurry and is often not the effect you were hoping to achieve.
Star trails appear in photos due to the natural movement of the Earth, which makes the stars move rather fast, 15 degrees per hour, to be more precise. In order to avoid this, astrophotographers must pay attention to all aspects of their camera system, such as the sensor size, the exposure time, the image resolution, the star angular speed and so on.
If you are just getting started in astrophotography, you likely do not own an equatorial telescope mount or star tracker yet. Thankfully, there is one simple rule that could replace the countless amount of preparation: the 500 rule.

In this stunning photo by Elizabeth Ford, a closer inspection reveals slight star-trailing after 20 seconds using a full frame camera and 25mm lens.
Why Photographers Use the 500 Rule
The 500 rule is more of a guideline, but that does not mean it is not useful. This simple formula can make a big difference in your night sky photography, because (in theory) you’ll be able to create photos with sharp stars to the edges of the field.
It serves to discover the maximum exposure time allowed before the stars become blurry or before star trails appear. Setting the shutter speed longer than this rule allows will result in an unclear photograph (the stars will appear as trails rather than dots).
Using this formula requires some math knowledge, but you do not have to be a nuclear scientist to understand and apply it. It is actually very simple, but the smallest changes often make the biggest difference.
The following video by Mike Smith shows some great test shots using the 500 Rule with a crop sensor and full-frame cameras at varying focal lengths:
How it Works
The rule is as follows:
SS = 500 / (CF x FL)
If you are perplexed by this formula, there is no need to worry; you just need to understand the abbreviations. SS stands for the shutter speed expressed in seconds, CF is the crop factor of your sensor (the ratio between your sensor and a full-frame one), while FL refers to the focal length in millimeters.
500 / (Crop-Factor x Focal Length) = Starting Shutter Speed
Here is an example of the formula used with my Canon EOS 60Da (APSC-C sensor) camera and a 50mm F/1.8 camera lens:
500 / (1.6 Crop-Factor x 50 focal length of my lens) = 6.25-seconds

That means that, using this camera and lens combo on a stationary tripod, I will need to limit my exposures to 6 seconds each to avoid star trailing. To help collect more light in a short exposure, I’ll set the lens to f/2.8 (fast, but a little sharper than f/1.8) and use an ISO of 3200.
Depending on the type of camera you own, you will need to use different crop-factor values. Here is the list you can refer to:
- 1 X – Full frame cameras
- 1.5 (1.6) X – Nikon (Canon) APS-C cameras
- 2 X- Micro 4/3 cameras
- 2.7 X and higher – Compact cameras with a one-inch type sensor (or smaller)
Even though it is widely accepted, the use of the number “500” in this formula does not carry any particular meaning. This number is just something astrophotographers figured out works the best for this type of photo.
This formula works because it automatically calculates the starting shutter speed for your camera to get the clearest possible photograph, and it does so in the shortest time.
Let’s imagine you wanted to take a beautiful photo of the night sky without any previous knowledge of how to avoid star trails. You set your micro 4/3 camera’s shutter speed to 60 seconds using a remote shutter release cable, expecting an amazing result. On the contrary, you end up with a blurry photo that doesn’t represent how nice the sky looks in reality.
The 500 Rule can give you a reference point for how long you should expose the image with your camera system. It’s not an exact science, but it does work when capturing images like the one below.

A single exposure at 17mm using the 500 Rule with a crop sensor DSLR on a tripod. Up-close, the stars may trail slightly.
The Science Behind It
The basic idea is providing an easy formula that will guess how long the exposure time can be before the movement of the stars becomes noticeable.
The sky rotates 0.0042 arc degrees per second, or in simple words, 360 degrees in 24 hours. If you own a full-frame camera and use a 24mm lens, its horizontal view will be about 73.7 degrees.
Let’s say this camera has a 24 megapixel sensor (6000 x 4000). The aforementioned 73.7 degrees are projected onto 6000 pixels, resulting in 81.4 pixels/degree. With this kind of lens, the exposure time will be about 21 seconds according to the 500 rule (500/24).
The sky will move about 0.09 degrees during these 21 seconds (0.0042*21). 0.1 degrees = 7.3 pixels with this kind of camera (81.4*0.1).
The 500 Rule was developed around a level of blur that may look acceptable at normal viewing sizes. On a high-resolution digital camera, however, that same movement can span several pixels and become obvious when the image is enlarged.
Usually, we look at pictures on a computer screen. If you try to zoom in your full-resolution photograph to 100% you will notice that stars are not actually dots – this doesn’t actually matter because you would never notice this with a naked eye.
So, if you’re planning to print large-format versions of your photos, it’s worth considering. If you generally share your photos online (Flickr, Instagram, etc.), the fine details become much less important.

A reference guide for digital camera sensor sizes. Wikipedia.
For Full Frame Cameras
The calculation is easiest with a full-frame camera, though you should expect to cut down on exposure time a bit. Because you do not need to multiply the focal length by a crop factor, the formula is simply 500 divided by your focal length.
In the case of my Canon EOS 5D Mark II with a 24mm lens attached (a promising camera and lens combination), the formula is 500 / 24 = 20.83 seconds. That means I could expect to see stars that are mostly still in a 20-second exposure.
20 seconds is probably a little ambitious, so I typically shoot a few seconds less than that. An 18-second exposure is no slouch, but I’d still recommend using the lens “wide-open”. For my Canon EF 24-105mm lens, that value is F/4.
Lastly, I’d suggest using ISO 1600 or higher if possible, and using image stacking to help reduce noise afterward (more on this soon). The 24–105mm is versatile, but its f/4 maximum aperture means you will need a relatively high ISO or image stacking when using it without a tracker.
A faster f/1.8–f/2.8 prime lens will usually collect more light during the short exposures allowed by the 500 Rule.
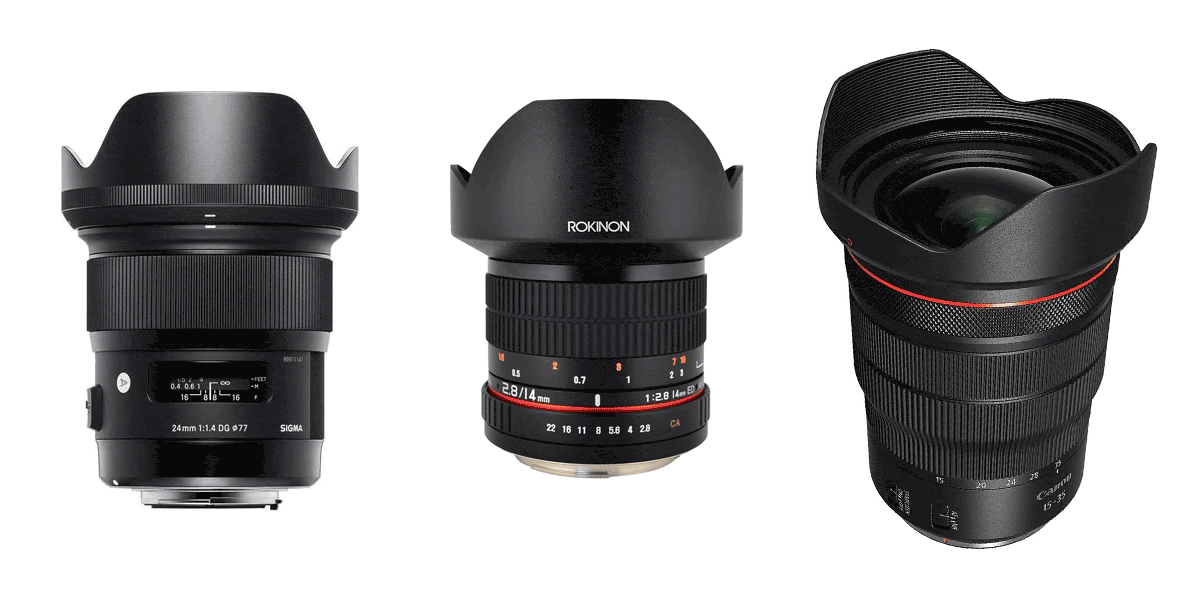
Related Article: The Best Lenses For Milky Way Photography
For Crop Sensor Cameras
There are two types of crop sensor cameras – Canon and Nikon. The Nikon cameras’ crop factor is 1.5, so by using the 500 rule, you get this result:
500/ FL / 1.5
So, if you’re using a 50-millimeter lens, the formula will look like this:
500/ 50 / 1.5 = which will result in 7 seconds of exposure.
The crop factor for Canon cameras is almost the same as Nikon’s – 1.6. The formula should look like this:
500 / focal length / 1.6.
Now, if you use the same 50mm lens, the formula would be:
500 / 50 / 1.6 = resulting in 6 seconds of exposure.
Shutter Speeds
It is important to remember that this rule is not a perfect solution and that slight adjustments will have to be made according to circumstances. Factors such as light pollution, atmospheric haze, and the angle of the stars are something you should keep in mind.
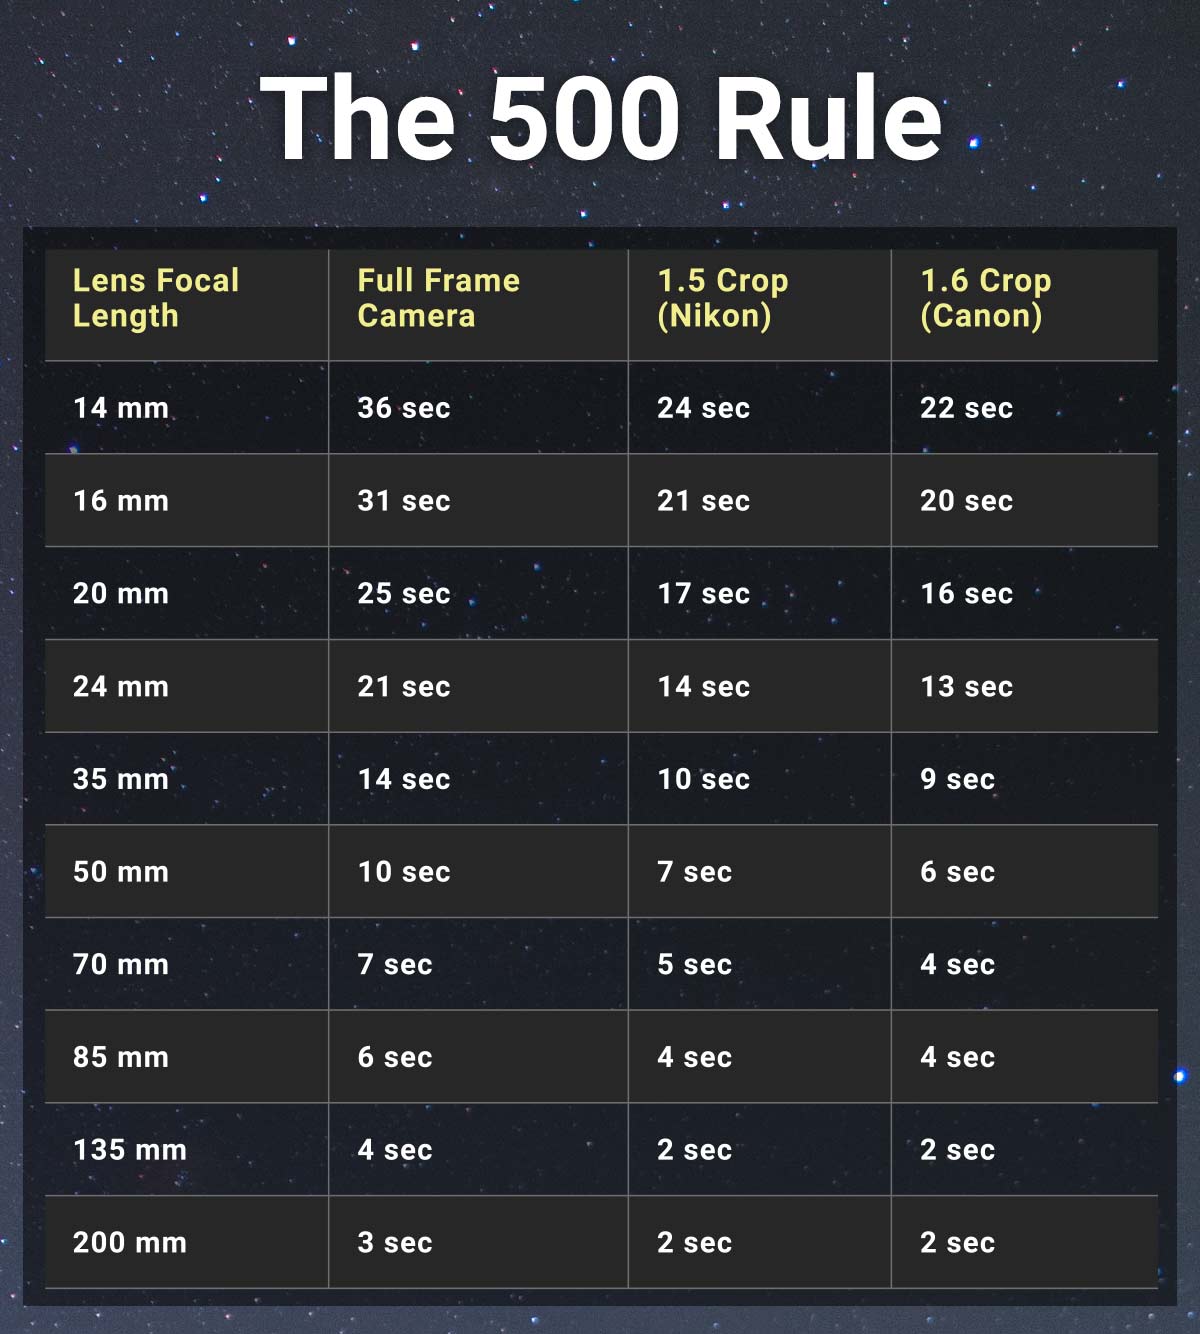
Here’s a chart that could be useful to you regarding shutter speed in general.
Does the 500 Rule Actually Work?
The above reference chart is a great starting point, but do these shutter speeds actually work in the field? The answer is, sometimes.
I asked this question to the AstroBackyard Facebook group to see what amateur astrophotographers around the world had to say. There was a mix of responses on whether the 500 rules actually hold true, and the general consensus was that they do a great job most of the time.
Experienced photographer Craig Stocks noted that taking an image free of star-trailing using the 500 rule will depend on the resolution of the camera and the quality of the lens. The higher the resolution of the system, the more likely you are to see star trailing.
In the example below, he used a Sony a7R2 with a Sigma 14mm f/1.8 Art lens at ISO 2500 for just 20 seconds. Even 20 seconds is actually a shorter exposure time than the 500 rule would allow; star trailing is visible in the image when viewed at 100%.
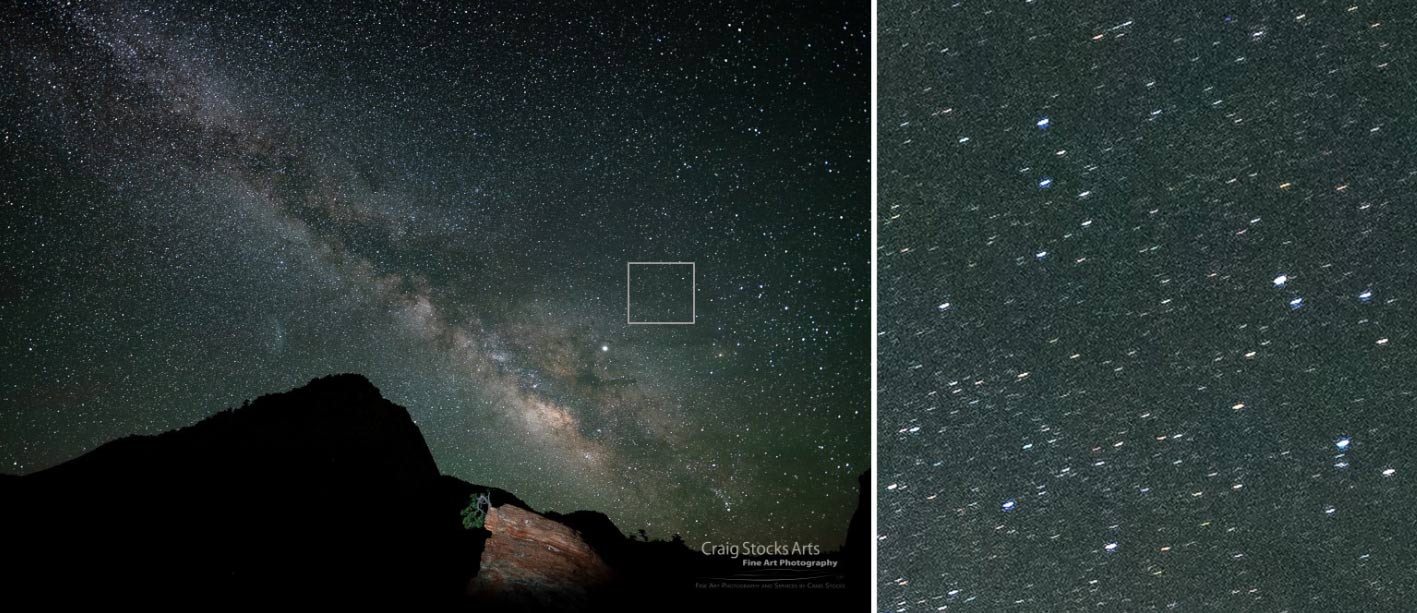
In a lower-pixel-resolution camera, this effect is less pronounced, and the 500 rule yields better results.
Star trailing also varies with the part of the sky you are photographing. Stars near the celestial equator show more apparent motion than stars close to the north or south celestial pole. This is one reason advanced calculators may consider the declination of your subject.
The bottom line is that the 500 rule should be considered a great starting point, but it is not a precise measurement, and you will need to experiment with your specific camera and lens system.
The NPF Rule
While searching for a definitive answer on whether the 500 rule (or 600 rule) is still relevant with today’s cameras, I was pointed to this article discussing the NPF Rule. The NPF Rule has been added to the PhotoPills app to provide a real-time shutter speed recommendation.
They call it “Spot Stars,” which is essentially an NPF Rule calculator.
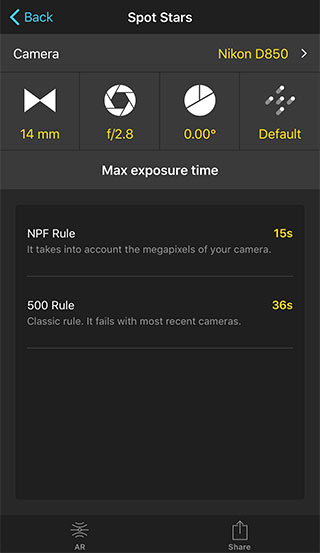
The Spot Stars Calculator found in the PhotoPills app.
The author notes that larger sensor cameras, such as the Nikon D810, do not produce acceptable results with the 500 Rule, especially if you plan to print the images in large format. The original NPF Rule was developed by Frédéric Michaud, and the formula is as follows:
(35 x aperture + 30 x pixel pitch) ÷ focal length = shutter speed in seconds.
If you don’t know the pixel pitch (measured in microns), just divide the sensor’s physical width in millimeters by the number of pixels in width and multiply by 1000. For example, the sensor in my Canon EOS 60Da has a physical width of 22.3 mm, and a sensor resolution of 5196 x 3464 (4.29 µm).
So, the formula for my Rokinon 14mm F/2.8 lens would be [(35 × 2.8) + (30 × 4.29)] ÷ 14 = 16.19 seconds. That’s much shorter than the recommended exposure time of 22 seconds with the 500 Rule!
The Power of Stacking
If your goal is to improve the quality of your photos, you should always use RAW format instead of JPEG. This simple change will provide you with flexibility, which will come in handy when editing your photos. If you are not using a tracking head to track the movement of the sky, the stars will never be in the same position.
The amount of light you collect for one pixel depends on how long a star stays in one place. Increasing your ISO is not always a good idea, as it can significantly increase the amount of noise in your image.
The best solution to improve your image quality in the departments of greater signal (light), smoother details, and overall less noise is image stacking. Stacking your astrophotography images is one of the most powerful ways to reduce noise, and it’s really not that hard.
In the following video, I use Adobe Photoshop to manually stack a set of 30-second images to improve image quality.
The first step is to take a set of photos at a relatively low ISO, following the 500 rule. The next step would be combining or stacking all of these photos afterward in order to drastically enhance all of the little details in the final photograph.
This procedure requires you to align the sky according to all the exposures, and optionally calibrate the photo, but certain software such as DeepSkyStacker, Starry Landscape Stacker, and Sequator can facilitate this and make the process faster and easier.
As time-consuming as the process may be to manually stack images in Adobe Photoshop as shown in the video above, I enjoy the experience very much. There is something about seeing your image improve slightly over time that is very satisfying!
Image stacking is a central step when it comes to editing in astrophotography. We would not be able to witness the beauty of the night sky through pictures in the quality we have today without utilizing this technique. Increasing the ratio of signal to noise gives a much cleaner photo.
For foreground details, you may need to mask this area and blend in a separate exposure highlighting this area. In the example below, a single image of the terrestrial landscape was blended in to replace the blurry result from registering the stars in the image.

If you plan to stack your images, be aware that the ground will be blurry unless you blend in a stationary version.
Useful Tools
Here are some of the many stacking software options available to you. I tend to use Adobe Photoshop to stack my untracked images, or DeepSkyStacker. Adobe Photoshop has an image stacking script option to automate the process, and it is worth checking out.
⦁ Sequator – It is great to use if you are a Windows user because it is free. It makes the process of image stacking extremely easy and you will end up with a beautiful photograph in no time. It also supports RAW format, which is important when trying to achieve the best quality.
⦁ Starry Landscape Stacker – This software is available only for Mac OS X users, and specifically for nightscapes.
⦁ DeepSkyStacker – This tool is free and cross-platform, but primarily intended for deep-sky image registration and stacking.
⦁ Adobe Photoshop – Photoshop is useful for manual or semi-manual stacking, but less automated for complex foreground separation.
Star Trail Images
What about times when you want to show star trails? Star trail photography can result in beautiful portraits of the apparent movement of stars in the night sky, like the image below. The process involves capturing images with much longer exposure times than you would use for the 500 rule.
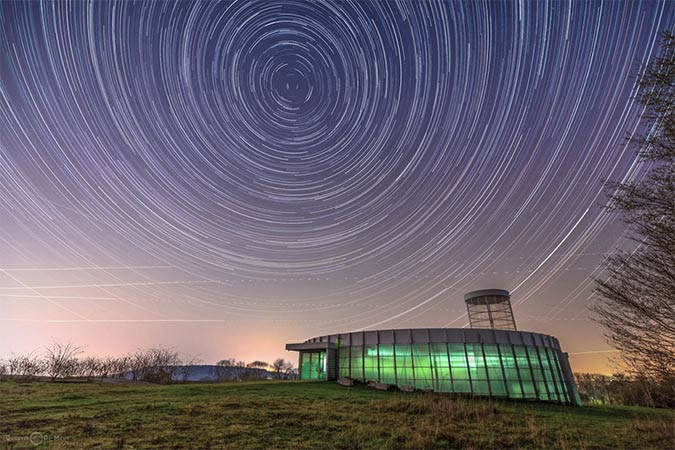
In this star trail image by Quentin De Meur, the photographer intentionally let the stars trail and stacked several photos.
Photographers will use the longest exposure time possible (without blowing out the highlights), to capture the most amount of movement in the sky as possible.
In many cases, this is a 30-second exposure on a fixed tripod. The images are then blended together in Adobe Photoshop using the “lighten” blend mode to create ultra-long star trails over time.
Conclusion
The 500 Rule is not the be-all and end-all solution for capturing the perfect image of the night sky, but it is an extremely useful reference point. Many beginners (myself included) start with a crop-sensor, entry-level DSLR camera and kit lens (usually 18-55mm or similar).
For users in this situation, I believe the 500 Rule is an excellent formula to try out the next time you set up your tripod. If you have a high-resolution sensor with 30 MP+, you may want to dial back the 500 Rule suggestion or look into the NPF Rule.
By simply understanding how this formula works, you will gain a better grasp of capturing photos of the stars at night, which are essentially moving targets.
Whether you are using a full-frame camera or a Micro 4/3, the 500 rule is a practical benchmark in many situations. is a practical benchmark in many situations.
When combined with image stacking and various software tools, capturing a beautiful image of your favorite constellation or the Milky Way is within your reach.