M33 Galaxy – The Triangulum Galaxy
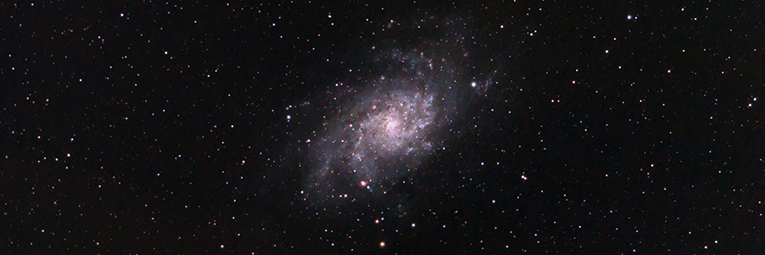

The Triangulum Galaxy
The M33 Galaxy is the third-largest galaxy in the local-group of galaxies, behind the Milky Way and Andromeda. Its large size from our vantage point makes my wide-field astrophotography 80mm telescope a great choice for imaging this target. Despite it’s size, the Triangulum Galaxy appears much dimmer than M31 – The Andromeda galaxy. If you are new to astrophotography, chances are that the Triangulum Galaxy is one of the first few galaxy names you have learned.
M33 Galaxy Photo Details:
Telescope: Explore Scientific ED80 with WO Flat III 0.8x FR/FF
Mount: Skywatcher HEQ5 Pro Synscan
Guiding: Meade DSI Pro II and PHD Guiding
Guide Scope: Orion Mini 50mm
Camera: Canon EOS 450D (Modified)
ISO: 800
Total Exposure: 7 Hours (84 x 300 seconds)
Processing Software: Deep Sky Stacker, Photoshop CC
Support Files: 20 darks, 20 flats, 20 bias
Target Acquired – Messier 33
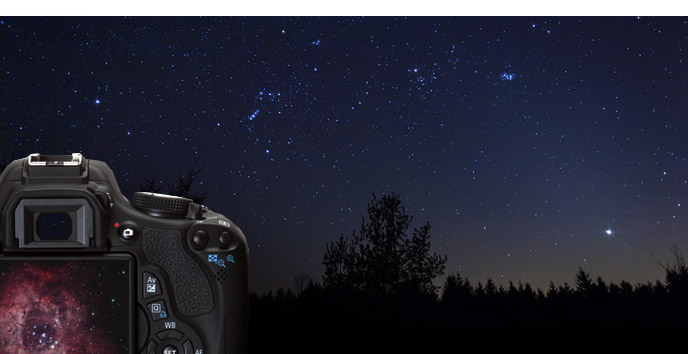
I have managed to image the M33 Galaxy from my backyard for multiple nights over the course of nearly a week. I can’t remember the last time we have had such a long stretch of clear night skies in the Niagara region. Mind you, these clear nights occurred during weekdays, and I have to be up early for work (and to walk the dog) early each morning. Needless to say, I haven’t been getting much sleep lately. Luckily my astrophotography equipment can be set up and ready for imaging in about 30 minutes. This includes polar alignment, calibration, focus and guiding.

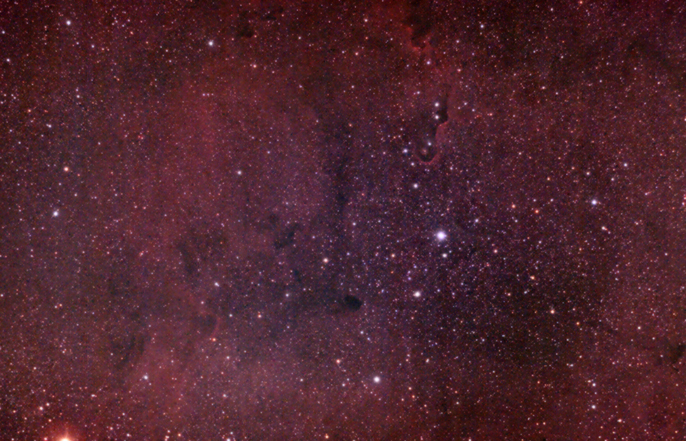
But first, the Elephant’s Trunk
My first imaging session was on the night of September 16th. Smack-dab in the middle of the work week. I didn’t originally intend to shoot the M33 galaxy that night, I started with IC 1396. The Elephant’s Trunk nebula is a concentration of interstellar gas and dust within IC 1396, located in the constellation Cepheus. You can view the results of this project below.
This area of the night sky is in a perfect spot for imaging at this time of year from my location, almost directly overhead. I captured 38 frames on this DSO on Wednesday night. The subs were 4 minutes each using ISO 800 on my aging modified Canon Xsi.
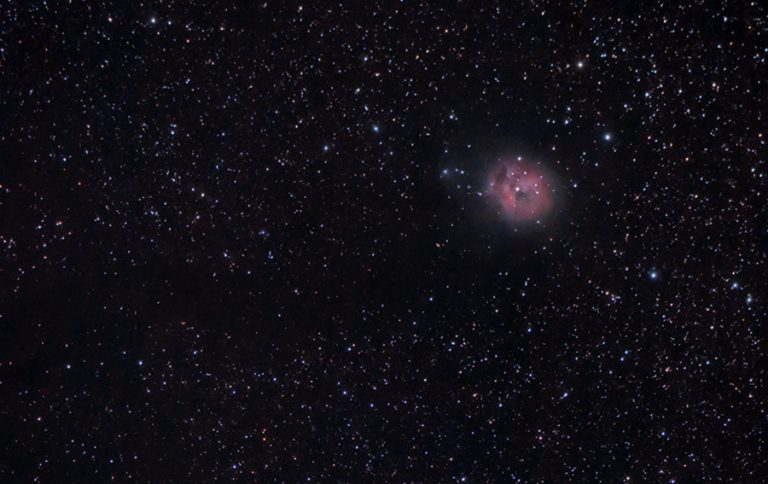
IC 1396 – Elephant’s Trunk Nebula
IC 1396 – Astrophotography Image Details
Telescope: Explore Scientific ED80 with WO Flat III 0.8x FR/FF
Mount: Skywatcher HEQ5 Pro Synscan
Guiding: Meade DSI Pro II and PHD Guiding
Guide Scope: Orion Mini 50mm
Camera: Canon EOS 450D (Modified)
ISO: 800
Total Exposure: 2 Hours, 24 Minutes (36 x 240 seconds)
Processing Software: Deep Sky Stacker, Photoshop CC
Support Files: 15 dark frames
The Elephant’s Trunk nebula can be seen in the top center-right of the photo above. It is a dark patch with a bright, sinuous rim. The rim is the surface of a dense cloud that is being illuminated and ionized by a very bright, massive star. Faint objects like this are difficult to image from light-polluted skies in the city. I found myself battling with horrible gradients and noise when processing this image. I will likely add more time to the Elephant’s Trunk Nebula during the weeks that surround the new moon in October. Another 4 hours should help me pull out more detail with less noise.

On to the M33 Galaxy…
After achieving a steady graph in PHD guiding, and a tight-focus on my reference star (Alderamin) I set BackyardEOS to take 50 frames, and I headed to bed. I set my alarm for 2:00am, and managed to stumble back out to the patio to check on my results. The Elephant’s trunk nebula was too far west, and my telescope would soon by aiming directly at my garage! Because the sky was still crisp and clear, I figured I would add some time a second object for the night. I imaged the M33 Galaxy back in 2012, but that was before I self-modded my 450D for astrophotography. The Triangulum Galaxy contains some beautiful pink nebulosity within it that I knew I could now capture.
The following 2 nights of the week were also clear, and I took full advantage. This time, I shelved my plans for the Elephant’s trunk, and focused all of my efforts on Messier 33. I captured an impressive 49 subs the following night at 5 minutes each, and then I added another 17 light frames the night after that!
[adrotate banner=”20″]

My total number of frames on this object was now over 100! That’s a lot of imaging in one week. All that was left now was to stack and process all of the data acquired. I set Deep sky stacker to use “the best 90% of frames” to register and stack, which resulted in a final stack of 84 images total, or exactly 7 hours. I even had success with my creation of flat and bias frames. I shot the bias frames through the telescope with the lens cap on, at the fastest shutter speed my camera allows (1/4000 of a second). The flat frames were created by shooting through the telescope, pointed at the early morning blue sky. These were shot with the camera in Av mode. I shot separate bias and flat frames for each night, except the first. Only dark frames were used for that imaging session.
Processing a photo with 7 hours worth of data is quite enjoyable. There is less noise, and more detail than I am used to. As with all of my astrophotography images, I am sure I will re-process my photo of Messier 33 several times until I feel like I have done the galaxy justice. Everyone has their own taste, and at the end of the day, you have to be happy with it.
BackyardEOS 3.1
I finally purchased a copy of BackyardEOS 3.1 Classic Edition. My trial period has ended, and I am very happy with the software. The focus and framing tab, dithering control, and file organization features are my favourite, and make me wish I had upgraded to this software a lot sooner. I always had a hard time getting accurate focus using the live-view function of my DSLR. The focusing function built-in to BackyardEOS allow you to view a digital readout of the star size in real-time as you focus your telescope. The lower number you see on-screen, the better your focus! The filename for each sub lists the ISO, object name, exposure time, date and even the temperature! This is extremely handy when stacking a large number of frames from multiple nights.

I would love to hear what you think of my results for this galaxy image. You can also follow me on twitter to see more of the “behind-the-scenes” stuff from the backyard. As always, if you have any questions about the equipment I used, or my processing techniques, please leave a comment below. Thank you so much for visiting my website.