Tracking vs Guiding
If you are new to the world of astrophotography, you may be wondering what the difference is between tracking and guiding. These terms are used by amateur astrophotographers when discussing the movement of their equatorial telescope mount.
Tracking and guiding (autoguiding) are used in conjunction with each other to keep your subject still for long-exposure astrophotography. Basically, “tracking” means that your telescope follows the target, and “guiding” is a technique used to improve the accuracy of tracking.
![]()
When it comes to taking long exposure images at night, tracking can be the difference between a photo of stars, and one that includes deep sky objects such as nebulae and galaxies. You do not need a telescope to enjoy astrophotography, but tracking really opens the door to new and exciting photo opportunities.
The Difference Between Tracking and Guiding
Tracking, is referring to the movement of the telescope’s axis, usually in sidereal rate. This means that the polar axis of the equatorial telescope mount has been accurately polar aligned with the north (or south) celestial pole, and it is now tracking the apparent movement of the night sky.
Guiding, is referring to a technique called autoguiding, where a secondary guide camera is used to communicate small adjustments (pulses) to the mount for improved tracking accuracy. A computer software application such as PHD2 Guiding is used to handle autoguiding, which involves using a guide star as a reference point.
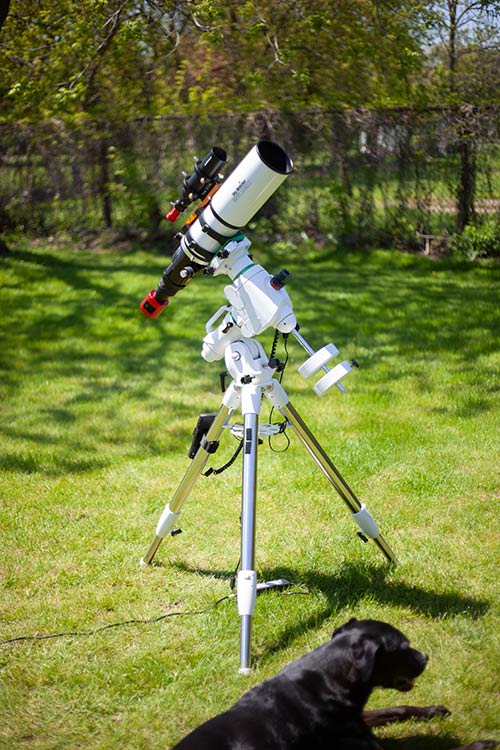
An equatorial telescope mount for astrophotography.
Why Tracking is Important
Because the Earth is spinning on its axis, the night sky appears to move (slowly) throughout the night. To compensate for this rotation, an equatorial mount moves at the same speed of this rotation, and “tracks” the night sky.
When a telescope mount is tracking the night sky at sidereal rate, you can take long-exposure photographs of objects in space. If the polar alignment of your telescope mount is accurate, and your payload is well balanced, you can expect to collect image exposures of 1-minute or more with sharp stars and a detailed image.
There are a number of factors that contribute to the maximum exposure length possible when tracking. These include the capabilities of the telescope mount itself, and the focal length of the telescope or lens. The higher the magnification of the optical instrument, the more demanding tracking becomes.
Tracking and Guiding are not the Same Thing
It is possible to be tracking the sky without guiding. When it comes to astrophotography, it’s the tracking that is most important because, without it, stars will begin to trail after a 30-second exposure or sooner. The elapsed time before star trailing occurs will depend on the focal length of your camera lens or telescope.
The 500 rule is often called upon to determine the amount of time you can expect to shoot a single exposure without tracking. This is a useful calculation for those shooting on a stationary tripod, but it does not apply to those using a tracking telescope mount such as the Sky-Watcher EQ6-R Pro.
Tracking does not only apply to sophisticated computerized equatorial mounts, small star trackers like the iOptron SkyTracker Pro also track the night sky to compensate for the rotation of the Earth. Portable, lightweight star trackers usually have an RA motor only, which is all you need to take wide-angle long exposure images of the Milky Way.
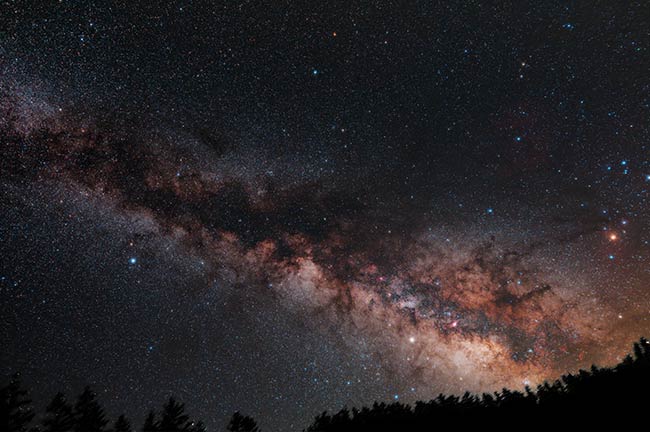
The Milky Way. Wide-angle camera lens and DSLR on a small star tracker.
Related post: Choosing a Star Tracker for Astrophotography
Is Autoguiding Necessary for Deep Sky Astrophotography?
It may seem like autoguiding is a requirement for long exposure, deep sky astrophotography. This is simply not true. Many of my favorite deep sky images were taken using a simple tracking mount without the use of autoguiding.
With that being said, there are a few things to consider. For example, in the case of the image shown below (Thor’s Helmet), autoguiding was not needed for two important reasons:
- The focal length of the telescope used (Celestron RASA 8) was wide and forgiving (400mm).
- The Celestron RASA 8 has an f-ratio of F/2, meaning a substantial amount of signal can be collected in a short exposure.
- The equatorial telescope mount used (Celestron CGX-L) is capable of handling the weight of the payload used, and much more.
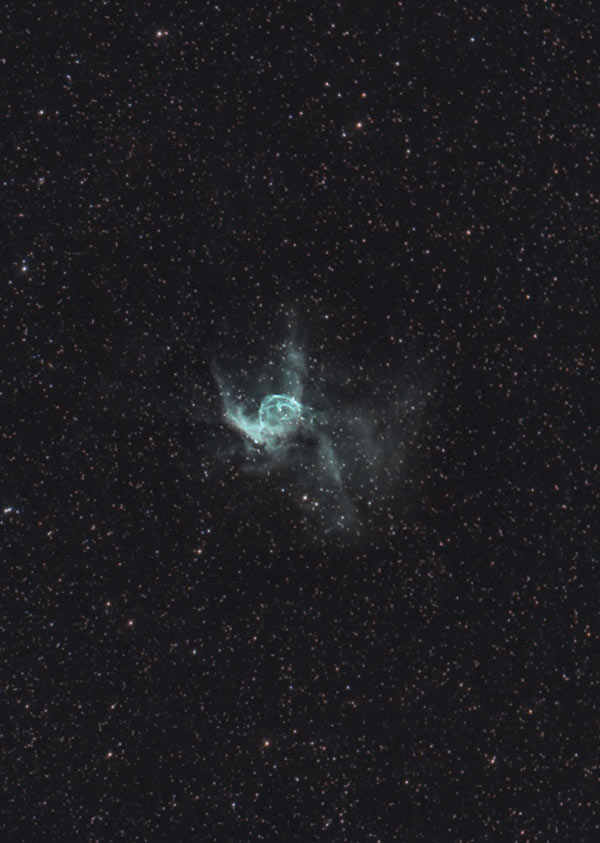
Thor’s Helmet (nebula) captured using a tracking telescope mount without the use of autoguiding.
The bottom line is, the longer you shoot for, and the higher the magnification used – the more guiding can help. Aside from capturing several images using short exposures on the RASA 8, I have also enjoyed collecting unguided images on the iOptron SkyGuider Pro. Although this star tracker is capable of autoguiding, it is often not necessary.
The image below was captured using 30-second exposures at ISO 6400. The camera was a Canon EOS 7D Mark II, and the telescope was the William Optics RedCat 51.
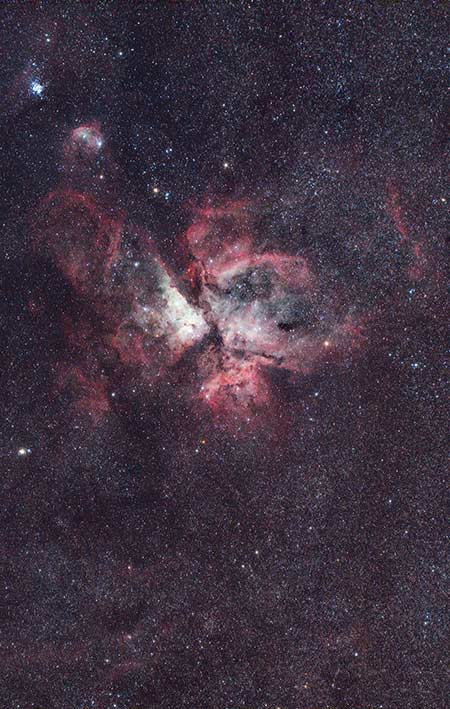
A stack of 18 x 30-second (unguided) exposures of the Carina Nebula.
When to Use Autoguiding
Autoguiding is a powerful technique to leverage when capturing deep sky objects in space. Autoguiding allows you to shoot longer exposures because “guiding” can offset common tracking issues such as periodic error. Essentially, the guiding software follows a single star and tells the telescope to move slightly based on the subtle movements of the star.
The autoguiding software must be properly calibrated in both the RA (right ascension) and DEC (declination) axis to perform optimally. For autoguiding to be effective, you must ensure that the software is not over-correcting (making unnecessary corrections), or under correcting (not sending enough correction pulses to the mount).

A typical setup for deep sky astrophotography.
It’s important it is to cover the basic best practices for accurate tracking before diving into autoguiding. Autoguiding is great for making subtle improvements to your mounts tracking performance, but there are number of things you can do to ensure that your tracking accuracy is optimal before adding this functionality to your rig.
Balance is Everything
Balance in both axis is critically important. This means properly balancing the telescope in RA using the counterweight, and the DEC axis by positioning the telescope so that the weight is evenly distributed from front to back.
The telescope should “stay put” in any position when the RA and DEC clutches are unlocked. The height of the counterweight will change the balance of your payload in RA, so take the time to find the precise position needed for an evenly balanced load.
Balancing the declination axis is often more difficult, as you may require an additional dovetail rail depending on your imaging configuration. In the case of a refractor telescope, the front objective lens is usually heaviest, meaning you’ll need to slide the telescope downwards on the saddle to find balance.