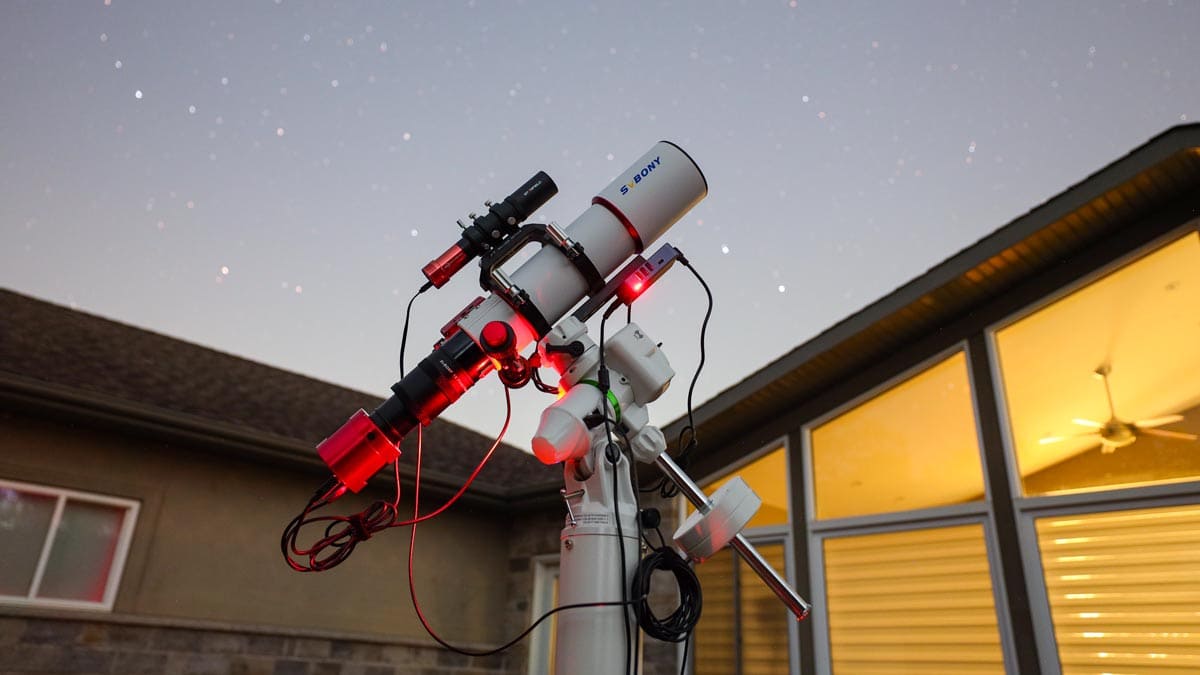
The Wizard Nebula in Cepheus

Last updated: September 9, 2026
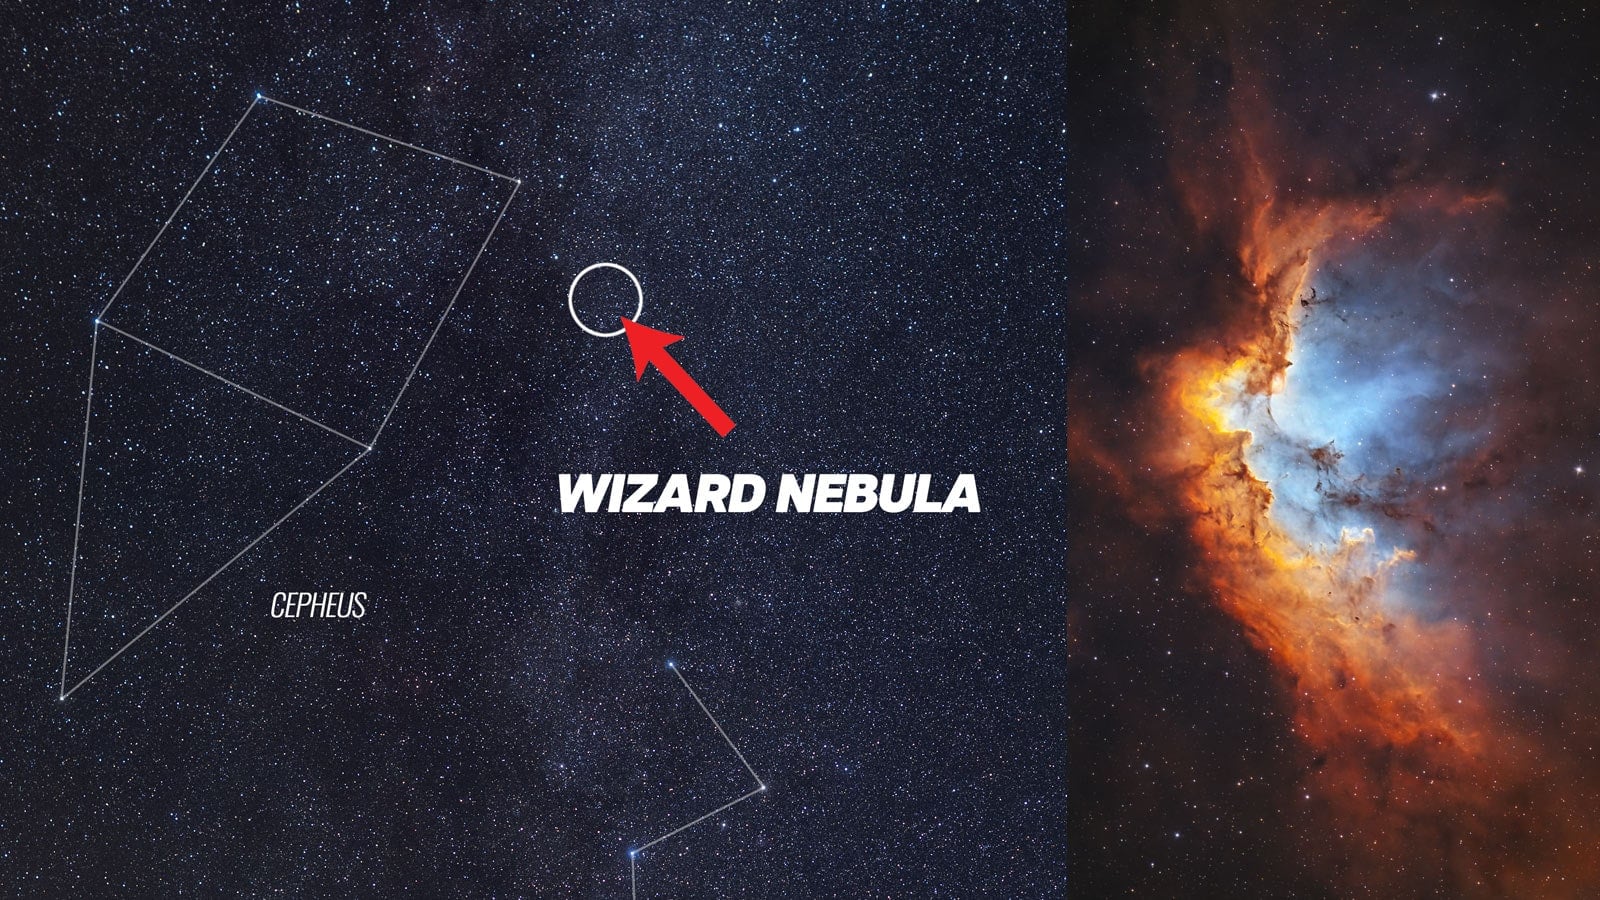
The Wizard Nebula is a large star-forming region in the constellation Cepheus, about 8,000 light-years away. The name is commonly used for the glowing emission nebula Sh2-142 and the young open star cluster inside it, NGC 7380.
In long-exposure images, dark dust lanes carve a pointed hat, face, and flowing robe into the surrounding hydrogen gas. It is a rewarding target for deep-sky astrophotography, especially with a narrowband filter, but the nebula itself is extremely challenging to see through an eyepiece.
I have photographed the Wizard Nebula several times with different cameras, filters, and focal lengths. My latest version used an Apertura CarbonStar 200, a monochrome astronomy camera, and narrowband filters. That image collected roughly 18 hours of exposure time and revealed far more structure than my early DSLR attempts from the backyard.
About The Wizard Nebula
The Wizard Nebula is an emission nebula and stellar nursery in Cepheus. NGC 7380 is the young open star cluster embedded within it, while Sh2-142 is the surrounding cloud of ionized gas. For astrophotography, use a focal length of about 400–1,000mm, collect several hours of exposure time, and consider a dual-narrowband or SHO filter set under light-polluted skies.

My latest image of the Wizard Nebula, captured with a telescope and monochrome astronomy camera.
What Is the Wizard Nebula?
The Wizard Nebula is an active region of interstellar gas and dust where new stars are forming. Radiation and stellar winds from hot, young stars energize the surrounding hydrogen, causing the cloud to glow. Dense pillars and lanes of dust block some of that light and create the silhouette that gives the nebula its nickname.
Depending on how the image is rotated, you may see a wizard wearing a tall, pointed hat with one arm extended. This shape is not a separate physical object. It is a line-of-sight pattern created by bright emission, dark dust, and the human tendency to recognize familiar forms.
NGC 7380 and Sh2-142 are often treated as interchangeable names, but they describe different parts of the same complex:
| Name | What It Describes |
|---|---|
| Wizard Nebula | The common name for the overall nebula and cluster complex |
| NGC 7380 | The young open star cluster embedded in the nebula |
| Sh2-142 | The surrounding H II emission region in the Sharpless catalog |
| Collinder 452 | Another catalog designation for the open cluster |
This distinction also explains an apparent contradiction in many observing guides. You may see an apparent magnitude of 7.2 listed for NGC 7380, yet observers describe the Wizard Nebula as extremely faint. The magnitude refers to the combined light of the star cluster, not the much lower surface brightness of the extended nebula.
Wizard Nebula Facts
| Property | Details |
|---|---|
| Object type | Emission nebula, H II region, and young open cluster |
| Constellation | Cepheus |
| Right ascension | Approximately 22h 47m |
| Declination | Approximately +58° 07′ |
| Distance | Approximately 8,000 light-years |
| Apparent size | Bright central region about 25 × 20 arcminutes; fainter surrounding emission extends farther |
| Apparent magnitude | About 7.2 for the star cluster; not a useful measure of the nebula’s visibility |
| Best imaging season | Late summer through fall in the Northern Hemisphere |
Distance estimates vary between catalogs and studies, which is why you may see values from roughly 7,000 to 8,500 light-years. NASA describes the active star-forming region as spanning about 100 light-years. At that distance, the light recorded in a new image began its journey toward Earth thousands of years before recorded history.
At the heart of the region is DH Cephei, a system containing two massive, hot O-type stars. Their intense ultraviolet radiation ionizes the surrounding hydrogen, while stellar winds help shape the columns and cavities visible in detailed images. This is not a quiet cloud in space; it is a young, energetic environment being sculpted by the stars forming inside it.
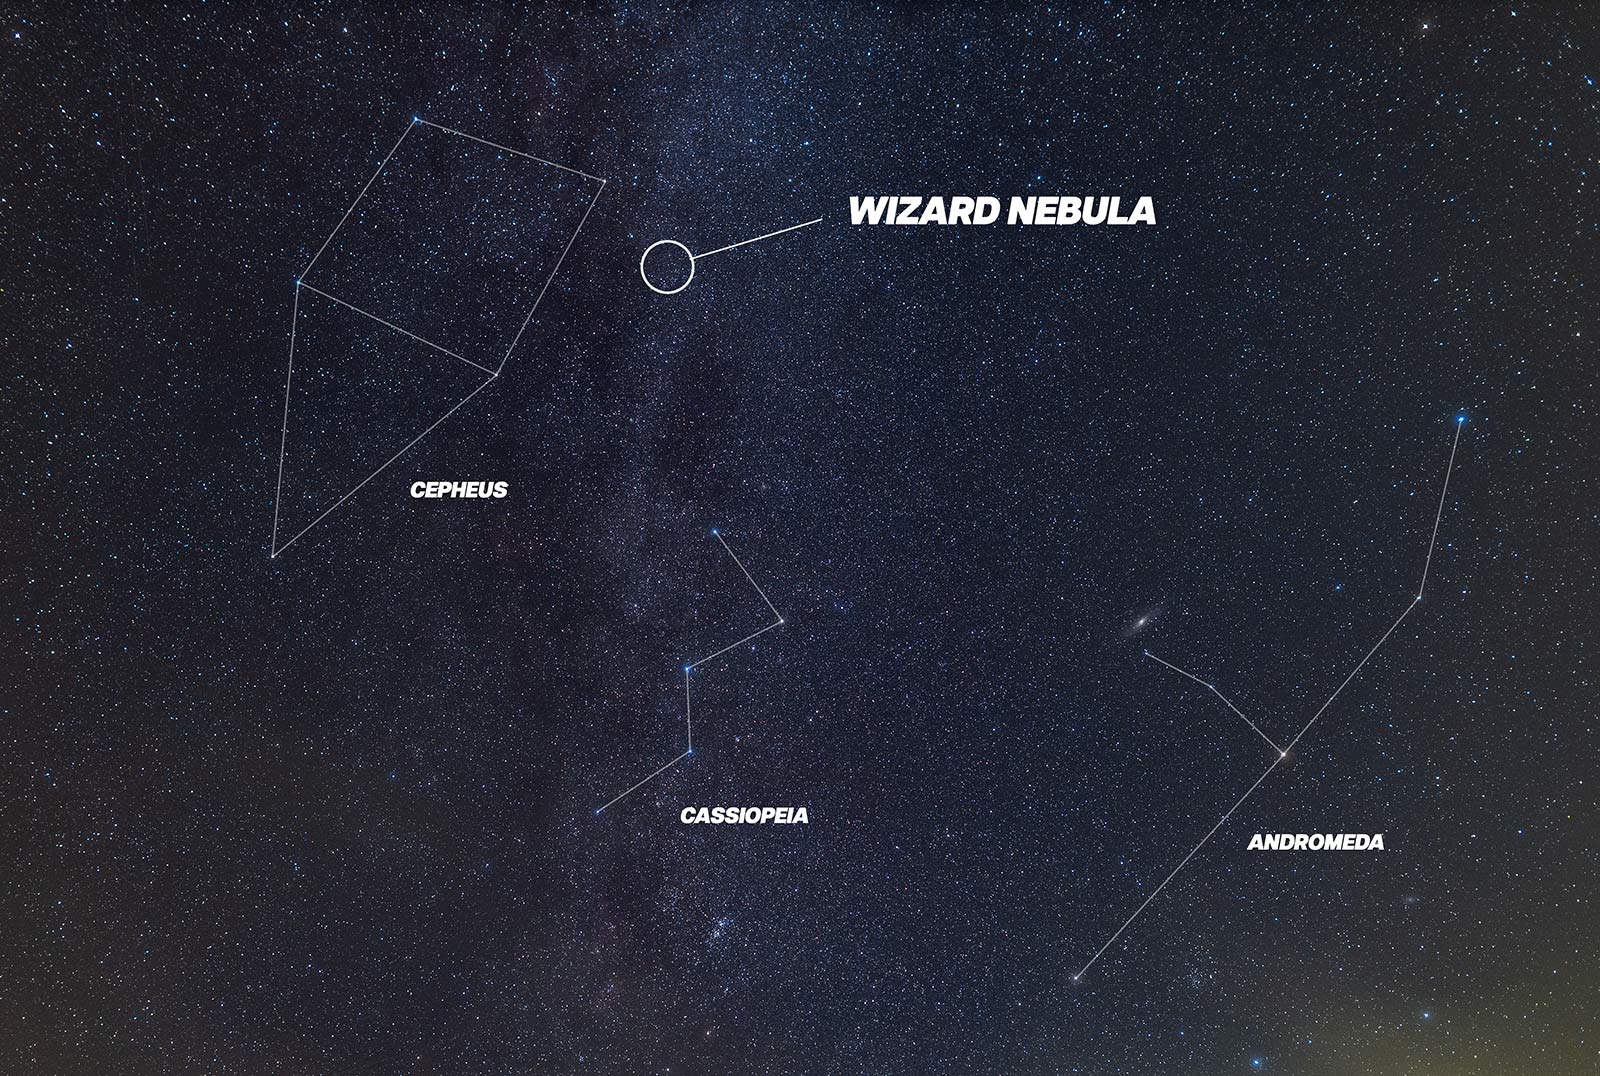
To find the Wizard Nebula, look north of the recognizable constellation Cassiopeia (that looks like a W).
Where to Find the Wizard Nebula
The Wizard Nebula lies in northern Cepheus, between the familiar constellations Cassiopeia and Cygnus. Its coordinates are approximately RA 22h 47m, Dec +58° 07′. It is close enough to the north celestial pole to remain above the horizon all night from much of Canada, the northern United States, and northern Europe.
From my latitude in Southern Ontario, Cepheus climbs high in the northeastern sky during late summer and becomes especially well placed on fall evenings. A high altitude is valuable for astrophotography because the target is viewed through less atmosphere, which usually improves transparency, guiding, and image sharpness.

If you use a computerized equatorial mount, search for NGC 7380 rather than “Wizard Nebula.” After a plate solve, compare the star pattern with a planetarium app and frame the bright central ridge slightly off-center to include the surrounding emission.
A GoTo equatorial telescope mount, such as the ZWO AM5, makes this process much easier. Modern plate-solving software can center the target accurately even when the nebula is invisible in a single unstretched preview.
Best Time to See and Photograph It
For Northern Hemisphere observers, the Wizard Nebula is best photographed from August through November. It rises earlier as summer progresses and is already high in the sky during the evening by early fall. September and October are particularly convenient because you can collect several hours of data without waiting until the middle of the night.
Observers at mid-northern latitudes may be able to image it outside this window because Cepheus is circumpolar, but “above the horizon” does not always mean “well placed.” I try to capture it when it is at least 30 degrees high and prioritize the hours around its highest point in the sky.
From low northern latitudes, the target remains visible but does not climb as high. From much of the Southern Hemisphere, its declination of +58 degrees places it very low in the north or below the horizon entirely. In those locations, local latitude and a clear northern horizon determine whether an imaging attempt is practical.
Planning Your Wizard Nebula Image
Check the Moon before committing to broadband data. A bright Moon can wash out the faint outer nebulosity, but narrowband H-alpha, OIII, and SII data can still be productive. I usually save my darkest, clearest nights for broadband star color and use brighter nights for narrowband imaging.
Can You See the Wizard Nebula Through a Telescope?
The open cluster NGC 7380 is much easier to detect than the nebula surrounding it. Under a dark sky, a telescope can show a loose gathering of faint stars, but the Wizard shape seen in photographs is not something you should expect to see clearly at the eyepiece.
Sh2-142 has very low surface brightness. Experienced visual observers generally need a moonless, transparent sky, dark adaptation, a wide-field eyepiece, and an OIII or UHC nebula filter. A larger aperture helps collect light, but sky quality and contrast are just as important. Even under good conditions, the view will be a subtle patch or arc of nebulosity rather than a detailed wizard.
This is a good example of the difference between visual astronomy and astrophotography. A camera can accumulate photons for hours and reveal faint gas that the eye cannot hold from one instant to the next. The vivid red, blue, and gold versions online are also processed images; those colors will not appear that way visually.

I can see the open cluster NGC 7380 through my large Dobsonian telescope visually, but not the ‘wizard’ nebula shape.
Photographing the Wizard Nebula
The Wizard Nebula is not the easiest beginner target, but it is well within reach of a tracked deep-sky imaging setup. Its brightest signal is in hydrogen-alpha, so it responds extremely well to narrowband imaging. The challenge is collecting enough clean data to bring out the dusty central structure without crushing the surrounding faint emission.
Telescope and Focal Length
A focal length between about 400 and 1,000mm works well for most APS-C astronomy cameras. Short refractors capture the Wizard with generous space around it, while a Newtonian or longer refractor isolates the detailed core. The camera sensor size changes the field of view, so confirm the framing in astronomy software before the first clear night.
| Focal Length | Expected Composition |
|---|---|
| 250–400mm | Wide field with surrounding Cepheus dust and star fields |
| 400–700mm | Comfortable full-nebula framing for many APS-C sensors |
| 700–1,000mm | Detailed view of the bright Wizard structure and cluster |
| Over 1,000mm | Close study of pillars and emission; framing and guiding become less forgiving |
Aperture does not determine the framing; focal length and sensor size do. A larger aperture can support a faster optical system or more resolution, but a small refractor can still produce an excellent image if it is well corrected and the mount tracks accurately. For beginners, I would choose a manageable telescope and reliable mount over the largest aperture available.
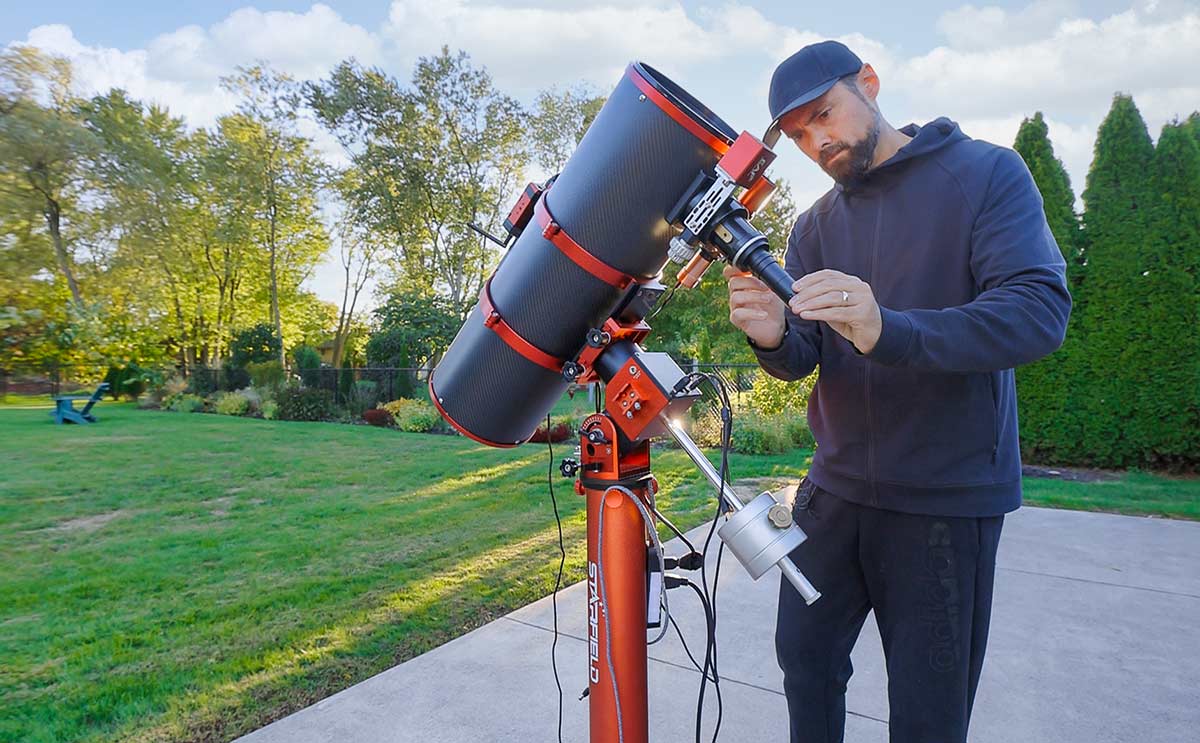
I used an 8-inch reflector telescope to photograph my latest version of NGC 7380 from the backyard (Apertura Carbonstar 200).
Camera Choices
A modified DSLR, mirrorless camera, cooled one-shot-color camera, or monochrome astronomy camera can all photograph NGC 7380. An unmodified DSLR records less of the deep-red H-alpha signal, so the nebula will take longer to reveal and may appear less substantial.
A cooled astronomy camera is especially useful on warm late-summer nights. Regulated cooling reduces thermal noise and keeps the sensor temperature consistent, which makes calibration easier. It does not dramatically reduce read noise by itself; read noise is primarily determined by the sensor and gain setting.
A one-shot-color camera is the simplest route to a color image. A monochrome camera with separate filters takes more planning but gives you greater control over each emission line. My strongest result on this target came from monochrome SHO data because I could stretch and balance the H-alpha, OIII, and sulfur-II signals independently.
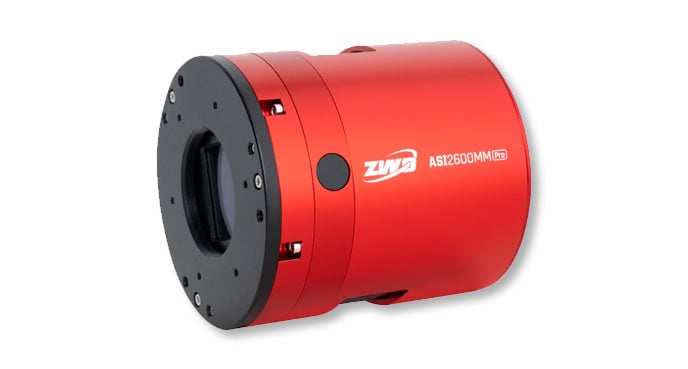
I captured my latest version of the Wizard Nebula with a ZWO ASI2600MM Pro monochrome dedicated astronomy camera.
Best Filters for the Wizard Nebula
From a dark sky, you can photograph the Wizard Nebula in broadband RGB, but the contrast is relatively low. From my light-polluted backyard, a narrowband filter makes a dramatic difference.
| Filter | Best Use |
|---|---|
| UV/IR cut or broadband | Natural star color and RGB data under dark skies |
| Dual-narrowband Ha/OIII | High-contrast color data with a one-shot-color camera |
| H-alpha | Strongest nebula structure and an excellent luminance/detail layer |
| OIII | Blue-green oxygen signal; weaker and more sensitive to the Moon and gradients |
| SII | Completes an SHO/Hubble Palette data set with a monochrome camera |
Optolong, Antlia, Astronomik, Baader, Chroma, and several other companies make filters capable of producing excellent results. The brand matters less than choosing the correct size and bandpass for your camera, telescope, sky brightness, and budget. Very narrow 3nm filters reject more unwanted light, but they cost more and often require longer exposures than wider filters.
For a color camera under city skies, a dual-narrowband filter is my practical recommendation. For a monochrome camera, H-alpha is the best place to start because it is the strongest signal in this object. OIII is valuable for color contrast, but it generally needs more care and exposure time.
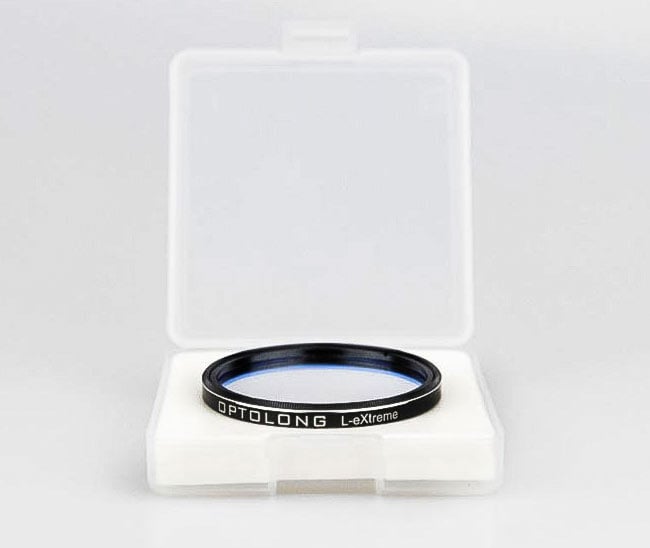
For nebula photography from the city with a color camera, a dual-narrowband filter like the Optolong L-eXtreme filter is a great choice.
Suggested Camera Settings
There is no universal exposure length for the Wizard Nebula. The right setting depends on focal ratio, filter bandwidth, camera gain, sky brightness, and whether your mount can guide consistently. The goal is to expose long enough that the background signal separates from the left edge of the histogram without saturating large numbers of stars.
| Imaging Setup | Practical Starting Point |
|---|---|
| DSLR or mirrorless, broadband | 60–180 seconds at ISO 800–1600 |
| Cooled color camera, broadband | 60–120 seconds at the camera’s common deep-sky gain |
| Color camera, dual-narrowband | 180–300 seconds |
| Mono camera, 5–7nm filters | 180–300 seconds per sub-exposure |
| Mono camera, 3nm OIII/SII | 300 seconds can be useful when guiding and conditions allow |
These are starting points, not rules. With today’s low-read-noise cameras, five-minute exposures are not automatically better than a larger number of shorter subs. I regularly use 60-second broadband exposures successfully. Longer narrowband exposures can make sense, especially for faint OIII through a tight bandpass, but only if tracking, wind, and star saturation remain under control.
For total integration time, aim for at least 3–5 hours with a sensitive camera and narrowband filter. Eight to 12 hours provides more freedom during processing, and a deep SHO image can benefit from 15 hours or more. Total exposure time usually matters more than whether each individual frame is 180 or 300 seconds.
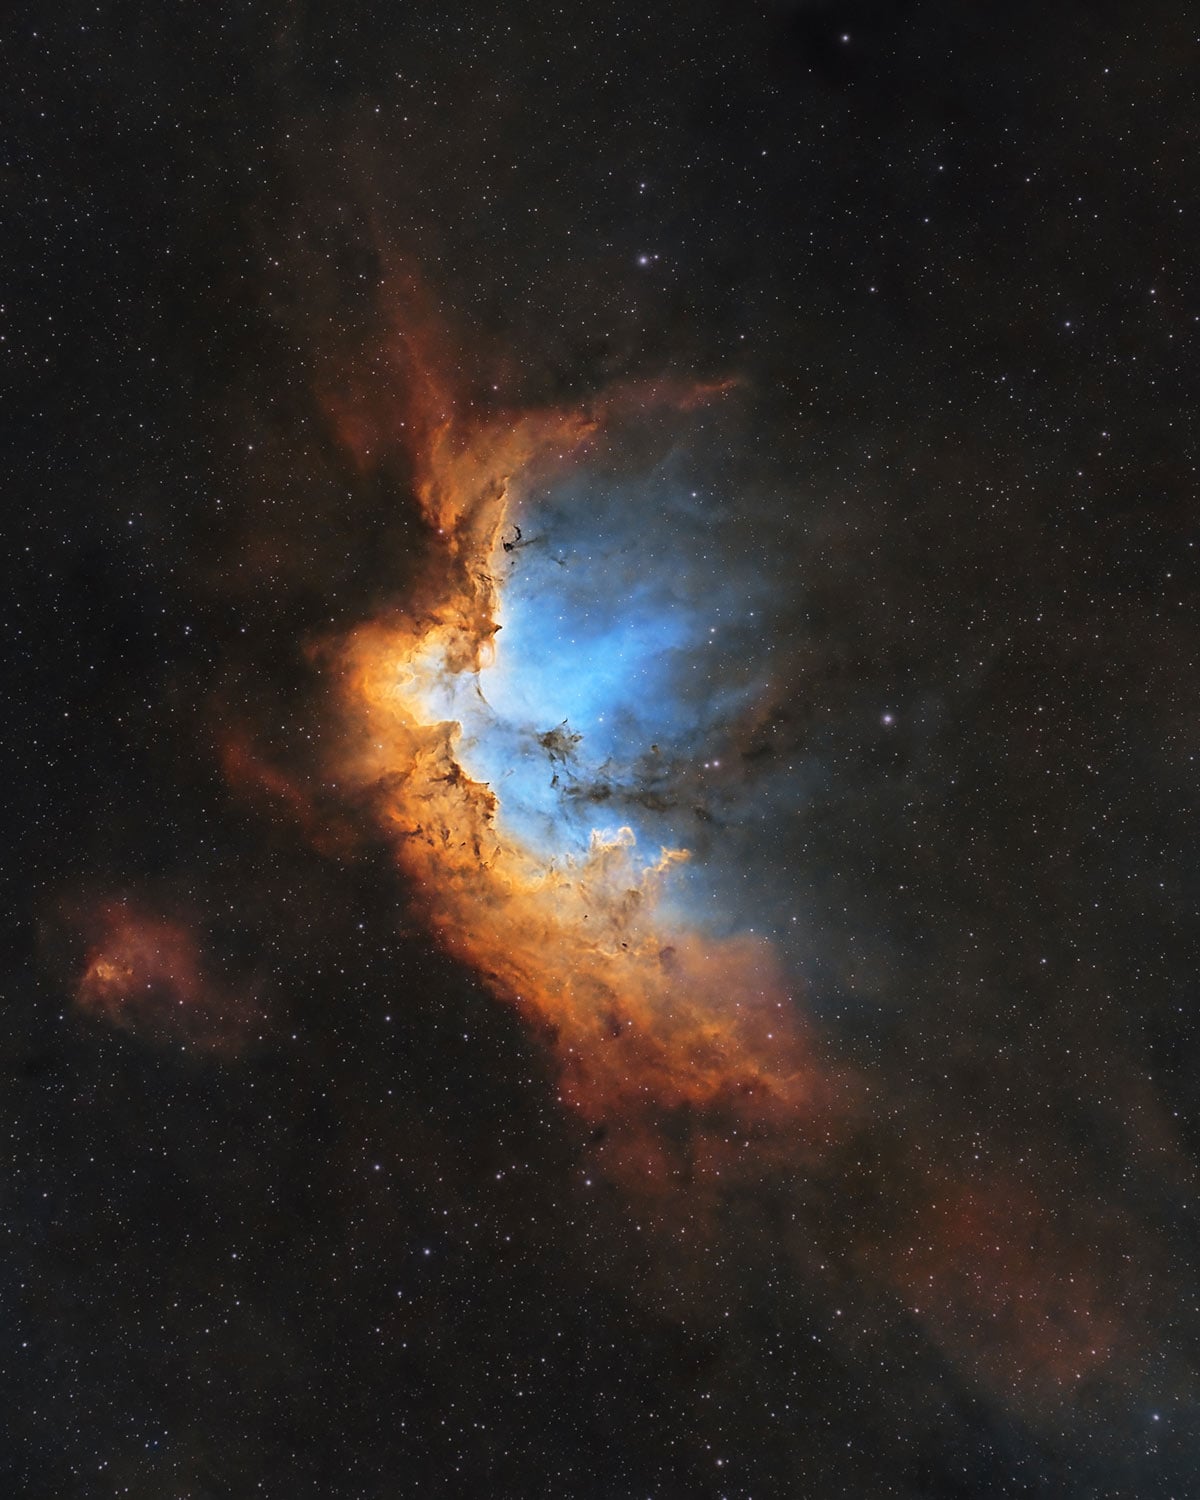
An image I took of the Wizard Nebula using a small refractor telescope (Apertura 75Q).
My Wizard Nebula Imaging Results
My first attempts at this target used a DSLR camera from the backyard. I poured many hours into the image, but the result was discouraging because the red nebulosity barely separated from the bright sky background. That experience taught me that simply extending the integration is not always the most efficient answer. Matching the filter and camera to the target can make a much larger difference.
I later revisited the Wizard Nebula using a more sensitive deep-sky camera and added dedicated H-alpha data. The broadband frames supplied natural star color, while the narrowband layer strengthened the shape and fine structure of the nebula.
- RGB data: Captured through a 2-inch Explore Scientific UHC filter
- H-alpha data: Captured through a 2-inch Astronomik 12nm H-alpha filter
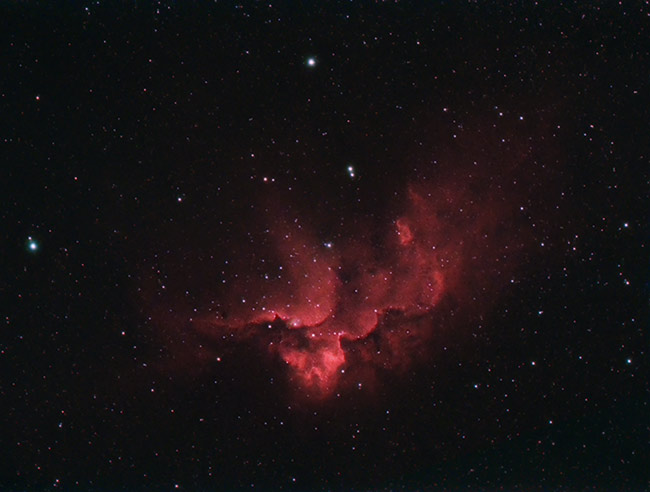
An earlier HaRGB image of the Wizard Nebula using dedicated H-alpha data.
This HaRGB approach was an eye-opening step in my progression as an astrophotographer. It allowed me to keep believable broadband color while using H-alpha as a high-contrast detail layer. It remains a useful strategy for emission nebulae when you want a more natural-looking result than a fully mapped narrowband palette.
My more recent image used the 8-inch f/4 CarbonStar 200 Newtonian and a monochrome camera. The longer focal length resolved the pillars and dark lanes, while the SHO filters separated sulfur-II, hydrogen-alpha, and oxygen-III. With roughly 18 hours of data, I had enough signal to reveal the faint outer regions without forcing the background.
A Practical Capture Workflow
- Plan the framing. Enter NGC 7380 and your exact telescope and camera into a field-of-view calculator. Decide whether you want the entire complex or the detailed central Wizard.
- Choose a high-altitude window. Prioritize the hours around culmination and avoid imaging the target through trees, haze, or the brightest part of a light dome.
- Polar align and guide. Good tracking produces smaller stars and protects the fine edges of the dust pillars. Dither between frames to reduce fixed-pattern noise.
- Plate solve the composition. A raw sub may show little more than stars, especially through OIII. Plate solving removes the guesswork and makes multi-night framing repeatable.
- Check focus regularly. Late-summer and fall temperatures can change quickly. An electronic focuser is helpful, but a Bahtinov mask and scheduled manual checks can also work.
- Inspect the histogram and stars. Make sure the background is not clipped and that your brightest stars are not unnecessarily saturated. Adjust the exposure rather than copying a setting from a different sky or telescope.
- Collect calibration frames. Use dark, flat, and bias or flat-dark frames appropriate to your camera and calibration workflow.
- Build integration time. Keep only sharp, well-tracked frames. Several clean nights combined together will outperform one noisy marathon session.
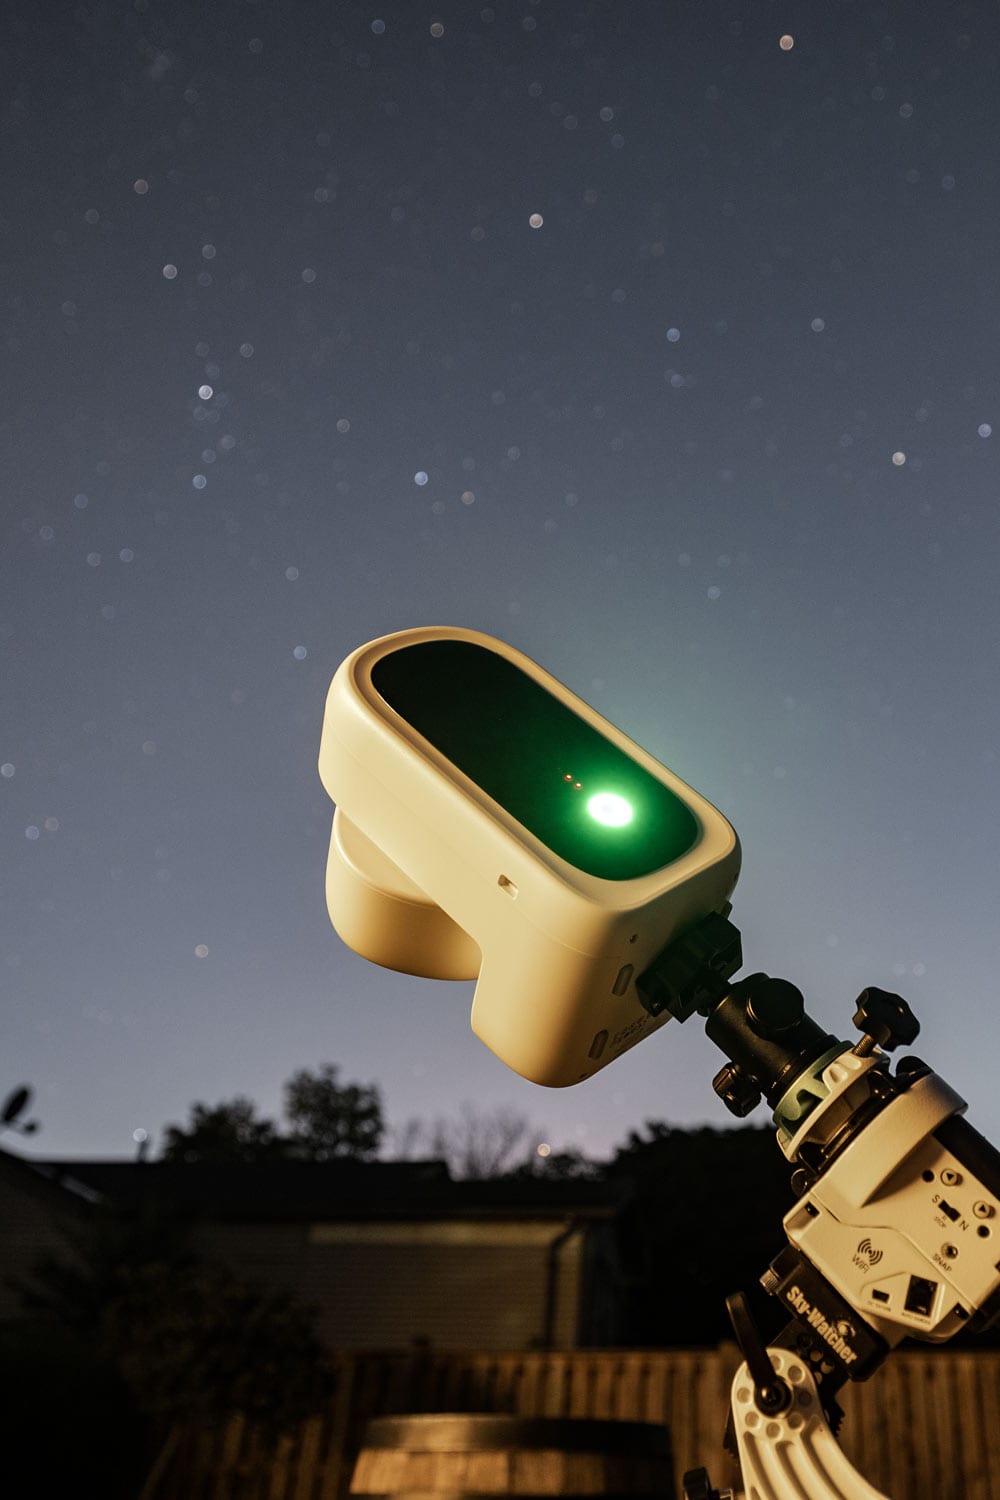
A smart telescope like the Seestar S50 Pro is a practical way to photograph the Wizard Nebula from the city.
Processing the Wizard Nebula
I currently process my deep-sky images primarily in PixInsight and Photoshop. The exact sequence changes with the data, but my Wizard Nebula workflow follows the same general structure I use for other narrowband emission nebulae.
- Calibrate, register, and integrate the frames. I use WeightedBatchPreprocessing in PixInsight and inspect each master before moving forward.
- Correct gradients carefully. Cepheus contains real background dust and faint emission, so aggressive gradient removal can erase actual signal. A starless image often makes it easier to distinguish a smooth light-pollution gradient from real structure.
- Apply linear corrections such as deconvolution or BlurXTerminator and noise reduction before stretching, using conservative settings.
- Separate stars and nebula when useful. Processing the starless data independently gives me more control over contrast and saturation without bloating the star field.
- Combine the channels. For SHO, I map SII to red, H-alpha to green, and OIII to blue, then rebalance the strong green contribution. For HaRGB, I blend H-alpha into the red channel or use it selectively as detail.
- Stretch gradually. Protect the bright central region while lifting the faint outer nebula. Small Curves adjustments are safer than one extreme stretch.
- Restore controlled stars. I preserve star color, reduce their dominance if needed, and blend them back without allowing dark halos around the bright stars.
PixInsight is my main calibration and technical processing tool, while Photoshop remains excellent for final Curves, Levels, Camera Raw adjustments, and small color refinements. Other software can work too, but Sequator is designed mainly for aligning tracked or untracked nightscape images and is not my first choice for a guided, multi-channel Wizard Nebula project.
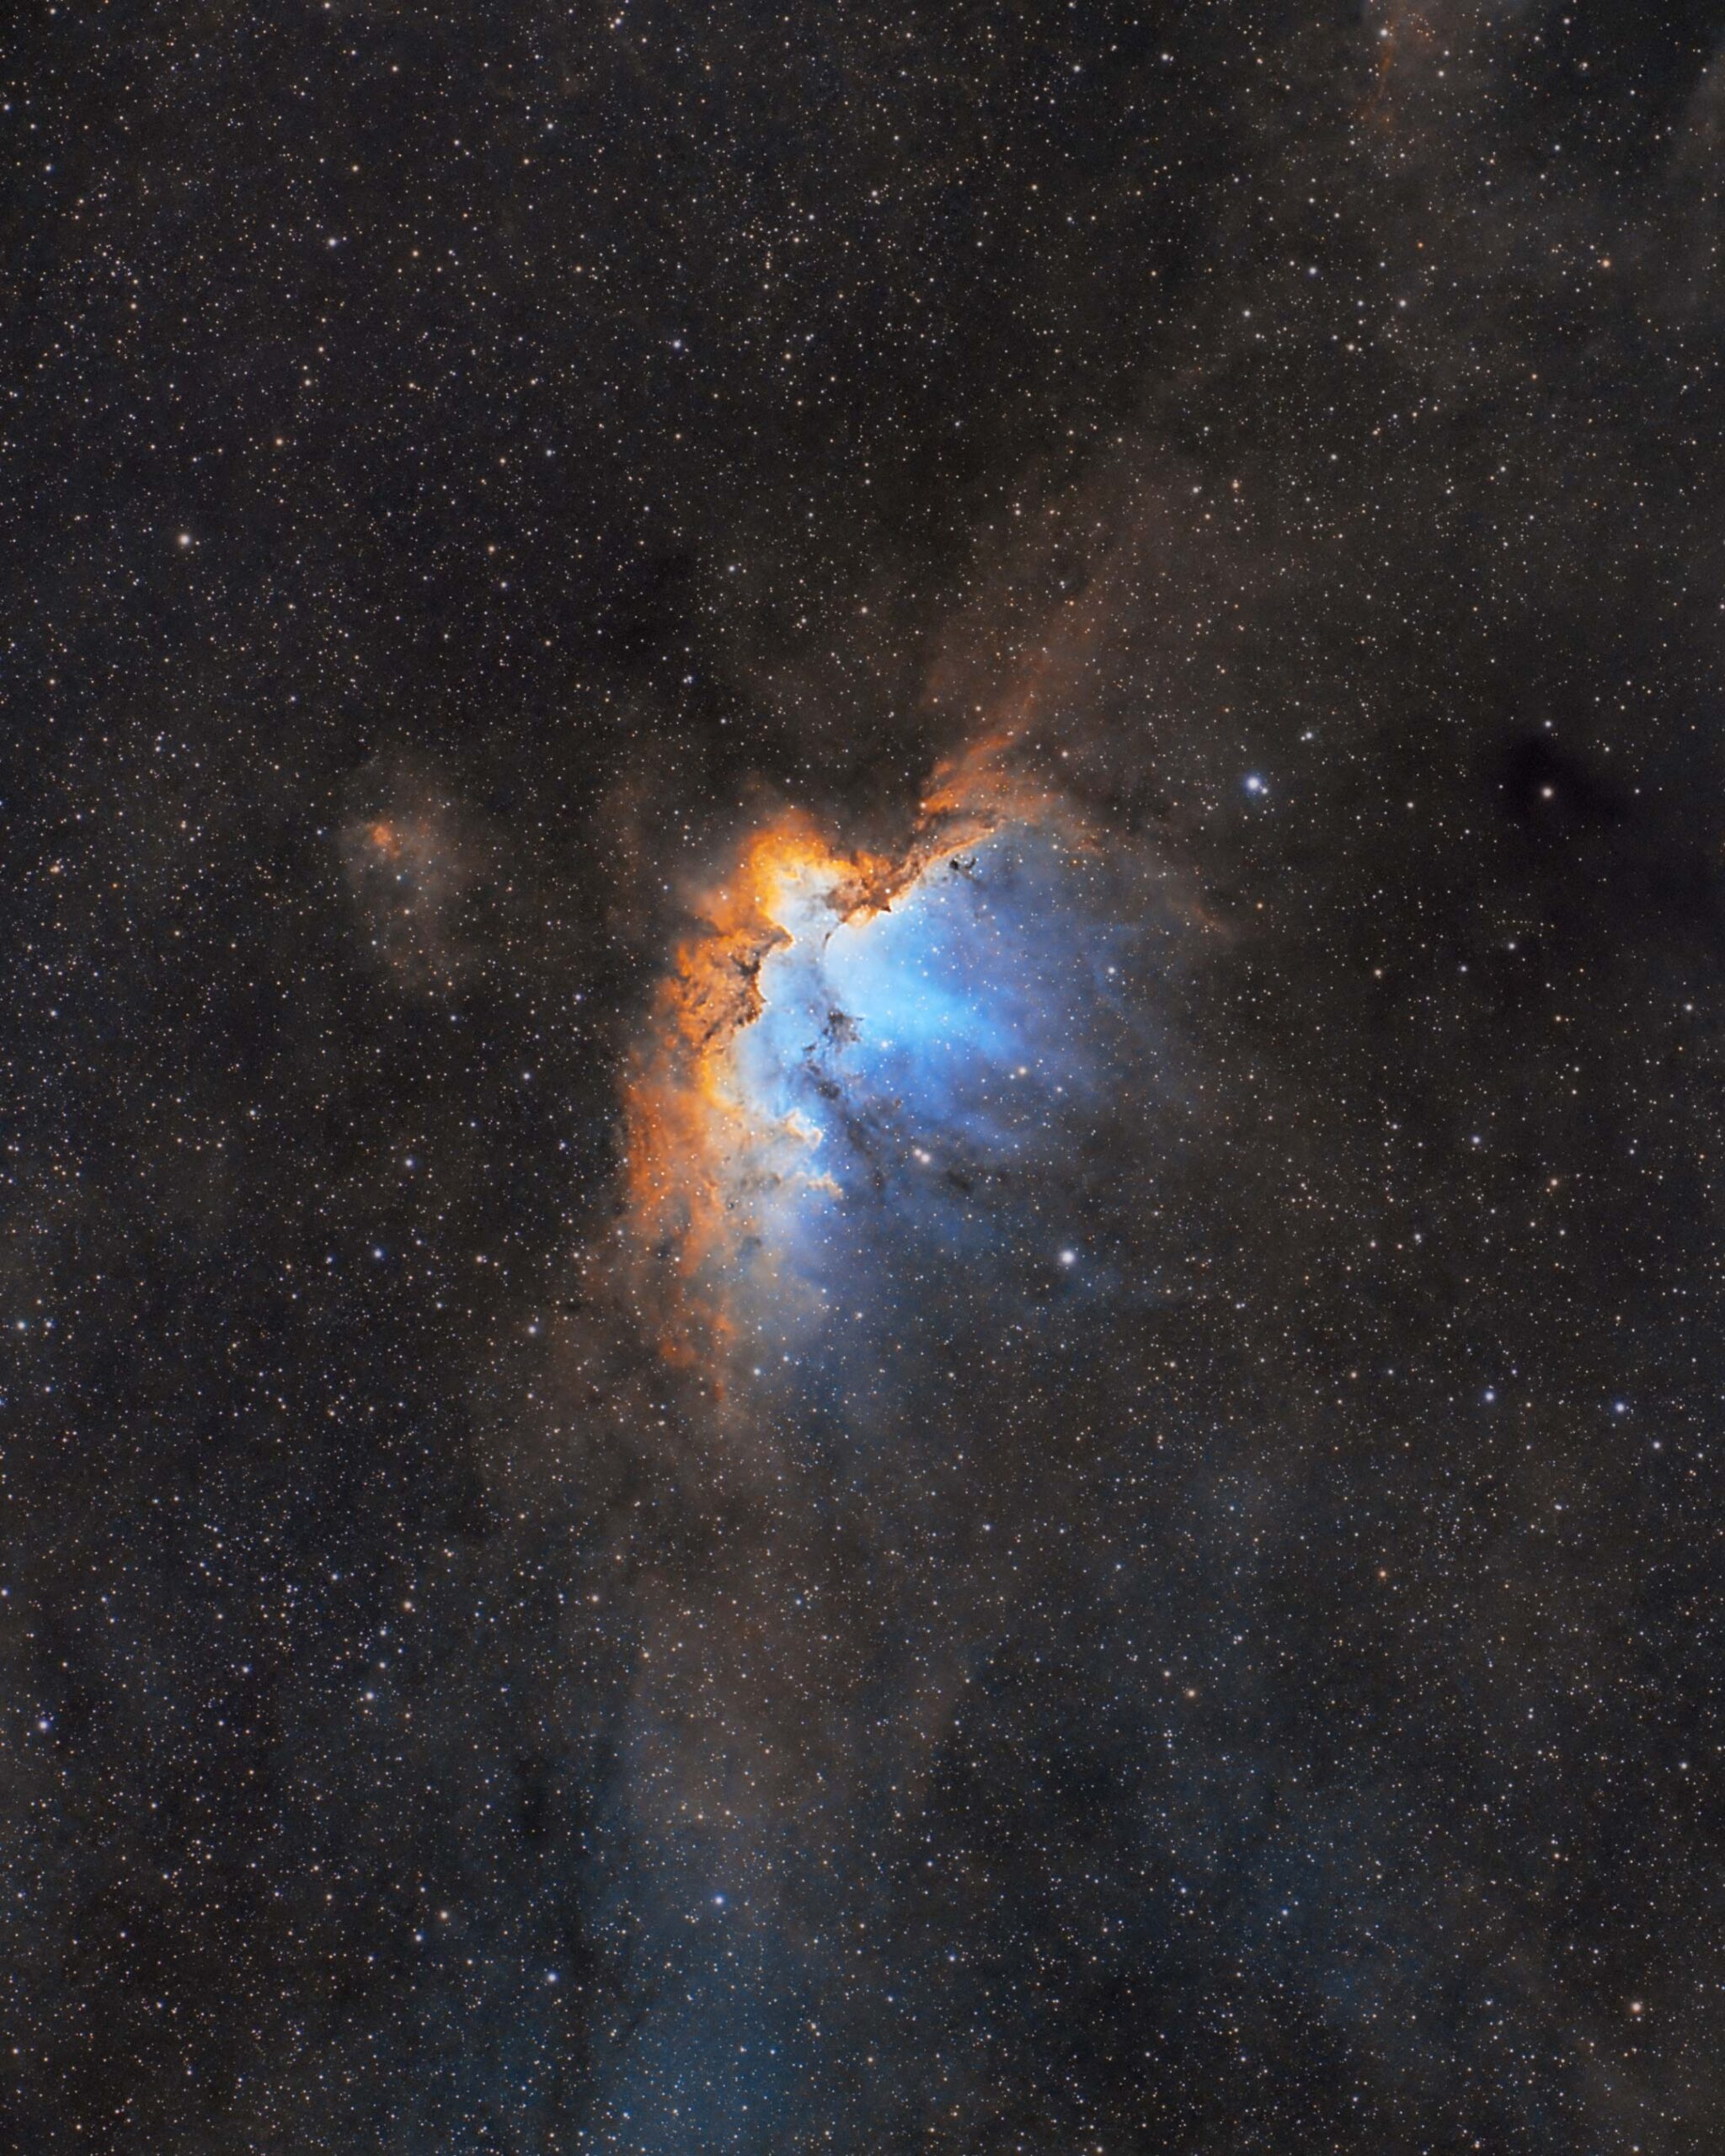
The Wizard Nebula in the Hubble Palette (SHO). Photo by Trevor Jones.
Common Mistakes to Avoid
- Expecting the nebula to look bright in a test exposure: A single sub may appear underwhelming. Apply a temporary screen stretch before assuming the target is missing.
- Using the magnitude as a visibility guide: The commonly quoted magnitude describes the cluster, not the surface brightness of Sh2-142.
- Choosing focal length without checking the sensor: The same telescope creates very different framing on full-frame, APS-C, and smaller sensors.
- Collecting too little OIII: H-alpha often dominates this target. Equal exposure time in each channel does not guarantee equal signal-to-noise ratio.
- Stretching weak data too hard: This creates blotchy backgrounds and exaggerated color. More integration time is usually the cleanest solution.
- Removing real background signal: Cepheus is rich in faint dust and emission. Use restrained gradient correction and compare the result with a sky survey.
- Ignoring star color: Narrowband combinations can leave stars strongly magenta or green. Separate RGB star data is the cleanest solution when natural star color matters.
- Over-sharpening the pillars: The Wizard has dramatic edges, but pushing local contrast too far creates crunchy detail and dark halos.
Frequently Asked Questions
Why is it called the Wizard Nebula?
Dark dust lanes surrounded by glowing gas resemble a wizard with a pointed hat and flowing robes. The figure is easier to recognize in deep, high-contrast photographs and may appear sideways or upside down depending on the image orientation.
Where is the wizard in the Wizard Nebula?
Look near the brightest central ridge and rotate the image until the narrow dark pillar resembles a pointed hat. The surrounding arcs of emission form the face, arm, and robe. Some people see it immediately, while others need the outline pointed out first.
Are NGC 7380 and Sh2-142 the same object?
They are connected but not technically identical. NGC 7380 is the embedded open star cluster. Sh2-142 is the surrounding emission nebula, or H II region. “Wizard Nebula” is commonly used for the complete scene.
How far away is the Wizard Nebula?
It is approximately 8,000 light-years from Earth. Published estimates vary, so values between roughly 7,000 and 8,500 light-years are common.
Can I photograph it with a DSLR?
Yes. A modified DSLR records the nebula’s H-alpha emission more efficiently, but an unmodified camera can still capture the target from a dark sky with enough total exposure time. Use accurate tracking, a fast optical system, and plenty of stacked frames.
Can I photograph the Wizard Nebula without a filter?
Yes, especially under dark skies. Broadband data can produce natural star color and a pleasing red nebula. Under heavy light pollution, a dual-narrowband filter will usually reveal the structure much more efficiently.
What is the best filter for NGC 7380?
For a one-shot-color camera in light pollution, a dual-band H-alpha and OIII filter is the most practical choice. For a monochrome camera, start with H-alpha and add OIII and SII if you want a full narrowband color image.
How much exposure time does the Wizard Nebula need?
Three to five hours can produce a satisfying result with a fast telescope and narrowband filter, but eight hours or more makes the faint outer nebulosity easier to process. My deep SHO image used roughly 18 hours of total integration.
Final Thoughts
The Wizard Nebula is a target that rewards patience. It can be frustrating with an unmodified camera under city lights, but the right filter transforms it into a detailed network of pillars, dust, and glowing hydrogen.
If you are photographing it for the first time, keep the setup simple: frame NGC 7380 at a manageable focal length, start with H-alpha or a dual-narrowband filter, and focus on accumulating clean data. You do not need the largest telescope or the longest individual exposures. A reliable mount, careful focus, and several hours of well-calibrated images will take you much farther.