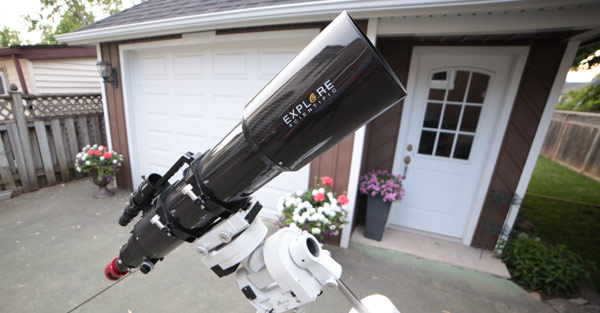
The Explore Scientific ED140 Apo Refractor
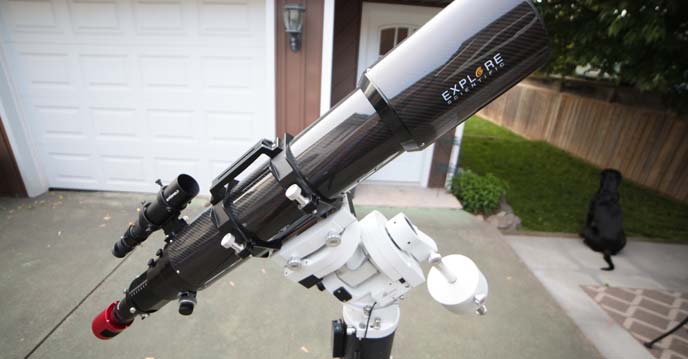
I am thrilled to tell you that I recently got my hands on a brand new Explore Scientific ED140 CF APO Triplet Refractor. If you’ve been following AstroBackyard for some time now, you’ll know how I feel about APO refractors in terms of astrophotography performance.
The refractor telescope design has many unique advantages when it comes to deep sky astrophotography. Specifically, an air-spaced triplet apochromatic optical design will share many of the same characteristics you’ll find on a high-end telephoto camera lens. The biggest difference is – they usually reach much further. (The ED140 has a focal length of 910mm)
The Explore Scientific ED140 CF
I won’t tell you that you need a 140mm refractor to enjoy deep sky imaging, because that’s simply not true. Instead, look at my experiences with this telescope as a window into the possibilities that await you in the future. By the time you have outgrown your little astrophotography telescope, maybe you’ll consider stepping up to the stunning Explore Scientific ED140 triplet apochromatic refractor.
I met up with the team at Explore Scientific last month at NEAF – and they asked if would try out their new ED140. Would you turn an opportunity like that down?
I didn’t.
In the video above, you’ll see me use the ED140 to capture a deep sky astrophotography image from my backyard. I decided to choose a target that could be completed in one night, using a one-shot-color camera. The great globular cluster in Hercules (M13) is a fitting choice for an incredible telescope like this, and the first globular cluster I’ve ever shot on my YouTube channel.
The Apochromatic Refractor Advantage
Before I get into the details of this giant APO, I’ll provide a little bit of backstory.
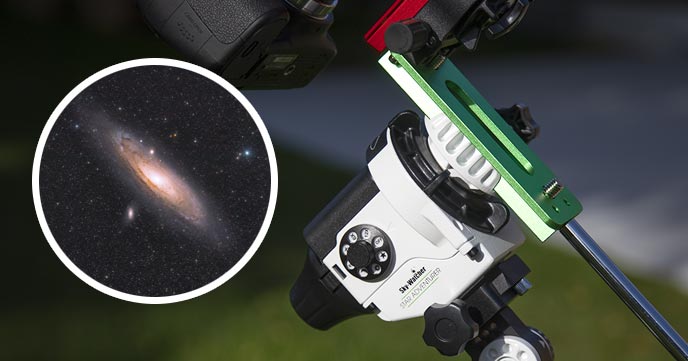
Back in 2011, I started using an Explore Scientific ED80 F/6 refractor. For many years, I was thrilled with the images I was taking using the ED80 and a DSLR camera. If you like shooting wide-field targets such as the North America Nebula, the Andromeda Galaxy or the Pleiades, a small apochromatic refractor telescope like this is a superb choice.
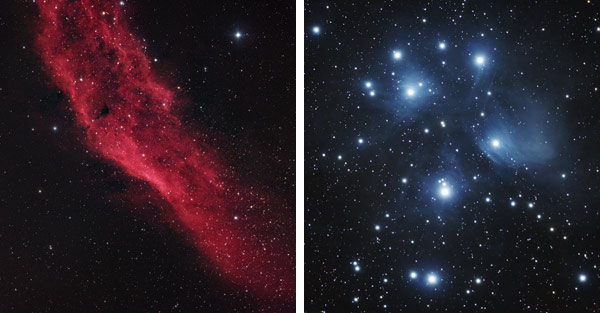
My early deep sky images using an Explore Scientific ED80 Triplet APO.
The only thing you’ll be missing out on with a small telescope of this size is the visual observing power and increased magnification that comes with an instrument with a larger aperture. A refractor in the 60-100mm range generally offers an extremely wide field of view, which is great most of the time.
If your primary interests lie in objects that require high magnification and light-gathering ability such as planets, you may want to think about a larger telescope. Photographing small galaxies, globular star clusters and solar system targets are not a small APO’s strong points.
The lack of chromatic aberration, coma or need for constant collimation make the refractor design my absolute favorite type of telescope design when it comes to deep sky astrophotography. However, to get the extra light gathering power found in larger telescopes, expect to pay a lot more per inch of aperture.
An F/6.5 Carbon Fiber Monster
A large refractor like the Explore Scientific ED140 not only offers the image quality and performance APO owners expect but also the reach and resolving power needed to capture planets and smaller deep sky objects. 5.5″ inches of aperture gives you the light-gathering power needed to soak in the delicate fine details of objects in space.

The carbon fiber tube of the ED140 is lightweight and strong
In my opinion, you can’t fully appreciate the additional aperture from a telescope like this without gradually working your way up in size. As I mentioned, I’ve had the pleasure of taking astrophotography images with many sizes of refractor telescopes – everything from a 61mm telescope to a 132mm. This has given me with some practical perspective about the difference extra aperture makes when it comes to astrophotography.
The Explore Scientific ED140 CF Triplet APO now holds the title of the absolute biggest refractor telescope I have ever used for astrophotography.
Core Specs:
- Focal Length: 910mm
- Focal Ratio: f/6.5
- Tube Length w/ Dew Shield: 991mm
- Diameter: 140mm
- Weight: 21 lbs
- Dovetail: Vixen

First Impressions
The first thing I noticed when I picked up the box, was how light it was. The Explore Scientific ED140 is noticeably light for its size, no doubt due to its carbon fiber construction. Despite being 8mm wider in aperture, this telescope is roughly the same weight as the William Optics FLT 132. The Carbon fiber tube doesn’t sacrifice strength for a lighter payload either. This versatile material is extremely strong and is also said to compensate for temperature fluctuations better than a steel tube.

With my gear staying outside in a non-insulated garage – I’ve never really had any issues waiting for my telescopes to cool down/warm up. However, I understand that this is something to consider for many amateur astrophotographers. I’m a big fan of the way this telescope looks, and not just because it matches my ED102. For those that appreciate aesthetics, the finish on this instrument is a real head-turner at star parties.
What’s Included?
As I have mentioned in the past, the accessories included with astrophotography telescope packages vary widely. Some will include everything from a dedicated field flattener to the guide scope, while others may not even include the mounting hardware and sell the optical tube on its own.
The Explore Scientific ED140 F/6.5 APO Triplet includes some impressive extras in their standard package.
Heavy Duty Carry Case
The first thing you’ll notice when you take this giant telescope out of the box is that it comes with a heavy-duty hard carry case. This looks identical to the case that came with my Explore Scientific ED102 CF – which has come in very handy when traveling with the scope. This case was rugged enough to get packed into my trunk with lots of heavy camping gear on top.
The carry case comes with a thick padded-foam insert that holds the ED140 securely. For those planning on traveling with the ED140 – this case is TSA approved.

The hard carry case is heavy duty and TSA approved
2″ Diagonal for your eyepieces
The ED140 telescope includes an Explore Scientific branded 2″ diagonal in the hard carry case. A diagonal reflects the image through the telescope on a 90-degree angle to provide a more comfortable experience using an eyepiece. This is an essential accessory for anyone who plans on using this telescope for visual use.
I have only ever used one diagonal before this one, and it was also an Explore Scientific “99% reflective” model. I must admit, I have not taken the diagonal out of the case yet, nor have I used the Ed140 for any visual observations yet.
In terms of visual performance, the large aperture and fast focal ratio (F/6.5) of this telescope mean that impressive views of both deep-sky objects and solar system objects are possible under the right sky conditions.
It’s not clear how long I’ll have this telescope for, but I’d love to test it out under the dark skies of Cherry Springs State Park next month.
Heavy-duty 3″ Hexagonal focuser
The 3″ hexagonal focuser is big and rigid, which is what you’d expect on a telescope of this size and price point. No doubt, most will use the ED140 will primarily be used for astrophotography, so it’s reassuring to know that Explore Scientific rates this focuser at a 10-lb payload. My camera gear is nowhere near that weight, but owners of large CCD cameras and filter wheels will appreciate this payload rating.
With the ZWO ASI294MC-Pro camera attached, I was easily able to find focus using this ultra smooth 10:1 dual speed focuser. Once locked, there is no “play” in this focuser. Meaning, no surprises while imaging due to the focuser shifting or jarring the camera.
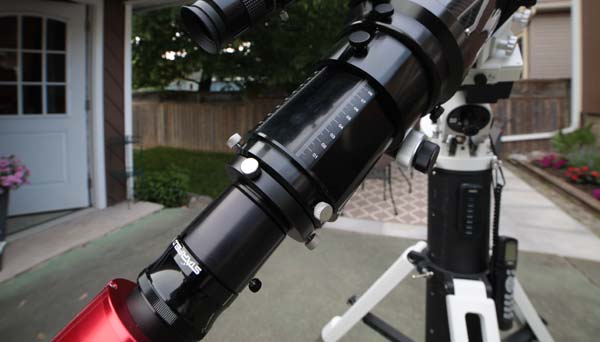
The 3-inch dual-speed hexagonal focuser on the ED140 is solid
Cradle Ring with Handle and Dovetail
Mounting the ED140 is easy due to the included cradle rings and Vixen-style dovetail plate. I really like this design, and it’s the same mounting style used on the 102mm version. Aside from making the telescope easier to manage, the handle portion is a great spot to mount an additional finder scope, center the guide scope, or attach a ball head and camera lens.
In the past, I’ve mounted a DSLR camera and heavy 300mm F/4L lens to the handle of the cradle rings. The 1/4″ channel running through the middle makes it easy to fasten additional gear to it.

The included cradle rings for the Explore Scientific ED140
Integrated Dew Shield
The integrated dew shield is large and stays secure. It’s quite stiff and tight, which I like. I can be confident that the dew shield will not slowly slip down the tube when the telescope is pointed upward.
Essential Astrophotography Accessories
Recommended Field Flatenner/Reducer
Currently, there is no dedicated field flattener for the ED140 APO. The team at Explore Scientific has assured me that a dedicated flattener/reducer will be available for this telescope soon. I plan to try out my 2″ StarField 0.8X flattener/reducer on this telescope to see if it’s a good fit.
Adding a Guide Scope
Upon opening the locking case, you may notice a lack of finder/guide scope with this package. I feel that most folks looking to upgrade to the ED140 CF will already have an existing guide scope, so it wouldn’t make sense to pay for another one as a part of this package.
Thankfully for me, the ED140 came with a pre-installed base (saddle) for a finder/guide scope. This means I don’t have to look for any additional mounting rings or add any extra hardware to the scope.
I’ve been able to use the Explore Scientific finder scope mount from my ED102 on this telescope. If you don’t already own this specific style of mount, you’ll need to order one. It’s a bit different than a traditional Synta-style saddle that you’ll find on the Orion branded products.
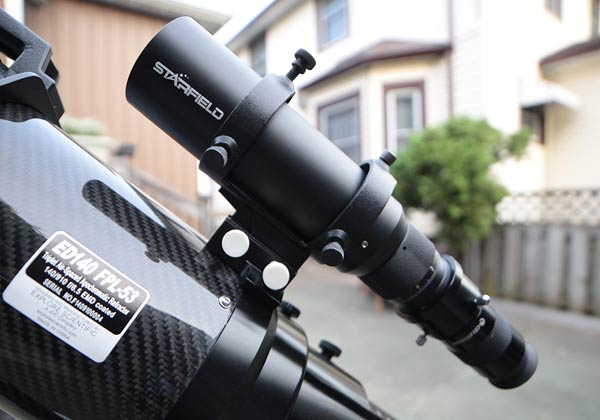
The 50mm Starfield Guidescope is a great match with the ED140
Inside this mount, I’ve installed a 50mm Starfield guide scope. This is a compact, lightweight and wide field guide scope that pulls in numerous guide stars for autoguiding purposes. Ontario Telescope sells this guide scope as a package with the Altair GPCAM2 camera, making for a very convenient and complete autoguiding combo.
50mm Starfield Guidescope Complete Autoguiding Package
I haven’t talked about the StarField guide scope I’ve been using a lot lately, but I will in the near future. I will say that I’ve got 50 and 60mm versions that both do an excellent job of autoguiding when used with the Altair GPCAM2 mono guide camera.
About the Ohara FPL-53 Glass
The most impressive feature of this refractor has to be the Ohara FPL-53 extra-low dispersion ED glass used in its triplet optical design. This is a top of line material and considered the best glass ever produced by Ohara.

The company mentions that the FPL-53 glass used in the Explore Scientific ED140 is very similar in characteristics as Hoya FCD-100. I’ve received numerous questions about the differences between the FCD-100 versions of the Explore Scientific telescopes and the original Hoya extra-low dispersion glass versions.
My ED80 and ED102 both used the original Hoya glass, and making a defined difference in image quality between these telescopes and FPL-53 is difficult. A refractive index comparison is needed to tell the subtle differences in these materials.
The bottom line is, the glass used in the Explore Scientific Triplet series APO’s have always produced incredible astrophotography images, and now they’re better than ever. FPL-53 is perhaps the finest glass you’ll find in a refractor telescope with characteristics closely related to pure fluorite.
The Meade 70mm Quadruplet APO and the William Optics Z61, Z73 and FLT 132 all use FPL-53 as well. This is a true diffraction-limited optical design that virtually eliminates chromatic aberrations and produces high-contrast images. This Explore Scientific telescope also utilizes proprietary EMD enhanced multi-layer coatings on all optical surfaces.
A versatile astrophotography workhorse
The focal length of the ED140 is 910mm. So, a great mid-range magnification at prime focus, perfect for most nebulae and the larger galaxies. My favorite emission nebula targets such as the Omega Nebula and Lagoon Nebula are the perfect size for this focal length.
The lack of a dedicated field flattener/reducer at this time means that I am forced to find a workaround if I want sharp stars to the edge of the field. My crop-sensor (APS-C) sized DSLR and astronomy cameras (ZWO ASI294MC-Pro, Altair Hypercam 183M) have relatively small sensors, so this is less of an issue. Full-frame camera owners looking to utilize the full imaging sensor size will definitely need a solution from Explore Scientific to fully enjoy this telescope.
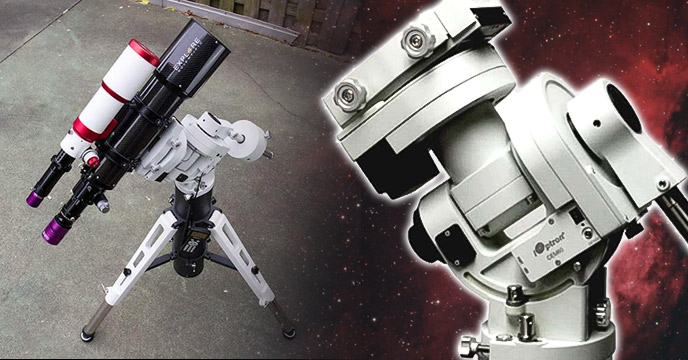
Mounting and Autoguiding
The ED140 is about 20 lbs, so a robust equatorial mount such as the iOptron CEM60 is needed to use a refractor of this size for deep sky astrophotography. During my first imaging run, I had tremendous success using the Starfield 50mm guide scope package for autoguiding.
Those looking for a plug-and-play autoguiding solution should certainly give the Starfield / GPCAM2 combo a look. Just remember that you’ll need an Explore Scientific style finder mount to attach it to the base.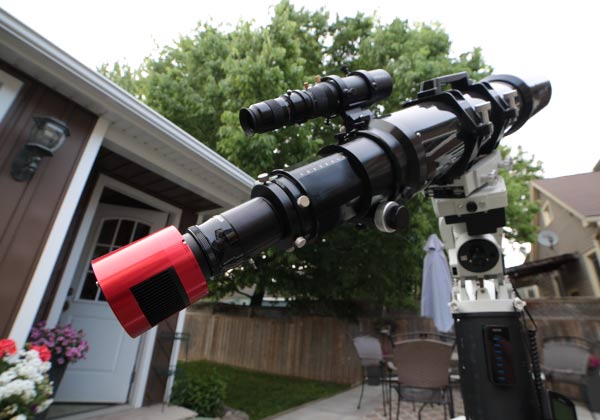
Final Thoughts
My “first light” with the Explore Scientific ED140 was a huge success, and that’s not always the case with a brand new telescope. This speaks to the reliable and painless experience a refractor telescope like this provides to amateur astrophotographers. The ZWO ASI294MC-Pro turned out to be a great fit with the ED140 – with only the very edges of my image frame showing elongated stars (even without the use of a field flattener).
The broadband RGB image of M13 I captured was a pleasure to process, and clearly showed the difference the added aperture makes when it comes to astrophotography. The combination of longer focal length and extra light-gathering power resulted in my best version of the Hercules globular cluster to date.
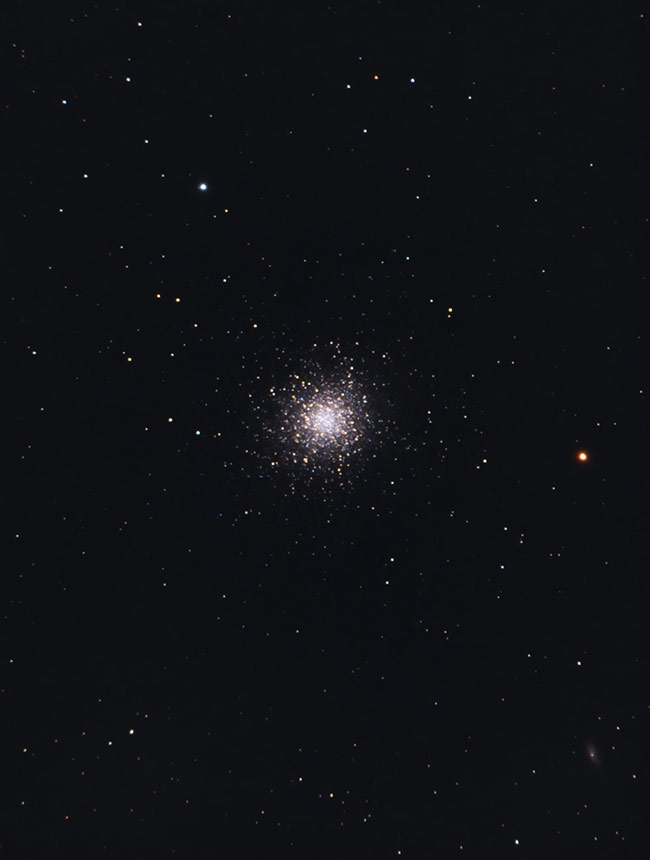
The Great Hercules Globular Cluster (M13) using the Explore Scientific ED140 CF
This image uses 2 Hours and 9 minutes (129 frames) worth of total integrated exposure time using a ZWO ASI294MC-Pro Camera.
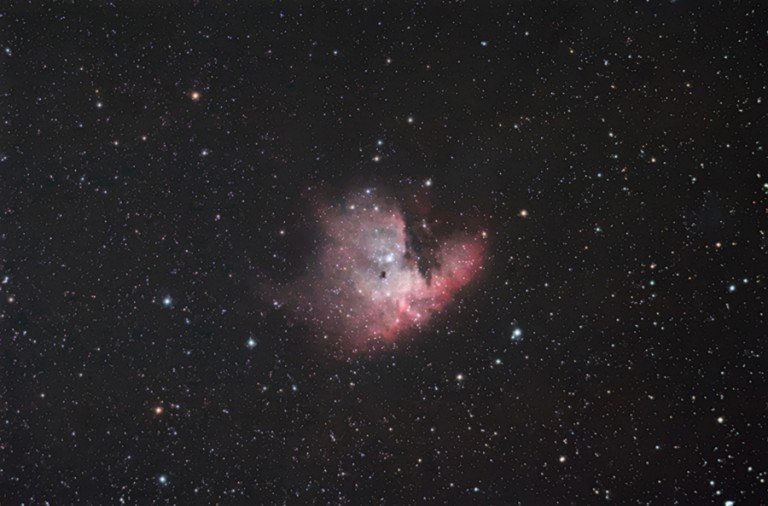
On June 15th, I captured the following image of the Trifid Nebula using the 140 under dark skies. For a behind-the-scenes look at the complete setup used for this photo, watch my video from the 2018 Cherry Springs Star Party

The Trifid Nebula using the Explore Scientific ED140 CF
This image uses 3 Hours and 3 minutes (61 frames) worth of total integrated exposure time using a ZWO ASI294MC-Pro Camera.
Hi,
I am photographer myself but not that much in to astro…. I do shoot astro at time using f2.8 lenses but never ever thought or tried to shoot using telescope….
Wonderful images … Hope to get an opportunity to capture galaxies and stars using telescope.
Hi I have great experiences of shooting Astro images but in groups.can you please help me in my astro setup for both deep space and planetary imaging under the budget of 3000$.being in India at my region I am capable of shooting the night sky but confused in buying the equipments.Hope you help me in time.
Thanks for the review. I am relatively new to astronomy and this really helped me both understand some basics and what to look for.
LIKE TO BUY THIS TELESCOPE
Great video,
What mount would you recommend for the ED102 CF ?
Thx
Steve
Another nice segment of astrophotography equipment trial runs. As always keep them coming.
What was the final outcome on the Field Flatenner/Reducer?