Astrophotography Image Processing Challenge
Here is an opportunity to have a crack at processing some data captured from my light-polluted backyard. The image download below is exactly 5 hours of integrated exposure time on the Soul Nebula.
The data for this photo was captured on November 14th, 2017 using a Meade 70mm Astrograph Quadruplet APO refractor.
This Meade Quadruplet APO provides an exceptionally flat field of view with an APS-C sensor DSLR, without the use of a Field Flattener. The focal length of this telescope was a great fit for this deep-sky object, when in use with a crop-sensor DSLR like the Canon EOS T3i.

Download my Unprocessed Data
The data is by no means perfect, and I am sure that it will be quite frightening to those who are accustomed to images taken with either a cooled camera or darker skies. Below you will find a link to the RAW image data that you can process using the image processing software of your choice.
Download > My Unprocessed Stack of the Soul Nebula
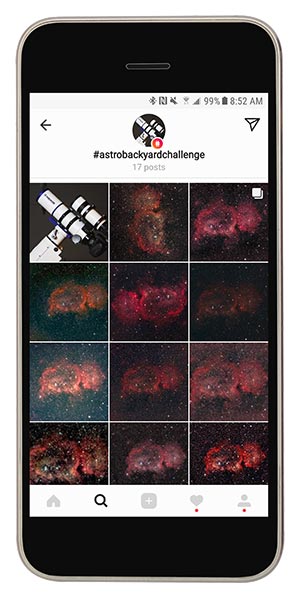
The file is very large (170 MB). Feel free to share your edit of the photo on social media, with the hashtag #astrobackyardchallenge.
Processing this image is a great way to hone your image processing skills in Adobe Photoshop, or whichever image processing software you happen to use. My goal is that someone can produce a much better image than I could with this raw data.
If you’re wondering what a typical deep-sky image starts out like, I created an in-depth post about what your images should look like after you capture them.
Image Processing Software Choices
One of the many joys of this hobby is the freedom to choose the software that you feel most comfortable using. For me, that’s Adobe Photoshop. Here are a few of the most popular options when it comes to processing an astrophoto:
Astrophotography Image Processing Tutorial (Video)
In the video below, I’ll walk you through the steps I take in Adobe Photoshop CC to produce my final version of the image. Feel free to download the RAW data and follow along for yourself.
About the image data:
The image is a 32 Bit .TIF file created in DeepSkyStacker. The image is comprised of 150 light frames, 15 darks, 15 flats, and 15 bias. The images were registered and stacked using Bilinear Interpolation, with the Black Point set to Zero.
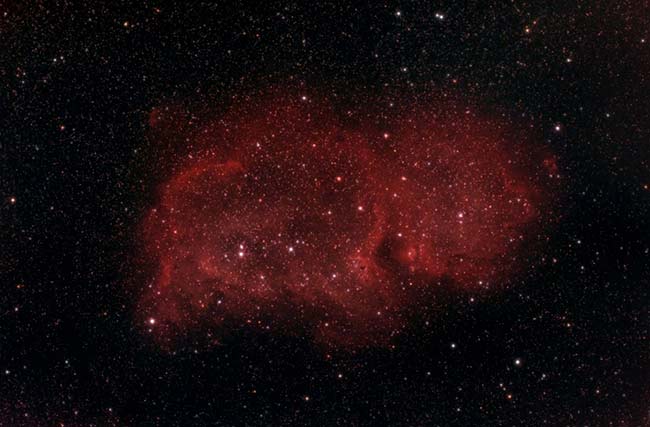
At this point, I have not attempted to process the image myself, so I don’t have a finished example yet. However, I have opened the file in Adobe Photoshop to confirm that it is useful data. This is a great example of how each of my astrophotography images begins when captured from my backyard.
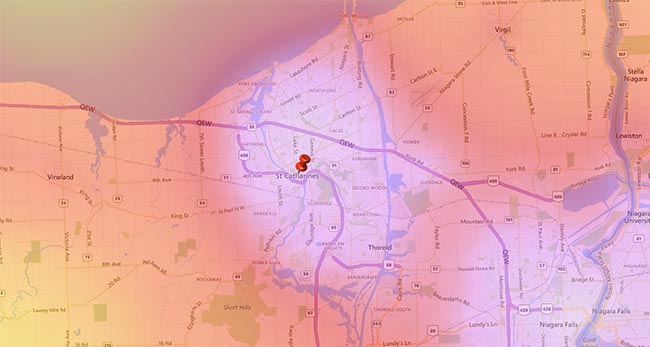
The Location this image was shot (St. Catharines, Ontario)
The images were shot in a red zone (Bortle 8) in the center of a city with a population of 150K. A light pollution filter used in my modified Canon EOS Rebel T3i (600D) was the SkyTech CLS-CCD. The exposures were 2 minutes each, at ISO 800.
The telescope was mounted to a Sky-Watcher HEQ5 Pro Equatorial Mount, and autoguiding was used for accurate tracking. The weather was cold (2°C), the transparency was average and there was 15% Illuminated in the Waning Crescent phase. It did not rise above the horizon during this imaging session.
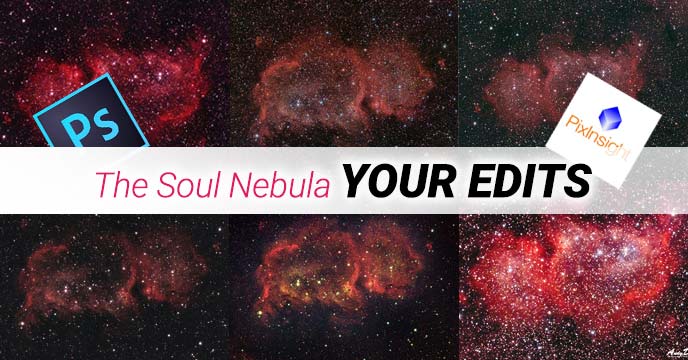
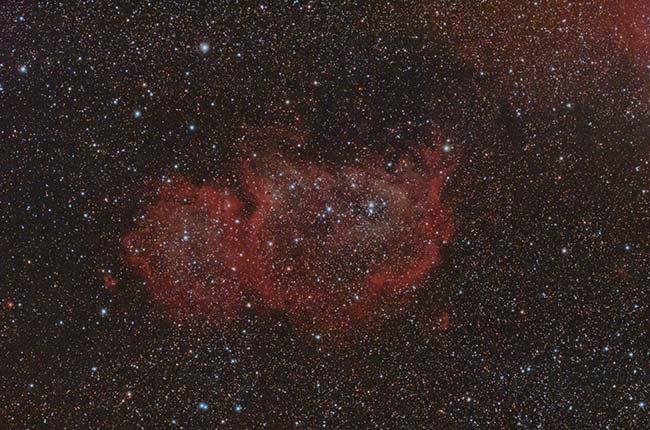
Your Edits of the Soul Nebula
The same data, processed using various methods and software
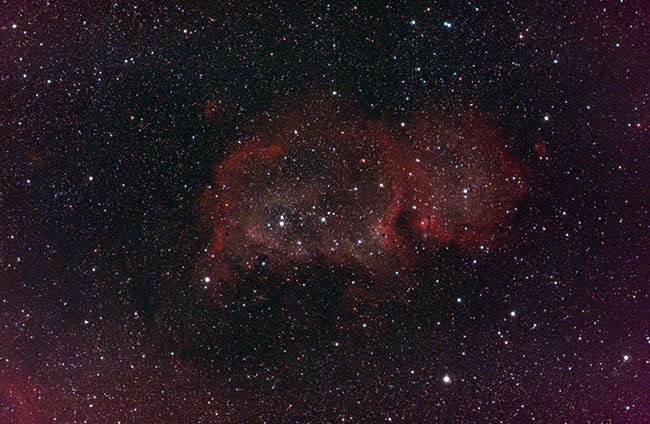
 The following images are versions of my data processed by followers of the AstroBackyard Facebook Page. Due to an overwhelming response of images, I have only shared the images posted to Facebook.
Also, I apologize that the images are so small! This blog simply wasn’t designed to host high-resolution images the way Astrobin or Flickr do. However, at this size, you should still be able to get a “bird’s eye view” of what the overall edit accomplished in portraying.
To find the rest of the images, just search #astrobackyardchallenge on Instagram and Twitter. The image processing notes provided are listed with each image. Thank you to everyone that participated in this project.
Mike Slater
Processing Comments:
Had a quick go! Very different to my usual process – I always moan about the sky at home, but that bortle seven is cruel! It’s been a little while since I did DSLR images so it was good fun to get some practice in again! Normally my images are underexposed and I stretched them the other way, so working with this data was interesting – I might try shooting to the right in my next project.
I used photoshop for all my processing – I haven’t yet bought any action sets so everything is done by hand here. First I converted to 16bit, then used the levels to set my black and then stretched.
I then did a minimal crop to prevent blurring the artifacts from DSS on the edges in the next stage. Next, I duplicated the copy to perform the subtract function to remove any possible gradients.Another stretch.
I then saw a few artifacts again – Namely a difference in the black floor on the background on the right-hand side. So I cropped heavily to the crop you see here. Then applied a star reduction using the color range tool. A few more stretches. A separate layer with the stars removed was used to enhance the nebulosity. Then blended the enhanced layer to show the amount of stars I wanted below. A contrast enhancement using the RGB curves individually. And that is about that.
I did enjoy seeing someone else’s dataset for the first time. Took me out of my comfort zone a little with that bortle 7. I certainly appreciate my skies a lot more now! Thank you for a fun challenge!
Jason Smith
Processing Comments:
PixInsight
Linear stage
———–
Screen stretch
Dynamic Crop
Automatic Background Extraction (skipped Dynamic Background Extraction due to time, but that would’ve been better)
Background Neutralization
Color Calibration
Stretched with Screen Transfer function to Histogram and saved as 16bit TIF
Non-linear stage
—————-
Opened stretched image with Topaz DeNoise 6 and ran RAW Lite setting with Adjust Shadow at .60 and resaved, reopened with PixInsight
Applied Luminance mask, inverted and made a curves adjustment to darken the background
Applied Star Mask and ran Morphological Transformation to reduce star sizes
A few masks/curves/saturation boosts
Unsharp Mask to sharpen
I probably should’ve done a Local Histogram Equalization, but I forgot. Challenges were the number of stars and a gradient on the right. Other than that, great data and turned out better than my 10 hour HaRGB monstrosity.

Neil Newby
Processing Comments:
A rather barbaric attack on this data, just to see how much light was really recorded. I have a long path to follow when it comes to processing data but am always up for the challenge.
I used a screenshot to show the image & the process tree on the right-hand side because I’m lazy! All process in Pixinsight no PS.
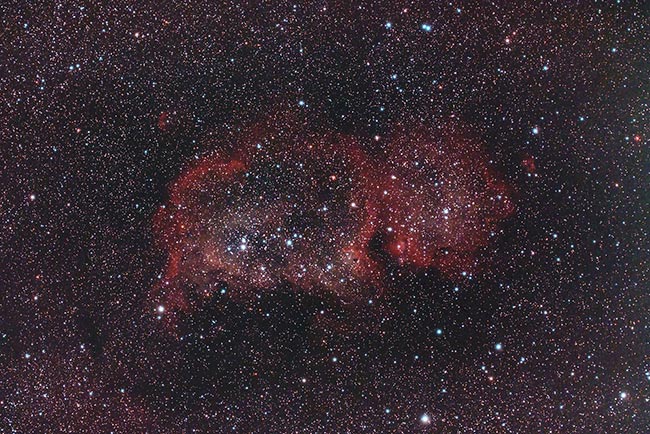
Connor Matherne
Processing Comments:
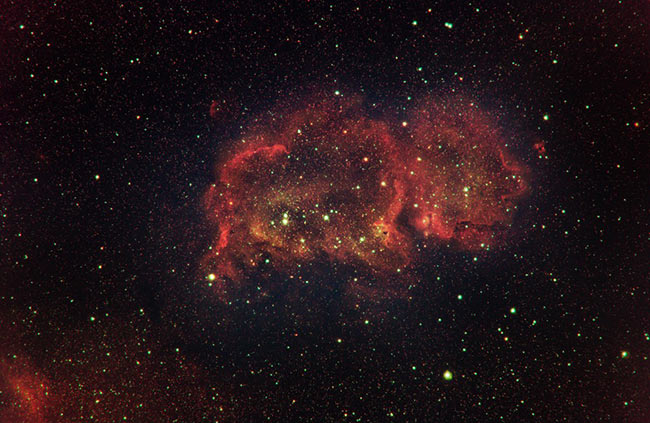
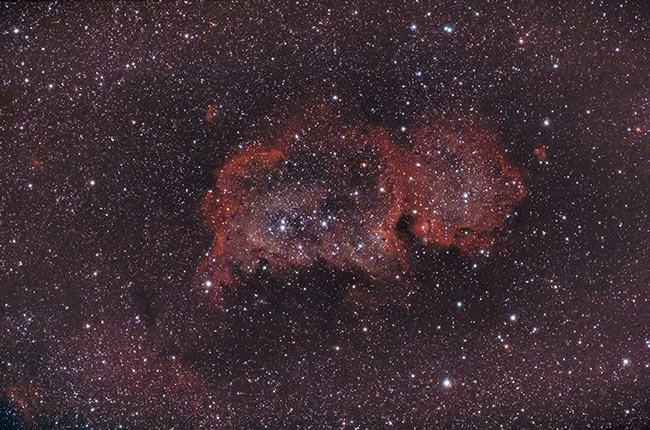
On a quest to prove that you don’t always need a modded camera That red in the upper right is actually from the Heart Nebula, you got a lot more faint dust than I think you realized! Great data set, lots of fun to work with.
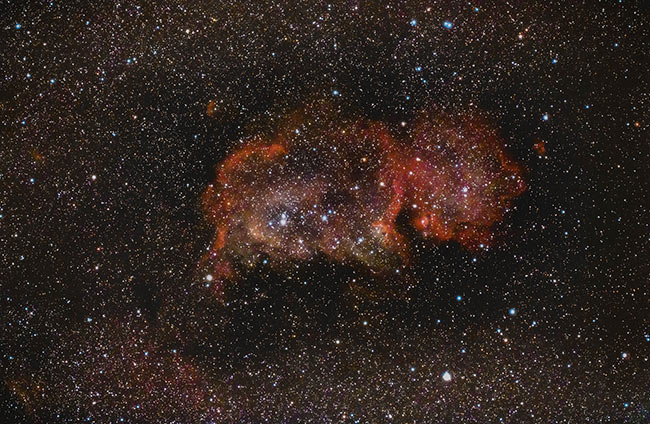
Jf-Fortin Monde
Processing Comments:
My try… PI and PS processing. Basics adjustment in PI, i.e. background extractor, background neutralization and color balance. Stretching and cropping. Extract luminescence and LRGB combination + saturation enhancement. Mask for nebulosity and HDR multiscale. After this initial process with PI, I continue in PS using multiple layers with a different kind of blending to reduce the noise, increase details, adjust colors and do fine tuning. The noise is very present in this raw picture, so it’s not easy to remove it without removing details or destroy some good data of the image.
Eric Cauble
Processing Comments:
Here’s my attempt. I used pixinsight and some photoshop trickery to get rid of some of the gradients in the corners. It looks good until you zoom in.
Phil Han
Processing Comments:
Took a quick go at this in PS and LR. Start a with a couple levels stretches before converting to 16bit. Cropped out the misalignment. Then a couple more mild mid-range curves stretching. Went to channels and separately adjust levels for contrast. Then back to curves for RGB and each for more contrast. Moved to LR for sharpening and luminance noise reduction. Small shift on CA adjustment. Reduced vignetting(opposite). Back to PS for star reduction 2x, dust and speckles, and a little more tweaking. It was basically a battle with noise. The data is there. I blame it on the cameras ISO. At 1600 it would be impossible to remove nearly as much artifacts than at 800. Stretching before changing the bitrate could be a problem in reducing noise. Thanks for the challenge.
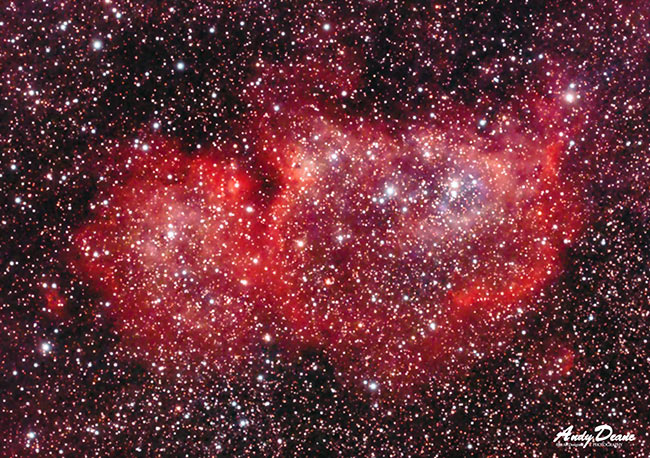
Andy Deane
Processing Comments:
This was fun! Thank you for the data to play with. Processed in StarTools. Bin 25%, develop, deconvolution, color balance (went artistic with saturation levels), darken the background with isolation in the life module, sharpen, noise reduction and then Photoshop for a bit of color balance and curves. Thanks again for the opportunity!! C/C Welcome!!
Andrew Klinger
Processing Comments:
Here’s my go in PixInsight! DBE, BN, CC, TGV and MMT noise reduction, ArcsinhStretch, HistogramTransformation for a bit more stretch, Exponential Transformation with a mask to push nebulosity, CurvesTransformation to increase saturation, LHE, MT on stars, final CurvesTransformation.
Gregory Murray
Processing Comments:
complete novice here. Edited all in Affinity Photo. Kept it as a 32 bit during all editing. I learned a lot here with this one, thanks, Astrobackyard! it was truly a challenge. My first attempt was extremely red and then I realized that in levels stretching, I could stretch the master, red, green and blue channels all separately. It’s still red, but not like it was. I did this maybe 3 times, channel mixer, denoise on just the shadows, a couple different curves layers and here you have it.
Eric Narges
Processing Comments:
Here’s my take on the data. Stretched, and reduced light pollution with Astro Pixel Processor, and touched up with PI using Astrotools.

Riccardo Balia
Processing Comments:
This is my version! Elaborated with PS and Camera Raw.
Jan Schubert
Processing Comments:
Hey, This is my Version of your Soul Nebula Data, processed with Pixinsight. Greetings from Germany!
Llamar Vasquez
Processing Comments:
Thanks for raw image Trevor… here’s what i got.. used PS, Curves & Levels, GradientXTerminator, Astronomy Tools Action Set.
Kurt Zeppetello
Processing Comments:
Interesting and great idea. 1) PS – color balance, curves, Astronomy Tools – horizontal, vertical, deep sky noise, 2) StarTools – HDR, Banding, 3) LR2 – color, tint, vignetting, vibrance.
David McGarvey
Processing Comments:
Nice idea Trevor! I did the initial stretch using RNC-Color-Stretch. I then performed additional stretching in PS using levels/curves. I then tackled the gradients using some layering in PS and also the graduated filter tool in LR. A few brightness/contrast tweaks, etc. You had some really nice data to work with here.

Steve Balke
Processing Comments:
Well, I didn’t give up and here’s my first try at processing in PS.

Bent Marcussen
Processing Comments:
Hi Trevor. Nice challenge. I tried to make a full processing using Adobe Lightroom only.
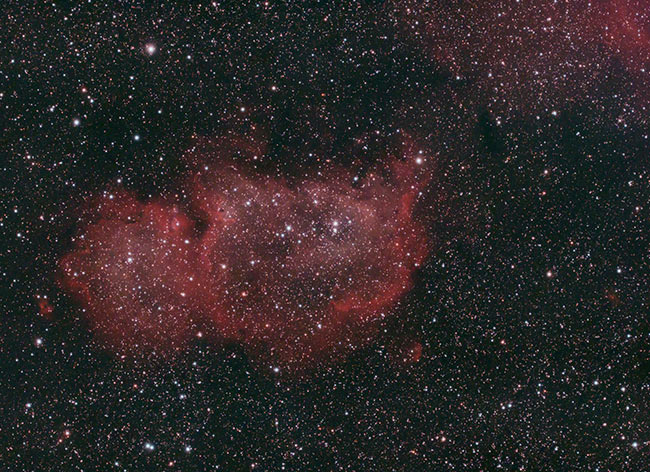
Victor Van Puyenbroeck
Processing Comments:
Saw this a little late, but here’s my take in PixInsight. I tried to maintain good star color and carefully removed the light pollution gradient, leaving the emission from the Heart Nebula intact.
Steps were: rotate, crop, ChannelExtraction, DBE, ChannelCombination, BN, CC. Then stretched with ArcsinhStretch for star color, ACDNR, HT, CurvesTransformation.
Then made a starmask to correct the cores of the stars with HT and shrink them with MT. Finally, remove green with SCNR, increase local contrast with LHE and smooth with TGVDenoise. Also tried PhotometricColorCalibratio
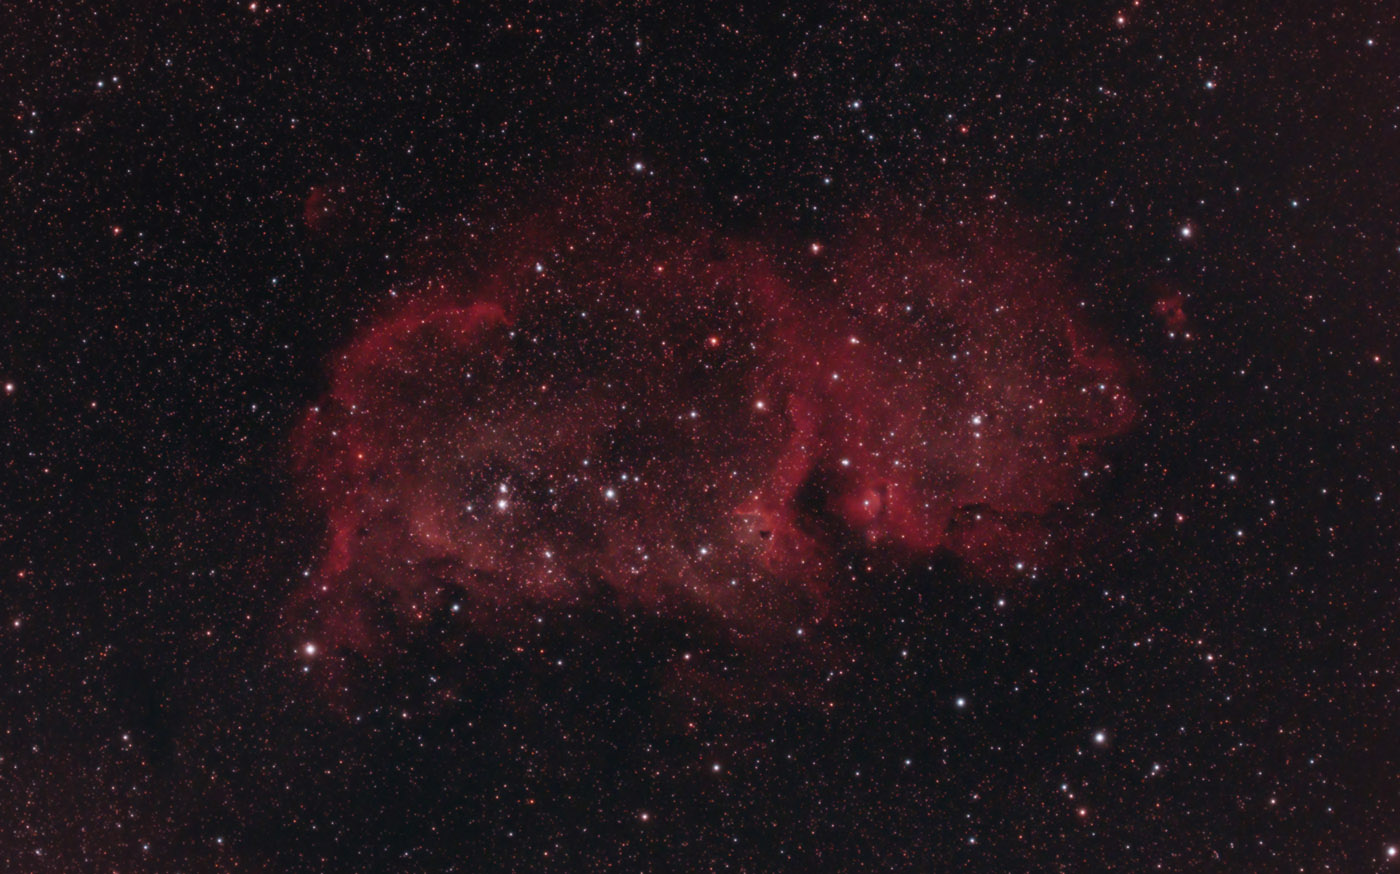
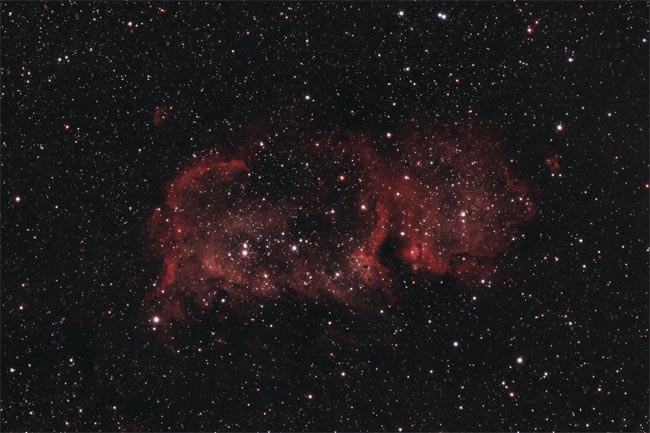
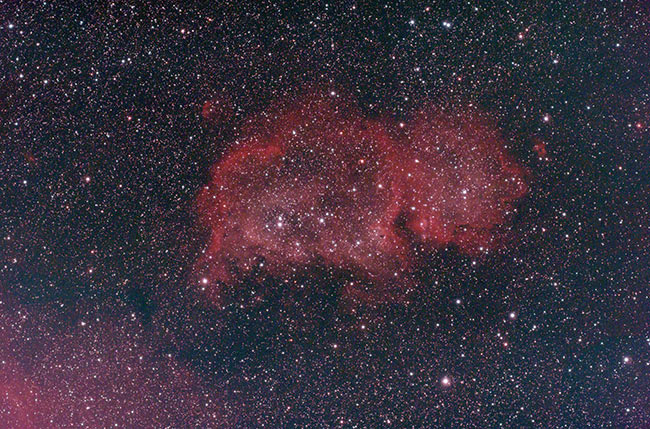
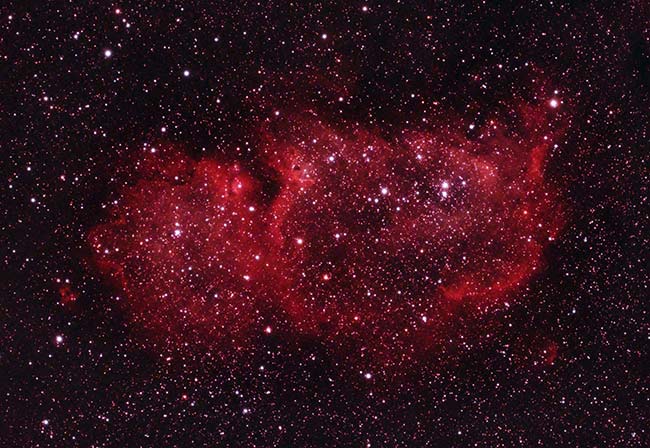
Trevor Jones
IC 1848 – The Soul Nebula
Click here to see a version with added H-Alpha data
Total Exposure: 5 Hours (150 X 2 Minutes @ ISO 800)
Mount: Sky-Watcher HEQ5 Pro Synscan
Telescope: Meade 70mm Quadruplet APO
Camera: Canon T3i (Full Spectrum Mod)
Filter: SkyTech CLS-CCD
Guide Scope: Altair Starwave 60mm
Guide Camera: Altair GPCAM2 AR0130 Mono
Images Captured using Astro Photography Tool
Registered and Stacked in DeepSkyStacker
150 Lights, 15 Darks, 15 Flats, 15 Bias
Processed in Adobe Photoshop CC
1. Set Black and White Points
2. Curves Adjustment X 3 Iterations
3. Color Balance
3. Gradient Xterminator
4. Color Range Saturation
5. Noise Reduction (Astronomy Tools)
6. Sharpening and Contrast (Astronomy Tools)
7. Minimize Stars
8. Added Luminance Layer