Using Luminar AI for Astrophotography
Skylum sent me a copy of their new Luminar AI software and asked me if I would try it out on my astrophotography images. I thought it was pretty cool that this company acknowledges the growing astrophotography niche and our unique needs in software.
The creators of Luminar AI state that it is “The first image editor fully powered by artificial intelligence.” AI seems to be all the rage these days, found in image editing software such as Topaz Labs DeNoise AI and now Adobe Photoshop.
The goal of Luminar AI is to make image editing more “fun” and less time-consuming. I can see how this is a pain point for photography beginners, but it is not something I personally struggle with at this stage of my career.
However, it did present me with the opportunity to edit my astrophotography images in a different way than ever before. The closest I have come to this experience is the filters inside of Instagram, but Luminar AI is much more in-depth.

I added subtle clarity and structure to my deep-sky images using Luminar AI.
It is a results-based software, meaning it presents you with one-click options (templates) to instantly transform a boring image into something more. Whether you are happy with these results or not, is the question.
The templates system is an interesting way to completely change the feel of your image, in a very creative and fluid way. Luminar suggests preset filters for your image based on the type of content it reads from the data, and this is where the AI is at work.
I found this system to be hit or miss on my astrophotography images, especially when used on an image of a deep-sky object. Nightscape photos with natural foreground landscapes had a much higher success rate.
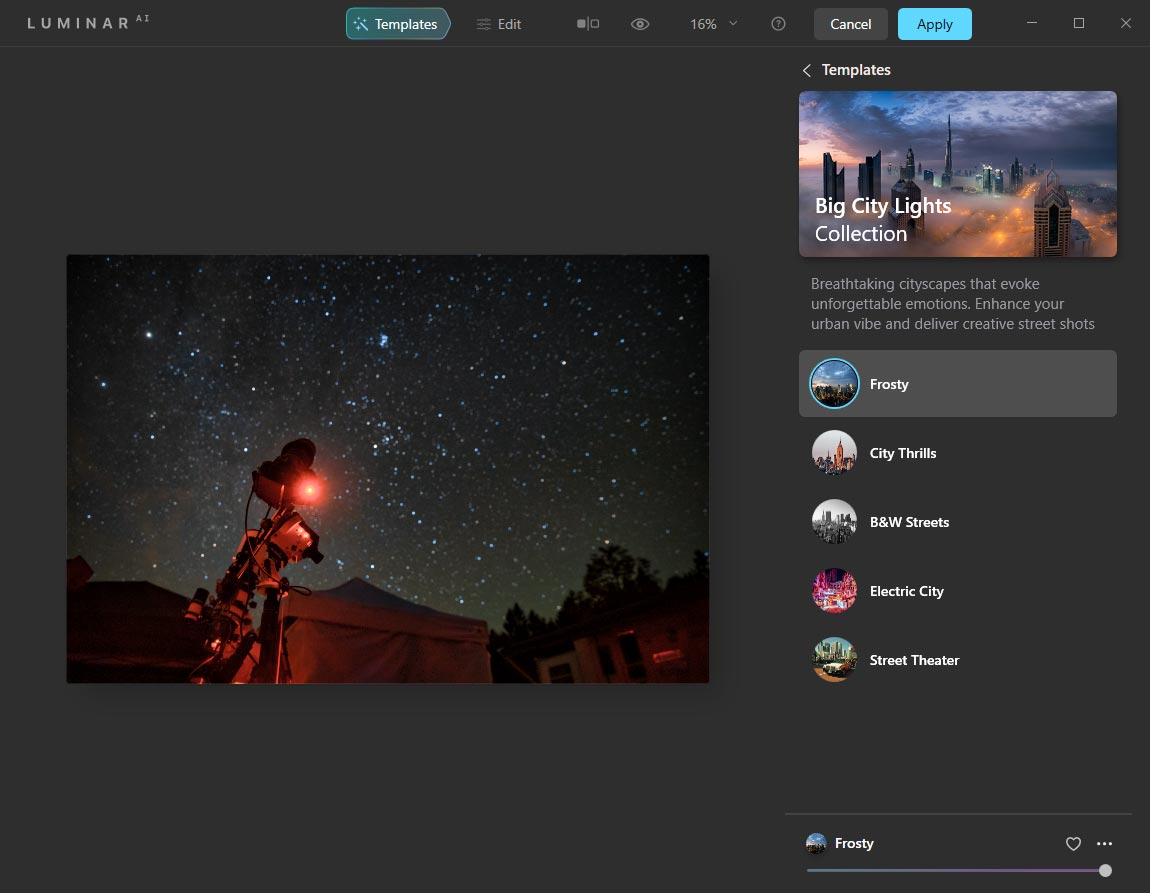
In the example below, I started with an out-of-the-camera image (single exposure) and used Luminar AI for all processing. I used the ‘Frosty‘ template to start, which can be found within the Big City Lights Collection (An unfortunately named theme for astrophotographers).

The Templates work best on Nightscape-style images.
Using Luminar AI for Astrophotography
I’m pretty comfortable with my image processing routine these days, and I’ve got a lot of experience using astrophotography stacking and processing software like DeepSkyStacker and Adobe Photoshop. (I have an astrophotography image processing guide for those interested)
When Skylum reached out to me, I wasn’t sure whether this software would even work correctly on a deep-sky astrophotography image. Most photographers stick to subjects during the day, or at least subjects that are lit at night.
In the video below, you will see some of my early results using Luminar AI for astrophotography images. I test the software on both a nightscape-style photo, as well as a deep-sky photo of the Orion Nebula.
Astrophotography is a completely different type of photography, and you often need to get crafty with your software to produce the results you’re looking for. Many out-of-the-box image editing tools don’t apply to long exposure images of the night sky.
I also didn’t understand why an astrophotographer in my shoes would be interested in software that specializes in one-click effects (similar to an Instagram filter).
But I think after you see a few examples of what’s possible, I think you’ll agree that it could be a very powerful tool for beginner to intermediate astrophotographers (or even experts looking for a creative way to add some finishing touches.)

The templates work much better on nightscape-style images than a deep-space photo.
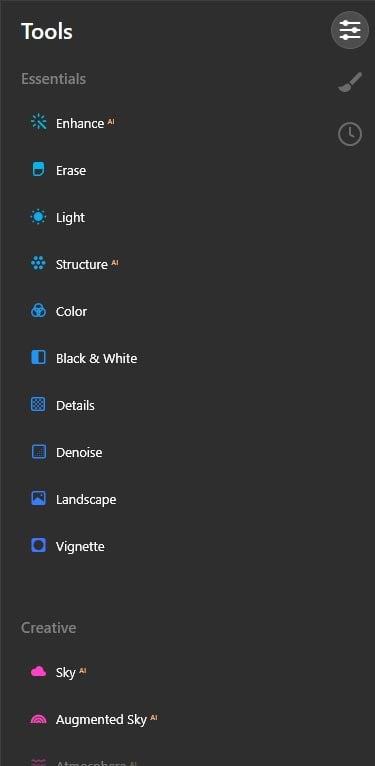
How it Works
The software is available on its own as a stand-alone tool, or as a third-party plugin for Adobe Photoshop. The latter is how I prefer to use the tool, as much of the image processing steps are completed here, and I like to use Luminar AI as a final step.
In case you couldn’t tell from the name, Luminar AI is fully powered by AI intelligence, which aims to make the entire image processing experience faster and easier. Machine learning actually reads your image and suggests templates suitable for your photo, and even where to apply specific adjustments.
A look at the Luminar AI user interface (Templates tab).
I’m just going to warn you now, some of them are pretty out there. I personally don’t like to add elements to my images that aren’t there, but if you want to, you can add fog, reflections, and even preset skies. This probably isn’t what you want to do as an astrophotographer that, you know, photographs the sky.
A lot of these features are built for daytime landscape photography and portrait photography (Skin AI, Body AI, etc.), but if you dabble in other forms of photography I am sure you will have a lot of fun bringing them into Luminar AI.
I’ll actually be using this software on my YouTube thumbnails moving forward. I think it’s a perfect time to add some eye-catching pop to those ever-important little images.
Useful Features for Astrophotography
A simple tool that I found to be particularly useful for nightscape photography, was the Composition AI. This tool is best appreciated when used with a nightscape image with foreground interest in the frame.
Think of this feature as ‘AI-powered cropping‘, that suggests compositions designed in collaboration with professional photographers. It can fix common issues like tilt, perspective, and alignment.
Within the Edit tab, I have found the enhance, structure, and detail adjustments to be the most useful tools for a deep-sky photo. These tools are said to be using artificial intelligence when used, but I find the results to be similar to comparable tools in Adobe Camera Raw.
The primary editing tools of Luminar AI.
You need to be careful not to overdo it with these sliders. The image can get out of hand in a hurry, and your photo may begin to look unnatural (see image below).
Below, is an example of Luminar AI used on a deep-sky object (a reflection nebula in Orion). I used the edit sliders to adjust the structure and sharpness of the photo. No templates were used for this effect.
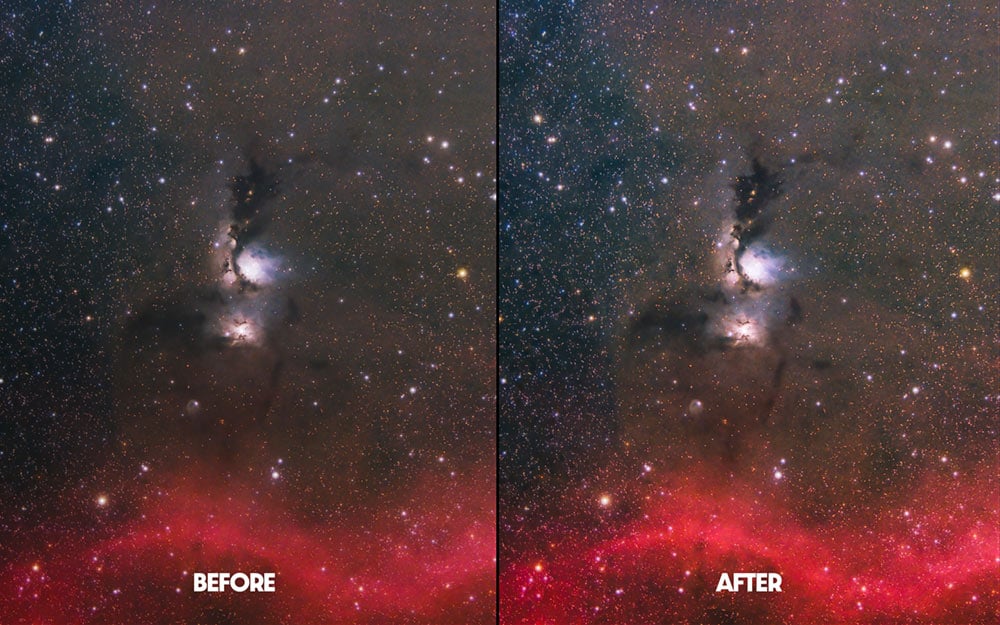
Before and after making edits to my nebula image using Luminar AI.
The creative section of the Edit tab is where things get interesting. This is where the controversial ‘sky replacement’ (officially called Sky AI) options live.
Naturally, most astrophotographers will not be interested in replacing the primary subject of their photo. I tried the sky replacement tools on a daytime image of my telescope to see how well it works, and I must say that the automatic masking and refinement tools are impressive.
You can adjust every aspect of your fake sky (chosen from a preset list of options) from the size, to the direction of the sunlight. See the photo below for a better idea of what this tool looks like in action.

Using the Sky Replacement (Sky AI) tool in Luminar AI.
Final Thoughts
Do I think Luminar AI can replace a robust image editing software monster like Photoshop or PixInsight? Absolutely not. But if you’re looking to add a software tool that lets you get creative to add some flair and finishing touches to your projects, I think you will enjoy it.
Since installing the software as a Photoshop plugin, I find myself running my images through the tool as a final step before sharing my images on social media. Subjectively, it doesn’t always improve the image, but in many cases, it leads to some final tweaks.
If you’re a control freak who makes calculated processing steps at each step of the image processing journey, you likely won’t appreciate the creative, spontaneous nature of Luminar AI. If you’re a visual person who prefers to steer your image towards what your eyes like, you’re going to love it.
Personally, I am somewhere in the middle. I truly believe that trying out new software that forces you to process images differently makes you a more well-rounded photographer.