Altair Hypercam 183C Image Examples
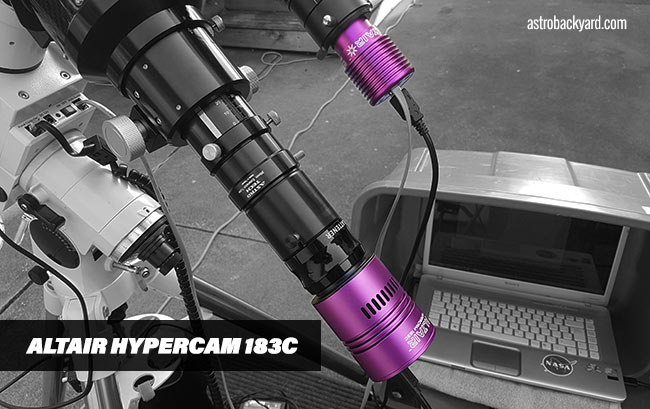
The Altair Hypercam 183C is a one-shot color astrophotography camera designed for deep sky imaging. The exciting part about this particular model is its affordable price tag, and performance. For this reason, cameras like the Hypercam 183C are often the next step up from a DSLR.
One of the biggest drawbacks of the DSLR’s is their inherent noise qualities, especially during long exposures in warm weather. The 183C was designed to stay much cooler than a standard DSLR, both in terms of body design and with the included internal cooling fan.
An affordable color astrophotography camera
Having owned this astrophotography camera for a few months now, I have really been able to explore the imaging capabilities of the 183C. I am happy to report that this camera has exceeded my expectations and that I highly recommend the 183C for beginners wishing to jump into CCD astrophotography.
The Equipment Used
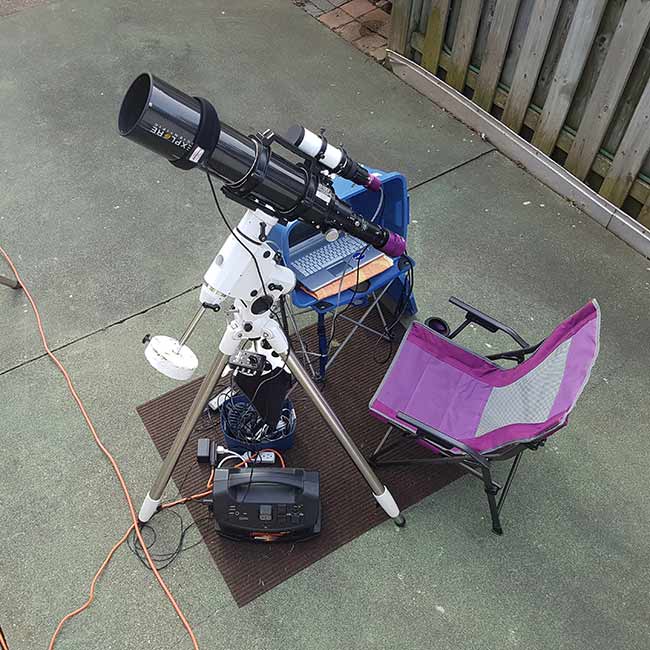
The following deep sky images were captured using the Altair Hypercam 183C through an Explore Scientific ED102 CF refractor telescope. The 183C was fitted with an Altair Lightwave 0.8X reducer/flattener. This is my primary deep-sky imaging setup that I use in the backyard.
The telescope tracked each target in the sky thanks to a Sky-Watcher HEQ5 Pro Synscan mount. Each image used autoguiding to increase the level of tracking accuracy, and thus sharpness of the photo. The Altair Autoguiding combo is used in conjunction with PHD2 guiding to produce long exposure images with crisp details.
This camera is controlled using an imaging software known as Astro Photography Tool. This software allows you to focus the camera (I use also use Bahtinov mask), frame your target, and automate a series of exposures. Each image on this page was registered and stacked using DeepSkyStacker, following by post-processing in Adobe Photoshop.
Below you will find a number of deep sky astrophotos captured using the Hypercam 183C, through various light pollution and narrowband filters. For RGB (true color) images I recommend the Baader Moon and Skyglow filter, and for narrowband – I enjoy my set of Astronomik 12nm 2″ Round Mounted filters.
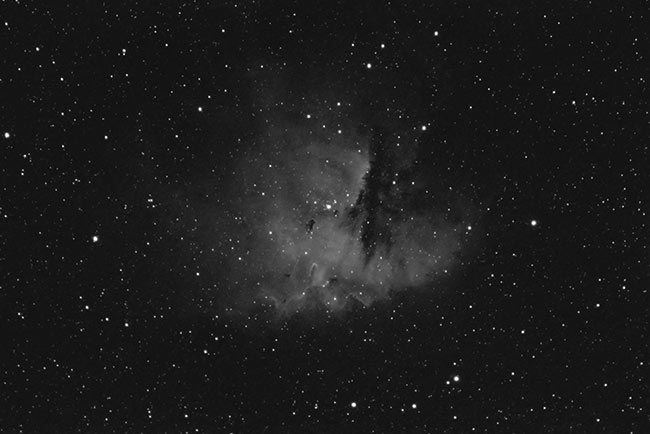
The Pacman Nebula in HaRGB
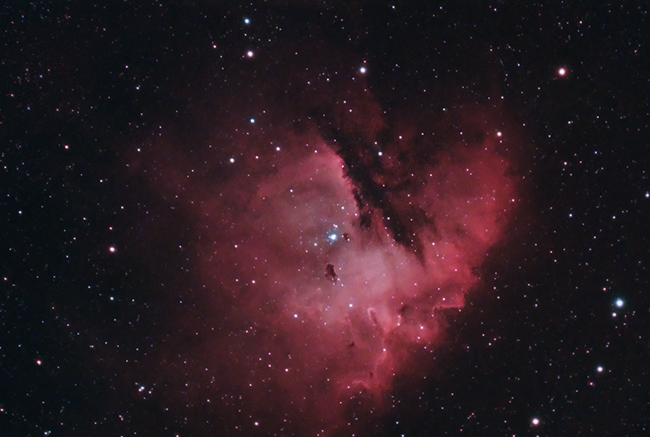
RGB: 84 x 90s, HA: 49 x 210s
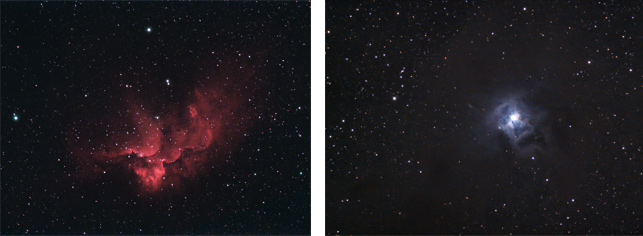
The Iris Nebula in True Color RGB:

RGB: 2 Hours, 16 Minutes Total Exposure (60s, 180s subs)
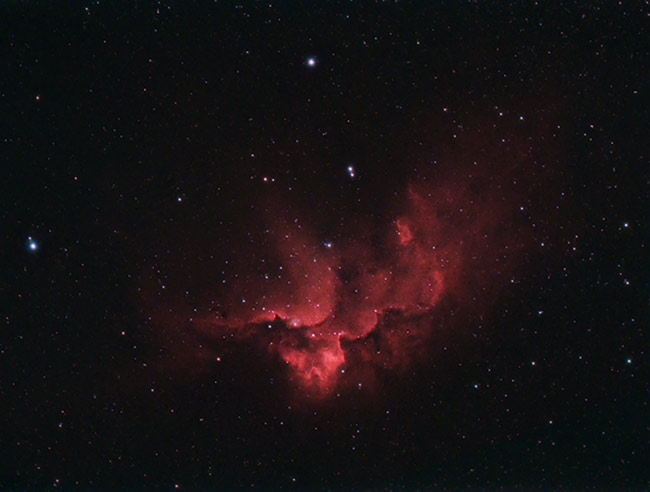
The Western Veil Nebula in RGB + Ha, SII, OIII

RGB: 40 x 120s, HA: 47 x 300s, OIII: 64 x 180s
The Wizard Nebula in HaRGB:
RGB: 50 x 90s, HA: 67 x 210s
Transitioning from a multi-purpose DSLR to a dedicated astrophotography camera has been both a learning experience and an eye-opener. The sensitivity of the 183C pushes the limits of the optical quality of my telescope.
I am blown away by the potential of my current astrophotography gear and have a lot of room to improve along the way.
Altair Hypercam 183C Settings & Tips
Gain Setting
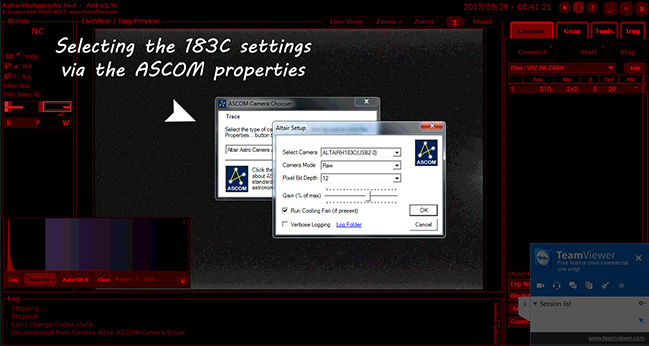
I have found that using a Gain setting of 60% maximizes light gathering ability, without introducing an unhealthy amount of noise. This setting must be selected upon connecting the Hypercam 183C, in the ASCOM properties dialog box.
In Astro Photography Tool, hold the shift key down before hitting the “connect” button for the camera. This will open up the ASCOM settings, where you will select the 183C camera, and then adjust the slider to control the desired gain setting.
This is also where you will check the box to tell the camera to run the internal fan.
Binning and Exposure Times
Selecting a binning value of 2 x 2 not only increases the clarity of your images, but the camera buffer has an easier time transferring images to your computer. Yes, you lose some resolution/image size, but each image benefits from the smaller pixels in terms of sharpness.
Early on, I had issues with dropped frames (Sharpcap) using the 183C at 1 x 1 binning. This is largely due to my outdated imaging PC that lacks a USB 3.0 port.
Depending on the amount of light pollution you shoot under, your exposure lengths may vary. For me, color images of 90-seconds in length produce images with a desirable signal-to-noise ratio. Not only do these short exposures pick up an impressive amount of color and detail, but you also benefit from the rewards of dithering and stacking a large number of files.
Shooting Narrowband
If you are shooting narrowband images, the exposure times will be longer, with the Gain setting unchanged. For example, when shooting h-alpha with the Hypercam 183C, an exposure of 210-seconds (or 3.5 minutes) yielded impressive details without introducing heavy noise.
Shooting Darks and Flats
For both color and narrowband images, subtracting dark frames during the stacking stage is absolutely necessary. An amp glow pattern can be seen on the debayered preview image when shooting long exposures. This is completely wiped out by stacking darks in DeepSkyStacker.
Flat frames are not totally necessary but recommended. You can save yourself a lot of image processing time by adding flat frames to your final stack. The flat frames remove gradients and dust in your images.
To shoot flat frames in Astro Photography Tool, I suggest using the Flat Frames Wizard. I stretch a white t-shirt over the objective of my telescope and point it towards an even blue dawn sky.
Stacking in DeepSkyStacker
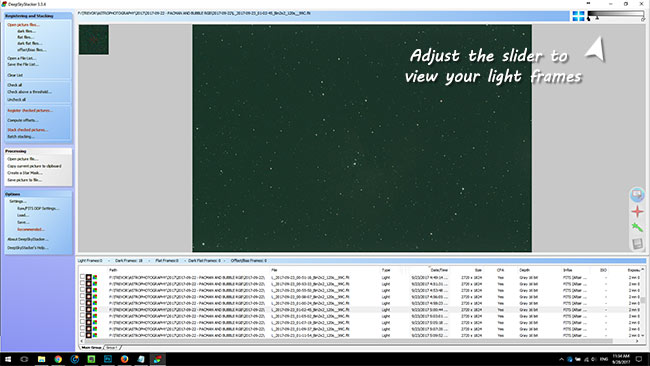
If you are using DeepSkyStacker to register and stack your images using the 183C, there are a few things to note. The first one is that you will likely need to adjust the image preview slider (top right of the screen), to view your image frames. Without doing this, your light frames may appear completely black (or green!).
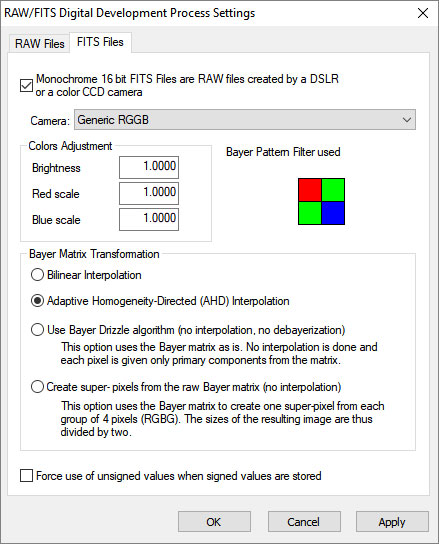
As for the stacking settings, there are 2 things to mention. You’ll want to use Generic RGGB as the Bayer pattern for this camera in the FITS Files dialogue box. Make sure Monochrome 16 bit FITS Files is checked off, and that you are using Adaptive Homogeneity-Directed (AHD) Interpolation is selected as your Bayer Matrix Transformation.
Here are the settings I use when using DeepSkyStacker with the 183C:
You will likely need to adjust the Star Detection Threshold as well. My images usually need a value of 3-5% for DSS to detect enough stars in the field to register them.
Once your Gray 16 bit FITS files have been stacked, the resulting image should be in full-color RGB, so that you can begin image processing in Adobe Photoshop.
This astrophotography camera is available at Ontario Telescope and Accessories. Visit Altair Astro on Facebook to learn more about their latest products and cameras.