Skip to Content

astrophotography filter

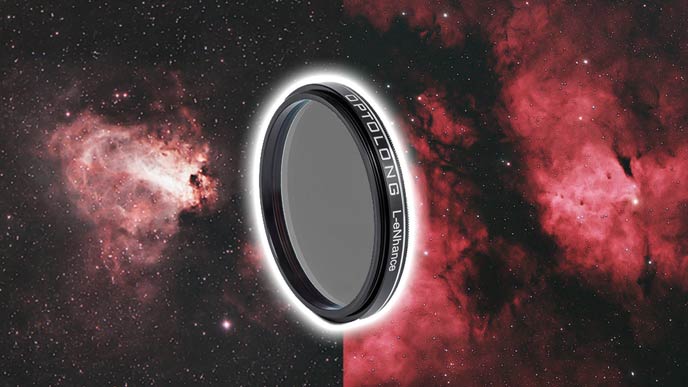
The Impressive Optolong L-eNhance Filter

In this post, I’ll share my results using the Optolong L-eNhance filter for deep sky astrophotography in the city. The L-eNhance is a dual band pass filter that ignores artificial light, yet collects a strong signal emitted by certain nebulae.

This light pollution filter was designed for color cameras, whether it’s a DSLR (a modified camera is best) or a one-shot-color dedicated astronomy camera like the one used (ASI294MC Pro) for the images in this post.

As many of you know, I mostly shoot from the city. I love to travel to dark sky locations, but imaging from home is a lot more practical, and I can do it more often. 

Optolong L-eNhance Filter

The Omega Nebula & Helix Nebula| ZWO ASI294 MC Pro + Optolong L-eNhance Filter

The problem is, the city I live in is home to over 100 thousand people, and that makes it very bright. Excessive light pollution is a reality for many of us, and I’m not sure we fully understand the long term negative effects of it yet.

The battle between light pollution and amateur astronomy wages on, but thanks to organizations like the IDA, more people are aware of the situation and making small steps in the right direction. 

Here’s a look at the light pollution I shoot through in my backyard. As you can see in this animated gif, it looks as though the light pollution increased significantly between 2018 and 2019. 

light pollution

Light pollution data from LightPollutionMap.info. 2018-2019.

For backyard astrophotographers like me, light pollution creates some serious challenges, from horrible gradient patterns to a pathetic signal-to-noise ratio. 

It seems like we have to work twice as hard as those under dark skies do to capture a beautiful image.

Fortunately, though, light pollution filters exist – and the companies that make them are getting better and better at isolating the “good” light from the bad. The argument as to whether a light pollution filter for broadband targets (such as galaxies) can actually help you collect better data continues in the forums, but I have found them to make my life a lot easier. 

However, nobody can argue the fact that a narrowband filter (often called “line filter”) can be exceptionally useful from the city. The filter I am discussing in this post is a dual-band pass filter, that collects light in two prominent emission lines, H-alpha, and Oxygen III.

transmission graph

The transmission graph of the Optolong L-eNhance dual-band pass filter.

Looking at the transmission lines of the bandpasses above, you may notice that this filter is only allowing a very selective amount of light to pass through to the camera. The good news is, some of the most incredible deep-sky nebulae in the night sky emit the majority of their signal in these two wavelengths. 

Which ones? The Eagle Nebula, Omega Nebula, and North America Nebula, to name a few. Emission nebulae are some of the most widely-photographed deep-sky targets by amateur astrophotographers, and from a filter perspective, they are much more obtainable from the city than a broadband galaxy.

Optolong L-eNhance Filter

The Optolong L-eNhance filter was designed for color cameras, such as a DSLR camera or a one-shot-color astronomy camera. The camera used for all of the example images in this post is a ZWO ASI294MC Pro, a 10.7 MP 4/3″ sensor camera with cooling. 

If you take a good look at the transmission graph, you’ll notice that the first band pass line includes both the OIII, and H-beta wavelengths. Essentially, this means that the filter should collect an even more “natural” looking image than one that isolates Ha and OIII exclusively.

The H-beta (486.1nm) emission line is nowhere near as impactful as the hydrogen-alpha line (656nm) when photographing an emission nebula target, but I like the idea of including this subtle wavelength for a more well-rounded image.

Transmission Lines

  • H-beta: 486.1nm
  • OIII: 501nm
  • H-alpha: 656nm

As you’ll see in the images shared in the post, this transmission combination leads to some surprising “natural” looking images when used with a color camera.

In the video below, you’ll see me use the Optolong L-eNhance filter for deep sky astrophotography in the backyard. Notice the bright white LED streetlamps that line my street. These artificial lights are largely ignored by the L-eNhance filter, as they do not emit light in the spectrum that passes through the filter.

In the video, I’ve threaded the Optolong L-eNhance filter (48mm version) to the field corrector of my Sky-Watcher Esprit 100 refractor telescope. The filter sits between the sensor inside my ASI294MC Pro color camera and this apochromatic refractor telescope.

Threading the filter directly to the field corrector involves carefully removing the internal ring that seals the filter glass into the housing. The reason for this is to access the threads on both sides of the filter. I do not recommend this method, as the filter glass becomes loose, and you could easily drop or damage the filter.

Instead, I would look into a filter drawer system that is compatible with your telescope. This allows you to easily swap filters in and out of the imaging train, and maintain the accurate spacing between your camera sensor and the corrector/field flattener.

L-eNhance Filter

The Optolong L-eNhance filter (48mm).

Some telescopes, such as the William Optics Zenithstar 73, or Radian Raptor 61 include a threaded slot for a 2″ filter inside of the field flattener and/or adapter. This is a very convenient location for a 48mm filter, as it is completely sealed from the elements.

Optolong L-eNhance Filter Specifications

Here are the technical specifications of this filter, coming straight from the company. I have to admit, I don’t know what most of these terms mean, but in the spirit of creating the most useful resource possible, I’ve included them for those that do. 

  • Blocking Range: 300nm – 1000nm
  • Blocking Depth: >99% light pollution line
  • TPeak: T>90%
  • Substrate: B270
  • Thickness: 1.85mm
  • Surface Quality: 60/40
  • Transmitted Wavefront RMS: λ /4
  • Parallelism (arcsec): 30s

If you don’t know what the transmitted wavefront RMS reading means in terms of the pictures you can expect to capture with your color camera, keep reading…

Imaging Results from the City

The first object I chose to photograph was the Butterfly Nebula, which is also found within the Sadr region in Cygnus. The reason I chose this target for my testing, was because this area is absolutely loaded with emission nebulae. If you have a filter that specializes in isolating H II regions, this is an area of the night sky you need to photograph.

Having used a dual bandpass filter in the past (STC Optical Du0-Narrowband) from my backyard, I had a feeling that the L-eNhance would meet my expectations. I primarily shoot using a color camera, to maximize the chances of completing an image in a single night. If you are like me, a dual bandpass filter may be the answer you are looking for. 

In the past, I have used a number of Optolong branded filters, including narrowband “line” filters for Ha, OIII, and SII. The Optolong L-Pro is one of my favorite broad-spectrum filters, so my experiences with this company have been stellar thus far. (They even sent me an Optolong Flag for my garage as a thank you for my video content!)

Results using a 100mm Refractor Telescope

astrophotography camera

The first image was captured using a high-end refractor telescope (ED triplet apochromat), with a focal length of 550mm. The image scale of this system is 1.7, which creates a pleasing resolution for wide-field nebulae targets like the one below. To find out the image scale of your camera and telescope, you can check out this online calculator

With a dual-band pass filter like the L-eNhance, moonlight, and the glow of my city do not interrupt a memorable imaging session in Cygnus. Below, is the image I captured using the L-eNhance filter with my ZWO ASI294MC Pro (one-shot-color) camera. The final image includes 69 x 4-minute exposures for a total integration of 4 hours and 36 minutes.

L-eNhance Filter Review

The Butterfly Nebula in Cygnus. 69 x 4-minutes.

If you would like to see all of the equipment used for this shot, I have broken everything down piece-by-piece on this page.

Below, you’ll see a breakdown of what the data looks like in each color channel, after the image has been processed and balanced as the version above. Although these images are non-linear, it should give you a better idea of how much data was collected in each color after neutralizing the background. 

The “stretched” image (the one shown above) shows exaggerated levels of data, but it does indicate the general level of sensitivity to color in each channel. 

color channels

After an extremely successful night using the L-eNhance filter on my 100mm refractor, I thought it would be interesting to see what would happen when I use it on the Celestron 8″ RASA

Results using the Celestron 8″ RASA

To use this filter with a Rowe-Ackermann Schmidt Astrograph system, it must be placed in front of the camera sensor that sits on the corrector plate of the front of the telescope. To achieve the correct spacing between my camera sensor and the optical window of the RASA, I use this Starizona filter drawer

I also installed a new Pegasus Astro FocusCube 2 motorized focuser to the RASA, for improved accuracy when focusing on this demanding F/2 optical system. The one I have was designed specifically for Celestron SCT telescopes and the RASA (this is the model I use). 

Celestron RASA

The Celestron RASA 8 F/2 with ASI294MC Pro color camera attached to the corrector plate.

As fast as the F/2 f-ratio of the RASA is, it also means that achieving critical focus manually is very difficult.  I believe that relying on camera control software to measure the accuracy of your focus precision is a must. 

Which software? Many amateur astrophotographers have had success using Sequence Generator Pro, and I personally use Astro Photography Tool. The FWHM or HFD readings of a star are needed when attempting to find (and maintain) critical focus (More on this in a later post).

Here is a better look at the FocusCube 2 installed on the RASA. The process involves removing the standard focus knob on the telescope and attaching a bracket to the base. I’ll share a new video and review of this focuser for the Celestron RASA soon. 

focuser for RASA

Pegasus Astro FocusCube 2 (motorized focuser) for the Celestron RASA.

To highlight the qualities of this filter on a telescope like the RASA, I decided to hop over to the Omega Nebula in Sagittarius. From my latitude in Canada, I have a very short window of opportunity to photograph this target. It does not reach a high apparent altitude in the sky, which makes it a demanding target for amateur astrophotographers in the Northern US or Canada.

As you’ll see in the image below, the images straight out of the camera will appear green using CMOS camera like the ASI294MC Pro. 

raw image before stretch

A raw un-stretched image (stack) using the Optolong L-eNhance filter with a color astronomy camera (ASI294MC Pro)

To create the final image, each sub-exposure was 3.5-minutes in length, with the camera set to Unity Gain. For this image, I also used autoguiding with the RASA as well (for the first time). I attached a small 50mm guide scope (Starfield 50mm guide scope) and bracket to the base of the 8″ tube. 

The ZWO ASI290mm Mini is a reliable guide camera that always pulls in more than a handful of useful stars for autoguiding purposes. 

The biggest advantage of having an autoguiding system in place with the RASA (in my opinion), is the ability to dither between frames. In previous imaging sessions with the RASA, I had no trouble capturing unguided images with round stars on the Celestron CGX-L. However, walking noise was prevalent due to a lack of the simple (yet powerful) act of dithering.

astrophotography

The Omega Nebula. Color CMOS camera with Optolong L-eNhance filter.

When it was all said and done, I ended up with 29 x 210-second exposures on the Omega Nebula through the 8″ RASA. As you can see in the processed image stack above, achieving a “near-natural” looking color balance with this dual band pass filter is possible. I can’t help but think that the additional light collected in H-beta makes a subtle, yet important difference on targets like M17. 

I also pointed my telescope towards the Helix Nebula using this filter. This planetary nebula in Aquarius is another deep sky object that does not reach a high apparent altitude in my night sky. The L-eNhance filter did a fantastic job of separating the glowing gases of NGC 7293 from a light-polluted sky. 

The Helix Nebula

The Helix Nebula. ZWO ASI294MC Pro + Optolong L-eNhance Filter.

L-eNhance vs. STC Optical Duo-Narrowband

Many readers have asked how the Optolong L-eNhance filter compares to the STC Optical Duo-Narrowband filter. In my tests, it produces VERY similar results when used an emission nebula. If you look at the transmission graphs between the two, you’ll see why.

The L-eNhance lets in a subtle amount of light in the H-beta line, which I am yet to illustrate how much of a difference this makes. The transmission peak in the OIII spectrum also appears to be wider, which may help produce a more natural looking image (at the expense of less isolated data). 

L-eNhance vs. STC Duo-Narrowband

The bottom line is, these filters act very similar, and I don’t own equipment sophisticated enough to truly show the difference between the transmission qualities of this glass. In reality, I think most folks just want a filter that compliments their color camera when shooting in the city, or under moonlight. If that is what brought you here, I think you’ll be extremely impressed with the Optolong L-eNhance.

What others are Saying…

I’m not the only one seeing great results with this filter. Ron Brecher is one of my favorite astrophotographers, and someone I look up to personally in terms of his work and his career. He uses sophisticated imaging equipment from his observatory in Canada (only 2 hours from me!) to capture stunning deep-sky objects. He shared this image on his website, and on twitter about the Optolong L-eNhance filter:

Astrodoc Review

The image was captured using a QHY 367C one-shot-color camera through a Tak FSQ-106. Be sure to visit Ron’s website to see the full-size version of the image, it’s really incredible!

Final Thoughts

Narrowband filters, especially ones that collect light in two band passes at once offer an incredible way for backyard astrophotographers to collect impactful images with a color camera. Whether you shoot with a DSLR or dedicated astronomy camera, a capable light pollution filter can be the difference between setting up twice a week, and twice a season. 

There is no substitute for dark skies, but there is hope your light-polluted backyard. The Optolong L-eNhance filter took months to develop, and as you can see first hand from my images, the results are impressive. 

If you have used the Optolong L-eNhance filter with your color astrophotography camera, please let me know what you thought in the comments. Feel free to include a link to your personal website or AstroBin profile to share an image captured with it. Seeing others work is a great way to validate the performance of this filter. 

Update, August 2020

The Optolong L-eXtreme Filter has launched, and many amateur astrophotographers agree that it is an improvement over the L-eNhance. This version of the filter isolates the OIII bandpass at 7nm, without including H-Beta, and the small bandpass between OIII and Hb.

The resulting images appear to be more dynamic with better contrast. The following image of the Veil Nebula was captured using the Optolong L-eXtreme filter and a QHY268C one-shot-color camera.

Veil Nebula

The Veil Nebula. Captured using the Optolong L-eXtreme Filter.

Other Filters in this Category

Related Tags

Canon Rebel Astrophotography

|Camera|11 Comments

The very first camera I used for astrophotography was an old Canon Rebel Xsi (450D) DSLR. Even though the production of this camera was discontinued many years ago, I still use and enjoy this camera today.

A DSLR camera like the Canon Rebel 450D is a versatile choice as it can easily be attached to a telescope for deep sky imaging using a T-Ring and adapter. You can also use this camera with fantastic camera lenses such as the Rokinon 14mm F/2.8 for wide-angle nightscapes and Milky Way photography.

I’ve used many types of cameras for astrophotography from monochrome CMOS imaging cameras to cooled one-shot-color models. My Canon Rebel DSLR’s continue to produce amazing images, and they are one of the best ways to get started in the hobby.

The Milky Way

The Milky Way captured with a Canon Rebel T3i on a SkyTracker Pro Mount

Astrophotography with a Canon Rebel DSLR

I eventually upgraded my DSLR camera to a (slightly) newer Canon EOS Rebel T3i (600D), and it came pre-modified for astrophotography. The modification that was made to this camera is known as the “full spectrum modification”, which involved removing the stock IR cut filter inside the camera body.

Although there are many choices to consider when it comes to choosing a camera for astrophotography, an entry-level Canon Rebel series DSLR offers a unique combination of value and performance.

In this post, I’ll share my personal results using the Canon Xsi DSLR for astrophotography, and give you my recommendations for a beginner DSLR camera.

Canon Rebel Xsi for astrophotography

The Canon Rebel XSi a popular DSLR camera for amateur astrophotographers

If you don’t own a telescope yet, but want to get into astrophotography using a DSLR, have a look at the following resource page: Astrophotography Tips You Can Try Tonight

Capturing Deep-Sky Targets with a DSLR

The moon’s glaring presence has subsided, and it is now time to gather more RGB (color) light frames on my coveted summer deep-sky milky way objects. This is now my 5th summer as an amateur astrophotographer, and I don’t like to waste time when choosing my target for the night.

During the months of May-July, the Messier objects located near the core of the Milky Way have my full attention. My favorite summer deep-sky objects lie within the Sagittarius region of the Milky Way Core. Many of them are bright and colorful such as the Lagoon Nebula, Eagle Nebula, and the Swan Nebula.

The Lagoon Nebula is one of my all-time favorite targets and a worthy photo opportunity for any DSLR camera and telescope. The summer emission nebulae in Sagittarius are so bright, it is possible to photograph them from a light=polluted area such as your backyard in the city. My backyard skies are rated a Class 8 on the Bortle Scale.

From my latitude in the Northern Hemisphere (Ontario, Canada), the main aspect to consider is having a clear window of sky to the South, as most of the summer Milky Way targets travel Southeast to Southwest throughout the night.

Canon rebel astrophotography


The Lagoon Nebula using a Canon EOS Rebel Xsi

The photo of the Lagoon Nebula above was imaged over several nights last week. I set up my telescope gear on June 30th, July 2nd, and July 3rd over the Canada-Day long weekend in my backyard. It’s rare that we have such a long stretch of clear nights, especially on a long weekend.

This colorful nebula does not rise very high in the sky from my latitude in Southern Ontario. In fact, it just barely clears the height of my backyard fence. When planning a deep sky imaging session, it’s important to have a clear view of your target for an extended period of time.

I consider myself very lucky to be able to photograph such a glorious night-sky treasure from home.  You can view the specific photography details for my final image on my Flickr profile. I also managed to squeeze in some more imaging time on the Eagle Nebula, as well as the Elephant’s Trunk Nebula over the weekend, as you will see further down the post.

Capturing Galaxies

I have photographed many galaxies with my Canon EOS Rebel Xsi from the backyard. One of my most successful images was the Triangulum Galaxy. A long stretch of clear nights allowed me to collect over 7 hours of exposure time on M33.

This is a diffuse deep-sky object which can make it difficult to observe visually, but through photography, we can reveal the beautiful structure and color of this galaxy. The telescope used to capture the image below was an Explore Scientific ED80 with a focal length of 480mm.

Triangulum Galaxy

The Triangulum Galaxy using a modified Canon EOS Rebel Xsi

For Beginners / Newbies

You can view the equipment I use to take images like the ones on this website here or watch this video as I take you through my complete setup for astrophotography.

If you already own a DSLR and telescope and have started taking your own astrophotos – you may benefit from my astrophotography tutorials about image processing.

I connect my Canon Rebel DSLR to my laptop computer using a USB cable and control the camera through a software application known as BackyardEOS.  With this application, I can tell my DSLR to take multiple exposures of varying lengths and ISO settings.

Backyard Telescope

My Canon Rebel Xsi attached to an astrophotography telescope

I can also use this program to focus the stars, and make sure that my astrophotography subject is in the center of the frame. A typical session in my backyard will last all night long and have my Canon Xsi set to take anywhere from 30-60 three to four-minute exposures on a nebula or galaxy.

Dark frames of the same temperature are also captured during the night to reduce noise in the final image. As a general rule of thumb, the colder your digital camera is while imaging, the better!  Long-exposures taken during a hot summer night will produce even more noise than usual.

The Canon Rebel series DSLR cameras are also well-suited for Moon photography. If you connect the DSLR camera to a telescope, you benefit from its long focal length (compared to most lenses) for an up-close look at our nearest celestial neighbor.  

Moon through a telescope

If you are interested in this aspect of solar system astrophotography, be sure to have a look at my Moon photography tutorial. The Moon is an excellent target for your DSLR camera at any focal length. 

Hot Summer Nights

On a recent attempt to gather some H-alpha data on the Elephant’s Trunk Nebula, I discovered the limits of my DSLR when imaging in the hot summer heat.  On this particular night in Mid-June, the temperature remained over 30° well after midnight.

This was just too hot for my Canon 7D to capture any useful data on my deep-sky target.  (I use a different DSLR for my H-Alpha captures, as my Canon Rebel Xsi has the LP filter fitted to it at all times)

The hot hazy skies, combined with a dangerously hot sensor produced a red, noisy mess of an image.  An exposure of 30 seconds to a minute may be fine in this heat, but I was shooting 7-minute subs at ISO 1600 to pick up faint nebulosity through a narrowband 12nm Ha filter.  Lesson learned!

I have since returned to the Elephant’s trunk nebula in the constellation Cepheus, and let me tell you – it is faint!  Photographing IC 1396 from a light-polluted backyard in the city has proved to be quite the challenge.  I was able to capture about 2 hours of exposure on this nebula last week, which is not enough to produce a pleasing image.

By stretching the data far enough (using curves in Adobe Photoshop) to show the rim of the nebula, the background stars become blown out and noisy.  It takes many hours worth of imaging to produce a decent portrait of this DSO.  Here is my early result with limited exposure time:

IC 1396 - Elephant's Trunk Nebula

The Elephant’s Trunk Nebula in Cepheus

Best Beginner DSLR for Astrophotography

I have stood behind the Canon brand of DSLR’s from the beginning. Based on the advice I read in the Backyard Astronomers Guide back in 2010, I chose to start my photography adventure using Canon digital cameras.

At the time, they were the clear choice for astrophotographers, offering the only DSLR built for astrophotography (They later released the Canon 60Da)  Nikon has come a long way since then in the way of astrophotography, but my heart still belongs to Canon.

The Nikon D810A is a camera intended for astrophotography, as you may have gathered with the “a” designation in the title. This is Nikon’s first DSLR dedicated to long-exposure astrophotography. This camera body was based on the original D810, but include a sensor that is four times more sensitive to H-Alpha red tones than an ordinary DSLR.

Canon EOS Rebel T3i

In 2015 I upgraded to Canon EOS Rebel T3i camera for astrophotography. The T3i (600D) came pre-modified by an astro-modification service known as “Astro-Mod Canada”. I have used this camera to capture many deep-sky objects using various clip-in filters.

This is the DSLR I always recommend to beginners. First of all, it is the successor to the Canon Xsi which I use now and can provide actual results (my photo gallery) of the astrophotography performance of this camera. Second, it is a great value.

Canon Rebel T3i

You will find used models of this camera body at online retailers (such as Henry’s in Canada) for a fraction of the price of a new CCD Astronomy Camera.  You can no longer purchase this camera new, so if you can’t find a used body at camera retailers, you will have to search online forums such as Canada Wide Astronomy Buy and Sell, or Astromart.

This camera can also quite easily be modified for astrophotography by yourself or a professional.  The features of the camera itself are quite standard of all models these days, but this DSLR is capable of taking astonishing deep-sky and landscape astrophotography images.

My favorite feature of the T3i is the flip-out LCD screen. This comes in very handy when shooting deep-sky astrophotography images because the camera is often in an awkward position when connected to a telescope.

Tilting the screen to a more accessible angle allows me to focus the telescope using the 10X live-view function of the camera. I can also review the histogram, make changes to the exposure time, and review my light frames as they are being captured.

The Canon T4i and T5i are also excellent choices but are a little more expensive.  The Canon T5i can be purchased in a kit including an 18-55mm lens.

Recommended Clip-in Filters

I have used a wide variety of clip-in light pollution filters with my Canon Rebel DSLR cameras. For deep-sky targets containing hydrogen-alpha emission data such as the Eagle Nebula, a narrowband filter like the 12nm Astronomik Ha is an excellent choice.

For capturing broadband RGB data on my targets, the SkyTech CLS-CCD filter allows me to block a healthy amount of city glow. This filter creates an impressive amount of contrast between your object and a light-polluted sky.

For broad-spectrum targets such as galaxies or reflection nebulae, I recommend trying the Optolong L-Pro filter. This multi-bandpass filter is less aggressive and helps retain the natural colors of the stars in your image.

DSLR camera filter

The Optolong L-Pro filter in My Canon Rebel 600D

Why use a DSLR?

There are many different types of astrophotography cameras available, other than Digital SLR’s. Dedicated thermal-cooled CCD cameras are much better at producing deep-sky images with less noise, but are much more expensive and less user-friendly.

Webcams can produce stunning images of Solar System planets and the moon and can be inexpensive and easier to use. The Altair Hypercam 183C is an example of a dedicated astronomy camera that can bridge the gap between a DSLR and a CCD.

I still enjoy using a DSLR because it’s an enjoyable experience. You can’t beat the value and versatility of the Canon Rebel series cameras.

Light Pollution Map

I often speak of the light pollution from my backyard in the city.  I love to get away from home to image under dark skies at my astronomy club’s observatory (RASC Niagara Center) – but I rarely have time to drive 40 minutes with all of my equipment to this special place.

To maximize my time under the stars, it makes more sense for me to get as much astrophotography in at home, in the backyard. (Hence the name of this website) The light pollution produced by the city I live in is quite heavy, especially in certain areas.  My house is in the worst of it, being located in the central area of town.

I found this helpful Light Pollution Map that shows just how bad it really is:

Light Pollution Map

Light Pollution Map for my Backyard

The Bortle Scale

Do you see that?  I am in a Red Zone!  I would estimate that my location is either a class 7 or 8 on the Bortle Scale, although I have not yet taken an accurate light pollution measurement.  The Bortle Scale states that a class 6 zone (NELM 5.1-5.5) will have your surroundings easily visible and that the Milky Way is visible only at the Zenith.  

These characteristics are true of my backyard and is referred to as a bright suburban sky. How much light pollution is in your backyard?  You can use this nifty interactive map to find out: Light Pollution Map

To view all of my best images captured with a Canon Rebel Xsi and T3i, check out my photo gallery.  I wish you all the best in your future astrophotography endeavors, clear skies.

Helpful Resource: Getting Started with Deep Sky Astrophotography

Related Tags