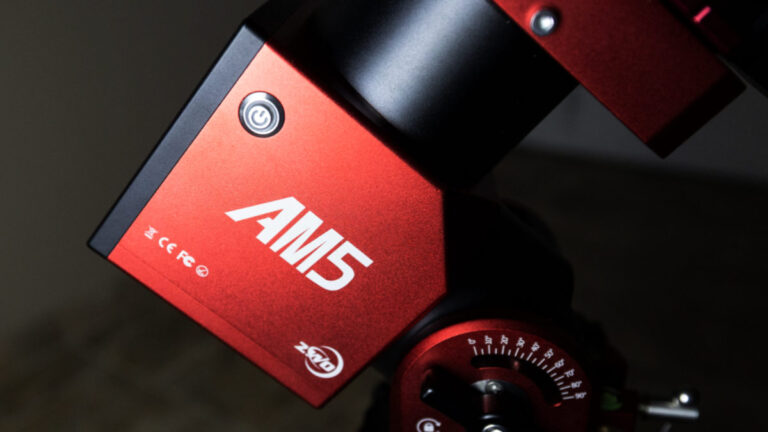
Skip to Content

Telescope Mount

ZWO AM5 Full Review

|Equipment|18 Comments

The ZWO AM5 is the astrophotography mount I didn’t think I needed. Yes, it perfectly matches the color of my existing ZWO cameras (and ASIAIR Plus), but do I really need a tracking telescope mount that doesn’t require a counterweight?

I have casually observed a number of harmonic drive telescope mounts appear in the astrophotography market over the past 5 years. I thought they were a clever idea, but definitely not something I would consider to be a ‘must-have’. 

After all, the traditional equatorial telescope mounts I use for astrophotography have been helping me collect incredible deep-sky images from my backyard for over a decade, why change now? Well, this one is a bit different. 

The AM5 is a strain wave gear (harmonic drive) telescope mount that was specifically designed to be compact, portable, and lightweight. In fact, it is not much heavier than a portable star tracker, yet it can handle the job of a much more robust equatorial mount. 

My first question was, does it actually track better than my existing astrophotography mounts? And to my surprise, the answer was no. So why is everyone excited about a new technology that doesn’t improve the primary function of the device?

The AM5 is all about portability. It’s about how everything seems to get a little easier once you start using it. The small size and overall convenience of the ZWO AM5 have changed the way I approach the art of astrophotography.

ZWO AM5 Mount

ZWO AM5 Harmonic Drive Mount ($1,999 at OPT)

Key Features

  • No Counterweight (for loads up to 28 lbs)
  • Guiding Error Between 0.6-0.8 
  • Extremely Portable & Lightweight
  • Functions in EQ/AZ Modes
  • WiFi Connection 
  • ASCOM Compatible
  • Vixen + Losmandy Dovetail Mounts
  • Flawless Function with ASIAIR
  • Up to 44 lbs payload (with counterweight)

Orion Nebula

The Orion Nebula in LRGB. ZWO AM5, ASI 2600MM Pro, Radian 75.

In this article, I’ll show you how well the ZWO AM5 harmonic drive mount has performed for me in all weather situations, from the backyard and beyond. From hot and sticky July nights to frosty January nights with temperatures well below freezing. 

The team at ZWO kindly lent me a demo copy of the AM5 mount around the same time they started shipping in the USA. There was zero obligation to provide a positive review, nor was I compensated in any way. 

I began testing the ZWO AM5 harmonic drive mount in July 2022, just as Ashley, Rudy and I moved into our new house.  I have been using this astrophotography mount for 8 months now, and I am ready to share my honest opinions about it. 

ZWO AM5 Harmonic Equatorial Mount Review

The ZWO AM5 is an incredible option for small to medium-sized astrophotography setups. With several deep-sky astrophotography kits at my disposal in the astro-garage, I find myself reaching for the AM5 most often. 

Although the majority of my deep-sky astrophotography sessions take place at home in the backyard, I like to travel to darker skies during the new moon phase in the warmer months.

I fully realized the magic of the ZWO AM5 when packing up for the Okie-Tex Star Party. This event required a full day of travel by plane, from Ontario, Canada to Amarillo, Texas (with a layover in Dallas). 

The deep-sky imaging rig I brought with me was the most advanced, capable astrophotography rig I’ve ever flown with. It included everything from the ZWO AM5  tracking mount to a 75mm apochromatic refractor telescope.

Oh, and a full-frame ZWO ASI6200MM Pro monochrome camera, a 5-position filter wheel, and a heavy-duty carbon fiber tripod. A bit of a jump from my usually travel-friendly setup involving a star tracker and telephoto lens. 

ASIAIR telescope

The ZWO AM5 mount set up at the Okie-Tex Star Party.

Historically, traveling with a deep-sky astrophotography kit is a bit of a challenge. If you do somehow manage to pack a robust, telescope-capable computerized tracking mount in your luggage, you better hope that it was packed securely with lots of padding.

I have never trusted an airline enough to safely check my luggage with my precious telescope mount inside. So if I am bringing astrophotography gear on a plane, it must fit in my carry-on bag. 

Not only is the ZWO AM5 mount small enough to pack neatly into your carry-on luggage, but I also brought it in my ‘personal item’ backpack. Yup, I could pull it out to play with right there on my lunch tray if I wanted. (I kept it in my backpack the whole time).

AM5 carry-on-bagAM5 packed into my Nomatic V2 camera bag

Ashley brought the Sky-Watcher Star Adventurer GTi, another incredibly portable (fully capable) astrophotography mount. With an 11-pound payload capacity, the Star Adventurer GTi falls into the star tracker category, yet it is not much smaller in overall size than the ZWO AM5. 

telescopes at a star party

Our telescopes under the Bortle 1 skies of the Okie-Tex Star Party. 

After many successful astrophotography sessions with this mount, I decided it was time to share the incredible results and positive experiences I have had with it over the past 6 months. If you are in the market for a portable astrophotography mount to compliment your wide-field refractor telescope setup, I think the AM5 will exceed your expectations. 

Before we get into the nitty-gritty, let’s answer some of the most common questions people have about the ZWO AM5:

What is the maximum payload of the ZWO AM5?

The maximum payload capacity of the ZWO AM5 mount is 28.6 pounds, without the use of a counterweight. When a counterweight is added, the maximum payload capacity increases to an impressive 44 pounds. 

How much does the ZWO AM5 weigh?

The ZWO AM5 mount weighs just 11 pounds. It is lightweight enough to easily carry in and out of your garage, and fit in your carry-on bag on an airplane. 

What is the longest practical focal length for ZWO AM5?

I have personally had success using the AM5 with refractor telescopes from 400-800mm. ZWO confidently markets the mount as being able to handle a Celestron C11 (2000mm) without the use of a counterweight. 

How do you polar align a ZWO AM5 mount?

Because there is no polar finder scope built into the mount, you must use an electronic polar alignment tool such as the one built into the ZWO ASIAIR software. This was a bit of an unwanted change for me.

horsehead nebula

The Horsehead and Flame Nebula. ZWO AM5 mount, ASI2600MM Pro, Radian 75 APO. 

Equipment Used:

What’s in the Box?

The ZWO AM5 mount arrived at my house in two boxes. Box number 1 included the mount head itself, and the other contained the official ZWO T40 carbon fiber tripod. The tripod is strong and lightweight (5 pounds), and I definitely recommend purchasing this tripod to go with your AM5 if you can. 

A pier extension is also available to accommodate longer telescopes (to avoid running into the tripod), but I have not used it myself. The tripod can be purchased individually or in a bundle with the mount as it arrived for me. 

  • ZWO AM5 mount
  • The Carrying Case
  • The Hand Controller
  • Two Allen keys
  • A USB Cable
  • The Manual
  • ZWO T40 Tripod

astrophotography mount

The tripod is strong and sturdy, but you may find that it is a little short at just 31.5″ tall with the tripod legs fully extended. This places the telescope at about my waist, which was a bit strange at first. In terms of stability, having a lower center of gravity is a good thing. Just be sure that you’re able to point your telescope over any obstructions you have in your yard such as your house or any tall trees.

ZWO lists the maximum payload capacity for the tripod at 110 pounds, a ridiculously heavy amount that I doubt very few will ever come close to. Each tripod leg has padding along the top which is very much appreciated when carrying this setup outside in the winter. The tripod is said to be able to accommodate mount heads from other manufacturers including Celestron and Sky-Watcher, but I have not tested this feature myself. 

ZWO TC40 Tripod

The ZWO TC40 Tripod is lightweight and ultra-stable

ZWO also offers pier extensions for those with imaging payloads on the longer side. Using my setup, the small refractor, filter wheel, and dedicated astronomy camera cleared the tripod legs even when pointed near the zenith, so this was not an issue for me. The pier extensions allow for more room between your telescope and the mount head so you don’t have to worry about a collision. 

ZWO AM5 Harmonic Drive Mount

Running the ZWO AM5 

I know that many others that have reviewed the ZWO AM5 mount have successfully controlled it using software on their laptop computer (including the increasingly popular NINA). Because I am a huge fan of the ZWO ASIAIR Plus wireless experience, I chose to run the mount exclusively with this software. If you prefer to use your existing favorite image capture software, the ZWO AM5 supports ASCOM PC control. 

This allows me to control absolutely every aspect of my imaging session, from polar alignment to plate-solving my target. I have not connected the hand controller to the AM5 mount, not even once. The seamless, hands-free control of the mount using the ASIAIR mobile app is just too easy and painless to not utilize.

With the AM5 in the home position, I start my polar alignment process. The ASIAIR software communicates directly to the mount via the included USB 2.0 cable, and runs the mount through a short routine involving rotating the telescope about 45 degrees in the RA axis.

From there, it’s a matter of following the on-screen prompts to make subtle adjustments to the alt/az adjustment bolts on the mount to dial in your polar alignment. The software uses your camera to take short exposure images of the star field and quickly plate-solves the information to guide you in the right direction.

Once this has been completed (it usually takes me about 2 minutes these days), you can slew to your intended target, or perhaps a bright star to focus your camera using a Bahitnov mask. If you own a ZWO EAF, the process becomes even easier as you wait for the software to find the perfect focus for you. 

ASIAIR controlling AM5 mount

It should come as no surprise that the AM5 and ASIAIR communicate flawlessly, as I am sure this is exactly what ZWO had in mind when they developed the mount. The ASIAIR is constantly being updated and tweaked to include new features such as a mosaic planner, deep-sky image processing, and much more.

If you use a non-ASI camera, I understand your frustration with the ‘closed ecosystem’ ZWO has created, but for ASI camera users (my first dedicated astronomy camera was the ZWO ASI071MC Cool in 2017) like myself, it is a great time to be an amateur astrophotographer. 

Balancing Your Telescope

If you are used to setting up a traditional deep-sky astrophotography setup on an equatorial telescope mount, this part just feels wrong. You do not need to balance the telescope in the RA and DEC axes on the ZOW AM5. In fact, there is no possible way to balance the telescope in RA if you are not using a counterweight. 

This is something to get used to (and you will), but it seems to throw all of the rules of setting up a telescope on a tracking mount out the window. Now, this incredible feat can not be mentioned without a bit of warning. 

Although the AM5 harmonic drive mount can handle the telescope payload with ease, you must ensure that the tripod base underneath is solid and secure. With a small refractor telescope like the one shown below, the tripod is stable even with the telescope slewed toward the meridian. However, with a heavier payload, it is possible for the entire tripod to tip over if the weight of the tripod base is not secure. 

The combo (mount head and tripod) I was supplied with included a canvas ‘pouch’ that sits between the tripod legs. I’d recommend adding weight to this area (I believe this is what it was intended for). This is a great spot to place any power supply cables and lens caps as well.

best astrophotography telescope

 ZWO AM5 Guiding Performance

ZWO provides the following periodic error report on their website and states that “ZWO measures each mount and includes an exclusive PE curve before it leaves our factory”. I received a unique periodic error report for the ZWO AM5 I am using and it was very similar to the one shown below. 

ZWO AM5 Periodic Error Chart

The guiding performance of the ZWO AM5 is more than adequate for my needs as an amateur astrophotographer. I regularly enjoy a total RMS error of about .06-.08 arc seconds depending on the sky quality conditions that night.

These values are equal to the level of performance I had become accustomed to using the larger Sky-Watcher EQ6-R Pro. It should go without saying, that these numbers can only be achieved after an accurate polar alignment of the telescope mount. 

The autoguiding experience on the ZWO AM5 is so consistent and painless, it is just not something I even think about when running an imaging session. After I polar align the mount, I use the guiding tool on the ASIAIR app to perform a quick calibration routine, and I am on my way. 

Shooting at a focal length of about 400mm is not exactly pushing the mount to its limits, but this is a practical use case for many backyard amateur astrophotographers. I am confident a heavier load would achieve similar performance, although I think a practical focal length range for this mount is 2000mm and under.

ZWO AM5 guiding graph

The guiding performance of my ZWO AM5 using the ASIAIR Plus. (Radian 75mm APO + ASI2600MM Pro). 

What is a Harmonic Drive Mount?

The ZWO AM5 uses a strain wave gear instead of worm gears as you would find in a traditional equatorial telescope mount such as the Sky-Watcher EQ6-R Pro or Celestron AVX. 

A harmonic drive has three key components, a wave generator, a flex spline, and a circular spline. The wave generator has an elliptical shape and consists of an elliptical hub and a special thin-walled bearing that follows the elliptical shape of the hub.

A strain wave gear system does not experience backlash, and balancing the weight of the telescope and imaging equipment is not required.

Hamonic Drive Mount

The strain wave gearing system at the heart of the ZWO AM5. 

Compared to a traditional equatorial mount head with worm gears, the harmonic drive design has the benefit of containing the entire system in a smaller, lighter mount head.

ZMO AM5 Specifications

  • Mount Modes: Equatorial + Altazimuth
  • Periodic Error: <+/-20″
  • Weight: 11 lb (5 kg)
  • Payload Capacity (Without Counterweight): 28.6 lbs (13 kg)
  • Payload Capacity (With Counterweight): 44 lbs (20 kg)
  • Dovetail: Losmandy, Vixen
  • Max Slew Speed: 6°S
  • Latitude Adjustment Range: 0°-90°
  • Power Requirement: DC 12V 5A
  • Autoguide Port: Yes (ST4)
  • Communication Interface: USB/WiFi
  • Hand Controller: Yes
  • Operating Temperature: -15°C-40°C
  • Power Failure Protection: Yes

The design of the ZWO AM5 mount is very practical and slick in terms of both style and operation. It does have that familiar harmonic drive mount look to it (it reminds me of a robotic arm like one you would see in a factory), which is due to the fact that it aims to keep the size to a minimum. 

The signature ZWO red matches the rest of my ASI cameras and accessories perfectly (if you’re into that sort of thing). I’ve heard some people complain about the loud “beep” the AM5 makes when you turn it on and slews to a new target. ZWO has since provided the option to turn this volume down (or off completely) within the menu on the ASIAIR software.

The AM5 can accept both Vixen and Losmandy style dovetail mounts, depending on the mounting hardware of your telescope. The tension knobs on the right-hand side of the mount head feel solid and secure, providing some peace of mind when your telescope is attached.

Veil Nebula

The Veil Nebula. ZWO AM5, ASI2600MM Pro, Radian 75 APO.

There is a finder shoe on the right side of the mount as well, which you could use to install a small finder scope to aid in polar alignment. I have not used this finder show for anything since the mount arrived. I would not suggest keeping anything in this location (such as an ASIAIR controller), as it looks like it could run into the tripod while slewing in certain directions. 

The power switch for the mount is on the other side and lights up red with a “beep” when you turn it on. The status indicator light shines red when in EQ mode, and green when in Alt/Az mode. This light is on the front of the mount, along with all of the primary input ports. 

On the front of the mount, you’ll find all of the main input ports on the mount including the USB 2.0 port, DC 12V power supply port, and autoguide port. I have never plugged the hand controller into the mount, as the USB cable running from the AM5 to my ASIAIR Plus handles all operations of the mount. 

The back of the mount is where you will find the important adjustment knobs to perform your polar alignment. The altitude and azimuth adjustment bolts are nothing special, but get the job done. I find it easiest to loosen the primary connection knob (the big black knob under the tripod) when making major adjustments in the azimuth directions. Just don’t forget to tighten everything back up when you’re done.

I rarely touch the tension grip for adjusting latitude, unless I am traveling far from home and need to make a major latitude change. The Altitude and Azimuth can both be locked to secure your position once polar aligned. 

Alt/Az Adjustment Bolts

Things to Keep in Mind

Watch the rear of the mount while slewing to ensure that no cables are getting caught up on the azimuth or altitude adjustment bolts. These spots stick out, and it wouldn’t take much for a cable to loop around one of the bolts and potentially cause damage to the port your device is plugged into. 

Always make sure to return the telescope to the home position when your imaging session has finished. Unlike a traditional equatorial mount, you can’t manually unlock the clutches in RA and DEC after the mount has been turned off. If you turn it off with the telescope off to one side, the off-balance load is much easier to top over when transporting your rig. 

Speaking of an off-balance load, you need to be very careful about tipping your entire setup over when not using a counterweight. My little rig with a 75mm refractor and imaging accessories only weighs about 12 pounds, and I can feel the weight leaning to one side when pointed near the meridian. 

Add weight to the tripod if necessary, and make absolutely sure that there is no potential for a tip-over with your setup. This may seem obvious to some, but if you’re coming from a German Equatorial mount (like me), this is not something you’re used to. 

Use a counterweight bar if you plan on mounting a heavy telescope  (20+ lbs) on the ZWO AM5. If the total overall weight of your imaging system is approaching 25 pounds (including your camera, filter wheel, guide scope etc.), I definitely recommend using a counterweight.

ZWO lists the size of the counterweight bar as an M12, and you will need to purchase this (and the counterweight itself) separately. 

ZWO AM5 Review

The ZWO AM5 and Radian 75 pointed toward the California Nebula in my backyard.

Final Thoughts

I think the two biggest potential sources of hesitation people have with the ZWO AM5 are its ability to handle a medium-sized astrophotography telescope and the tracking/guiding performance of the harmonic drive system. I too, had these thoughts when the AM5 arrived, and I am happy to report that my experiences with this mount have exceeded all of my expectations.

For owners of the ZWO ASIAIR wifi controller looking for a quality mid-range mount, the AM5 is an absolute no-brainer. ZWO has done an incredible job of creating a top-to-bottom deep-sky astrophotography system. 

The ZWO AM5 is a great fit for anyone looking for a travel-friendly telescope mount that can handle a decent equipment payload. For me, this meant being able to bring a serious deep-sky imaging setup to a remote location (on a plane) for the first time.  

This same portability and reliable performance mean that it is also the mount I use most often at home, simply because I can get it up and running the fastest. Sure, it may only be another 5-10 minutes to get my beloved EQ6-R running (which it often is, as well as the AM5), but the ZWO AM5 is my ‘ready for anything’ telescope mount that gets called into action most. 

astrophotography telescope

The ZWO AM5 is available at OPT 

Related Posts

Related Tags

Celestron CGX-L Telescope Mount – First Look

|Telescopes|19 Comments

The Celestron CGX-L is a robust, professional-grade computerized equatorial mount with an impressive 75-lb payload capacity. The deep sky astrophotography potential of the Celestron CGX-L is obvious, and I intend to experience this benefit first-hand.

The CGX-L is the largest equatorial telescope mount I have ever used for astrophotography, with payload capacity that surpasses the incredible iOptron CEM60 (by 15 pounds). The added stability will come in handy when using the largest telescopes in my inventory, such as the William Optics FLT 132 refractor.

Later this year, I will run a complete Celestron rig that includes the exciting new Celestron 8” RASA F/2. This incredibly powerful GoTo telescope mount was generously loaned to me from High Point Scientific for review.

Celestron CGX-L telescope mount

The Celestron CGX-L with an 8″ RASA mounted on top.

Introduction

If you are new to astrophotography and computerized telescope mounts, a GoTo equatorial telescope mount like the CGX-L allows you to choose an object from the hand controller database, and the mount will slew to your desired target. This includes Solar system objects such as planets and the moon, named stars, and deep sky objects.

The NexStar hand control screen on this mount will also display useful information about the selected object such as magnitude, constellation and extended information about the most popular objects. Needless to say, whether you’re using a telescope for visual use or for astrophotography, a GoTo telescope mount will spoil you.

In this post, I’ll go over the specifications and features of Celestron’s latest flagship telescope mount. I’ll also take you along for the ride as I prepare this mount for some backyard deep sky astrophotography from the city.


An Overview of the Celestron CGX-L Telescope Mount

The Celestron CGX-L computerized mount is capable of carrying Celestron’s largest optical tubes, and was designed for serious imagers and their backyard observatories. Despite the fact that this is the most massive telescope mount I’ve ever experienced, it actually has an exceptional load capacity to weight ratio.

Celestron designed the CGX-L to be as compact and portable as possible. Coming from someone who doesn’t own a backyard observatory, I can appreciate this feature! I’d love to fasten the CGX-L mount to a fixed concrete pier under a roll-off roof, but for now, I’ll be carrying this mount in and outside of the garage, tripod and all.

In the past, I have enjoyed using equatorial telescope mounts from iOptron, Sky-Watcher, and yes, Celestron. My very first telescope mount for astrophotography was a Celestron Advanced Series CG-5, and it is responsible for many of the images in my photo gallery. The positive experiences I had with this entry-level Celestron telescope mount early on are why I fully expect to fall head over heels for the CGX-L.

EQ mount head

The EQ mount head of the Celestron CGX-L is manageable considering its payload capacity.

I can’t imagine traveling with the Celestron CGX-L mount, but that will depend on how manageable the setup process experience is in my backyard. For now, the idea is to build a semi-permanent deep sky imaging rig that utilizes all of the Celestron CGX-L’s inspired features from my backyard.

Let’s have a look at the key design goals of the Celestron CGX-L.

Celestron CGX-L Design

The Celestron CGX-L hit the market in early 2017, and it brought several new, modern features to the world of observatory-class equatorial mounts. One of Celestron’s key design goals for the CGX-L were to increase the diameter of the worm wheels to 144mm, which provides smoother movement and can drive heavier telescopes more efficiently.

The dovetail saddle on the CGX-L is an impressive 270mm in length, which owners of larger optical tubes will appreciate. It’s reassuring to know that your expensive telescope and astrophotography accessories are safely secured to the mount head and with added security and stability of a larger saddle.

Because this mount is an attractive option for those looking to build a permanent, remote observatory, Celestron has included a number of remote operation-friendly features. This includes everything from built-in home and limit optical sensors to well-thought-out and convenient cable management options.

Attention was given to the ergonomic details of this mount, to make it as compact and manageable as possible for its size. Having moved this telescope mount from one house to another, I can honestly say that it was no more difficult to disassemble and transport than my much smaller Sky-Watcher EQ6-R Pro. The mount feels incredibly sturdy and heavy, and yet takes up a modest footprint despite its massive payload capacity.

The execution of a telescope mount that is both compact and easy to manage yet is observatory-grade is a testament to the evolution of our hobby. Decades of engineering and user-feedback have been applied to the CGX-L, and you can feel it when you use this mount.

Celestron CGX-L telescope mount

The total kit weight including the tripod is 120 lbs (not including the telescope attached).

New Features:

  • Load capacity increased to 75 lbs
  • Additional auxiliary accessory ports
  • Autoguider port on the Dec axis
  • Larger 144 mm diameter worm wheels
  • Longer 270 mm dovetail saddle
  • 70 mm stainless steel tripod legs with wide stance
  • Accessory tray for 1.25″ x 2″ eyepieces, and upright stand for smartphone or tablet
  • Optional add-on polar axis finderscope
  • WiFi support for StarSense AutoAlign and SkyPortal WiFi module

The head on the Celestron CGX-L has a relatively low profile. This makes it feel compact and stable, which you can feel when you place the mount on the tripod base. The mount uses Celestron’s latest motors, that have been described from the manufacturer as having more torque, and improved slewing and tracking accuracy under heavy loads.

The heavy-duty belt-drive system in the CGX-L can be observed and monitored first-hand thanks to the ingenious clear windows covering these parts. This allows you to watch the underlying motor operation of the mount as it operates with your telescope gear on top.

These critical equatorial mount actions are normally hidden underneath a hard cover, and Celestron’s transparency of this operation says a lot about their confidence in the design.

When it comes to the critically smooth operation needed for long-exposure astrophotography, friction must be avoided at all costs. The guts of the CGX-L include a spring-loaded brass worm wheel and a stainless steel worm gear to optimize gear-mesh and deliver reliably smooth movements.

AstroBackyard Review

See the Celestron CGX-L telescope mount being used with the 8″ RASA in this video.

Cable Management and Remote Operation

To me, there is nothing scarier than a cable snag that damages my photography equipment or the mount. I also have a somewhat unjustified fear of my camera or telescope striking a tripod leg during operation. It has never happened to me yet (knock on wood), but I have had a number of close calls over the years.

For this reason, I prefer to stay close by to my equipment when slewing to a new object. I can proactively help move any potentially hazardous cabling out of the way as the telescope changes position. But what about those that are running a telescope remotely, and can’t be there in person to avoid disaster?

Mounts like the Celestron CGX-L are prepared for this scenario thanks to an internal cabling design. Both the power input jack and lower accessory ports remain in a stationary position while the mount slews to a new target. The mount also includes internal hard stops in both axes to prevent cable tension or a costly tripod strike.

This type of worry-free operation is absolutely critical for those that are using this telescope mount in a remote observatory. For non-permanent backyard imagers like myself, I can leverage these features to take my astrophotography imaging automation one step further. That means fewer trips outside to monitor the equipment, as I can comfortably slew to a new object or perform a meridian flip from inside the house.

The Celestron CGX-L includes clever “home sensors” that tell the mount exactly where the primary index position is. This feature allows you to start the mount in the home position even if it was in another orientation before a power reset. This is something I’ve never experienced before on any of my telescope mounts, and I can certainly see the benefits of this attribute when using the CGX-L in an observatory.

The built-in limit sensors will automatically stop the mount from slewing or tracking before reaching the hard stop fail-safe. The operational “safety” features of the CGX-L are imperative for observatory installations, yet could be a lifesaver to anyone using the mount in a portable backyard configuration like myself as well.

telescope mount


The Celestron CGX-L being used with a William Optics Fluorostar 132 refractor.

An Improved Design

The EQ head position of the CGX-L is adjustable, which may help you optimize the center of gravity over the tripod once your astrophotography gear is mounted. This will also offer more flexibility in terms of latitude adjustments, as this mount is capable of setting latitudes of 3°- 65°.

The dual dovetail saddle provides convenient mounting options for both Vixen and Losmandy dovetail bar configurations. My Sky-Watcher Esprit 100 ED and William Optics Fluorostar 132 telescopes both feature the wider 3-inch “Losmandy” style dovetail for improved stability, and fit securely on the CGX-L.

The tripod itself is exceptionally solid and stable. The 70mm legs are the biggest I have ever seen, yet do not take up an absurd amount of space when collapsed. Celestron has noted that the legs now sit wider than ever before, which adds stability.

When I realized this subtle change, I instantly thought about how JMI will need to produce a new, wider Wheelie bar to accommodate the CGX-L. Speaking of subtle changes, the minimum height of the tripod has been lowered based on user feedback (not from me… I’m 6’3”!).

The integrated handle is very much appreciated when lugging the massive EQ head of the mount around when not attached to the tripod. It is extremely heavy, yes, but surprisingly manageable considering the incredible 75-lb payload capacity it can carry.

Telescope Control Software and Polar Alignment

The Celestron CGX-L includes their new PWI telescope control software that was co-developed by PlaneWave Instruments. Thanks to a feature known as “multi-point mount modeling”, this mount boasts extremely precise pointing accuracy.

This should be interesting to test in the backyard with only an accurate polar alignment procedure beforehand (no plate-solving). I am no stranger to a 3-star alignment routine, and I look forward to seeing just how close the CGX-L comes to hitting that first alignment star.

Speaking of Polar Alignment, the Celestron CGX-L includes the well renowned All-Star Polar Alignment software in the hand controller. I haven’t used this feature since my early days of deep-sky astrophotography with my humble CG-5.

This software-assisted polar alignment routine is an attractive option for those that don’t want to use external tools or resources to align the polar axis of the mount. You can polar align the mount using any bright (named) star in the sky without using additional polar alignment accessories or apps.

NexStar hand controller

The Celestron NexStar Hand Controller.

NexStar Controller and Electronics

Celestron’s famous NexStar hand controller is included with the CGX-L, and includes and a practical USB 2.0 port. This is where I will connect the mount directly to my imaging laptop computer using the PWI software.

There are 2 autoguiding ports for flexible cable management configurations, so I officially have no excuse for a tangled mess of wires with this mount. The 12V DC power input barrel connector is threaded, a feature I am seeing more and more with newer mounts.

If you have ever jostled the power input on your mount and lost connection while imaging (like I have several times), you’ll definitely appreciate this subtle upgrade.

The internal real-time clock saves the time and observation site information you have entered even after the mount has been powered off. 

I look forward to testing the mount control and plate-solving abilities of the ZWO ASIair with the CGX-L. Because this NexStar mount supports the INDI protocol, I can tap into some of the handy functions on the ASIair app from my tablet.

Thor's Helmet Nebula

NGC 2539 (Thor’s Helmet) photographed using the RASA 8 F/2 on the Celestron CGX-L mount.

StarSense AutoAlign

The Celestron StarSense AutoAlign feature is handy for those that are tired of lengthy 3-star alignment routines to train the telescope mount. This is something I have become accustomed to over the years with my previous computerized equatorial mounts. 

This accessory uses self-alignment technology to and a small digital camera to automatically capture a series of images in the night sky and identify them. It matches the images with an internal database to determine exactly where the telescope is pointed. This tool includes advanced mount modeling for better pointing accuracy from horizon to horizon. 

The CGX-L is one of many compatible Celestron mounts that can utilize the StarSense AutoAlign telescope accessory.

StarSense AutoAlign mount compatibility list:

  • Advanced VX
  • Astro Fi
  • CG-5
  • CGE
  • CGE Pro
  • CGEM II
  • CGEM, CGEM DX
  • CGX 
  • CGX-L
  • CPC, CPC DX
  • NexStar Evolution
  • NexStar GT  (2015 and newer)
  • NexStar SE Series
  • NexStar SLT
  • SkyProdigy

What I Really Like So Far

The instruction manual is very helpful with detailed information, photos, and diagrams. One such nugget of valuable information is Celestron’s advice about orienting the mount so that the counterweight shaft is directly over a tripod leg. Naturally, this orientation provides better stability, but also creates more room directly behind the telescope.

The CGX-L contains a not-so-secret 8mm Allen wrench underneath the bottom carry handle. It’s little touches like this that let you know that the team at Celestron spent a lot of time thinking  about the overall user experience.

The counterweight bar has a high-end brushed-nickle looking finish. It is also very long and heavy, with serious looking threaded stop nut at the end (toe-saver).

The DEC and RA clutch levers are extremely solid and secure. They are finished in Celestron orange, contain the iconic “C”, and even reveal a subtle sparkle sheen when viewed under the right lighting. They are substantial in your hand and feel secure when you lock them into place. There is no questioning whether the clutch has engaged or not.

counterweight

Attaching the 22-lb counter weight to the mount.

Specifications

  • Mount Type: Computerized Equatorial
  • Load capacity: 75 lbs 
  • Height adjustment range: 35.75″ – 52.75″
  • Tripod Leg Diameter: 2.75″)
  • Latitude adjustment range: 3° – 65°
  • Mount Head Weight: 52.6 lbs
  • Accessory Tray: Yes
  • Tripod Weight: 46.2 lbs
  • Counterweight: 1 x 22 lbs
  • Slew Speeds: 9 slew speeds
  • Tracking Rates: Sidereal, Solar and Lunar
  • Tracking Modes: EQ North & EQ South
  • Dovetail Compatibility: Dual saddle plates
  • Number of Auxiliary ports: 4
  • Autoguide port: Yes, 2 ports
  • USB Port: Yes, input for Mount and Hand Control
  • Power Requirements: 12V DC, 3 amps
  • Motor Drive: DC servo motors
  • Alignment Procedures: 2-Star Align, 1-Star Align, Solar System Align, Last Alignment, Quick Align
  • Periodic Error Correction (PEC): Yes
  • Computerized Hand Control: 2 line x 18 character backlit LCD, USB 2.0 port for PC connection
  • NexStar+ Database: 40,000+ objects
  • Software: PWI Telescope Control Software, Celestron’s Starry Night Special Edition Software, SkyPortal App
  • Total Kit Weight: 120.8 lbs

Starry Night Celestron SE 7 Software

When you purchase the Celestron CGX-L telescope mount, you receive a free copy of Starry Night Celestron Special Edition 7. Inside the protective sleeve that includes the manual, you’ll find a promotional card that displays your unique download code.

Starry Night Software

All you need to do is visit the Celestron website and register the product to gain access to the download. The software is available for both Windows and Mac operating systems. I downloaded the Starry Night Celestron SE 7 software for my imaging laptop running Windows 10.

This edition of Starry Night can be used to run realistic night sky simulations, and more importantly, control computerized telescope mounts such as the CGX-L when connected to the Aux. port.

Included Items

  1. CGX-L Equatorial Head
  2. CGX-L Tripod
  3. Accessory Tray
  4. 1 x 22 lbs counterweight
  5. NexStar+ Hand Control
  6. DC Power Cable
  7. 8mm Allen wrench

Celestron CGX-L

Final Thoughts

I hope you have enjoyed this overview and first look at the Celestron CGX-L computerized GoTo mount. I’ve had this amazing piece of equipment in storage for two months now, and anxiously await an opportunity to put it to work under clear skies this month.

You can expect a full review of this observatory grade telescope mount in the coming months. I will discuss the astrophotography performance of the mount from a practical point of view. This includes autoguiding performance, tracking accuracy, the NexStar control system and general use in the field.

The Celestron CGX-L Telescope Mount is available at High Point Scientific

Helpful Resources:

Celestron CGX-L video

In March 2019, I took the Celestron CGX-L for a test drive on the Leo Triplet (Click for video).

Related Tags

The Foundation of Every Great Deep Sky Astrophotography Rig

|Equipment|22 Comments

Over the past 8 years, I’ve had the pleasure of using a number of telescope mounts for astrophotography. Some of them were substantial imaging platforms that included features such as autoguiding and periodic error correction (PEC), while others simply tracked the night sky at sidereal rate in a compact and portable package.

The payload capacity and features of the telescope mounts available today vary, but their level of importance in regards to your overall astrophotography goals remain constant. After many years of enjoying backyard deep-sky astrophotography, I can safely tell you that your telescope mount will be the single most important piece of your equipment.

telescope mounts

Equatorial telescope mounts come in many shapes and sizes (and colors)

My latest adventures in the backyard have reminded me of the positive impact the right telescope mount can have on your overall imaging experience. In this hobby, the difference between a night of frustration and one of jubilation is often tied to the user experience your equipment provides.

Choosing a telescope mount for astrophotography is one of the biggest decisions you’ll have to make in this hobby. With steep price tags and overlapping features between models, it can be hard to make the right decision. So leverage my years of trial and error in this addictive and rewarding hobby we call astrophotography before you pull the trigger on a new mount.

In this post, I’ll share what’s worked for me in the past, and my early results using a new intermediate-level telescope mount for astrophotography, the Sky-Watcher EQ6-R Pro. I’ll include the images I’ve captured using this mount so far and specific performance indicators such as my autoguiding graph in PHD2 guiding.

The Most Important Piece of every Astrophotography Setup

I think we can all agree, that if the Earth didn’t rotate, deep sky astrophotography would be a heck of a lot easier. Compensating for the apparent movement of the night sky is why amateur astrophotographers require an equatorial mount to capture images through their telescopes.

However, even a small error in tracking accuracy will be “exposed” in a long exposure deep-sky image. In terms of astrophotography, the higher in magnification you go with your telescope, the more pronounced this error will be.

This is one of several reasons I continuously recommend a wide-field refractor telescope for beginners, as they are the most forgiving in this regard. They offer some of the lowest magnification views of the night sky, which is actually a benefit for many deep-sky photography targets.

telescope mount for astrophotography

My previous astrophotography mounts included the Celestron CG-5, Sky-Watcher HEQ5 and iOptron CEM60

Telescopes with a higher magnification may reveal any drift occurring from the mount. It will show itself in the form of elongated stars. An inaccurate polar alignment or periodic error in the right ascension axis may be the culprit.

But enough about the subtleties and joy of troubleshooting tracking issues, for now. The bottom line is, your telescope mount is the foundation of your astrophotography experience and can make or break the quality and consistency of your images.

An equatorial telescope mount that provides you with consistent, reliable results night in and night out can make the difference between a lifelong hobby, and a rotten experience that’s discouraging enough to make you want to put the telescope away for good.

I’d rather you take the first road mentioned, and that is the mindset behind this article.

Plan for Future Configurations

When it comes to selecting your first telescope mount for astrophotography (or upgrading your existing mount), I’d like to offer the following advice. Plan for the future. This isn’t groundbreaking advice and I am sure you’ve heard this mentioned before – but it’s the “why” that I am here to explain.

It’s easy to get caught up in the purchase of a new telescope for astrophotography and think “this is the telescope for me, the only one I’ll ever need”. This is how I felt about my Explore Scientific ED102 refractor. At the time, it was at the far reaches of my budget, and I believed that it would be the last telescope I’d ever buy.

I thought, as long as my current telescope mount could carry this 7-lb carbon fiber triplet, with my camera and accessories attached, I’d never need to upgrade. The truth is, I could have stuck with this combination for life – but then AstroBackyard happened.

deep sky astrophotography setup

My Explore Scientific ED102 refractor mounted to a Sky-Watcher HEQ5 Pro

What I mean by my previous statement is, I knew my YouTube channel and blog would get pretty stagnant if I continued to talk about the same equipment over and over again. Thankfully, I met Steve from Ontario Telescope in 2016, and the rest is history. (You can listen to Steve and talk astrophotography on the AstroBackyard Podcast).

Leave Room to Grow

For the first 5 years of my DSLR astrophotography experience, I was more than happy with using an 80mm refractor and a beginner level telescope mount. If you own a compact telescope (like the William Optics Z61 pictured below) that does not require a heavy-duty mount, you may never feel the need to upgrade. It means that have better self-control than most.

The problem is, deep-sky astrophotography is an addiction – and upgrading to a larger telescope down the road is a common occurrence. The setup pictured below includes the highly portable iOptron SkyGuider Pro, which is not only an incredible beginner-friendly mount – but a real performer.

It’s also a gateway mount” into the realm of deep-sky astrophotography I currently live in.

iOptron SkyGuider Pro

My William Optics Zenithstar 61 refractor on the iOptron SkyGuider Pro

Suddenly, the 11-lb payload capacity of your modest mount can no longer produce sharp images with your new telescope because it’s too heavy. That doesn’t mean you won’t use it anymore, but it will limit the types of telescopes you can mount to it.

On the other hand, if you “over-mount” from the beginning, you’ll have more than enough stability to run your current telescope kit, with lots of room to grow in the future.

Here’s a statement you may have heard before, that I have found to be true. For deep-sky astrophotography, you’ll want your telescope mount to have a payload capacity that is double the weight of your imaging gear. This may seem a little excessive, and there is certainly some wiggle room here. But in general, it’s a great rule of thumb.

My Telescope Mount Timeline

Year Brand Model Payload Capacity
2010 Celestron Advanced Series CG-5 25 lbs
2014 Sky-Watcher HEQ5 Pro SynScan GoTo 30 lbs
2017 iOptron SkyGuider Pro Camera Mount 11 lbs
2017 iOptron SkyTracker Pro Camera Mount 6.5 lbs
2017 iOptron CEM60 Center-Balanced Equatorial Mount 60 lbs
2018 Sky-Watcher EQ6-R Pro Computerized GoTo Mount 44 lbs
2019 Celestron CGX-L 75 lbs

I’ll be the first to admit that I may be a little biased towards Sky-Watcher mounts, but for good reason. Although I have spent some serious time with iOptron and Celestron mounts in the past, none compare to the mileage I’ve put on my Sky-Watcher HEQ5 Pro. I love this old mount, rusty counterweights and all.

It’s been repeatedly packed and unpacked from closets, garages, and trunks (and has the battle scars to prove it). It’s been everywhere from the dark skies of Cherry Springs to the dark corners of our basement apartment closet. How could I not hold a special place in my heart for a mount that has been the cornerstone of my hobby for so many years?

The Sky-Watcher EQ6-R Pro Computerized GoTo Telescope Mount

For this reason, I got a little extra excited when Sky-Watcher reached out to me about a snow-white EQ6-R Pro. I believe my years of use with the HEQ5 accelerated my comfort level and enjoyment with the EQ6-R Pro early on. The SynScan hand controller system and the overall user experience of the mount all felt very familiar to me.

Sky-Watcher EQ6-R First Impressions (Video)

Rudy kept a close eye on the giant boxes with “new smells” I opened on my backyard patio. In total, the shipment weighed 90 lbs. It was covered in “team-lift” stickers to avoid a lawsuit. My team consisted of myself, adrenaline, and black Labrador retriever. The feeling of unboxing a new piece of astrophotography gear (especially a new mount) is an unforgettable experience. I didn’t film an unboxing video this time, but I did snap a few pictures.

setting up the telescope mount

Setting up the Sky-Watcher EQ6-R Pro Telescope Mount

The first and most obvious thing I noticed while unpacking the Sky-Watcher EQ6-Pro was how heavy it was. In the world of equatorial mounts, that’s a very good thing. Stability is everything when your tracking objects that live in deep space, and the EQ6-R is rock-solid. Secondly, I noticed the green accents on the setting circles that match the new branding of the Esprit 100ED – this is less important but appreciated nonetheless.

Seeing as how the EQ6-R is the HEQ5’s new and improved big brother, I was absolutely smitten with delight unpacking and setting it up. For lack of a better analogy, it’s like going from an old Toyota Corolla to a RAV4😉

Upcoming Sky-Watcher EQ6-R Pro Review

A complete review of the Sky-Watcher EQ6-R Pro will take time and more experience to build properly. At this stage, I simply want to share my first impressions with the mount. I will say this, I can’t remember the last time I was able to unbox a piece of astrophotography gear and produce an amazing deep-sky image on the same day.

The fact that this is an advanced equatorial telescope mount, makes this statement even more impressive. If my early experiences with the EQ6-R are any indication of what I can expect (2 nights in), this should be a lot of fun.

Completed: Sky-Watcher EQ6-R Pro Review (May 2019)

backyard astrophotography

A night of deep-sky astrophotography in the backyard

Sky-Watcher EQ6-R Pro

Core Specifications

  • Mount Type: German Equatorial
  • Electronics: Computerized with GoTo
  • Weight: 38 lbs
  • Mounting Style: Vixen + Losmandy
  • Payload Capacity: 44 lbs
  • Counterweight Weight: 2 x 11 lbs
  • Tripod Leg Diameter: 2″
  • Tripod Weight: 16.5 lbs

Notable Features

  • Built-In Carry Handle
  • Robust Alt-Az Adjustment Knobs
  • Internal Belt Drive System
  • Thread-on 12V DC Power Socket
  • SynScan Hand Controller with 42,000 object database
  • Built-in ST-4 AutoGuider Port
  • Stepper Motors (64 micro steps driven)
  • Dual Saddle Mount (Vixen, Losmandy)
  • Built-In PEC training
  • Illuminated Polar Finder
  • Retractable Counterweight Bar

EQ6-R features and specifications

Deep Sky Astrophotography with the EQ6-R

The Sky-Watcher EQ6-R arrived at my door on Friday, and it sat in the dining room hallway until Saturday. With clear skies in the forecast for Saturday night, I was given the rare opportunity to try out a new piece of gear right away. (Longtime amateur astronomers and photographers know that new equipment is usually met with a week of cloud cover, at a minimum).

Everything was neatly packed in the box with a custom foam insert that cradled the head of the EQ6-R mount. I’ll keep this packaging for transporting the mount in the future, to take advantage of this custom fitted padding. The foam can be used in a large carry-case when I decide to upgrade from a cardboard box.

Over the years, I’ve seen a wide variety of instruction manuals and spec sheets that accompany new astro-gear. Some have been nothing more than a vague description of the product with poor spelling – and a link to a website for more info. This was not the case with the Sky-Watcher EQ6-R. The manual is an in-depth, premium resource, complete with detailed diagrams and well-written dialogue. Sometimes, it’s the little things that make the difference.

After locking the mount head into place on the tripod and securing the spreader/eyepiece tray, I corrected the latitude of the polar axis for my location. The dial is easy to read and responsive. It wasn’t much of an adjustment from the default position of about 45 degrees to 43 here in Ontario, Canada.

Alt-Az Bolt Upgrades

It’s impossible to ignore the impressive upgrades made to the alt-az bolts on the EQ6-R. Going from the rather dinky bolts on my old HEQ5 to the robust handles on the EQ6-R was quite the upgrade. The focus put into this seemingly underrated update is surely the result of user feedback over the years, and much appreciated from someone who’s spent a lot of time setting up telescope mounts.

alt-az bolts

The heavy-duty alt-az bolts on the EQ6-R Pro

Integrated Handle

The same goes for the built-in heavy-duty handle on the mount head. For those of you that lug a complete rig across the patio as I do, you’ll wonder how you ever got by without this. I can get one hand between the mount head rod and spreader, and the other with a tight grip on the handle.

With the Esprit 100ED APO and astrography accessories attached, it’s a heavy load. But at least I can carry it more confidently with the integrated handle.

Built-In Polar Finder Scope

With polar alignment being so critical for success, it’s a shame when a telescope mount either doesn’t include a polar scope, or it feels like an afterthought. I’ve always enjoyed the practicality of a built-in polar scope, and making adjustments to the HEQ5 was a breeze.

I am happy to report that the polar alignment scope on the EQ6-R is easier to use than ever. The polar finder reticle is illuminated red when the mount is one, providing the perfect amount of light to see the clock and the Polaris at the same time. The biggest improvement to this process is the previously mentioned alt-az bolt upgrades which allow you to make smooth, precise adjustments.

SynScan Hand Controller and Slewing

The new and improved SynScan system is a pleasure to use, and I still enjoy the manual process of the 3-star alignment. Once your polar alignment has been set correctly, it’s simply a matter of slewing to 3 bright stars in your window of sky to quickly train the mount to point accurately.

I won’t get into exact arc-minutes of precision, but let’s just say my second alignment star appears in my imaging telescope (at 500mm) every time. After star 3, I can be confident that I’ll be pointing directly at my faint deep sky target with minimal framing adjustment before shooting.

The mount is quiet, even when slewing at top speed. It’s a high pitched hum that reminds me of the HEQ5 motor, but refined. It’s certainly not loud enough to wake up the neighbors. The new and improved SynScan hand controller (Version 5) is connected via USB. This makes updating the hand controller firmware much easier using your PC.

Tracking Accuracy and Autoguiding Performance

For those of you that like to scrutinize the tracking accuracy of your telescope mount using the graph in PHD2, have a look at the screenshot below. For my image scale using the Esprit 100ED and ASI294 MC Pro, the total RMS error of less than 1.0 means that my 4-minute images came out very sharp. I don’t like to get too hung up on the numbers in PHD2 guiding (and you shouldn’t either!), but if you’re curious as to what I’ve observed with the EQ6-R – here it is:

My autoguiding graph in PHD2 guiding with the Sky-Watcher EQ6-R

The Images

When I have enough information and experience with the Sky-Watcher EQ6-R, I’ll provide a detailed review of the mount that includes the specific traits of the hardware including any backlash, and any quirks that come up with different telescopes riding up top. For now, I’ll share 2 images that were captured on nights 1 and 2 using the EQ6-R with an Esprit 100ED telescope.

For both images, the ST-4 autoguiding port on the EQ6-R was used to improve the tracking of my deep-sky targets. At this time, I have not attempted any unguided images with the EQ6-R, although that would be an interesting experiment.  To autoguide, I leverage the free PHD2 guiding software with my compact guide scope package that includes an Altair GPCAM2 camera and StarField 50mm guide scope.

The Eastern Veil Nebula

NGC 6992 – The Eastern Veil Nebula

California Nebula

NGC 1499 – The California Nebula

  • Total Exposure: 3 Hours, 28 Minutes (52 x 4-minutes)
  • Camera: ZWO ASI294 MC Pro
  • Telescope: Sky-Watcher Esprit 100ED
  • Filter: STC Astro Duo Narrowband

As you can imagine, I am quite impressed with the performance and user-experience the Sky-Watcher EQR-6 telescope mount has provided thus far. For the style of deep sky astrophotography I enjoy, it appears to be a great solution and upgrade from the HEQ5.

The wide-field Sky-Watcher Esprit 100ED is a perfect match for this mount, and I’m not just talking about the color scheme. For an idea of the different types of telescopes, you could potentially mount to the EQ6-R,  have a look at the AstroBackyard Facebook page. The announcement of this GoTo mount stirred up many backyard images of the EQ6-R in a variety of configurations.

Final Thoughts

I am very grateful to be in a position to be reviewing and enjoying astrophotography equipment in my backyard. Some tests span the course of multiple nights and even months. The steeper the learning curve, and the more hiccups that occur along the way – the longer it takes to share organized content and results.

With that in mind, the Sky-Watcher EQ6-R Pro arrived at my home 1 week ago today. Regardless of my previous experience using my old HEQ5 and equatorial mounts in general, this is a pretty impressive testament to the painless user experience this intermediate level equatorial mount offers.

Rudy

Rudy sitting proudly in front of my new telescope mount

The Sky-Watcher EQ6-R offers a good balance of affordability and performance/payload capacity. It’s an attractive option for anyone using a modest-sized refractor such as the Esprit 100ED and leaves room to grow into the future.

To stay up to date with AstroBackyard and my latest backyard adventures with the Sky-Watcher EQ6-R and everything else I’m up to, please subscribe to my e-mail newsletter. I’d like to thank Kevin at Sky-Watcher USA for this incredible opportunity. I think he finally got tired of seeing me drag that old HEQ5 out of the garage!

If you’re interested in the Sky-Watcher EQ6-R Pro mount, you can order online from OPT.

Related Posts:

The Mighty Celestron CGX-L Computerized Equatorial Mount

Related Tags