How to Align Astrophotos in Photoshop
During the image processing stages of astrophotography, you may find times where you need to align 2 images together in Photoshop. There are many benefits to learning how to align astrophotos in Photoshop such as producing images with an improved signal-to-noise ratio, and having the ability to combine different data sets together into a single composite image.
The process of aligning 2 or more astrophotography images together involves manually aligning the files so that they line up perfectly on top of each other. Luckily for us, stars make excellent registration marks to aid in the process of aligning the images. Almost every deep sky or wide field astrophotography image you take will include several stars of varying sizes to assist you in the alignment process.
If you have watched any of my previous image processing tutorials, you have likely seen the process of merging data shot using different filters. An example of this process in action, is with my HaRGB processing tutorial. This involves aligning a processed narrowband image (h-alpha) with broadband color data for a creative composite.

This image of the Pinwheel Galaxy includes multiple data sets that were aligned and merged in Photoshop
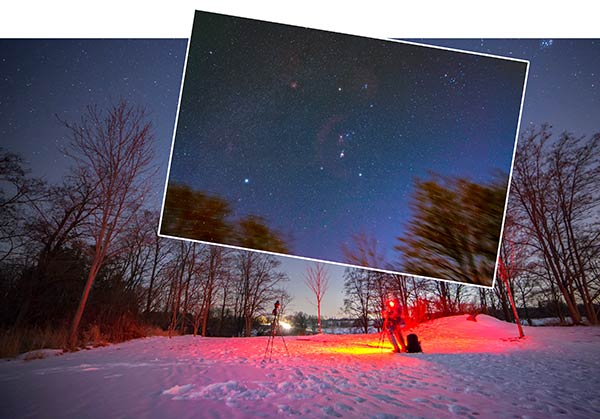
How to align astrophotography images in Photoshop
This Photoshop technique is useful if you want to align two or more image exposures together to reduce noise. You can also align data sets that have been processed with each other, and merge them into a new image. This is particularly effective when adding narrowband or luminance signal (light) data to an existing color image.
The process of combining data captured using various filters into a single file separated by layers (such as the LRGB process), is a very powerful astrophotography processing technique. It gives you much more control over each color channel of your final image.
I won’t go into the details of color mapping monochrome data into channels. This tutorial focuses on the tools and basic principals of scaling and aligning images together manually in Photoshop.
In this tutorial I will cover the basic techniques used to scale, rotate and align images. Here is a rundown of the topics discussed on this page:
- The importance of image-resolution
- Setting the opacity and blending mode of your image layers
- Scaling images using the free-transform tool
- Rotating image layers
- Using stars to accurately align your images
- Cropping your image
- Saving a new image with layers
Understanding Resolution and Image Scaling
The most important thing to remember during the process of aligning astrophotography images in Photoshop is resolution. The preservation of your data must be kept top of mind before making any edits to your composite image.
If done properly, you will not lose resolution or detail in your images by aligning and rotating your image frames.
For example, you must not enlarge the image using the free transform scaling tool when attempting to line 2 images up. Scaling the image frame down is fine, but never up. Scaling the image up even 5% results in the negative effects of interpolation and loss of detail.
An easy way to remember this concept and not be tempted to scale your image up is to define a set resolution base image.

Aligning images in Photoshop is a great way to apply new data to a color channel of an existing image.
Your base image will define the final, untouched image scale of your resulting composite. Any images layers that you apply on top as a new layer must be scaled down to align with this layer to not Interpolate the data.
It is said that rotating the image without adjusting the scale will interpolate the data, but in my experience the affects are not noticeable even under close inspection with the magnifying glass.
I recommend starting with a large base layer image, so that future data can remain as large as possible when being applied as a new layer on top. Ideally, your astrophotos will be saved in as large of a format as possible so you have more flexibility in presentation.
Small image files of 2 Mega-pixels (MP) or less may be fine for sharing online, but printing these photos is out of the question. For reference, the largest astrophotography images I have ever printed were roughly 4000 x 3000 pixels in size (12 MP), and they appeared impressively sharp in an 18” x 24” print.

I retained the native resolution of this image of the Eastern Veil Nebula for a large print (18″ x 24″).
How to rotate and scale multiple images together
Experts will often recommend to use the various layer blending modes such as “difference” during this process, but I find simply adjusting the overall opacity of your top layer image to be effective. An opacity setting of 50% will allow you to see both layers simultaneously, so that you can scale and rotate the top layer in place over the original.
At this stage, you may notice that the image you are applying on top is too big, or that the rotation between the images is significant.
Remember that scaling your top layer image down to match the background layer is fine, but you never want to up-scale the image. The easiest and most straight-forward scenario in this situation is to be working with image layers shot from the same camera, at the same focal length. This way, the image scale should be nearly identical and very little scaling will need to take place.
Matching the rotation of the image using the underlying stars will be your biggest task.
Due to cropping, general image manipulation, and shooting images at different focal lengths, the image scale of my image data often doesn’t match.
To scale the top layer image down, I use the free transform tool found in the Photoshop toolbar. Always hold down the shift key when adjusting the scale of your image layer to ensure that you retain the native proportions of the data.
You will inevitably need to zoom in and magnify the image to confirm whether you have aligned the stars in your image properly or not. This may involve a fair amount of back and forth, especially when correcting subtle differences in the rotation of the images.
Stars may align perfectly in the center of the image, but are way off near the edges of the frame. Rest assured, the images will eventually match up perfectly. I find it useful to use the arrow keys on your keyboard to shift the image in small amounts.
In this video, I manually stack image exposures in Photoshop to reduce noise:
Troubleshooting data miss-matches and cropping
If your images were shot using different telescopes or camera lenses, it’s possible that the image fields will not match perfectly due to distortion. In these cases, you can either choose to only align the images captured using the same optical equipment – or crop the images in to the data that matches closer to the center of the frame.
Using camera lenses and telescopes with a “flat field” come in handy in these situations because you can count on the stars at the edges of the frame to be sharp and free of lens distortion.
Cropping your final image extensively is not ideal, as you are losing image data that you worked so hard to collect. For this reason, it is best to capture images that you plan on later combining using the same field of view and orientation.
Drastic changes to the rotation are the biggest culprit of data loss due to cropping, especially if you have images that went from a portrait format to landscape. The missing areas of data (where the layers do not overlap) will need to be trimmed from your final image via the crop tool.
Combining images from different camera lenses
If you have taken two sets of images through different camera lenses, it may be difficult to properly align the astrophotos on top of each other. This is because camera lenses all have a specific profile, and the fields often do not match up perfectly with each other.
For example, in the image below, I used images captured using a Rokinon 14mm F/2.8 lens, and a Canon EF 17-40mm F/4L. Even after matching up the scale of the images perfectly in Photoshop, it was impossible to match the images up to the edges.
Overlaying an image shot through different camera lenses.
Setting opacity and cropping the final image
Once you have aligned the images to each other using the correct scale, and have matched the rotation, you can adjust the opacity of the layer to see the benefits of the combined data over your original. It is amazing to see the differences between the two images, especially if the each one is a stacked image of multiple exposures.
If you are comparing single image exposures with each other, you may notice artifacts such as satellites, airplanes, meteors, or even the movement of an asteroid between frames. In terms of signal-to-noise ratio, you will also see the random pattern noise reduce significantly as each exposure is added as a new image layer.
To reap the benefits of this technique, you will need to adjust the opacity of each layer with a gradual reduction of opacity. The process of stacking images and averaging out the digital noise pattern can be done at scale using software such as DeepSkyStacker.
The same benefits of registering and stacking multiple light frames apply when you align images manually in Photoshop as well. You can leverage this technique in Photoshop in real time by stacking the images yourself, or using the automated median stacking script in Photoshop.
There is a science to this, and it involves some math:
This type of composite will yield gains in the signal to noise ratio based on the square root of the number of images combined. In other words, combining 2 originals will yield approximately a 1.4x improvement in signal to noise, combining 4 originals will yield a 2x improvement, combining 9 originals will yield a 3x improvement, and so on. – Jerry Lodriguss
Aligning your astrophotos in Photoshop has several benefits, from an improved signal-to-noise ratio, to a powerful method of comparing datasets. The benefits are not exclusive to deep sky images either, planetary imaging, wide-angle nightscapes, and Milky Way photography can all benefit from this technique.
To create composite images that leverage image exposures of different lengths, aligning the images together will allow to create high-dynamic-range (HDR) astrophotos that are compelling and dynamic. I used this method to create an HDR Orion Nebula image with improved detail in the bright core.

This technique is useful when blending different exposure lengths together to create a high dynamic range image.
When aligning existing processed images with each other, you may realize that your image processing style has evolved extensively over time. You can then decide to re-process the data, or blend the sets together for the best of both worlds.
I have found that processing two sets of data separately, and combining them at nearly a 50/50 blend to be very effective a creating a balanced image.
See this technique in action in my Milky Way image processing tutorial:
Saving your image
When you are happy with the aligned image that includes one or more layers of data, you have 2 options available for saving the data. You can flatten the image and save it as a new image file, or save a .PSD version (Photoshop file format) of the image that includes the layers.
I recommend saving both versions, as one is great for sharing online or printing, while the other is useful for making further changes down the road. For reference, I save my high-resolution images in .TIF format to retain image quality. For smaller, compressed images destined to uploaded to my website or online gallery, a .jpg is fine.
I hope that you have found this tutorial useful in your quest to capture and process better astrophotography images. To stay up to date with my latest astrophotography tips, tutorials, and reviews, please subscribe to my newsletter.
Related Posts:
- Image stacking in DeepSkyStacker
- Astrophotography Image Processing Tutorial
- AstroBackyard Image Processing Guide