Skip to Content

2015

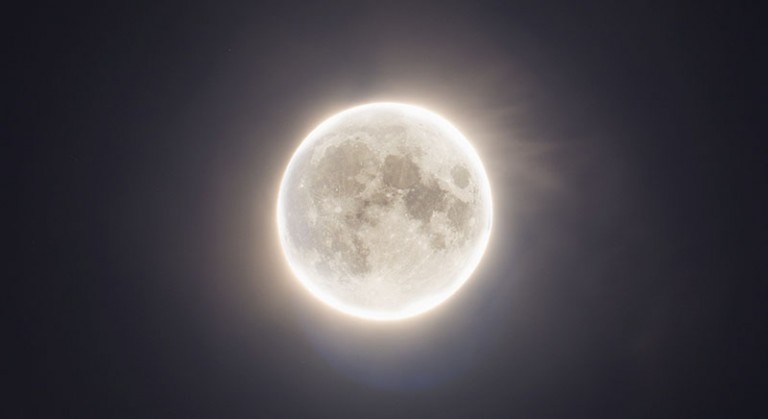
Christmas Eve Moon 2015

|The Moon|0 Comments

Full Moon on Christmas 2015


Merry Christmas and a happy new year to all of my fellow astronomy nerds out there!  2015 was an amazing year for me and my family with the purchase of a new home and the addition of a new four-legged friend named Rudolph. Next year will be even better as I continue advancing my skills in astrophotography, and sharing new tips and tutorials with my audience.  Thank you to everyone who has ever liked, retweeted, reblogged or double-tapped any of my images this year.  Merry Christmas!

So how did I get this shot?

I always seem to get a lot of comments about how interesting my moon photography is when it includes detail on the moon, plus the glow around it you see when there are a few clouds in the sky.  I’ve heard things like, “it looks like the sun!” and, “you can see the corona!”.  Well, the explanation is simple: I combine two separate exposures together.

Exposure 1: Short Exposure for moon details


Details on the moon shown in a short camera exposure


This was the result of a 1/400 shutter speed with the Canon 70D at ISO 100.  This was taken through my Explore Scientific ED80 Telescope riding on my Skywatcher EQ Mount. If you are taking the shot on a tripod through a long telephoto lens, you may have to use a higher ISO and a shorter exposure to avoid camera shake.  A telescope on a tracking EQ mount tracks the sky and moves with the moon, allowing me to take longer, steady exposures.

Exposure 2: Longer exposure for moon glow / corona


Moon glow taken with a longer shutter speed


As you can see, even a mere 1 second exposure completely blows-out the details on the moon, yet it picks up the beautiful glow produced by the weather conditions that night. The trick now is to overlay the shorter exposure that includes the details on the surface of the moon.  You will want to copy and paste the shorter exposure image as a new layer on top of the blown-out version.  Then, feather the edges of the detail version to blend the two exposures together. There are a bunch of different ways to accomplish this task, but being an old-school photoshop guy, I still like my old-fashioned eraser brush!


Christmas Moon 2015 - Combining Moon Exposures


It’s not for everyone, but I personally love the look of shots like these. It’s like the best of both worlds, you can see the a more natural looking moon in the sky under the current weather conditions, but can also enjoy the marvelous moon details. I hope this has been a useful tutorial for this method, and that you give it a try for yourself some day.


Here is another Example Using this Technique:


Moonglow rising

Related Tags

Photographing the 2015 Perseid Meteor Shower

|Meteor Shower|3 Comments
2015 Perseid Meteor Shower

I captured one Perseid meteor from my backyard – better luck next year!

2015 Perseid Meteor Shower

Above photo taken August 13th, 2015 – 12:22am

I was not able to travel to a pretty location to shoot the Perseids last night, so I just set up shop in the backyard! I planted my Canon 7D firmly on my tripod, and aimed above my house towards the constellation Perseus, and above. Using Backyard EOS, I set the camera to shoot 200 – 25-second exposures, at ISO 800. Then I went to bed!  Unfortunately, my battery died after 160 exposures. Luckily though, I didn’t end up empty-handed as this meteoroid streaked through the bottom left of the frame above at around 12:00am:)
 
I used some “creative” processing for the photo above. You may feel that the image is just a tad heavy on the blue! The light-pollution over my house produced a nasty gradient, and an even-black sky really pronounced this. Since the focus of this image is the tiny Perseid meteoroid on the bottom left anyway, I decided to enhance the blue levels to create a more pleasing, although somewhat unnatural looking night sky. Normally, I prefer my RGB black point to be set at roughly 32-32-33.
Backyard astrophotography

So many frames, so few meteors

About the Perseid Meteor Shower

The Perseid meteor shower is traditionally the most spectacular and most-reliable show of the year. The evening of August 12th through the morning of August 13th is the peak time for sky watchers.

Before all else, the biggest factor in a successful image (or viewing) of the Perseid meteor shower for 2015 is dark skies! This means getting away from the bright city lights that wash out the night sky, and prevent us from seeing all but the brightest of meteoroids. An unobstructed view of the North-Eastern sky and overhead is also ideal. This year’s display could be the best since 2010 due to that fact that we have the advantage of having a moonless sky. Experts predict anywhere from 75-100 meteoroids per hour at its peak under the right conditions! Realistically, you can expect to see a streak of light every few minutes or so.

Perseid Meteor Shower

The Perseid Meteor Shower of 2013 – Photo by Trevor Jones

 
I captured this photo in 2013, when the Perseids peaked 5 days after the new moon. Notice the streaking cosmic particle at the lower right of frame. You can also just barely make out the California nebula above the streaking meteoroid!  I have learned a lot since this photo was taken 2 years ago, I hope to get a great shot tomorrow night. This year will be even darker, with a chance to see more “shooting stars”.

Photographing the 2015 Perseid Meteor shower

Make sure you can find the constellation Perseus in the night sky. It is located below the recognizable constellation of Cassiopeia, which I always think of it as a big “W”. You will want attach your camera to a sturdy tripod and aim it roughly towards that constellation.  A nice wide-field lens would really help increase your chances of getting a great shot. This year, I plan on using the widest lens I own, my Canon L series 17-40mm. A kit lens that goes back to 18mm will also work just fine. Make sure you stay up nice and late, so Perseus is nice and high in the sky. Have a look at the handy reference photo provided by Sky and Telescope.
 
Where to look for Perseid Meteors

Radiant point of the Perseid Meteor Shower

While in manual mode on your DSLR, try setting a slow enough shutter speed to increase your chances of a meteor streak, but not so slow that the stars begin to trail themselves. I prefer to have pinpoint stars with the streaking meteor blazing through them. For the photo above, I used a shutter speed of 20 seconds, an ISO of 1600, with my lens aperture set to F4. Keep in mind that I was away from city light pollution.

I sat next to my tripod and continuously pressed the shutter button for a period of about one hour (fun eh!?) in hopes of catching a real burner.  An automatic timer or camera control through a laptop would make things much easier. Just look at what is possible when you have the right equipment, conditions, and creativity:

 
Photo of a meteor shower by Ken Brandon
Perseid Meteor Shower photo by Kenneth Brandon

The meteor shower occurs when earth travels through a debris-stream of comet particles, in this case, Comet Swift-Tuttle. The reason this annual meteor shower is called “The Perseids” is that the “shooting stars” appear to originate from a single point (or radiant) in the constellation of Perseus.
The best part about meteor showers is that you don’t need any optical aids like binoculars or telescopes to enjoy them, just your eyes. Okay, a lawn chair might come in handy, so make sure you have one of those! Most importantly, make a night of it with friends or family! Enjoy the excitement of the 2015 Perseid Meteor Shower, and watching the night sky light up with each other.

Related Tags