Astrophotography with a 12nm ha filter
With the aid of an Astronomik 12nm Ha filter, I can capture deep-sky images more often than ever before. With both the Canon EOS clip-in version for my DSLR and the 2″ CCD round mounted version for the my dedicated astronomy camera, I collect photons in every moon phase.
Despite the bright 80% illuminated moon this past Saturday night, I was able to capture some incredible deep sky photos of 2 deep sky emission nebula targets from my backyard in the city. Using my 102mm refractor telescopes, I collected isolated wavelengths of light on the Wizard Nebula in the constellation Cepheus, and Bubble Nebula in neighboring Cassiopeia.
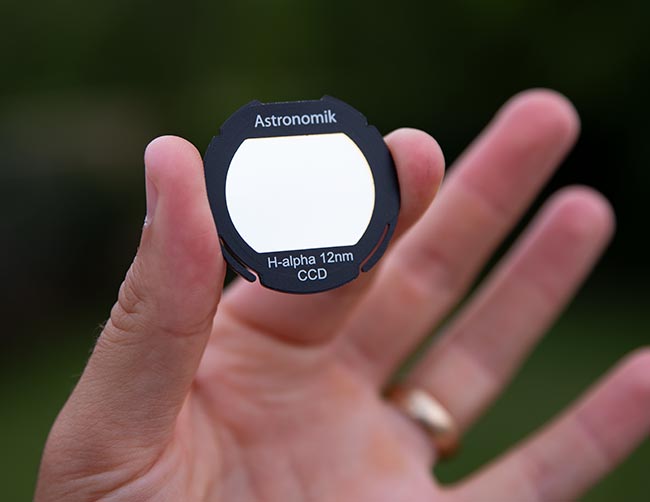
The Astronomik 12nm H-Alpha Clip-in filter for Canon EOS DSLR cameras (See Video)
A narrowband Hydrogen-alpha filter (Ha) has the power to cancel out nearly all of the surrounding city glow and moonlight in the sky. In seemingly magical fashion, it reveals the faint nebulae in the night sky that are impossible to see through an eyepiece with the naked eye.
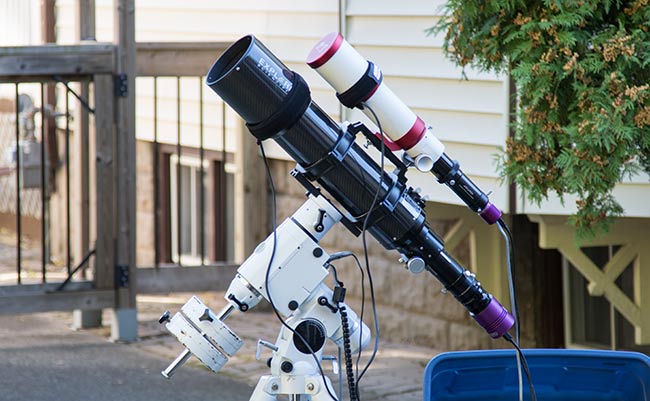
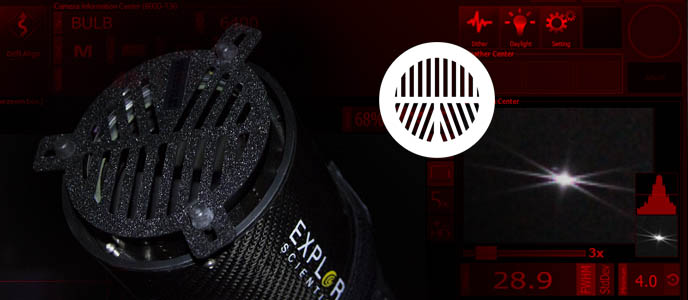
In the photo below, you’ll see my Explore Scientific ED102 refractor telescope, with an imaging payload that includes a 48mm (2-inch) Astronomik round mounted 12nm Ha filter. This filter is threaded to the nosepiece of my field flattener/reducer and fits securely into the focuser of the telescope.
In this post, I’ll discuss the advantages that a 12nm Ha filter can provide to your deep sky imaging experience. Whether you use a dedicated astronomy camera (mono or color), or a modified DSLR, a narrowband h-alpha filter will likely be the most useful filter you’ll ever use for astrophotography.
I personally had no idea what I was missing out on before I dove head first into narrowband astrophotography with my DSLR. You’ll need an astro-modified DSLR or dedicated astronomy camera to see the true benefits of this technique, which I will discuss in detail shortly.
Related Video: Results using a duo-narrowband filter with a color camera
Astrophotography with a 12nm ha filter
My current one-shot color CMOS camera performs exceptionally well with narrowband filters. Sure, a camera with a monochrome CMOS or CCD sensor with TEC (cooling) would outperform it, but I have a strange love of pushing my current gear to its limits.
The Altair Hypercam 183C includes internal fan cooling which keeps the sensor much cooler than a traditional DSLR. This comes in handy when shooting with a narrowband Ha filter, as you generally will want to shoot even longer exposures than you would in color. (This depends on your camera and the settings used)
After a very warm start to fall, the reality of a Canadian October night set in as the temperature plummeted to 4 degrees Celcius on Saturday. Who needs internal cooling when it’s freezing outside? It really is a great time of year for DSLR astrophotography – as the sensor can return to a more suitable temperature for long exposure imaging.
In the video below, you’ll get a behind the scenes look at my process of capturing the Bubble Nebula using an Astronomik 12nm Ha filter.
For an idea of what to expect when using a color camera, have a look at the following image of the Wizard Nebula captured in the Hydrogen Alpha wavelength. The individual image frames were captured using a gain setting of 60% on the 183C astronomy camera with a 12nm Ha Filter in front of the sensor.
The photo includes over 5 hours worth of 210-second exposures:
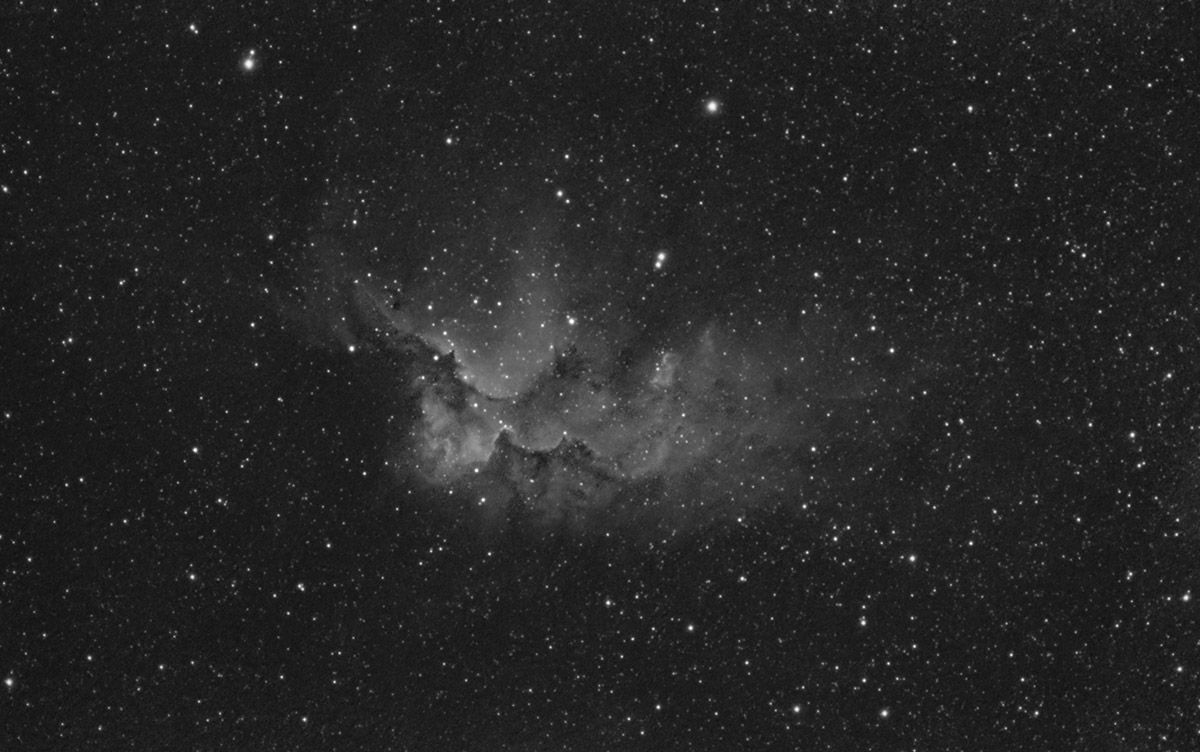
The Wizard Nebula in Ha – Altair Hypercam 183C Color CMOS Camera
Total Exposure: 4 Hours, 54 Minutes (84 frames)
The reason the photo is black and white is that it was created by extracting the red channel from the original data collected from the color CMOS sensor. This process is easy to complete using Adobe Photoshop, by copying the data from the red channel to a new image.
You can then process the Ha data separately, as you would with luminance data from a monochrome camera. Again, the signal is not nearly as impressive as it would be using a dedicated monochrome camera, but it can certainly improve your existing color images.
To illustrate this point, I have added the additional light in captured Ha to existing some existing RGB (color) data on the Wizard Nebula. The HaRGB composition method continues to produce incredible results from my light polluted backyard.

Using an H-Alpha Filter with a DSLR Camera
A DSLR camera is a fantastic way to start enjoying narrowband astrophotography with an H-Alpha filter, but there’s a catch. You must be willing to modify your existing stock DSLR camera (I modded my Canon 450 using this video as a reference) or purchase a pre-modified camera from a vendor that specializes in this service.
One point of confusion amateur DSLR astrophotographers may face is the description of the filter, and whether or not it is a good fit for your camera. For example, the Astronomik website lists the filter as a “narrow band filter for CCD photography”. So will this filter be effective with the color CMOS sensor in your DSLR?
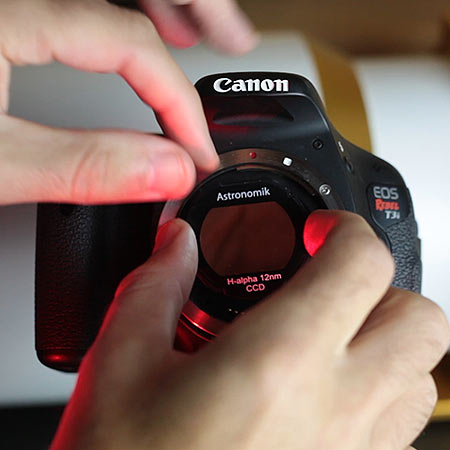
The 12nm Astronomik Ha Filter – Clip-in version for Canon EOS DSLR’s
The answer is yes, but you’ll need to have a modified camera to reap the full benefits of a Ha filter. By modified, I mean that the internal stock IR cut filter has been removed from the camera sensor. There are professional astrophotography camera modification services available to perform this upgrade if you are not up to the task yourself.
The stock IR (Infrared) filter inside regular DSLR cameras is there to produce natural looking photos for daytime photography, yet blocks out certain wavelengths of hydrogen-alpha light emitted by emission nebulae in the night sky.
For my Canon Rebel T3i, no additional IR cut filter replaced the stock one that was removed, and this is called a “full spectrum modification”, or “naked sensor mod”. Because I have not installed a replacement UV/IR filter inside the camera, I need to make sure that I always use an external UV/IR filter to properly focus my broadband (color) images.
An example is the SkyTech CLS-CCD filter that I use to collect color images from my light polluted backyard. The “CCD” portion of the name is referencing the added bandpass filters a modfied DSLR camera requires to focus.
A 12nm Ha narrowband filter can dramatically increase the contrast between your deep sky object and a bright city sky. It suppresses the emission lines of artificial lighting such as Mercury and Sodium, leaving only the intense details of the h-alpha light wavelength in your image.
Using a DSLR camera with an h-alpha filter means that all of the “good” signal (not noise) will reside in the red channel. To showcase this trait, have a look at the comparison of blue signal vs. red in this narrowband image of the Heart Nebula.

In September 2018, I captured images of two emission nebulae using my modified DSLR camera and a 12nm Astronomik Ha filter. The camera was attached to a wide field refractor telescope, the William Optics Zenithstar 73 APO.
If you currently shoot color deep sky images with a DSLR camera, I urge you to consider the idea of modifying it for astrophotography. You can then begin to tap into the amazing benefits of narrowband imaging using an h-alpha filter such as the Astronomik 12nm clip-in version.
The fact that you’ll be able to capture powerful images during a full-moon alone is worth the effort. Some of my most memorable astrophotography projects are HaRGB composite images that combine broadband RGB color images with added luminance signal of hydrogen-alpha.
A great feature of the clip-in variation of the Astronomik Ha filter is the ability to use it when a camera lens is connected. This means that you can capture wide field images of the night sky that isolate the interesting regions of emission nebulosity. Below, is an image created using a ha filter in conjunction with a 50mm camera lens on an iOptron SkyTracker mount:

The Orion Constellation in H-Alpha using a 50mm Camera Lens
Creating an HaRGB Composite
Then, I combined the images shot in Ha with my color version of the image – shot through an Explore Scientific UHC filter. This creates a composite version of the NGC 7380 that uses the grayscale H-Alpha image as a luminance layer.
Next up is NGC 7635 – the Bubble Nebula. This is just the beginning of a full narrowband project that will include OIII and SII. This project will likely carry on through the month of October – as I will need to wait for New Moon to capture the broadband color images.
With Saturdays imaging season, I the project is off to a great start.
The Bubble Nebula in Ha

Photo Details:
- Exposure Time: 3 Hours, 33 Minutes (61 frames)
- Camera: Altair Hypercam 183C (Gain 60%, Bin 2 x 2)
- Filter: Astronomik 12nm Ha Filter
At this point, I have also collected images using the Astronomik 12nm OIII filter as well. Another cold clear night in the backyard yeilded over 4 hours worth of total exposure time on my project. The details of the Bubble Nebula in OIII are less dramatic than the h-alpha, but a necessary stage in my narrowband project.
The Bubble Nebula in OIII
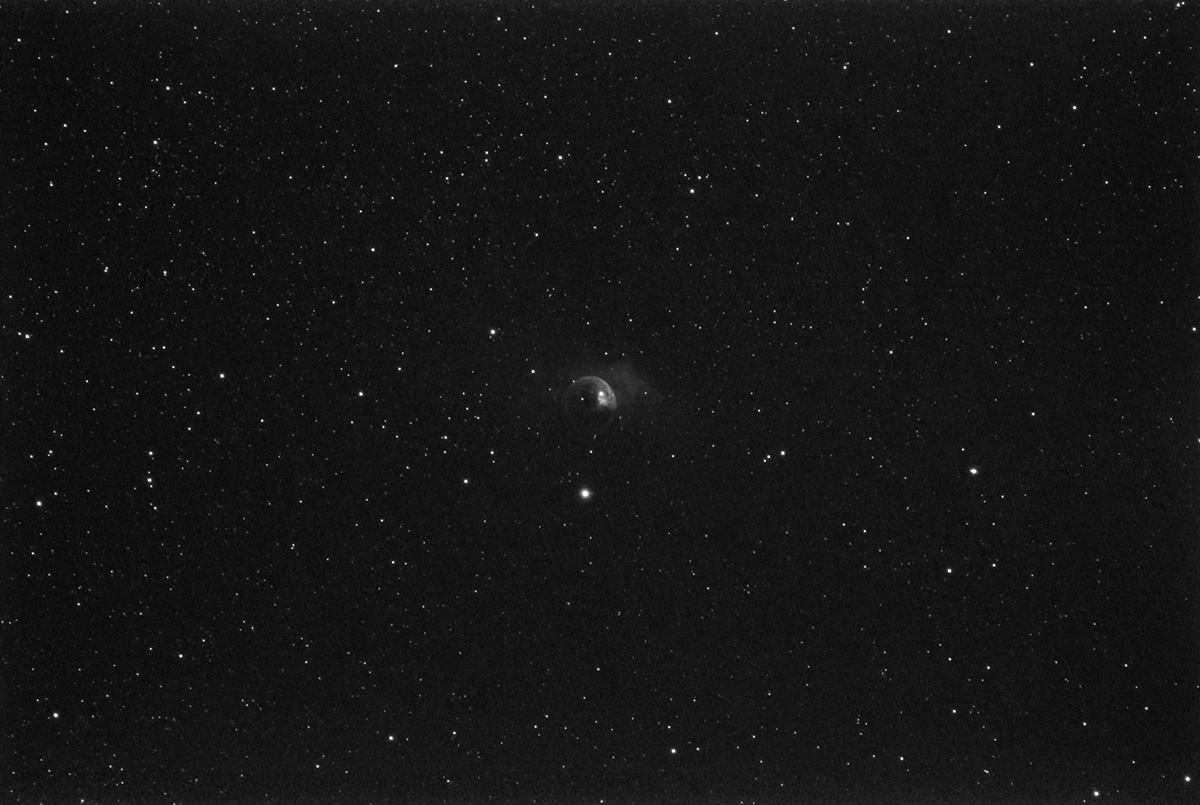
Photo Details:
- Exposure Time: 4 Hours, 43 Minutes (81 frames)
- Camera: Altair Hypercam 183C (Gain 60%, Bin 2 x 2)
- Filter: Astronomik 12nm OIII Filter
Final Thoughts
I hope that you have enjoyed seeing my progress into narrowband deep sky astrophotography with the use of filters. The color CMOS sensor camera I am using is not ideal for this type of photography, but it certainly gets the job done with a little patience.

I look forward to completing my narrowband project on the Bubble Nebula this month and will be sure to share my results.
With that being said, I am happy to announce the arrival of a Mono Camera as early as late October. This is a brand new astrophotography camera at an entry-level price point. Until next time, clear skies!


hi, excellent site and YouTube channel as well…it have been of great help to me.
I am into astrophotography since a year now, using a canon 450D modified (by myself).
last month the weather here have been horrible to say the least, i’m in the carribean (dominican republic). So we are hoping for some clear skies soon, while that happen I want to order a Ha filter and i have a couple of questions.
1. I have a 8″ newtonian with a MPC coma corrector that accept 2″ filter but what its best recommended by you, a clip on to attach directly to the dslr o a 2″ filter to add to the coma corrector ?
2. what its you procedure to capture using the ha filter (clipon) and the dslr? i ask because when you finish imaging in ha you do need to move the camera to remove the filter so you can capture in RGB, right? do you use some sort of mark on the camera so you will position it in the same orientation?
thanks again…
Thanks very much I am a subscriber to your channel which I find very useful. I have just got the Astronomik H-a filter, do I need to up the ISO to get the details ( I normally image at ISO 400 for 10 min or ISO 800 for 5 min). Also I assume I don’t need to take flats. Thanks very much
Hi Omar. With the DSLR clip-in variation of the filter, you should have no trouble threading the MPCC Coma Corrector on top (the same goes for a field flattener or Canon EF lenses.) As for shooting in color afterward, just try and frame the object up as close as possible. I manually combine the narrowband Ha data with color in Photoshop as either a luminance layer or synthetic red channel. Hope this helps! Cheers
Hi Mostafa. Glad to hear you are enjoying the YouTube channel:) I would recommend bumping up the ISO, yes. If you’re trying to stay conservative in terms on introducing noise, I’d stick to ISO 800. For reference, a typical sub using my DSLR with a Ha filter from my backyard is about 5 minutes at ISO 1600.
Yet again, another great post. I really enjoy how you take apart the process and explain the pieces and provide different examples. Excellent learning source.
I just pulled the trigger (after waiting for weeks for it to be in stock) on a ZWO ASI294MC Pro. Figured I might as well just go all out. I did get an IR Cut filter for it, but was wondering what other filters you’d recommend for my Bortle 6 skies. I am looking at that STC dual, but it seems to be back ordered everywhere. Should I start with an Ha filter just to get my feet wet?
Hi Trevor,
AstroBackyard has been tremendous in helping me get started in the hobby. I am considering an astro-modified Canon. The camera operating perameters list 0 deg C as the minimum operating temperature. Have you experienced any issues in cold weather other than battery drain? We live at a high elevation site in Montana.
Thanks, Rich
Hi Trevor, first I want to congratulate you for this fantastic website.
I live in a very polluted area and I am thinking about buying a Ha filter. The equipment I have is a Canon 450D that is modified and refrigerated, so I decide on a filter with the EOS clip system.
But I want to know what you think about the Ha filter of 7nm that is less restrictive, or the right one is the 12nm filter.
Thanks for your time.
Greetings from Spain.
Hi.
Great info and a subject I’m learning little by little.
Just purchased a 12nm filter with a canon 60da and lens.concentrating on Orion at the moment with 50mm lens finding focusing real issue.Im presuming I won’t get pinsharp stars with this filter but I’m really finding it hard to get a correctly focused shot.
Any tips please ?