The Leo Triplet of Galaxies
The Leo Triplet is an interesting group of 3 galaxies that are often observed and photographed within a single field of view.
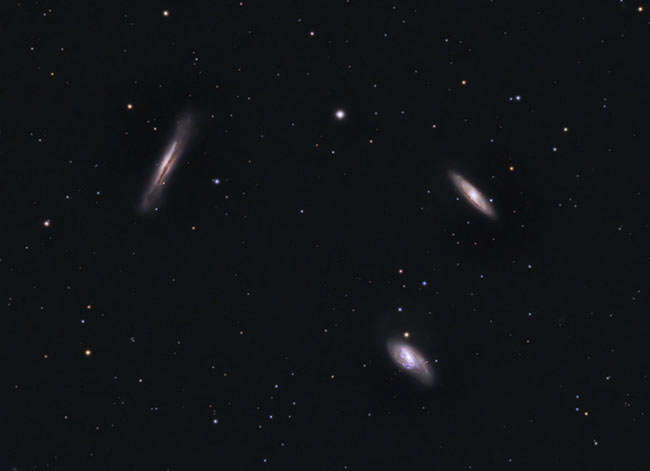
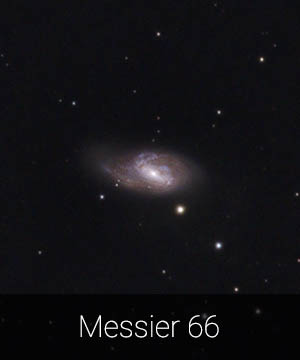
The Leo Triplet includes spiral galaxies M65, M66, and NGC 3628. This group of galaxies is also known as the M66 group, and is found in the constellation Leo.
Each one of the galaxies is tilted at a different angle, making them all appear quite different from each other from our vantage point on Earth.
NGC 3628 (The Hamburger Galaxy) is seen edge-on, with dark dust lanes that obscure the bright core of the galaxy. M65 and M66 are on angles that show off their beautiful spiral structure.
The Leo Triplet
My testing of the ASI071MC-Cool Astrophotography Camera continues. This time, on the Leo Triplet of Galaxies. This dedicated astronomy camera (one-shot color CMOS sensor) has taken the place of my Canon T3i DSLR for now. After some early struggles, I have enjoyed learning the new photography techniques involved with cooled CMOS camera imaging.
By now, many of you have transitioned from deep sky targets that were available during the Winter months into the springtime galaxies (myself included). Even though each night kicks off with Orion, the constellation quickly fades into the glow of the city as the night progresses.
I have been pointing my telescope towards Leo the lion for a few years now, usually starting in the month of April. The Leo Triplet occupies the “sweet spot” in the night sky where I have an opportunity to capture a respectable amount of data throughout the night, with a meridian flip intermission in between.
View my latest image of the Leo Triplet (April 3, 2017)
Target Acquired: The Leo Triplet
If you read my post on 8 deep sky targets for galaxy season, you’ll already know that the Leo Triplet is one of my favorite subjects to photograph at this time of year. Most galaxies are quite small when photographed through my 102mm refractor, but this trio of galaxies fits nicely within the frame.
The constellation Leo is present for the majority of the night during the months of March through May, which is where you’ll find the Leo Triplet. The diversity in galaxy types makes the Leo Triplet a satisfying astrophotography target for night sky photographers, both amateur and professional.
If you want to try it for yourself, set your goto mount to M65. You’ll discover M66 and NGC 3628 nearby even in short exposures.
You can view my most recent image of the Leo Triplet further down the post. It is a good example of what to expect using a small refractor.
To me, the Leo constellation is most easily recognized by the sickle or “reverse question mark”, as I like to call it. The sickle starts with the bright star Regulus and works up through the lion’s mane including another bright star, Algeiba. I will often use Regulus as a target for my star alignment process, as its magnitude and location are familiar to me.

Camera: ASI071MC-Cool (Color)
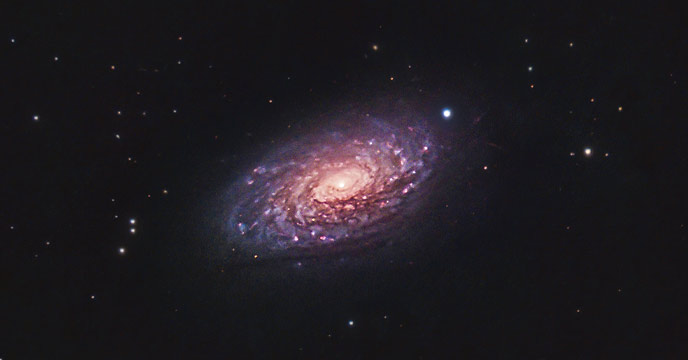
I’ll continue my deep sky astrophotography work using the ASI071MC-Cool (one shot color) CMOS camera for the next 2 weeks. If you missed any of my latest experiences using this cooled astronomy camera, have a look at the video below. I begin to understand some of the basics of CCD-style astrophotography and end up with a much better version of the M81 and M82 galaxies.
Like anything else, my enjoyment of the process becomes greater as I achieve better results. I feel like I have a system that works now, so it is exciting to keep using the new camera. I will likely capture one more deep-sky target with the ASI071 before returning it to OTA.
I photographed the Leo Triplet the night I shot the video below. It was the second target after spending time on Bodes’ Galaxy and the Cigar Galaxy.
I hope experienced Sequence Generator Pro users will excuse my lack of knowledge. I was delighted to be able to capture successful light, dark and flat frames using the ASI071 with SGP. Capturing flat frames was a little different than I was used to, but I eventually had success using the methods outlined on the AstroBackyard Facebook Page.
The team over at ZWO graciously included my video on the product page for the ASI071MC-Cool. I can only hope that sharing my experiences using the camera early on will be useful to future owners of the ASI071. It may give another perspective to the realities of switching to a CCD camera or dedicated astronomy camera by current DSLR owners.
I can see how SGP would do an amazing job automating almost the entire imaging session. I haven’t even scratched the surface of this software yet. The plate-solving, autofocus, and target sequencing features have opened my eyes to a new world of automation possibilities. These will come in handy when I eventually build a backyard observatory.
I also want to test out (APT) Astro Photography Tool before I have to send the camera back. On the surface, it looks to be a slightly more user-friendly option than SGP.
Switching from a DSLR to a Cooled CMOS camera?
I have been asked this question a number of times, and the answer is not yet. For starters, the Canon 600D continues to be my only primary imaging camera. I have been given an amazing opportunity to test products (Including the ASI071MC-Cool) thanks to my partnership with Ontario Telescope and Accessories. I will be sending the ASI071MC Pro camera back in about 2 weeks from now.
The costs involved in upgrading to a dedicated astronomy camera are not in my budget for this year. The equipment I currently use should paint a picture of the amount of money I am able to invest in astrophotography at the moment.
I have been very impressed with the results I have been getting with the cooled CMOS camera thus far. The final stacked images are probably the highest quality data I have ever brought into Photoshop. The 4 and 5-minute exposures captured using the ASI071 have been incredibly smooth, with very little noise. The color balance is little different than I was accustomed to with the 600D, but there are ways to correct this in post-processing.
Goodbye Thermal Noise
My regular processing workflow with the DSLR included a lot of time spent correcting noise and gradients. With the frames being captured at -30 degrees and below, removing noise is an afterthought. I still run one noise reduction filter near the end of the workflow, but that’s it.
It’s too bad that I am reviewing the ASI071 in the early Spring when the temperature regularly drops to zero at night. Those hot imaging sessions in July could really benefit from a cooled sensor!
My latest image: The Leo Triplet
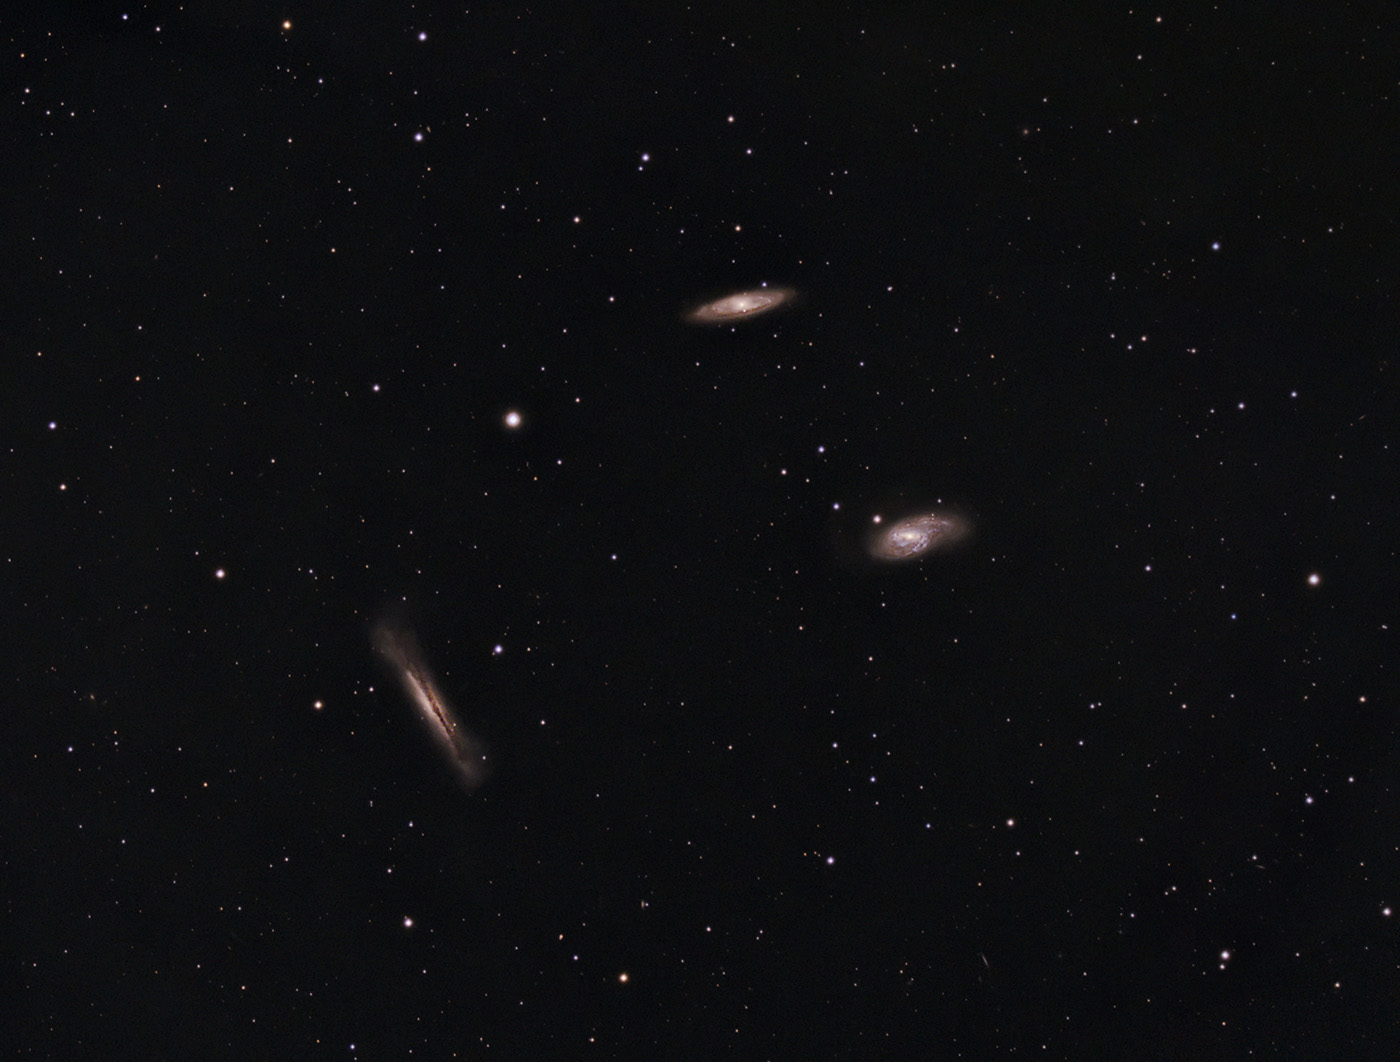
The image above was captured on March 17th from my backyard. I did not use any filters with the ASI071 including the recommended IR-UV CUT filter for better color balance and to prevent star-bloat. The camera was cooled to -30 degrees Celcius before taking each frame.
Astrophotography Details:
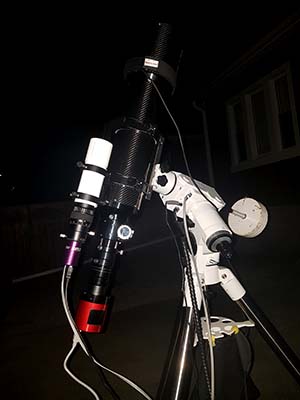
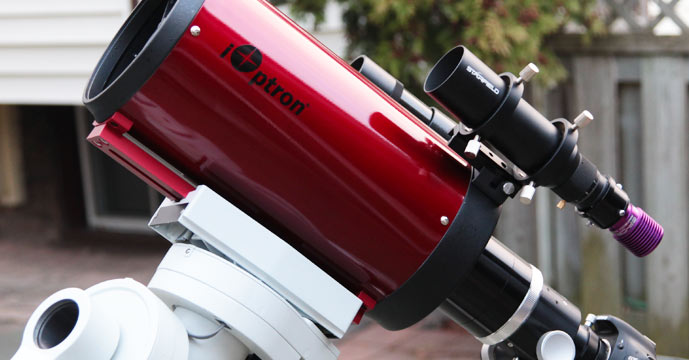
Equipment:
Photo Acquisition Details:
Total Integrated Exposure Time: 3 Hours, 30 Minutes
March 23: 21 x 300 Seconds
April 1: 20 x 300 Seconds
Camera at Unity Gain
Support Files: 15 Darks, 15 Flats for Each Night
Processing: DeepSkyStacker and Adobe Photoshop
No filters, from a red-zone, light polluted sky! I was shocked at the quality of the frames I was taking in the city with this camera. I think that astrophotographers shooting in heavily light-polluted areas could benefit a great deal using a cooled CCD.
The photo above was under 2 hours worth of total integrated exposure time. The potential for the ASI071 is remarkable.
If you would like to stay up to date with my latest images and equipment updates, please follow AstroBackyard on Facebook or Twitter. You can also subscribe to the AstroBackyard newsletter here: AstroBackyard Newsletter
Until next time, clear skies!
Related Posts:
A photogenic group of galaxies – The Leo Triplet
Altair Astro GPCAM2 and Starwave 50mm for Autoguiding
Deep Sky Processing in Photoshop
Resources:
An incredible photo by one of my biggest inspirations, Scott Rosen: The Leo Triplet

Hey Trevor, nice Image! I shot that along with the M96-Group and others last week. One thing do you think one your next videos you can demonstrate how to do flats. I have yet to do this correctly. I have to do a humongous amount processing in order to get rid of gradients which I think I could avoid in the first place by taking flats. I have not seen any demos of anyone actually doing them in the field. Cheers Kurt.
Thanks Kurt! I hope to capture M96 as well this season! Yes, absolutely about the flats. I know what you mean about the gradients… and flats make a world of difference. I’ll shoot a tutorial video very soon, thank you for the idea!! Keep up the great work on Quantum Quest and Astrobin! 🙂