Explore Scientific ED102
The Explore Scientific ED102 Triplet CF was built for astrophotography. This triplet apochromatic refractor telescope blends portability and performance into a single, sleek package.
With an aperture of F/7, and focal length of 714mm, deep sky astrophotography targets such as nebulae, star cluster, and large galaxies are well suited for this wide-field APO.
I’ve been using this telescope for astrophotography from my backyard since May of 2016, and since then I have enjoyed the quality of the images produced with it.
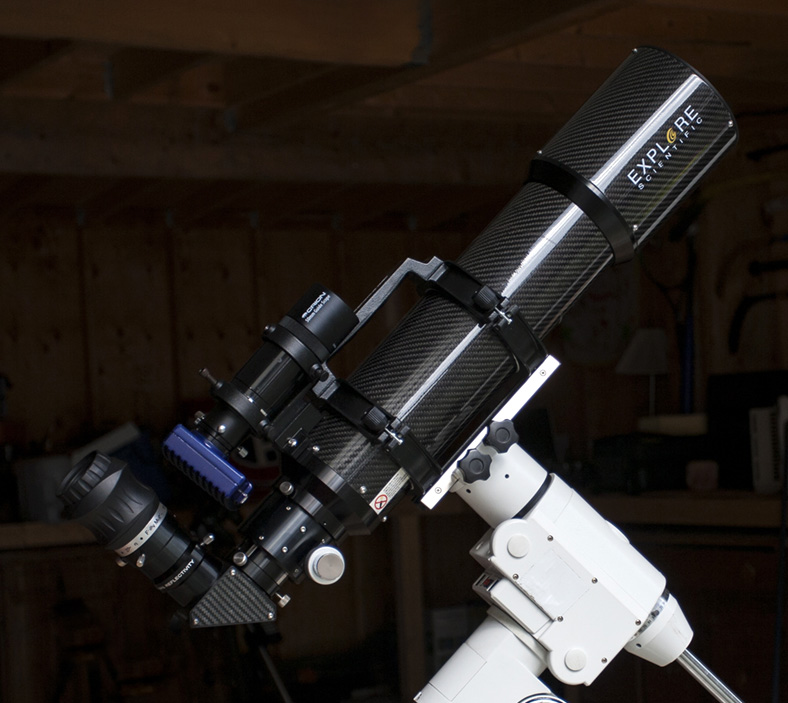
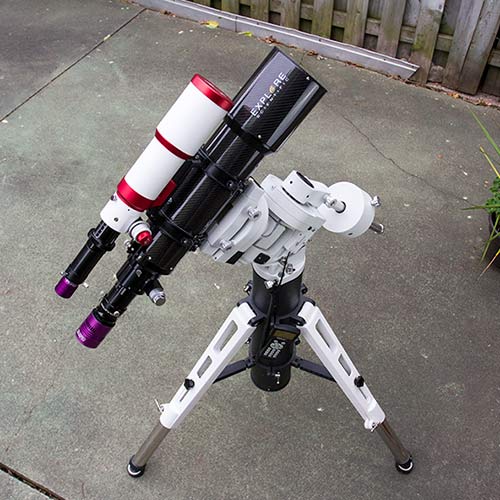
My Explore Scientific ED 102 Carbon Fiber refractor.
Modest German equatorial astrophotography mounts such as the Orion Sirius EQ-G or Celestron AVX will have no problem handling this lightweight tube, with all of your photography gear included.
I mounted the Explore Scientific ED102 to a Sky-Watcher HEQ5 equatorial telescope mount for many years. The carbon fiber refractors made by Explore Scientific are lighter than there aluminium counterpoints. I currently use a Sky-Watcher EQ6-R Pro Mount with the ED102, which has proven to be a winning combo.
Explore Scientific ED102 CF Review
Choosing the right telescope for astrophotography can make all the difference in the world. After many hours of research reading reviews, testimonials, and technical specs, I decided to upgrade to the Explore Scientific ED102 Carbon Fiber F/7 Triplet Apochromatic Refractor.
I hope that this review will help you make your telescope buying decision easier, as I have provided examples of real experience, and real photos captured using this refractor. To be clear, this is the original Carbon Fiber model, the FDC1. Since purchasing this telescope in 2016, Explore Scientific has released a new FCD100 series version.

Astrophotography Images using the Explore Scientific ED102 CF F/7 Triplet with a DSLR camera
Reliable Results and Sharp Images
First things first. My interests are in deep-sky astrophotography. My absolute favorite activity is to spend a night in the backyard photographing nebulae, galaxies and star clusters with my camera and telescope.
While the camera is capturing photons on my astrophotography target of choice, I can sit back and relax in a lawn chair and enjoy the beauty of the night sky with a pair of binoculars, or my Dobsonian telescope.
I thoroughly enjoy the process of acquiring the images, as well as all of the effort needed afterward to produce the final image. For this, I require a high-quality telescope that could produce sharp, high-contrast photographs on a regular basis.
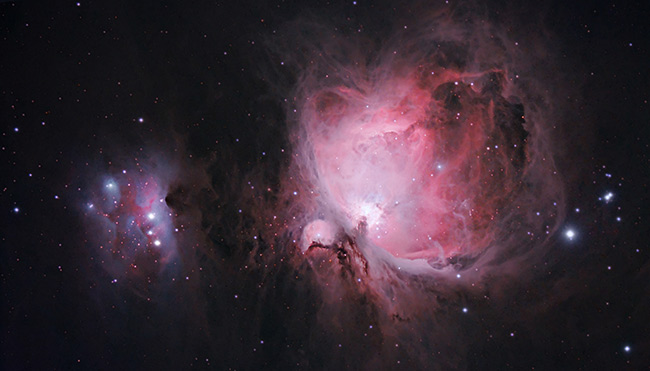
The photo above showcases the stunning Orion Nebula, captured using the Explore Scientific ED102 CF from my backyard. Messier 42 is a great target for your DSLR and telescope, as even a stock (unmodified) camera will pick up the colorful details of this nebula in a short exposure.
Related Article: The Ultimate Target for Your DSLR and Telescope
Although this photo has been cropped from its original size, it is an excellent example of the field of view you can expect with the ED 102. I found the 714mm focal length of this telescope to be a useful magnification for some of the best deep sky objects in the night sky.
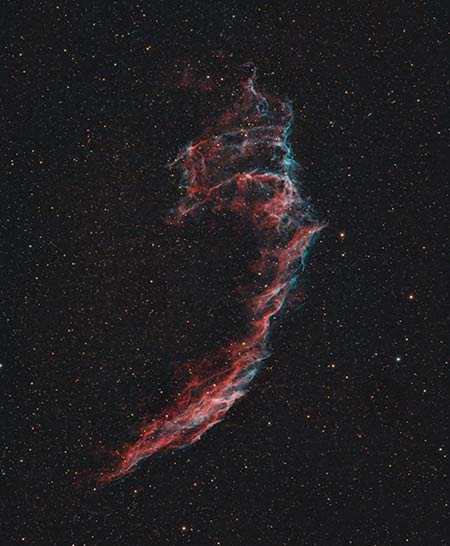
Below, you’ll see my image of the Veil Nebula captured using a dedicated astronomy camera and narrowband filter through the ED 102.
Quality Optics
The Explore Scientific ED102 CF FCD1 uses HOYA Extra-Low-Dispersion (ED) Glass with Enhanced Multi-Coatings. The triplet lens design means that the ED102 produces a flat field of view for astrophotography
This telescope is an excellent choice for anyone interested in capturing high-quality deep-sky DSLR astrophotography images.
Before upgrading to the ED102, my primary astrophotography telescope was an Explore Scientific ED80. This 80mm triplet “APO” holds a special place in my heart because it was my first real astrophotography telescope. Over the course of 4 years, I photographed more than 50 deep-sky objects with it.
The Explore Scientific ED80 tops my list of best astrophotography telescopes for beginners. I consider an apochromatic refractor to be the best telescope for a beginner to dive into deep sky astrophotography with.
Needless to say, if you are looking to buy a professional telescope for astrophotography, have a good look at the products available from Explore Scientific.
More Aperture, in a lightweight package
I purchased the ED80’s big brother in May 2016 with hopes of increasing the resolution and quality of my images. I wasted no time and started using the new telescope for a backyard astrophotography project right away.
Here is an example image using the ED102 telescope with a DSLR camera:

Upgrading to the ED102 from the ED80 was an easy decision, as my loyalty to Explore Scientific was earned over 5 years worth of imaging experience.
 Telescope Specifications
 Telescope Specifications
Focal Length: 714mm
Focal Ratio: f/7
Resolution: 1.14 arcsec
Diameter: 120mm
Weight: 7 lbs
Dovetail: Vixen
My experience using this telescope
Lightweight and solid
Because of its carbon fiber construction, the ED102 is extremely lightweight considering its size and the glass involved in the construction of high-quality refractors. The telescope requires only a single counterweight on the opposite end of my Sky-Watcher HEQ-5, or EQ6-R Pro.
This balancing act includes the weight of my Guide Scope, Guide Camera, and my Canon DSLR camera. Compare that to the weight of my massive 8″ Orion Astrograph Reflector which uses 2.5 counterweights at the very end of the counterweight shaft.
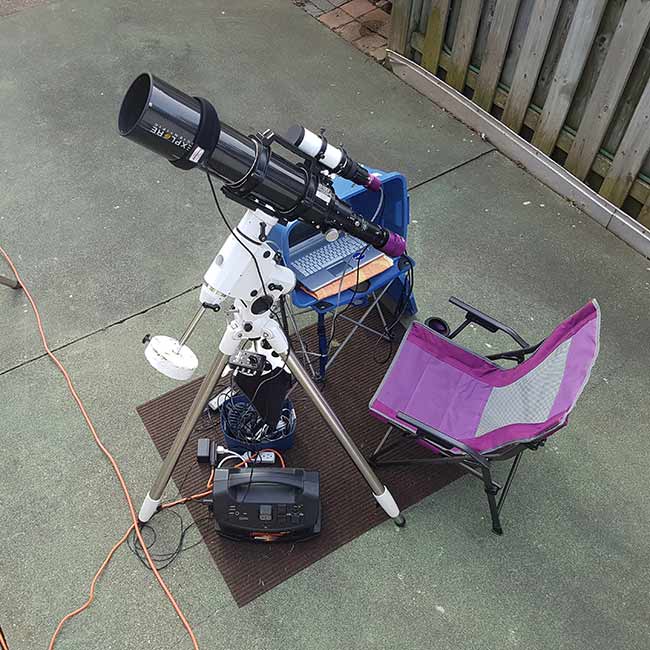
View my Deep Sky Astrophotography Setup
The Sky-Watcher HEQ-5 Equatorial Mount handles this lightweight refractor with ease, creating a rock-solid, smooth ride. Slewing and imaging with this combo is tight and secure.
2″ Dual-Speed Focuser
The 2″ dual-speed rack-and-pinion focuser works with a level of precision I became accustomed to after using the ED80. Although it is a rather rudimentary feature, I appreciate that the focuser tube includes lots of travel and includes a calibrated scale.
This is especially useful for astrophotographers, as I can quickly adjust my focus to a previous nights imaging session, and then fine-tune the position using the FWHM tool in BackyardEOS. The adjustment screws underneath the tube allow me to control the tension of the focuser and lock the tube into place.

The focus distance of the ASI294 MC Pro and Explore Scientific ED 102.
When using the Explore Scientific ED 102 with a dedicated astronomy camera such as the ZWO ASI294MC-Pro, it can be difficult to find the correct focus distance at first. You must also make sure that you have the correct spacing between the camera and your field flattener. In the case of the ASI294MC Pro, the correct spacing is 55mm.
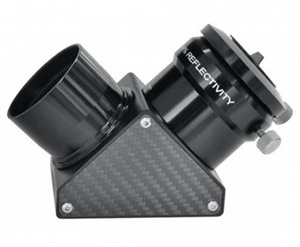
Dielectric-Coated Star Diagonal
The current package for this telescope on B & H Photo includes a 90° Dielectric-Coated Star Diagonal. This comes in extremely handy when performing the star alignment process at the beginning of my imaging session.
It provides a comfortable angle for visual observing as well, as you can rotate it in the focuser tube to find the perfect position for your height and viewing angle. When my camera is attached to the telescope, it is connected directly to the focuser tube as the diagonal is not needed for astrophotography.
Cradle and Dovetail
The ED102 comes with an adjustable cradle with a Vixen-style dovetail mount. By unlocking the telescope from the cradle, you can safely and securely slide the ED102 up or down to find the perfect balance for your equipment.
The handle also includes a cut-out to attach additional pieces of equipment such as a guide scope, finder or camera. In the past, I used the finder scope tube rings to mount my autoguiding system. You can also mount a telescope to the slot in the handle using a 1/4″ screw.

Retractable Dew Shield
The ED102 includes a built-in retractable dew shield, which blocks out stray light as well as protects the objective lens from moisture. With a twist, the dew shield locks into place. After many uses with this telescope, I have noticed the dew shield does not stay locked into place. A simple fix is to use a rubber band at the base of the dew shield to prevent it from slipping.
Despite this minor annoyance, the overall build quality of this instrument is impressive.
Attaching a Guide Scope
There are two easy ways to attach a guide scope to the Explore Scientific ED 102 CF. The first is to utilize the existing finder scope mounting bracket to insert the dovetail bar of your autoguiding telescope. Make sure you have the right mounting bracket for your guide scope, as the Explore Scientific mounting plate is different from the Orion-style bracket.
The next method is probably best, as you can achieve a better balance. You can use the slot in the cradle ring handle to fasten a dovetail bar using 1/4″ screws. This places your autoguiding system directly centered over your primary imaging scope which make balancing much easier.
Upgrading the Focuser
The focuser on the Explore Scientific ED 102 is nothing to write home about, it’s a basic design that works well enough. If you are looking to improve your focusing capabilities with the Explore Scientific ED 102 (specifically if you are using this telescope for astrophotography), you can install a third party motorized focuser.
One way to enhance the capabilities of the ED102 would be to add a motorized focuser such as Pegasus Astro Stepper Motor Kit. A motorized focuser can really come in handy for precision focusing during an imaging session.
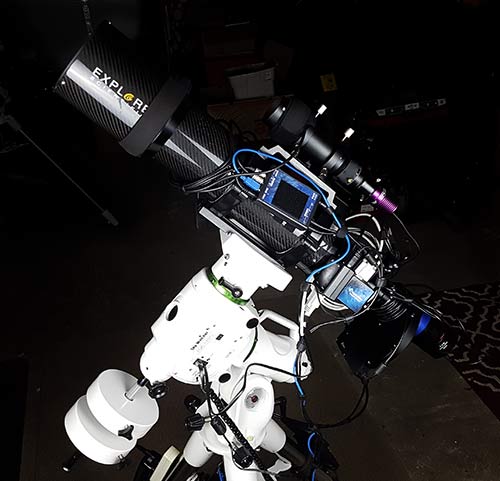
I have also started using the Explore Scientific with an electronic filter wheel, a Xagyl 5-position model. These upgrades and more can be seen in the following video:
Final Thoughts and Conclusions
I look forward to each and every time I get to put this telescope to use. At the end of the day, the results this telescope produces in the way of astrophotography images is the real measure of its capabilities.
I use an Altair Lightwave 0.8X Reducer/Flattener when imaging with both my Canon DSLR or Altair Hypercam 183C camera through this telescope. This further “flattens” the field of view in my images and reduces the telescope’s focal length for a wider field of view.
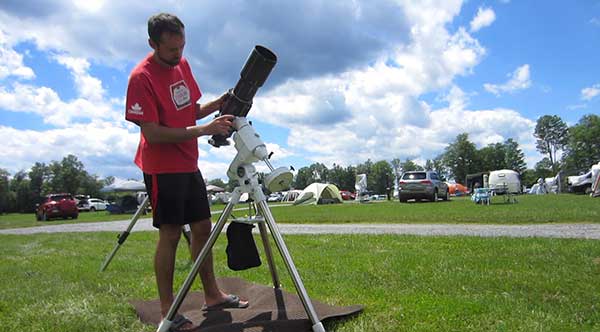
I saw the ED127 F/7.5 version of this telescope with this very addition at the Cherry Springs Star Party in 2017.
The ED102 set up for a night of imaging. A Dew Heater band is wrapped around the objective to reduce condensation.
The team at Explore Scientific is great to deal with. The communication and customer support I have received has made a lasting impression on me. I can highly recommend the Explore Scientific ED102 CF to astrophotographers and visual observers looking for a high-quality telescope that will deliver years of enjoyment. I hope that you found this review helpful in some way and that you learned a little more about this specific telescope.
Please follow AstroBackyard on Facebook to view my latest images using this telescope.