DSLR Photography Tips: Shooting the Milky Way on a Tripod

It’s time for another Photoshop tutorial, along with some night sky DSLR photography tips. This time, the subject is our glorious Milky Way galaxy. There is nothing more humbling than spending a night under the band of stars seen from within our barred spiral galaxy.
The true beauty of our universe is displayed in the arching collection of stars known as the Milky Way.
In the image processing video below, I’ll show you how to use Adobe Camera Raw to get the most out of your DSLR image. I’ll also cover some online photography schools available for those who wish to learn more.

Milky Way Photography with a DSLR
I’ve recently put together a resource for anyone interested in photography the Milky Way with their DSLR this Spring. This includes everything from the best times to set up – to the recommended camera settings. The Milky Way photography page found under Tutorials includes more information than on this post.
Night photography has become quite popular among all types of photographers, thanks to some inspiring photos of the milky way taken over the past few years. Now, there are some incredible online photography courses dedicated to creating nightscapes. More on this below.
How to Photograph the Milky Way with a DSLR
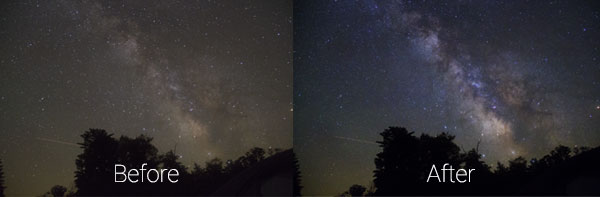
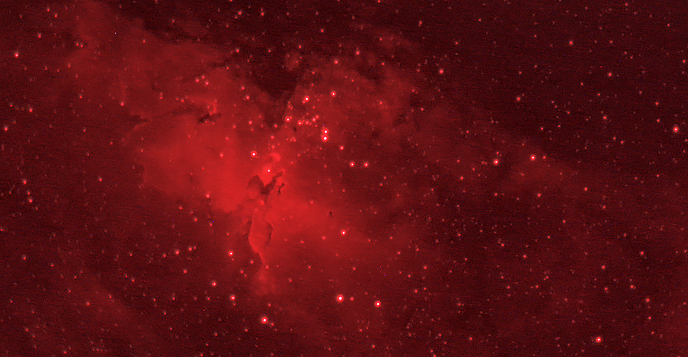
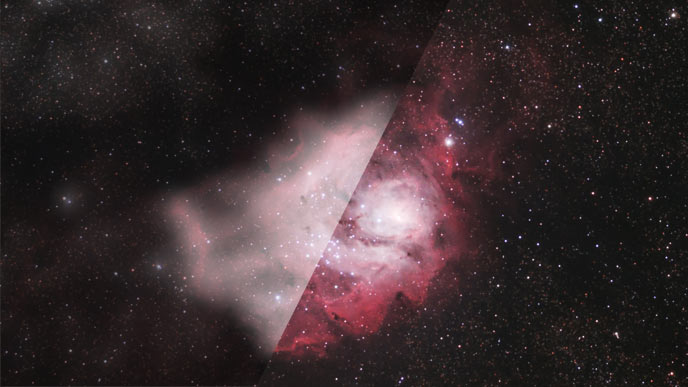
The photo above shows the difference a few simple edits in Adobe Camera Raw can make to your astrophotography image. Click the link above for the full tutorial, or watch the video below.
No Star Tracker Needed
Photographing the Milky Way without a star tracker is an attractive idea to beginner astrophotography enthusiasts. Due to the limited equipment needed, it is often one of the first types of astrophotography attempted.
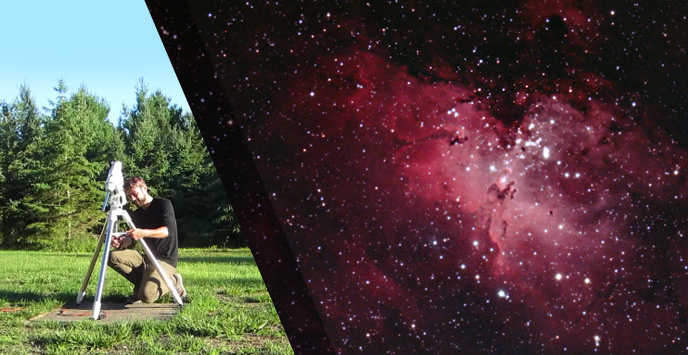
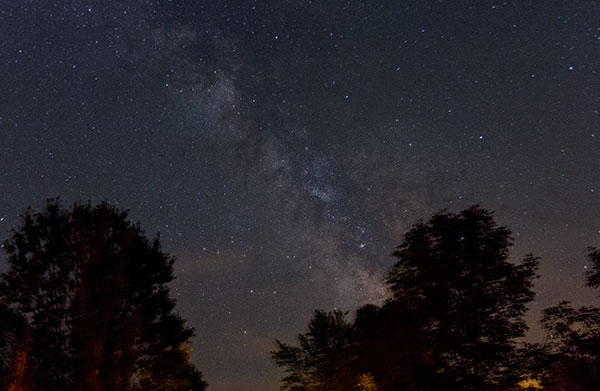
Modern DSLR Camera’s are well suited for Milky Way photography. For the best results, you can’t beat a location well away from city light pollution.
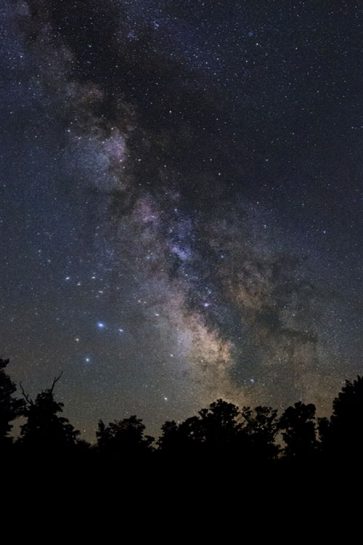
The image above was captured using a Canon EOS 7D and an 18-200mm Zoom Lens.
Long exposure Milky Way photography is not this camera’s specialty. The Canon 7D (Mark 1) is an excellent camera for nature/bird photography, but the amount of noise present at ISO 3200 and above leave much to be desired.
If you are new to photography, and in the market for a DSLR camera, a Canon EOS Rebel T6i would be a better choice. The Canon 7D has been replaced with the 7D Mark II, an excellent camera but an expensive choice for a beginner.
The example photo used in the tutorial was taken under the dark skies of Cherry Springs State Park. This is home to the Cherry Springs Star Party, which I will be attending this year!
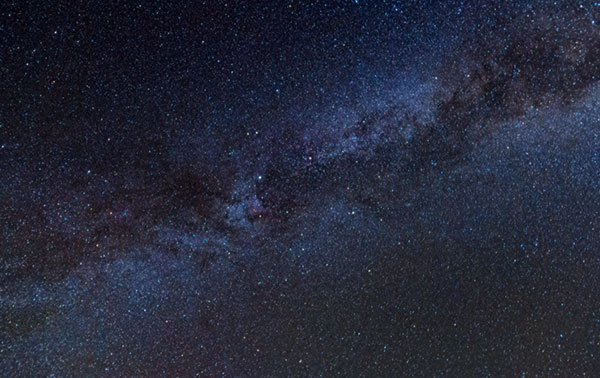
With some simple preparation and a bit of luck (weather wise), an incredible photo of the Milky Way is possible using a basic DSLR on a tripod. This type of photography uses a stationary tripod, with no star tracking or autoguiding is needed.
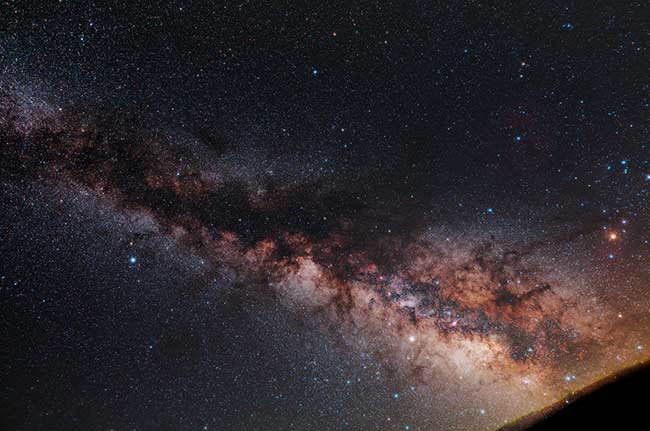
An astrophoto of the Milky Way reveals our galaxy as a bright swath of light and color across the sky. For all of the images of the Milky Way in this post, ISO 3200 and ISO 6400 were used. This can create a lot of noise, which is why stacking exposures in Photoshop can help.
The brighter nebulae and star clusters near the core will stand out. The colorful red emission nebulas in Sagittarius are the easiest to identify, with M8 being the most noticeable. The Summer Triangle is also located in this region of the Milky Way, featuring bright stars Vega, Deneb, and Altair.
Collecting a series of exposures is encouraged, as this will lead to a finished product with a much-improved signal to noise ratio.
Limited exposures of 30 seconds on a tripod are all you need to produce an image like the one below.
By utilizing the powerful features of Adobe Camera Raw, you can make “game-changing” adjustments such as the all important – perfect white balance.
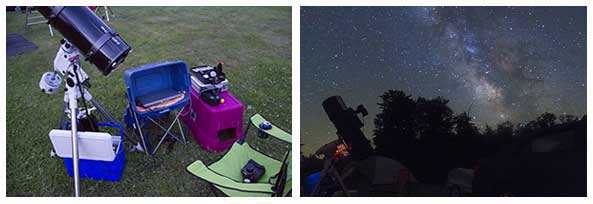
Photographing the Milky Way using a Star Tracker
Online Photography Schools
The overwhelming popularity of night photography has led to the availability of many online courses on the subject. These photography schools offer instructional material on everything from starry nightscapes to light painting techniques.
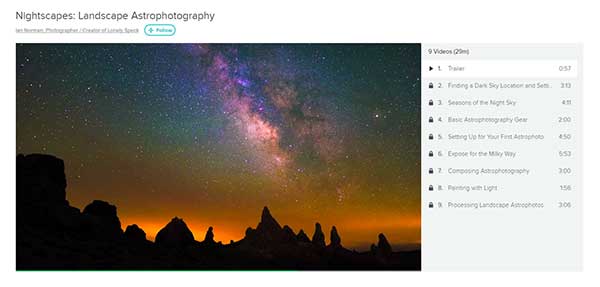
Skillshare Online Course: Landscape Astrophotography by Ian Norman
Everything I have learned about photography up to this point has been self-taught. However, the idea of completing a structured online course is an appealing option in the future.
The training programs usually list the required skill level before enrolling, although most courses cater to all levels. No matter what stage of this hobby you are at, building a portfolio of images and learning new skills is always a good idea.
Canadian Astrophotography School (CAPS)
There are some new courses available on astrophotography, that deal with some of the image processing techniques used by the pros. Canadian Astrophotography School features industry legends such as Ron Brecher as instructors.
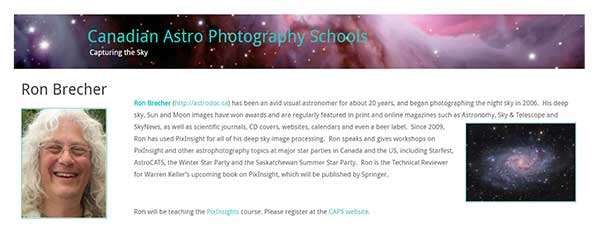
These instructional courses focus on everything from astrophotography basics to advanced processing in PixInsight. I hope to attend CAPS in the near future. You can visit CAPS on Facebook page for more information.
I hope that you find these DSLR photography tips useful when planning a Milky Way shot. If you’re looking for some more in-depth lessons on nightscapes and Milky Way photography, I’ve given you some of the options available to you.
Personally, I plan on developing my skills further both in terms of the acquisition process and image processing.
To stay up to date with my latest astrophotography tips and tutorials, please follow AstroBackyard on Facebook.
Related Posts:
Astrophotography Resources – Recommended Software
Resources:
Online Photography Course: Star Trails and Night Photography
How to Capture the Milky Way Using your DSLR (Video)
How to Photograph the Milky Way using a DSLR camera – WikiHow