60mm Starwave Guide Scope Package for Autoguiding
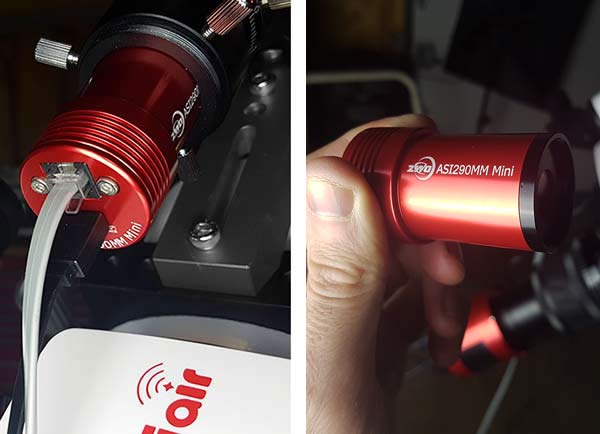
Update (2018): I now use a ZWO ASI290MM Mini guide camera with a 60mm Starfield guide scope for autoguiding. This camera has a slender, lightweight profile and an impressive SONY IMX290 Mono sensor. It is also compatible with the ASIair WiFi camera control device.
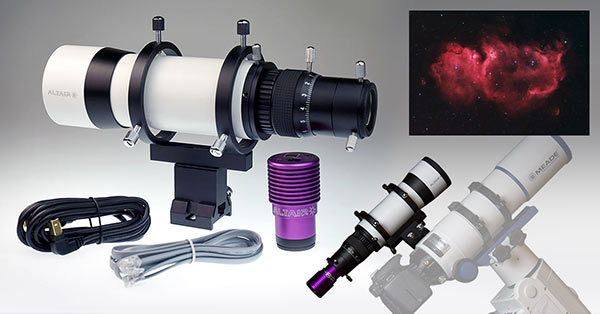
My friends over at Ontario Telescope & Accessories have sent me a new Altair GPCAM2 AR0130 Mono autoguiding camera and 60mm Starwave guide scope to use with my astrophotography setup. In this post, I’ll give you an early look at this practical autoguiding solution for deep sky astrophotography.
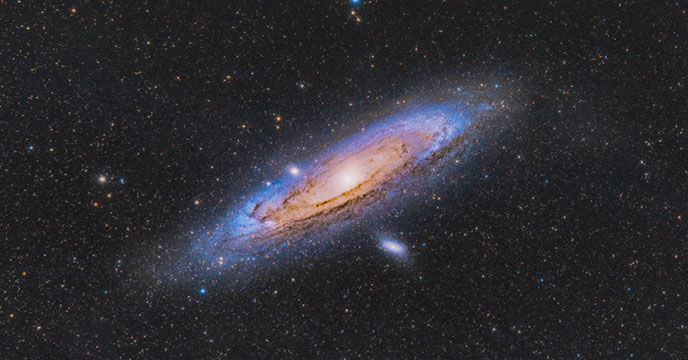
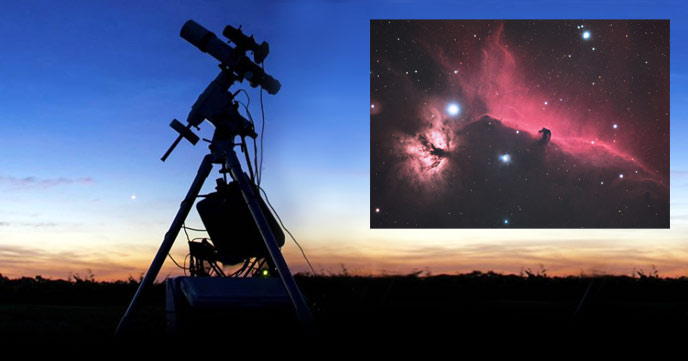
If you are looking to implement an autoguiding package to your imaging rig, the Starwave 60mm Autoguiding Package is an excellent option. I have used this guide scope and camera on a number of deep-sky astrophotography projects, including the Soul Nebula (Image Below).
Having the ability to autoguide your imaging session means longer exposures and better results. This review should give you an idea of what to expect when using this Mono sensor camera from Altair Astro.
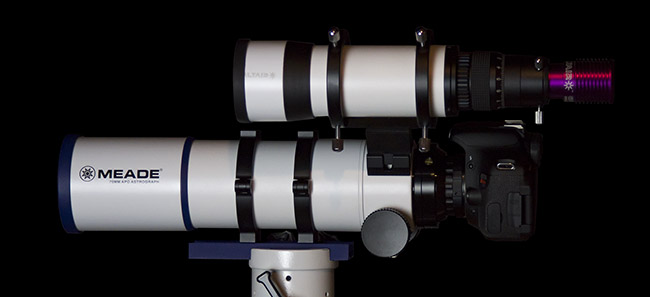
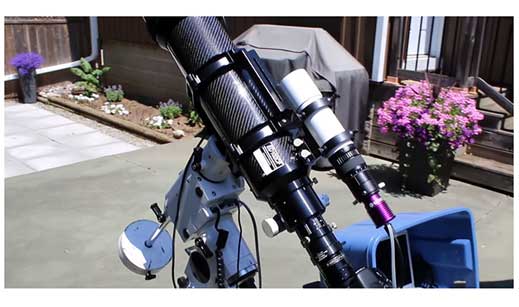
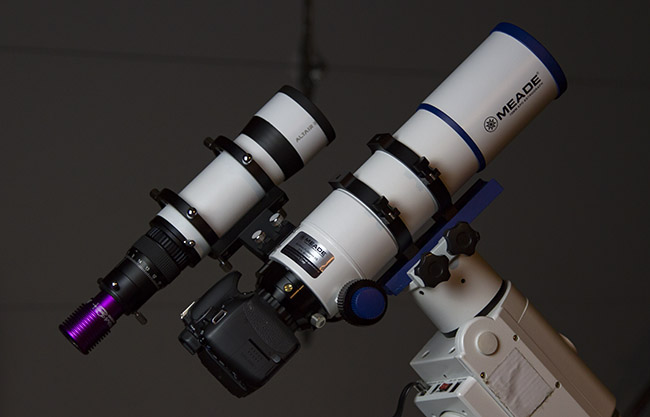
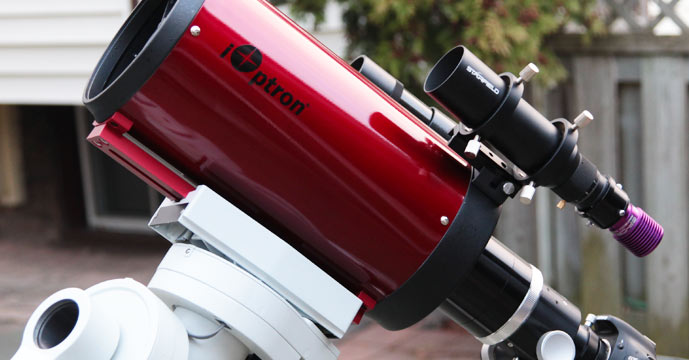
The Altair 60mm Guide Scope Package in use with a small refractor telescope
The 60mm Starwave Guide Scope Package
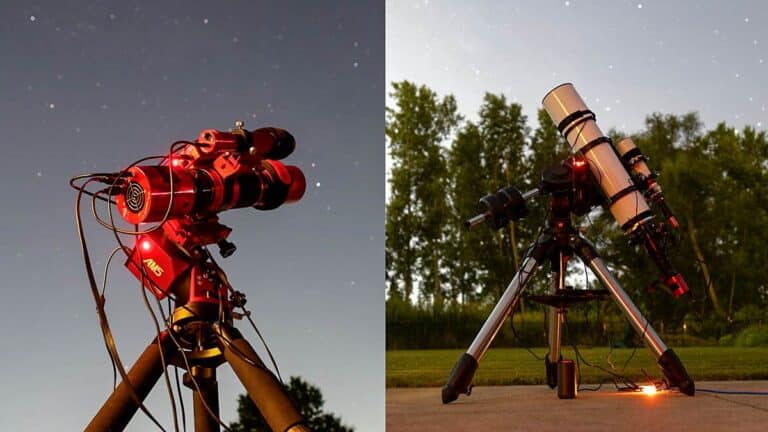
If you are lucky enough to own a high-end astrophotography mount made by Paramount, or Astro-Physics, you probably don’t spend too much time worrying about autoguiding. However, if you own a more modest equatorial mount such as the SkyWatcher HEQ5, Celestron AVX or Orion Sirus EQ-G, you can take your images to the next level by utilizing the power of autoguiding.
Whether you are connecting a DSLR camera body, or a dedicated astronomy camera to your telescope, your equatorial mount is capable of long exposure images of up to 5 minutes or more with autoguiding. The good news is, adding this powerful feature to your existing rig can be affordable, and that’s where the Altair GPCAM2 comes in.
Installing the Drivers and Connecting the Camera
You must download the up-to-date Altair Drivers to your PC from www.altairastro.com before connecting the camera. This took approximately 5 minutes in total, and I did the whole thing sitting outside next to my gear!
Once the latest driver is installed, the GPCAM2 connects to your equatorial mount and PHD2 guiding software quickly and easily. This camera is compatible with PHD2 guiding software, and others that use the ASCOM interface.
Installing the Altair GPCAM2 for the first time was a painless experience
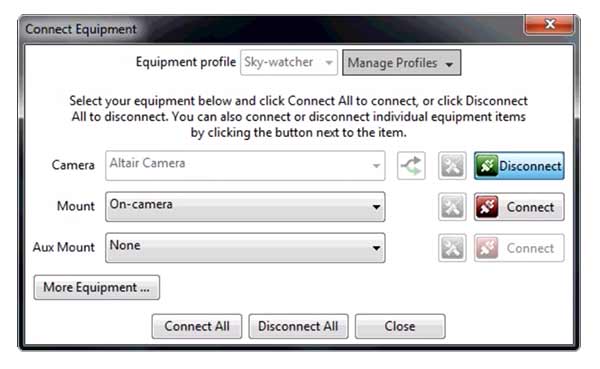
Once you have installed the latest Altair Camera drivers on your computer, you can go ahead and connect the camera via the included ST4 cable. I then select “Altair Camera” from the Camera drop-down menu, and “On-Camera” from the Mount menu, and connect.
You can now start taking advantage of much longer image exposures, with sharp stars! From my light-polluted backyard, exposures of about 5 minutes are as long as I can realistically go when using a DSLR camera. The image below shows the Soul Nebula using 2-minute exposures that were guided using the GPCAM and 60mm Starwave Guide Scope.
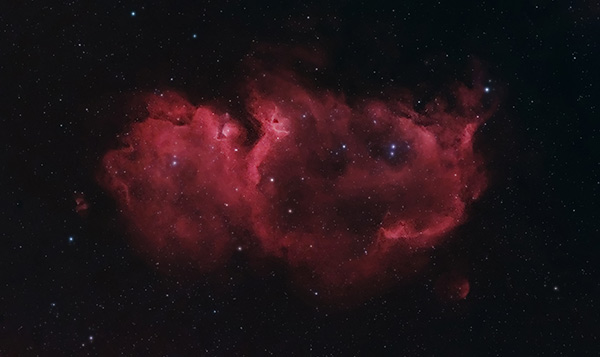
The Soul Nebula – Guided 2-Minute subs using the Starwave 60mm Guide Scope Package
To produce the image above, I stacked 150 separate 120-second exposures together to improve the signal-to-noise ratio. This brought the total exposure time to exactly 5 hours, using calibration frames such as darks and flats to further improve the image. Each and every image was sharp without oblong or miss-shapen stars thanks to the Starwave 60mm Guide Scope package.
Adding a reliable autoguiding solution to your deep-sky astrophotography setup can be a pivotal moment. This opens the door to many new deep-sky projects that require ultra-long exposures to record the faint details of your target.
 An Overdue Upgrade

For the last few years, I have been using a Meade DSI Pro II CCD camera through an Orion Mini 50mm Guide Scope to auto guide my telescope mount. This was connected to the Sky-Watcher HEQ5 with a GPUSB cable from Shoestring Astronomy, and controlled via my laptop computer using a free software called PHD2 guiding.
The biggest headache with this system was the lack of sensitivity of the camera sensor. This lead to long and drawn-out calibration periods in PHD2 guiding that would often result in a calibration error. There is nothing more frustrating than waiting for your autoguiding system to kick-in as a clear night sky advances overhead.
How to Mount the Guide Scope
Thankfully, I have been presented with a new option for my autoguiding needs thanks to my partnership with Ontario Telescope and Accessories. If you need help with mounting options for a particular telescope, Steve will let you know any additional accessories or adapters needed.
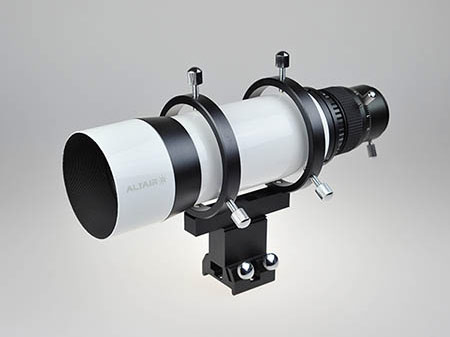
The Starwave Guide Scope includes a Universal Mounting Bracket with 2 thumbscrews
To attach the guide scope to a Vixen dovetail bar, you’ll need to remove the stalk using the M5 set screws. You can then attach it to your dovetail bar by using the two holes in the crosspiece between the rings. On the Meade 70mm Quadruplet APO, I was able to attach the Starwave 60mm Guide Scope to the built-in finder bracket on the scope.
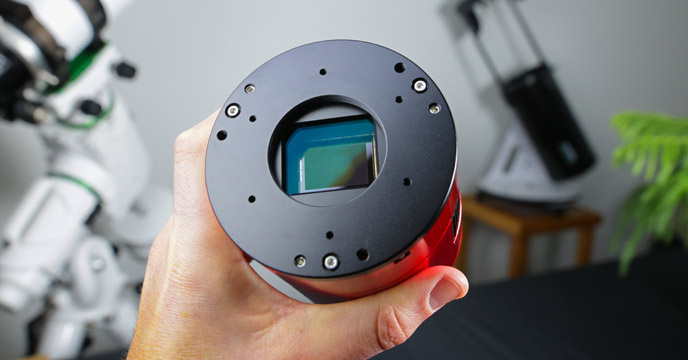
Altair GPCAM2 Mono
This is an attractive combination for astrophotographers wishing to build an effective, yet affordable autoguiding system for their deep sky imaging rig. One of the many advantages that this system has over my previous setup is the built-in ST4 port on the camera. This means that only one cable is required between the computer and the camera.
The Altair GPCAM2 AR0130 Mono has proven to be an effective solution for autoguiding, no matter which guide scope you use. I no longer need to use the GPUSB adapter cable (which frees up a USB slot), and only one cable is required between the computer and the camera. The fewer cables to trip on around my portable setup, the better!
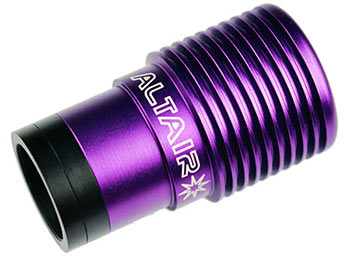
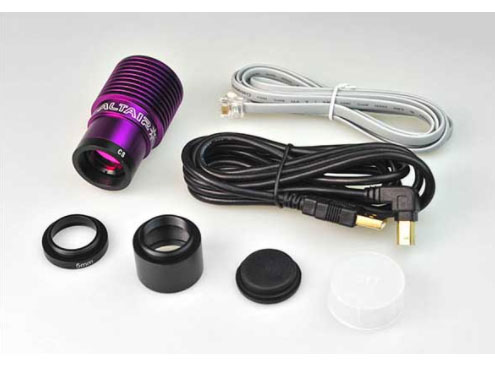
The tiny, yet powerful Altair GPCAM2 AR0130 Mono Guide Camera
The GPCAM2 autoguiding camera is smaller and more lightweight than my previous Meade DSI Pro II guide camera. Reducing the overall weight of your imaging rig has its advantages. The rather bulky proportions of the Meade DSI often caused me to bump my headlamp against it while looking through the telescope eyepiece.
I have also used the GPCAM2 through a number of guide scopes with success. This includes a much larger William Optics Zenithstar 72, and the William Optics 50mm Guide Scope on the Fluorostar 132 refractor.
Video: GPCAM2 Autoguiding Camera and Telescope
The following video will give you a better look at the Altair Guide Scope Package in action, including connecting the camera to PHD2 guiding for the first time. I was absolutely blown away by the difference in image quality from the GPCAM over my aging Meade DSI!
The images through PHD2 guiding are ultra smooth with no visible noise (depending on the gamma setting used). It is amazing to see deep-sky objects appear in live-view using a 1-2 second refresh rate.
This was my first experience using a modern-day cooled, dedicated astrophotography camera. I’ve incorrectly referred to the Altair AR0130 as a CCD camera when in actuality it uses a CMOS sensor. Needless to say, this experience has opened my eyes to the world of dedicated astronomy cameras.
Altair GPCAM2 AR0130 Mono Specs
- Sensor Size: 1/3″ (4.8×3.6mm)
- Pixel size in microns: 3.75×3.75 um
- Resolution in pixels: 1280 x 960
- Cooling: Air-Cooled large surface area body
- USB port: USB2.0 High-speed Port
This very capable little camera uses a small CMOS sensor like you would find in a DSLR camera. You could use this camera for deep-sky astrophotography, not just for autoguiding. Based on the ultra-smooth, low noise images I experienced first hand with this product, I am excited to experiment shooting some DSO’s with it.
For capturing Solar System objects and planetary photography, this device can be controlled via AltairCapture or SharpCap. I am interested in testing the planetary photography capabilities of the GPCAM2 this Spring.
Starwave 60mm Guide Scope
 Focal Length: 225mm
Focal Ratio: F/3.75
Focuser: Non-rotating helical focuser
The Starwave 60mm Guide Scope is a straight through finder telescope with an indexed non-rotating, helical micro-focuser. Using this sturdy mini refractor telescope for autoguiding is a pleasure. This lightweight 60mm scope fit into the existing finder scope bracket on the Meade 70mm Astrograph.
The included mounting hardware and rings allow you to position the Starwave where you want it using the rubber-tipped thumbscrews. These will not scratch the paint on the scope as you make small adjustments.
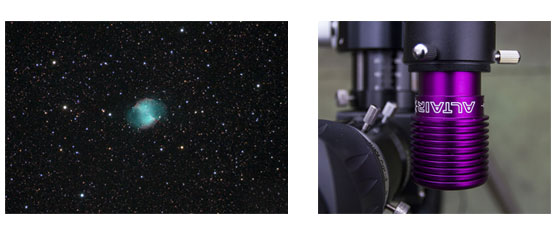
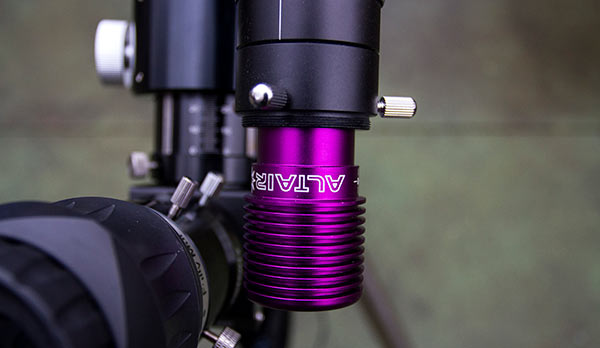
The brass compression ring at the focusing end of this scope held the Altair GPCAM2 snug and securely. The CS-mount adapter with the built-in clear optical window remains thread to the GPCAM2 at all times. I used the included 1.25″ x 20mm threaded nosepiece to reach focus with the Starwave telescope.
I keep the camera attached to the Starwave 60mm Guide Scope at all times, and the focus remains razor sharp every single time I power up the GPCAM2 in PHD2 Guiding for a new imaging session. I rarely make any adjustments to the focus using the helical focuser, and when I do they are small, rigid movements that lock into place.
In the coming weeks, I will experiment using the new autoguiding camera and telescope combo even more, and share my results. As for my imaging session on the first night with this new equipment, I was able to add some more time to my Rosette Nebula project. The photo below is the Rosette Nebula in HaRGB.

Final Thoughts
I hope that this Starwave 60mm Guide Scope Package review has given you an idea of what to expect when using this autoguiding setup. Since acquiring this combo, I have successfully used to it to photograph many new deep-sky objects. I have saved countless hours of frustration due to the simplicity and reliability of this autoguiding combo.
The Altair GPCAM2 allows you to spend more time capturing quality images, and less time worrying about graphs and lengthy calibration cycles.
For a full description and pricing of the Starwave 60mm Guide Scope Package, visit the product page on Ontario Telescope and Accessories.
how do you like your Starwave 50th guide scope? I got one from Ontario Telescope which has a lot ofor play in the helical focuser. I tried to tight the small set screws underneath the rubber band (rotational part) without success.
thanks,
Diego
Hi Diego – I like it a lot! I haven’t had to lock the focus into place, it stays put for months a time (Even though I could rotate it) It’s very rigid so I can make a fine adjustment if needed, otherwise it’s good to go. I would talk to Steve at OTA if you are having issues. I hope you get it sorted! Clear skies.
Hi Trevor,
Your page and channel are awesome. Lots of useful info for me as I start getting into it.
I’ve been considering an autoguider setup. I was considering the Orion awesome autoguider package (with the 80mm Orion short tube). But it’s a bit more expensive than this one (especially to get all the requirements to attach it to my scope).
I have a Celestron EdgeHD 8″ on the AVX mount.
Do you have any thoughts oer comparisons between this package and the Orion one?
Thanks,
Hi Andrew – Personally I think the Starwave 60mm package is a better deal. I’ve used the GPCAM2 through a number of guide scopes now and it’s never let me down. The 60mm Altair scope is well-built. OTA offers an SCT mounting package – So I’d look at that > http://www.ontariotelescope.com/product.asp?itemid=1117&Affid=2
So much useful information on this site… thanks!
Are the auto guiding function and image capturing function mutually exclusive? I’d like to use one cmos device to do both but nothing I’ve read so far seems to say it’s possible.
I have just tried the whole night to focus the ZWO ASI290MM using the Altair Starwave 50mm guide scope. Didn‘t work with or without the extender tube and moving the cam in and out. I had the PHD2 running and checked the screen every 5mm of focusing all the way… no stars. Any ideas? Thanks, Sven
I have ASI290MM and the Starwave 50mm working well. Just needed a routine for finding the correct backfocus: Target a bright star and go for max. backfocus (all extender tubes on scope and cam). A bright star will cause the screen in PHD2 to be completely lit. Reduce backfocus slowly by moving the cam into the scope. Check how the bright area in PHD2 decreases until you see the star as a dot. Cheers, Mick
Hi Trevor,
Love all your posts and reviews. super helpful. My photos are way better as a result !
I currently control my EQ6 mount with starry night via GPUSB. I autoguide (OAG) with ASI290 mono and PHD. System working is well.
You mention doing away with the GPUSB, but can you still control / goto with starry night ? If so how does the starry night connect / control. I figure less hardware less potential problems.