The Andromeda Galaxy
The Andromeda Galaxy is a large spiral galaxy located about 2.5 million light-years away from Earth. It is the largest galaxy in the local group, which also contains the Triangulum Galaxy. Cataloged as Messier 31 (M31), this deep sky object is observable for much of the year in the northern hemisphere, lying in the constellation Andromeda, next to Cassiopeia.
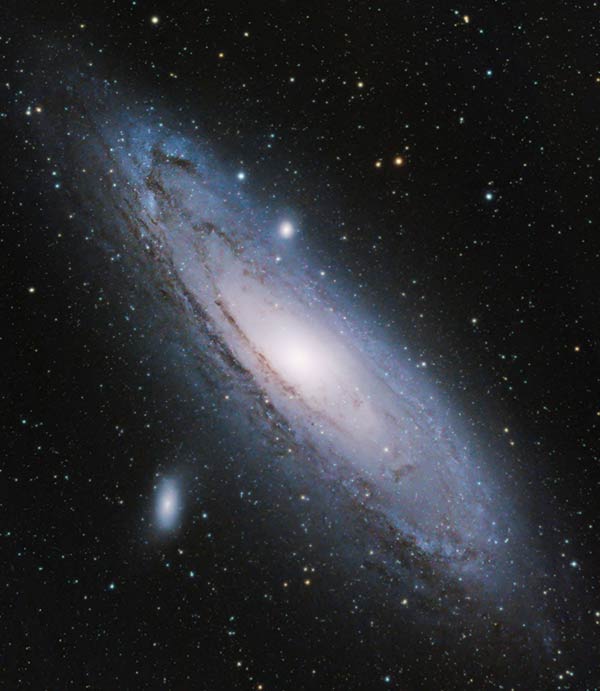
Over the years, I have photographed the Andromeda Galaxy many times using a variety of camera and telescope equipment. Through astrophotography, we can reveal the beautiful faint details of the outer spiral arms, and rich star colors in the region.
Whether you’re interested in observing this galaxy with a pair of binoculars or are ready to take a picture of it with your camera, M31 is one deep sky object that does not disappoint. All of the photos of Andromeda on this page were captured by me, using a camera and telescope.
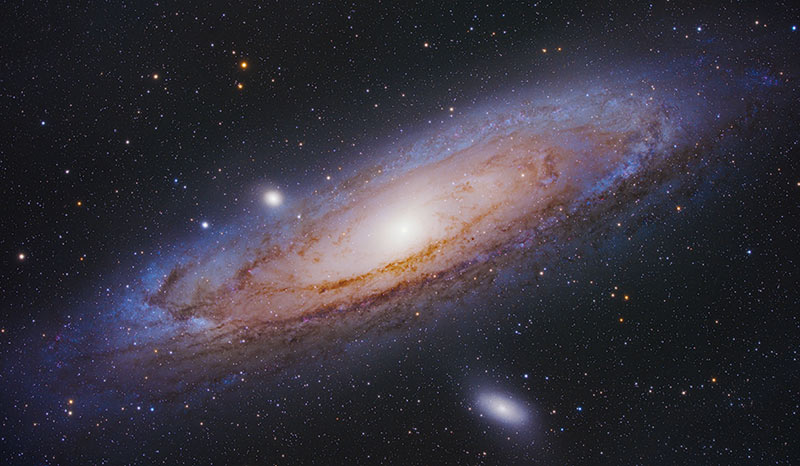
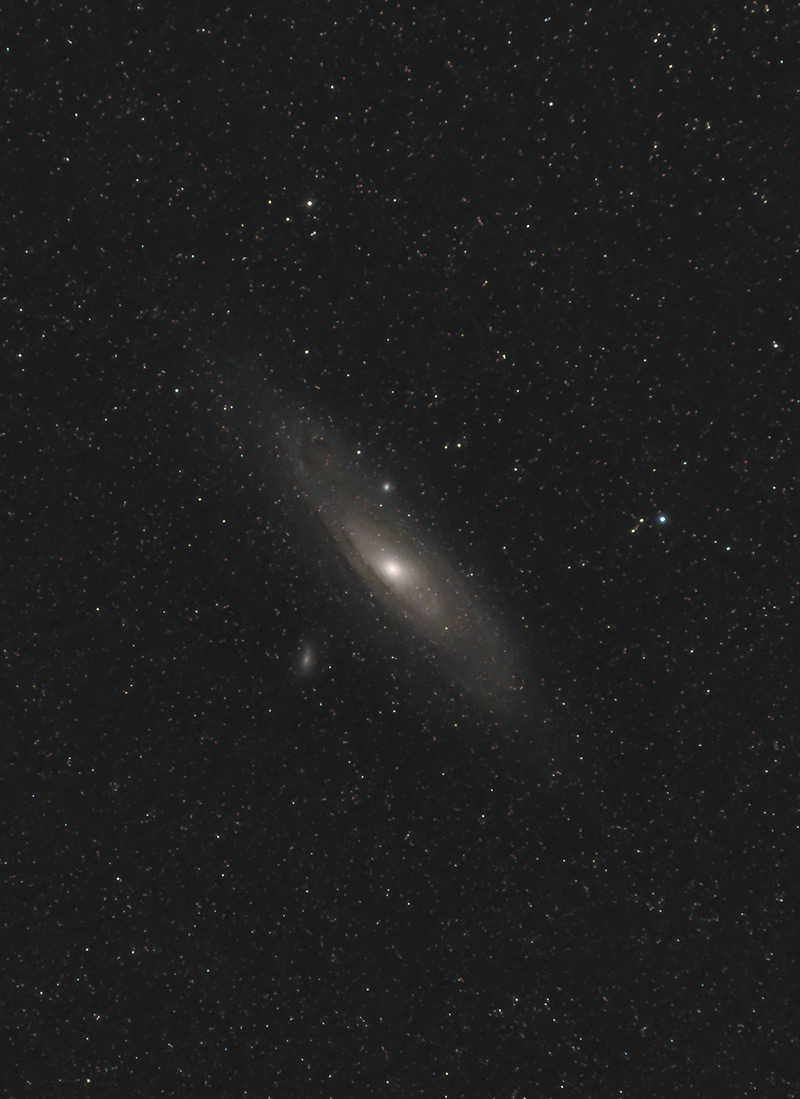
The Andromeda Galaxy captured using a camera and telescope.
I believe all nebulae and galaxies have the power to leave a lasting impression on an observer, but there is something about this galaxy that intensifies the vastness of space. The phrase I hear most often when people new to astronomy see Andromeda is “Is that real??”. It absolutely is.
The best part is, you don’t need to download a NASA wallpaper to see it, you can actually see it for yourself in the night sky (from the northern hemisphere). When you look towards Andromeda, you are looking at the most distant object you can see with the naked eye, an object that’s a staggering 2.5 million light-years away.
As far as deep-sky astrophotography targets go, M31 is actually one of the easier targets to capture early on. It may not look like an image taken with the Hubble Telescope, but it will most certainly impress your friends. In this article, I’ll cover the facts, observational history, and location of the Andromeda Galaxy.
The following video was too beautiful not to share. Here you will take a journey from this galaxy’s ancient history to its remote future using some of the most beautiful images you have ever seen.
Video: Journey to the Andromeda Galaxy
The Andromeda Galaxy
Documented observations of the Andromeda Galaxy go back as far as 964, when a Persian astronomer described this object in space as a “nebulous smear“. Andromeda was originally thought to be a nebula and was even referred to as the “Great Andromeda Nebula” in 1899.
Other than the Large and Small Magellanic clouds (visible from the southern hemisphere), the Andromeda Galaxy is the brightest galaxy you can see with your naked eye. To the unaided eye, M31 appears as a smudge of light in the Andromeda constellation. What you are seeing is its bright core.
Scientists believe that Messier 31 is expected to collide with the Milky Way in approximately 4.5 billion years, and will merge to create a massive elliptical or lenticular galaxy. Clearly, you won’t have to worry about this happening for a while, but it is fascinating to think of this scenario panning out over time.
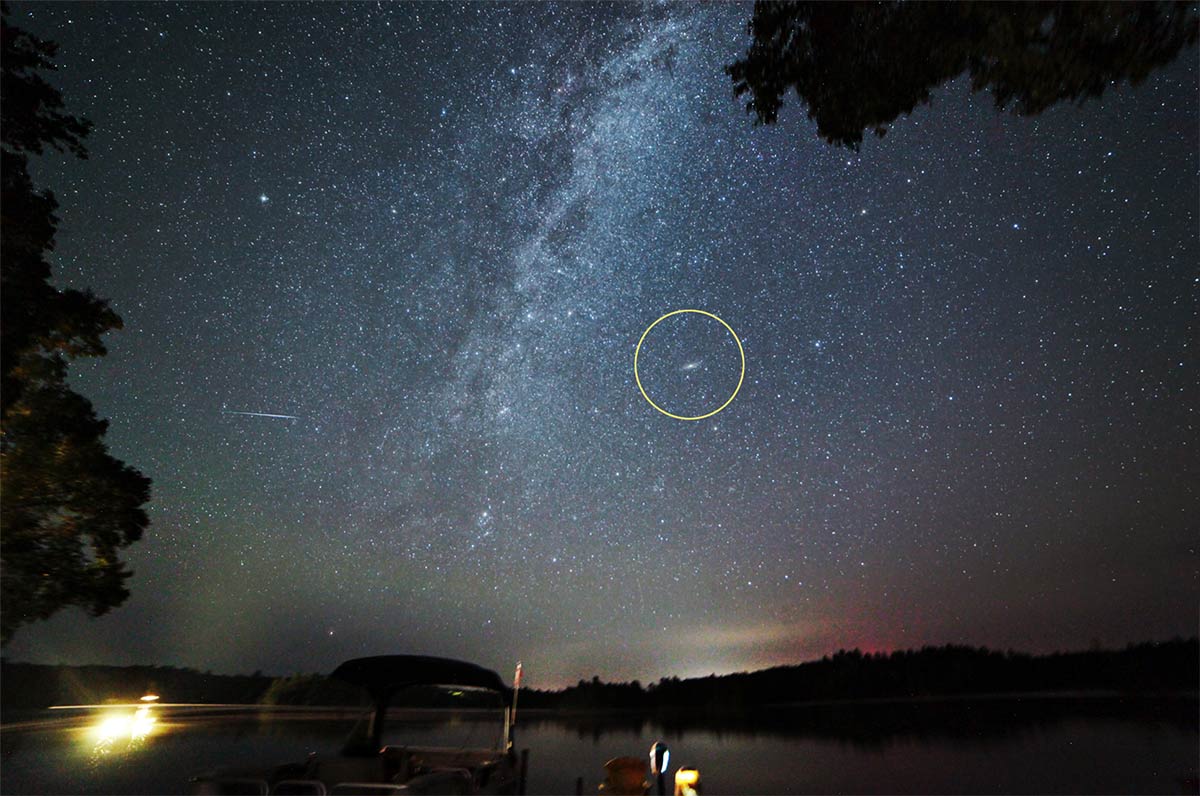
The Andromeda Galaxy is located between Cassiopeia and Pegasus (circled).
Here are some of the primary facts about the Andromeda Galaxy:
- Common Name: Andromeda Galaxy
- Cataloged: Messier 31, NGC 224
- Constellation: Andromeda
- Apparent Size (v): 3.167° × 1°
- Radius: 110,000 light-years
- Apparent Magnitude: 3.44
- Distance: 2.5 million light-years from Earth
- Number of Stars: 1 trillion
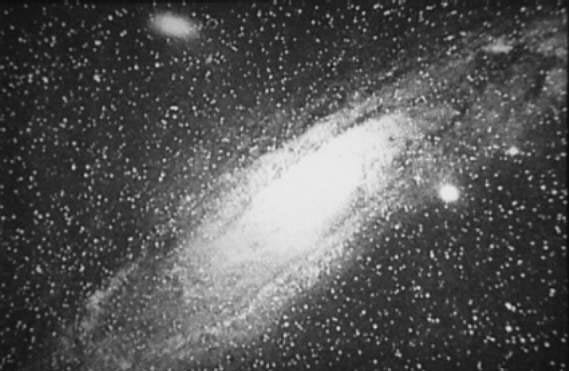
This is the first acknowledged picture of M31 or the Andromeda Galaxy (Isaac Roberts. 1888)
Where is the Andromeda Galaxy?
As far as galaxies go, Andromeda is one of the easiest ones to find in the night sky. The galaxy sits between the constellations Pegasus (the “Great Square”) and Cassiopeia. These 2 constellations are rather easy to find, even under moderately light-polluted skies.
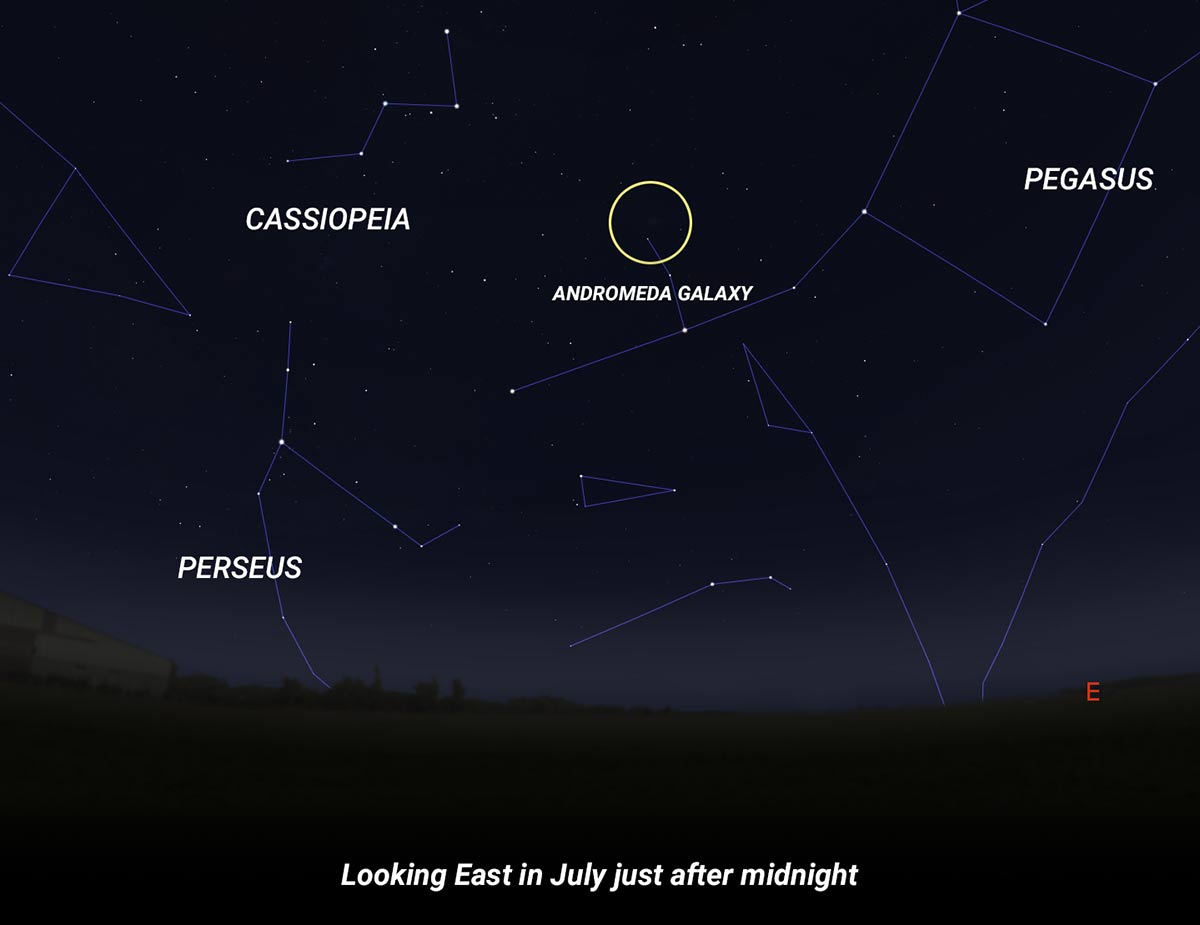
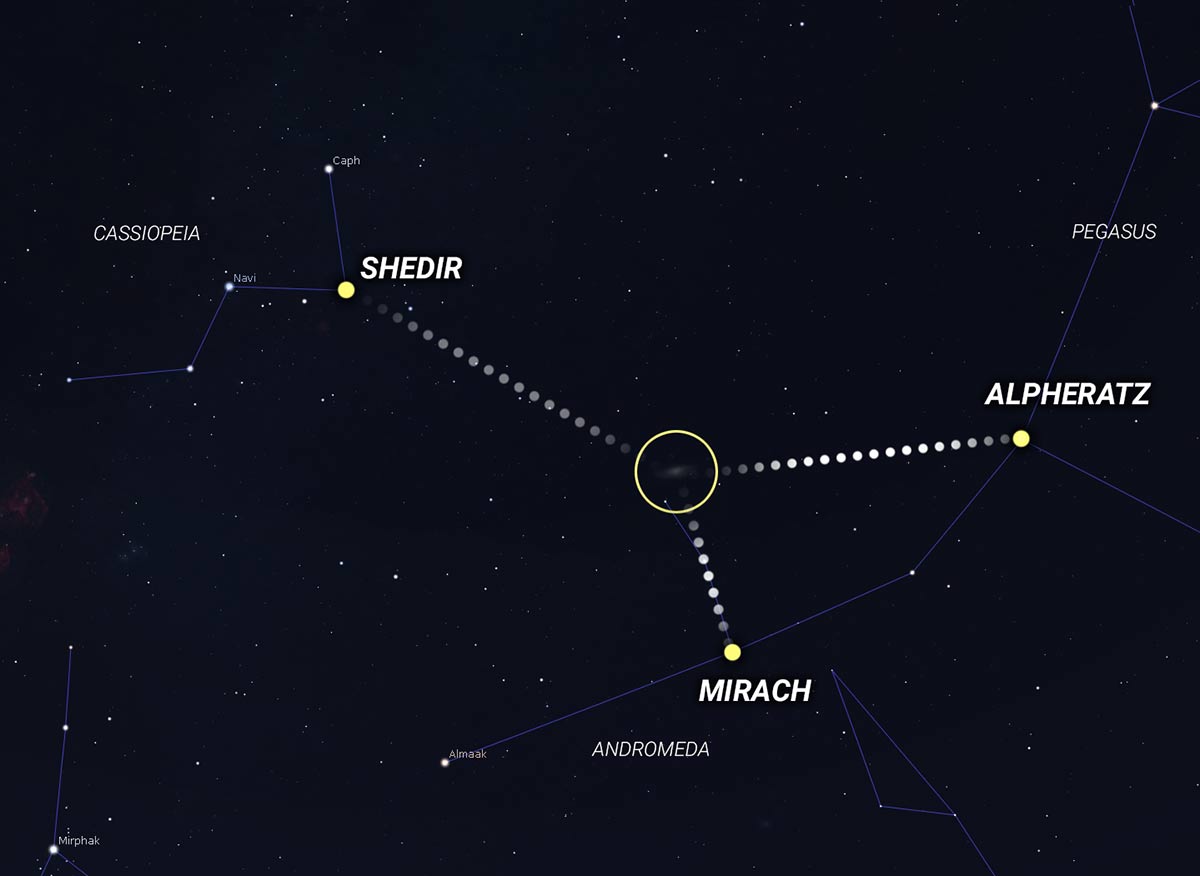
The Andromeda Galaxy is located in the constellation of the same name, but the Andromeda constellation is not easily recognizable to most observers. I find that the easiest way to locate M31 is to triangulate the position using the bright stars Alpheratz in Pegasus, and Mirach in Andromeda.
You can also use Cassiopeia to find Andromeda, by using the star Shedir and nearly following the line it points to from the other stars in the constellation. The following star map should help.
Find Andromeda in Binoculars
Andromeda is so bright, that it is visible to the naked eye under moonless, dark conditions. It is one of my favorite binocular targets to observe, right up there with the Orion Nebula. The visual appearance of M31 through a large telescope has mixed reviews. The bright core of the galaxy dominates the eyepiece, with little else to discern visually.
Despite its lackluster visual appearance, the thought of seeing another Galaxy with its own solar system is a mind-altering experience. This is one of the many indescribably humbling moments that occur while observing and photographing the night sky.
When to Look For it
From mid-northern latitudes, M31 is visible for at least part of every night of the year. However, this includes the wee hours of the morning and times when it is not in an obvious location in the night sky.
I prefer to start observing the Andromeda Galaxy with my telescope starting in late July when it reaches an adequate apparent altitude for a comfortable viewing session by 11 pm. As each night passes, Andromeda will start a little higher in the sky.
By September (northern autumn) the Andromeda Galaxy is high enough in the sky to observe starting at nightfall and watch it travel across the sky all night long. This is a great time to photograph the Andromeda Galaxy, as it is wise to shoot objects that are as close to the zenith as possible to minimize the effects of turbulence in the air and localized light pollution.
Are There Planets in the Andromeda Galaxy?
The Andromeda Galaxy likely contains millions or even billions of planets. With over 1 trillion stars in the galaxy, it is almost certain that many of them have orbiting planets around them.
However, because of the great distance between Earth and the Andromeda Galaxy, it is difficult to confirm this. Planets do not emit light the way stars and other galaxies do. All of the confirmed exoplanets astronomers have found so far are located within our own Milky Way galaxy.
At the time of writing (new scientific discoveries are happening all the time), there is one strong planet candidate in the Andromeda Galaxy. This planet is temporarily named PA-99-N2, and was detected during a microlensing event in 1999.
In order to support life on other planets, a planet must be in the habitable zone (also known as the ‘Goldilocks‘ zone), and be able to support liquid water. Due to the great distance between us and Andromeda, it is hard to tell how many planets are within these habitable zones.
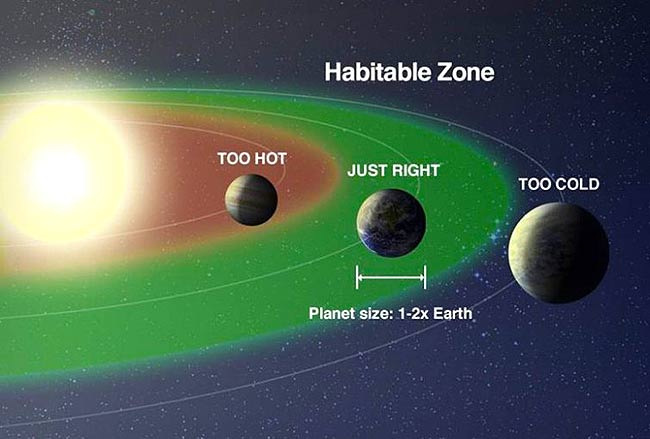
For a planet to support life, it must be in the ‘Goldilocks’ zone. NASA
Astrophotography Tips
Messier 31 is a sought-after target for amateur astrophotography enthusiasts, due to its massive size, bright magnitude, and exquisite spiral structure. As well as being the closest major galaxy to our own Milky Way, M31 is one of the brightest objects in the Messier Catalog.
As you begin taking photographs of Andromeda, you may notice how bright the core of the galaxy is. A single 30-second exposure will show plenty of bright light emitted from the center of the galaxy, yet lack the intricate details and colors of the outer spiral arms.
For this reason, it is best to capture several long exposure images and stack the data together to increase the amount of signal (light) collected overall. A good benchmark goal to shoot for would be capturing 30 x 3-minute exposures, using a modestly aggressive ISO setting of ISO 800 – ISO 1600.
The image below was captured using a Canon 60Da DSLR camera and RedCat 51 telescope on the Sky-Watcher Star Adventurer Pro mount. For this photo, 100 x 1.5-minute exposures at ISO 3200 were used.
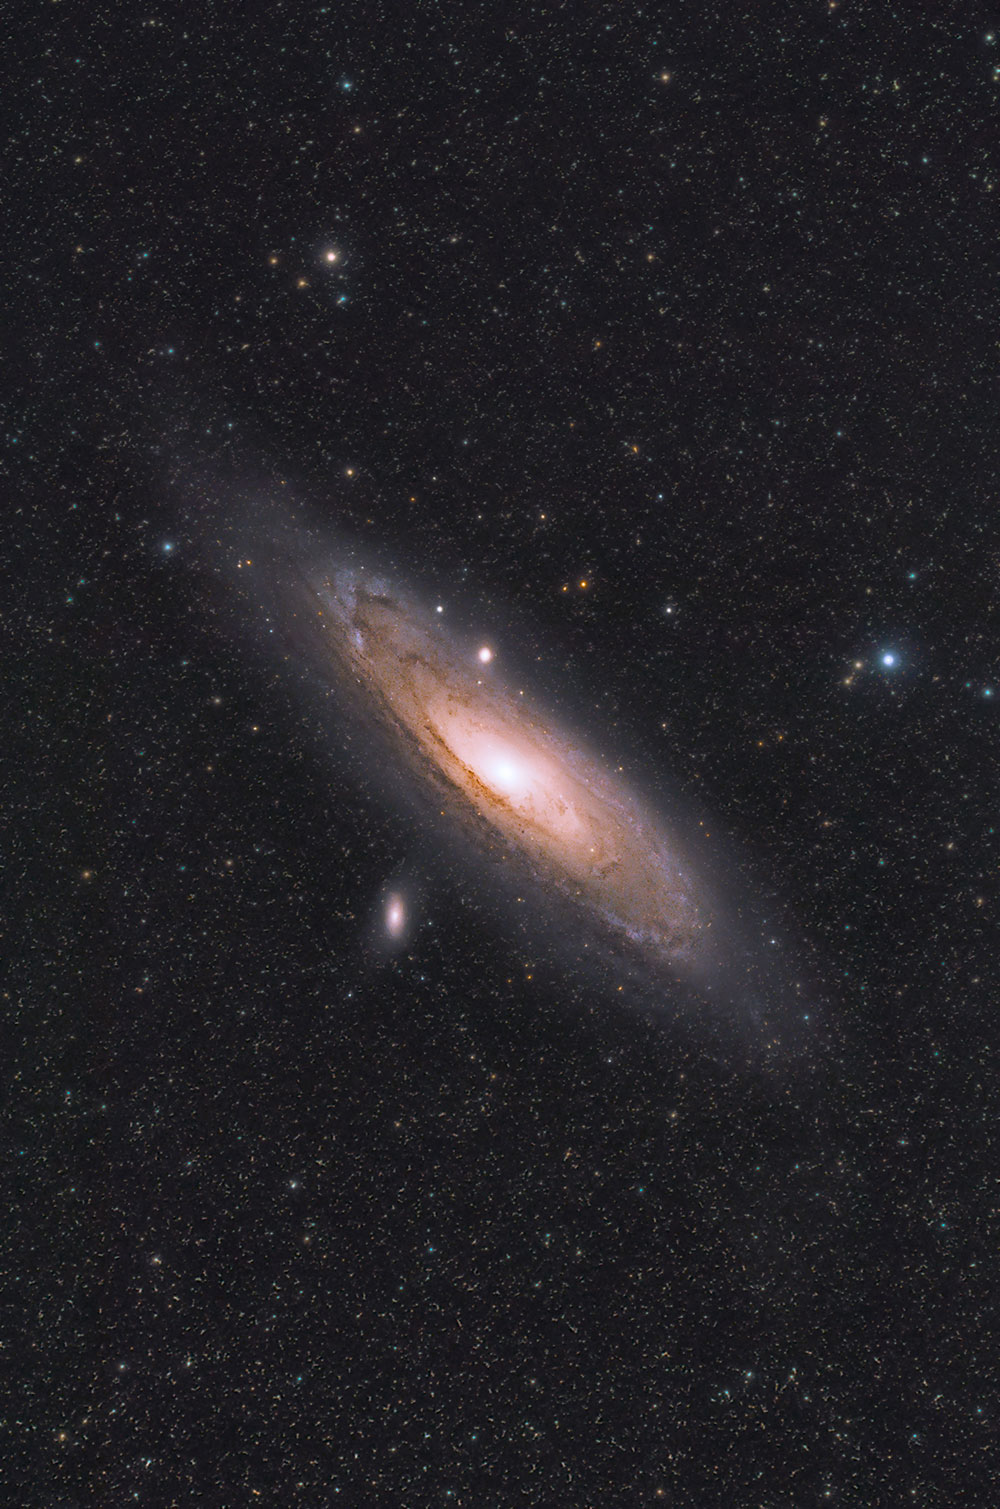
The Andromeda Galaxy captured with a DSLR camera.
The focal length of the telescope used gave me the right amount of magnification to show the entire Andromeda Galaxy, as well as its satellite galaxies, M32, and M110. Funny enough, a common problem amateur astrophotographers face when attempting to photograph this object is having too much magnification, and not being able to fit the entire galaxy within a simple frame.
Amateur astrophotographers that find themselves in this situation must create a mosaic, and stitch the photos together in post-processing. Those that put in the effort to complete this time-consuming task are often rewarded with an incredible, high-resolution, detailed image of the Andromeda Galaxy.
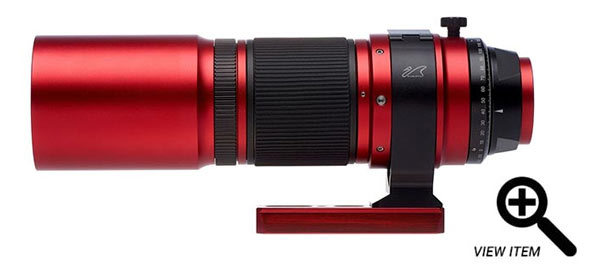
Luckily for me, the telescope used (William Optics RedCat 51) had a focal length of 250mm, which created the perfect field-of-view for Messier 31 when coupled with my crop-sensor DSLR camera. Below, is a picture of the telescope used for the image above. My DSLR camera was attached directly to the telescope, which is known as prime-focus astrophotography (Here’s how I attach the camera).
You do not need a telescope to photograph Andromeda. because it is such a large deep-sky object, a telephoto lens (or zoom-lens) will suffice. When it comes to photographing this galaxy, the most important factor is to shoot during the New Moon phase, and away from city light pollution.
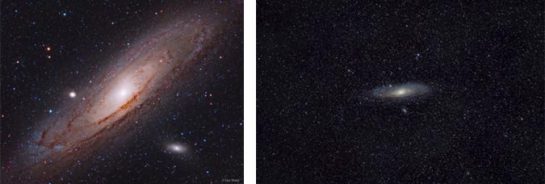
Below, is a re-processed version of the same data used for the picture above (the same sub-exposure files used), approached in a different way. This time, image processing techniques were used with the goal of creating a more colorful, dynamic image. Being able to take images in a completely different direction is one of my favorite aspects of astrophotography.
About the Image
The image above includes approximately 3 hours worth of total exposure time (integration), using 51 x 4-minute images. Each sub-exposure was captured using ISO 1600 on my digital camera. By stacking each of these individual images together, I was able to build an image with an improved signal-to-noise ratio (better details, less noise).
The white balance on the camera was set to “Auto” and the images were captured in RAW format. It is important to always shoot your astrophotography images in RAW format to preserve all of the data your camera sensor collects. You can then adjust things like temperature (white balance) after the photos have been taken.
To help reduce noise in the final image, I captured 16 dark frames. To calibrate and stack the image, I use software called DeepSkyStacker. This handy application handles the pre-processing stages of an astrophotography image, including stacking, registering, and calibration.
What Camera Should You Use?
The DSLR camera used for the photo above was not astro-modified, meaning the stock IR cut filter was still intact. There are professional services that can modify your camera for astrophotography, or you can do it yourself if you’re comfortable taking your camera apart.
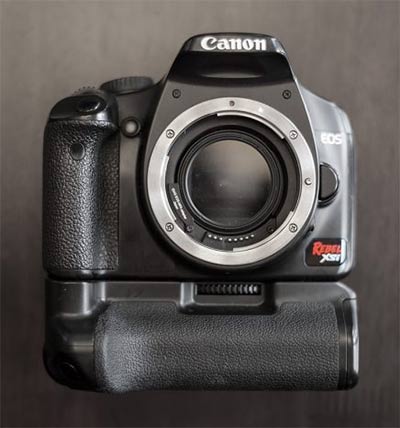
I used a (stock) Canon EOS Rebel Xsi (450D)
The Canon Rebel series DSLRs are their entry-level models, and are fantastic astrophotography cameras. I’ve owned several Canon Rebel cameras over the years, and have been extremely satisfied with the results.
A modified DSLR camera or dedicated astronomy camera will collect a stronger signal in the h-alpha emission line (656nm), which may add some fascinating details to your image of Andromeda. Because this galaxy contains its own nebulae regions within it, you may be able to record even more incredible color and detail in the galaxy by recording the hydrogen-alpha data.
As you can see, even a stock DSLR camera can capture a beautiful portrait of the Andromeda Galaxy. A mild light pollution filter was used, the (IDAS LPS D1 clip-in filter) for Canon APS-C camera bodies. This can help to reduce the amount of gradients and vignetting in your image, especially when shooting from the city.
Photo Details
Photographed on: July 20, 2012
Total Exposure: 3 Hours, 24 Minutes
Sub Frames: 51 x 240″ @ ISO 1600)
Mount: Celestron ASCG-5 GT
Camera: Stock Canon EOS Rebel Xsi
Telescope: Explore Scientific ED80 Triplet Apo
Guided with PHD Guiding
Stacked in DeepSkyStacker
Processed in Adobe Photoshop CC
Photographing Andromeda (Video)
In the summer of 2017, I brought a new astrophotography telescope with me on a camping trip. My target of choice was the beautiful Andromeda Galaxy and this time I had a wider focal length. The details of that trip and the equipment used are showcased in the video.
The data captured on this trip was merged with my existing image from 2012 to create an even deeper and more colorful view of this magnificent spiral galaxy.
Astrophotography tips and advice
Large objects like M31 benefit from the wide field of view provided by a small refractor. Using the Explore Scientific ED80 at 480mm, the galaxy fills the frame perfectly, with a little room to spare. I also used a William Optics field flattener/reducer to widen the view even further.
From a dark sky site, your sub-frames will show the gorgeous outer arms of the galaxy, with an ultra-bright core. Shorter exposures from the city will not show much more than the core, so you will have to coax out the details in post-processing.
To process this image, a great deal of attention was given to slight curve adjustments around the edges of the galaxy. The faint spiral arms around the edges were pulled forward, while the bright core was left untouched. This is a technique called a “layer mask”, which is useful when processing deep sky objects that have a bright core.
View over 50 amateur astrophotography images of the Andromeda Galaxy taken by the AstroBackyard community.
Using a Camera Lens
Because the Andromeda Galaxy is such a large target, it is possible to capture impressive results using a DSLR camera and lens. The photo below showcases M31 through a Canon EF 24-105mm F/4L Camera Lens, on an iOptron SkyTracker camera mount.
This was taken from my light-polluted city backyard, so the colors are a little off. To get the rich blues and faint details of M31, traveling to darker skies is recommended.
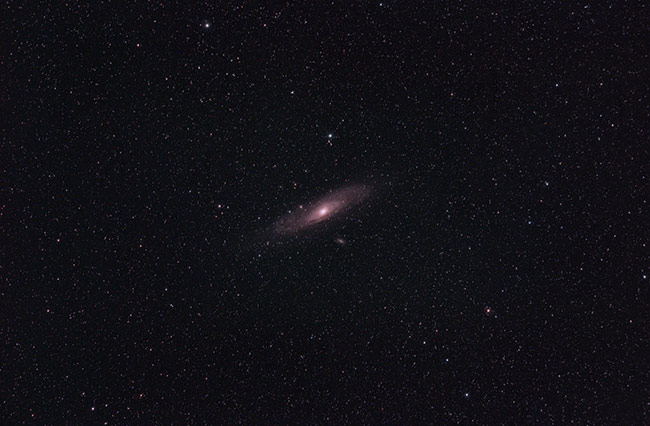
The Andromeda Galaxy at 105mm (APS-C Sensor DSLR)
At this focal length, you can really get a feeling for the vastness of space surrounding this galaxy. The images were captured with a Canon 600D DSLR (T3i), with a SkyTech CLS-CCD Light Pollution filter installed.
The individual frames were 2 minutes each, at ISO 800. In total, 75 frames were stacked in DeepSkyStacker to produce the image above.
Andromeda using a 135mm Camera Lens
The Andromeda Galaxy is the brightest and largest galaxy in the northern hemisphere, and only the Small and Large Magellanic clouds (galaxies) in the southern hemisphere are easier to spot in the night sky.
It should come as no surprise that it is possible to photograph M31 using almost any focal length (it may be hard to locate in a fish-eye lens!). However, some camera lenses seem to get the framing and scale of this object just right.
That is certainly the case with the Rokinon 135mm F/2.0 ED UMC lens. This lens, along with the Samyang 135mm variation, is an incredible optical instrument for astrophotography. Below, is a photo of the Andromeda Galaxy, along with M110 and M32 using a 135mm lens on my Canon 60Da.
The Andromeda Galaxy using a Rokinon 135mm F/2 lens.
The Benefits of Dark Skies
Dark skies make a real difference in both visual observing and deep-sky astrophotography. A number of my M31 photos were captured under darker skies than I have at home
The beautiful area where this photo was taken is a blue zone on the light pollution map. The site looks south over Lake Erie, creating some incredible views that I can not experience from home.

The dark sky location where my image was captured (The telescope used is also shown, on a different mount).
Being outside and experiencing the transition from dusk to nightfall is unforgettable. This aspect of the hobby is one of the many magical moments I did not realize I would experience when I got started.