Altair Hypercam 183C Review
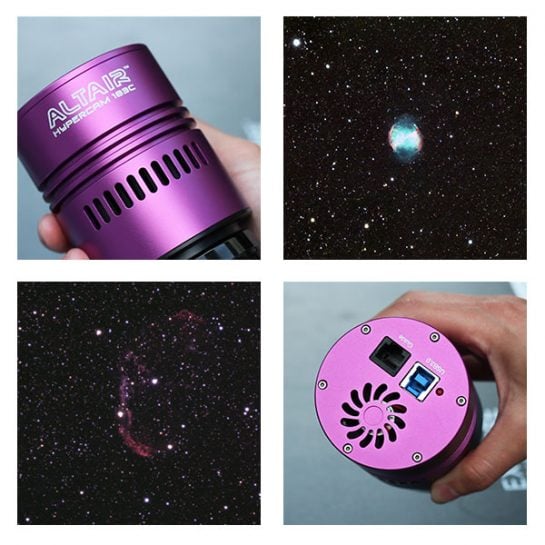
Thanks to my friends at Ontario Telescope and Accessories, a brand new Altair Hypercam 183C arrived at my door last week. The striking purple exterior color of this one-shot color CMOS camera makes a bold statement, but it’s the deep sky imaging capabilities of the cooled sensor that have captured my attention.
There are many options available for deep sky astrophotography these days, and traditional DSLR images such as myself are left with some tough decisions. One look at the data captured using a cooled CMOS sensor, and you will notice the astonishing difference this can make.
View my latest images using this astrophotography camera
In this post, I will share my deep-sky photo examples using this camera with my ED102 telescope. Please keep in mind that these images were captured in heavy city light-pollution. Under darker skies, the Hypercam will perform even better.
Altair Hypercam 183C Review – What you can expect from a city backyard
I should also mention that the image examples on this page were shot without any CLS (city light suppression) filtering. A 2″ round mounted CLS filter such as the Orion SkyGlow Broadband filter would have helped increase contrast and reduce the ugly LP from my location.
A cooled color CMOS camera for deep-sky
The ExmorR rated back-illuminated sensor is touted as being one of the most important factors when comparing this camera to a DSLR. The internal fan keeps this camera cool, and the low read noise qualities mean that the Hypercam 183C should blow my Canon 600D out of the water in terms of noise.
In my early test with this camera, I was astonished at just how cool this sensor was during an imaging session. There is no temperature readout on this chip, but the difference is obvious when reviewing the images I’ve captured.
The CMOS sensor size in this camera is 16.05 x 12.61mm, which Altair Astro says is well suited for my F7 refractor telescope. This camera is a new breed of astronomy imaging cameras designed to tap into the image quality benefits only previously experienced when using a CCD sensor.
Related: What’s the difference between a CCD and CMOS sensor?
The Hypercam is worth a look for those looking to upgrade from a DSLR or start their journey into astrophotography on the right foot. My testing will specifically focus on the deep sky imaging aspect of this camera.
Altair Hypercam 183C Features:
-
ST4 autoguiding port
-
Internal Fan Cooling
-
12Bit RAW mode
-
Built-in UV/IR filter
-
Built-in Amp Glow Reduction
Fans of DeepSkyStacker will be happy to know that you can, in fact, register and stack the .FIT files produced by this camera in DSS. Using the 12bit RAW color space means ultra high-resolution 16-bit full-color RGB image to dive into when image processing. More on this below.
Video: Let’s Photograph the Dumbbell Nebula
In this video, I get nostalgic about one of the first deep sky objects I ever photographed, the dumbbell nebula. You’ll see the Altair Hypercam 183C in action as I use it to capture exposures on M27 from the backyard.
Below, I’ll share my thoughts on the image quality of my Dumbbell Nebula image used in the video. This experience should provide you with a good idea of what to expect when using the Altair Hypercam 183C.
Deep Sky with No Autoguiding?
Short-exposure “lucky imaging” is an attractive choice for beginners. Early on, one of the toughest aspects of astrophotography a capturing a long exposure image with steady tracking. Obtaining sharp stars on an image longer than 2 minutes may seem impossible.
 Short exposure imaging on mounts that are not using autoguiding is an attractive option. The Hypercam 183C is a new breed of imaging camera that aims to produce incredible images by stacking many (really) short exposures to improve the signal-to-noise ratio.
Most modest entry-level astrophotography mounts (My Sky-watcher HEQ5 included!) such as the Celestron AVX and Orion Sirius are capable of exposures up to 1 minute without autoguiding. So, with a highly sensitive camera like the 183C, it may be possible to obtain impressive results my stacking many short exposures.
This is something that just isn’t possible with a standard DSLR camera. When the ISO is pushed too far, the thermal noise in the images begins to take over. With no cooling option, a DSLR sensor can reach scorching temperatures that make image processing a nightmare. (trust me on this one)
Here is an example of short-exposure deep-sky imaging using 10-second exposures on a very bright deep-sky object from Nick at Altair. The Orion Nebula using the Hypercam 183C.
Imaging and Guiding with Altair Astro

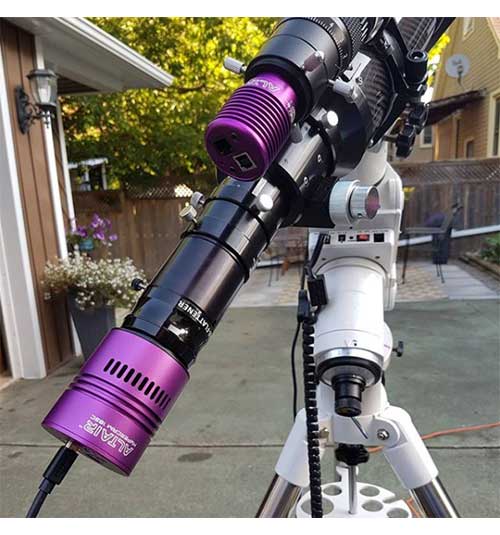
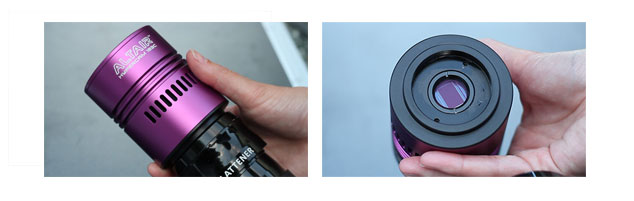
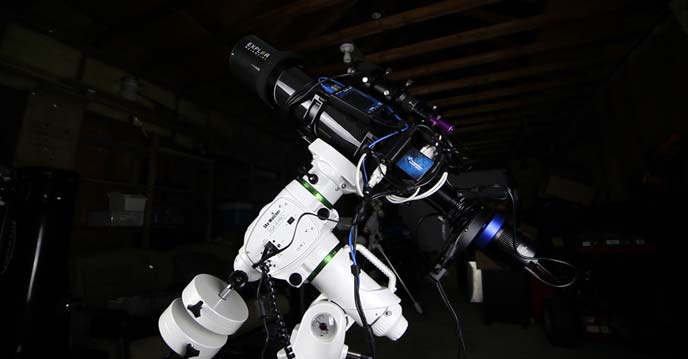
The Hypercam 183C threaded nicely into my 2″ Altair 08.X Flattener/Reducer. The camera is compact and lightweight, meaning my overall astrophotography imaging train continues to put very little stress on the mount.
I did not need any additional adapters to connect the camera to my telescope focuser. I used an Allen key to remove the threaded ring with a 1.25″ opening above the sensor. Once that ring was removed, I was able to screw my field flattener into the 183C directly.
An extension tube was needed to reach focus with the new Altair camera. So, although the imaging configuration is lighter and less obtrusive than my Canon DSLR, it is longer overall. This is something to watch during un-monitored imaging sessions where a crash into the mount may occur.
From a visual gear perspective (Something I have never put too much attention on), the matching purple Hypercam 183 and GPCAM2 look rather attractive. My deep sky imaging rig gets used too much to stay clean and polished. My rusty counter-weight on the HEQ5 is proof!
My current deep-sky imaging setup (Video)
Camera Control Software
One of the major factors involved with purchasing a new astrophotography camera is the considering the new software and drivers required to run the unit. In the case of the Hypercam 183C, I had three options for camera control out of the box:
I haven’t spent too much time with AltairCapture yet, so I decided on SharpCap Pro to control my imaging session. Up until now, I used SharpCap for framing and focusing using the ASI071MC-Cool and to aid with my Polar Alignment process. I had never controlled a full deep sky imaging session from start to finish until recently.
As I am sure many of you have experienced, my first night using a new software for deep-sky imaging was full of “ah-ha” moments that eventually resulted in a better understanding of the software.
I believe that SharpCap has the potential to be a solid choice for long exposure deep sky imaging sessions, even if it feels tailored for the planetary and EAA crowd. The always-refreshing image preview that starts as soon as your camera is selected can be off-putting and confusing for DSLR imagers.
Perhaps I have just become too accustomed to applications like Sequence Generator Pro and Astro Photography Tool for controlling a sequence of images.
I was able to overcome most of my issues after some quick investigating online. Unfortunately, one issue that remains is an unexplained “frame dropping” that causes my images to not be recorded onto the computer. The team at SharpCap is aware of the issue and offered some great troubleshooting options to help me out.
Update – The issue had to do with the USB port I was using on my aging laptop. Switching ports corrected the issue!
Deep Sky Image Example
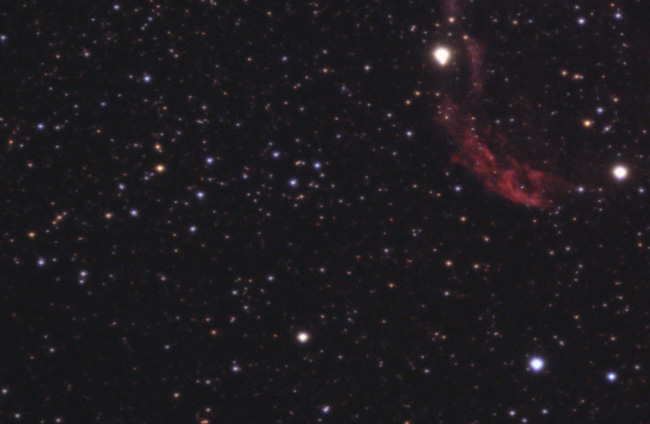
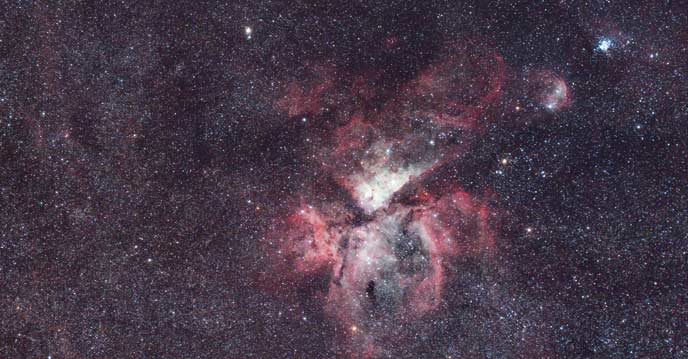
Limited to short exposures using SharpCap, I managed to capture 37 image frames at 60 seconds each on the Crescent Nebula. The imaging conditions and limited exposure time resulted in a poor rendition of NGC6888, but the image quality of the Hypercam 183C is evident.
Here is a close-up of an area in the image that shows the smooth details captured by the Hypercam. The star color is rich and beautiful using this CMOS One-shot-color sensor.
In this review, I really wanted to produce an image using several long exposure image frames (of 3 minute or more) to portray the true potential of this camera. Unfortunately, software bugs and weather did not coordinate. The image below is less than 1 hour’s worth of data using short 1-minute exposures.
To make matters worse, I accidentally used an external UV/IR luminance filter while imaging. I guess I forgot to read the full specification sheet for the Hypercam 183C and discover that it has a UV/IR filter built-in!
Test Image – Hypercam 183C (37 Minutes)
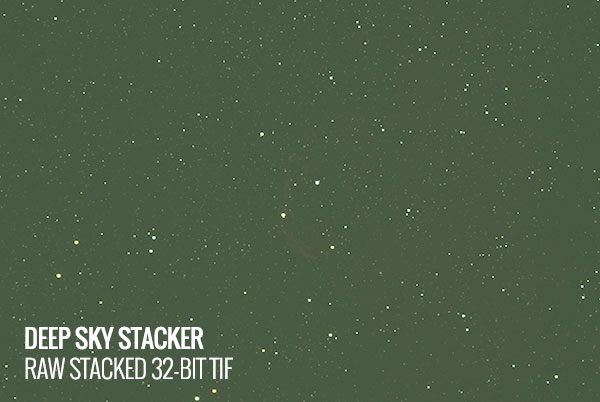
I have attempted to keep this data mostly raw, and have applied very little image processing at this stage. A basic curves adjustment, levels, and gradient removal were used to show off the image quality when using the Altair Hypercam.
Click the image for a larger version.

Total Exposure: 37 minutes
37 x 60s / Gain at 70% / Bin 1 x 1
Again, I can’t stress enough that this image is an example of the low noise qualities of the image frames. I could pull out much more nebulosity in the DSO using Photoshop, but that would not illustrate the aspect of the data I am referring to in this post.
This image includes much less exposure time than I would normally shoot. In retrospect, it was not a great test subject as the NGC 6888 requires OIII and Ha data for a complete structure. Regardless, this image represents overcoming the challenges involved with a new camera and imaging software early on.
More Example Images…
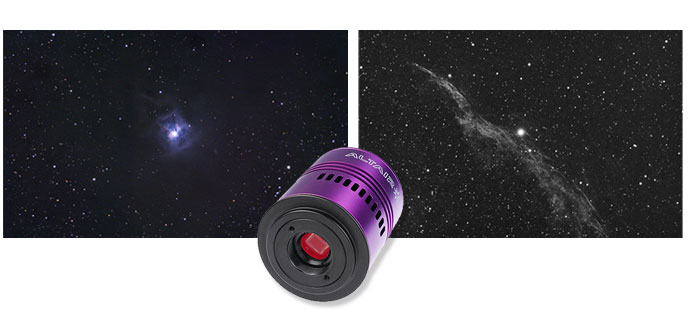
Here are some of the early images I have managed to capture using this camera from my light-polluted backyard. These images should improve once I add a CLS filter to the imaging train.
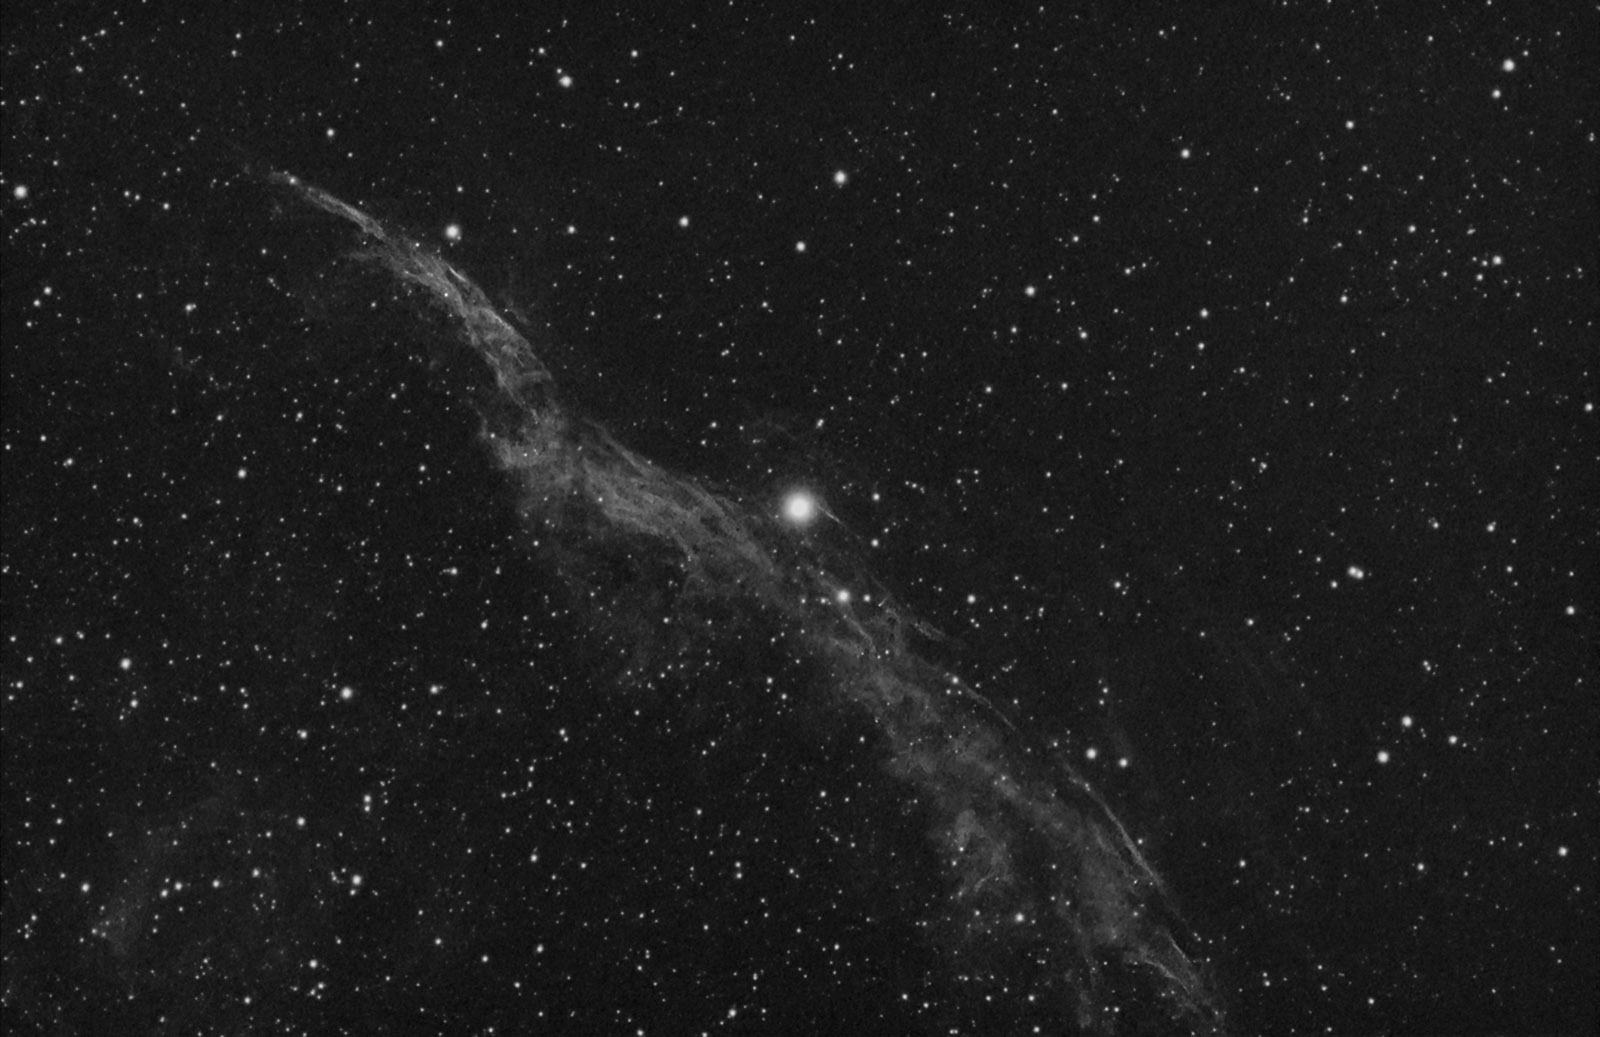
NGC 6960 The Western Veil Nebula (Witches Broom)
Total Exposure: 3 Hours, 55 minutes
47 x 300s / Gain at 50% / Bin 2 x 2
Astronomik 12nm Ha Filter
The overall image quality of the photos using the 20MP Hypercam is much better than my Canon T3i. This is evident when processing the stacked image data in Photoshop. I would not attempt a faint object like the Iris Nebula from my location with a DSLR.
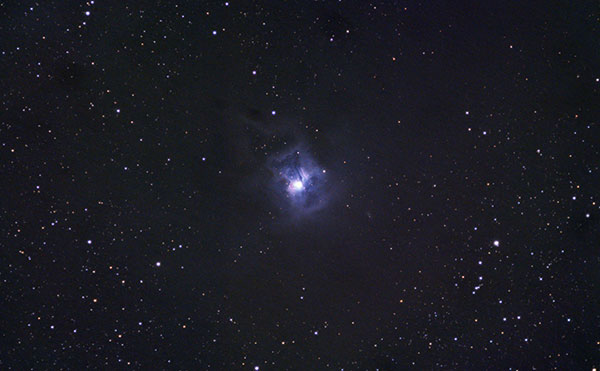
NGC 7023: The Iris Nebula
Total Exposure: 2 Hours, 16 minutes
105 Frames (60, 120, 180s) / Gain at 50% / Bin 1 x 1
No Filter Used
Overall, I am extremely impressed with the Hypercams deep sky image quality. The background sky was smooth and free of virtually any noise. Processing the image in Photoshop was a pleasure thanks to the smooth, detailed image produced in a relatively short integration period.
M27: The Dumbbell Nebula
The deep sky object of my first APT test was the ever so bright and satisfying dumbbell nebula. I often recommend trying M27 early on in your astrophotography ventures as this planetary nebula comes in at a whopping magnitude 8.1.
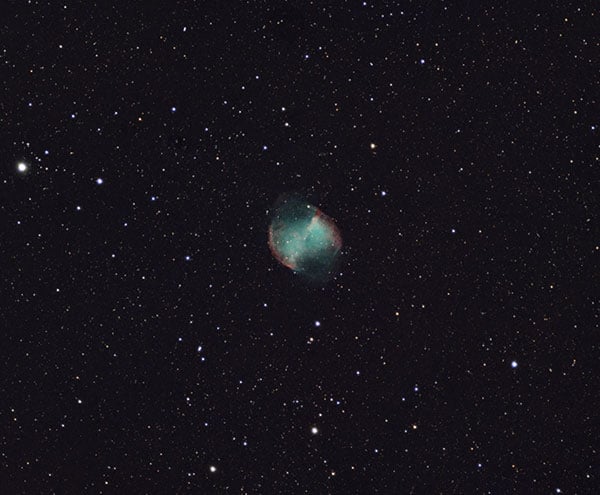
Image Details:
Total Exposure: 22 Minutes (22 x 60s) / Gain at 50% / Bin 1 x 1
Hypercam 183C Settings and Tips
Here are some helpful pointers for getting up and running your first night out with the Hypercam 183C. I would recommend using SharpCap to control this camera, as it is much more stable. However, so of you may prefer to use APT, and this advice may save you some frustrations.
Using the Hypercam 183C with Astro Photography Tool
These tips will come in handy only after you have installed the required drivers and Astro Photography Tool has successfully discovered the Hypercam 183C via the ASCOM properties.
- Connect your guide camera first, and make sure it is functioning properly. In my case that was the Altair GPCAM2 in PHD2.
- Use SharpCap 3.0 to frame and focus your imaging target. The highly sensitive imx183 CMOS sensor makes focusing with a Bahtinov mask ultra-responsive and accurate. The same goes for framing your object. Crank to gain up and, and you’ll often spot your DSO in a 4-8 second exposure.
- Start your imaging plan with a”fresh connection”. Disconnect the camera on startup, and shift-click the connect button. Choose the Hypercam in the camera selector, and confirm your gain setting, and that the fan is turned on!
Without re-applying this step before each imaging sequence, sometimes the sequence would get stuck on the first frame (“busy”).
Debayering in Deep Sky Stacker
The image frames were shot in .FITS format, using the RAW12 color space in SharpCap. It is worth noting that Deep Sky Stacker will only debayer 16-bit FITS files. I shot 8-bit files in a previous session and was unable to get color in my stacked image.
The Hypercam 183C uses an RGGB Bayer pattern, which is useful to know when getting ready to register and stack your images.
Whether you are using APT or SharpCap to control the camera, it is imperative to select the full RAW12 color profile mode to ensure you are recording the highest quality image data.
Using Astro Photography Tool
After some minor software issues, I am happy to report that the Hypercam183C works well with Astro Photography Tool. This is big news if you are accustomed to applications like BYE or SGP for camera control.
Astro Photography Tool has proven to be a capable and reliable tool when used with a color CMOS camera such as the ASI071MC or Altair Hypercam 183C.
The team at Altair was quick to provide support when I ran into trouble. Once the issue was addressed, an update to the Altair ASCOM driver was made and the 183C responded positively in APT.
Final Thoughts
The Altair Hypercam 183C shows the potential to outperform a modified DSLR camera for deep sky imaging. The sensor cooling fan is the single biggest advantage, along with a slew of other astronomy-specific qualities.
The added conveniences such as better focusing and complete chip sensitivity control are aspects that are only appreciated after several imaging sessions. With an understanding of the SharpCap camera control software, you are well on your way towards countless beautiful deep-sky images with the Hypercam.
It is a shame that much of my time with the 183C was spent tackling early software bugs and not capturing deep-sky images. This resulted in an example image of the Dumbbell Nebula that does not show the true potential of this color CMOS camera.
Please continue to follow AstroBackyard on YouTube and Facebook for new and improved images using the Altair Hypercam 183C this summer.
Related Articles:
- Astrophotography Cameras – What’s the Best Choice for a Beginner?
- The Rise of CMOS: CMOS Sensors winning the Camera Sensor Battle (TechHive)
- CMOS Fundamentals: What exactly is a CMOS Image Sensor? (Siliconimaging.com)


Nice review!
I too have received great support from the Altair and Sharpcap team when using the smaller sibling to your camera, the 178M, they really helped me troubleshoot and sort ou driver issues, so a big thumbs up to them.
I’m very happy with the results from my Hypercam and have been using it successfully with APT, with short exposures like you mentioned above, but dithering every frame. I only use dark calibration files, to remove amp glow, as I found that dithering helps remove the majority of what little noise there is after sigma stacking in DSS, without flats or bias.
Enjoy your camera this summer, I hops it gets you some awesome images!
Check out an image i took with the 178M and the aforementioned settings, maybe you could try something similar:
http://www.astrobin.com/full/301197/0/
Thanks, Minos! Glad to hear about your success with the Hypercam 178C. I just checked out your Astrobin profile – impressive work!!
I am also glad to hear that you are successfully using APT to control the camera – something I would love to accomplish more reliably with the 183C. Like you said, Altairs support is top notch so I am confident I’ll get everything sorted out.
I feel like I haven’t even scratched the surface of what this camera can do.
Happy imaging!
Wonderful review. Thanks for sharing.
Thanks Nancy!
Which GPCAM 2 are you using? 130?. Thanks for your efforts. I look forward to the next video every time you publish one.
Thank you, Stephen! Yes, I use the AR0130 Mono guide cam. The mono version is more sensitive and can provide better guiding. As for the Altair 183C, I am still in the process of a complete deep-sky project. (About 2 hours into NGC 7023). The one thing I would mention is that the field of view will be quite narrow in your C11 (Great for galaxies!) The chip size means a much more narrow field of view than I am used to with the ED102. All the best!
I’m considering the purchase of you AT&A setup. Starwave 50m GPCAM 2 130 colour and Altair 183C. Any thoughts on how useful this would be with my Alt Az Celestron C11.
The EQ mount is too prohibitively expensive and a poor second hand market in Europe is no help.
I’ve just picked up a second hand NEQ6 Pro-R for £700. Had to round trip 350 miles to get it. Keep your eyes peeled!
Sounds great Stephen! Excellent choice on the mount – worth the drive 🙂 Are you planning on mounting the C11 to the NEQ6?
I bought the kit to mount the C11 to the Celestron AVX mount then changed my mind and bought an explore scientific 127 ED APO . I was reluctant to dedicate the C11 to astrophotography. It’s such a brilliant visual scope. I ended up with the Altair 130 and 183 with the Celestron AVX (i’m still worried about that mount for this scope) and the ED Apo 127.
Tonight I’m taking my C11 to a viewing party ( no astrophotos). I will see how that goes. This is the worst summer in 15 yrs for viewing the stars in SW France. Fingers crossed for tonight.
The star night went well except for some serious dew. It turned to ground level fog in the early hours of the morning and prompted a complete corrector plate clean the following day. I suddenly realised just how important it is to keep dew off the scope.
Very unusual in SW France in mid summer. Temp fell to 12C.
Next job is to get the new 127 APO ED setup and test the cameras.
Trevor, between the exit of the scope 2″ and the altair 183 you have a number of extenders. What are they? please.
Stephen, im using the AVX with my C8 and 183C doing 4 hours of integration and PHD2 reporting RMS of 0.09 on the DEC,, no problem..’neither should you have with your refractor.
Hello,
I confused by your setup shown on the two pics (Camera + FieldFlattener).
The Back Focus specs for the field flattener is 55mm and you attached it directly on the camera without extensions.
How can it be possible?
Thank you,
Davide.
Hi Davide, I’ve had a number of questions about this. The 183C reaches focus using the Altair 0.8X flattener flush against it. There is some space between the sensor and reducer glass, but it’s less than the recommended 55mm. (Maybe 35mm?) I can only assume I am not having issues focusing due to the size of the sensor – and the image scale using my 714mm FL scope. I’ll keep looking into this though.
Hey Trevor, first off great website you have going and a wealth of useful information you have put together. Enjoy every video you post and look forward to the next.
I have a question regarding the field flattener/reducer spacing. I’ve got the hypercam 183C along with the ES ED102CF scope. I’ve put the 2 extension tubes that come with the scope together along with the field flattener/reducer then the camera. I’ve been reaching focus no issues but my question is the F ratio and the field of view with this setup. I notice that your images with the hypercam 183 has a wider FOV than mine, also when I plate solve with astronomy.net it says my focal length of my scope is 630. I know that reducing the focal length increases the FOV so I’m wondering if I remove one of the spacers I would reduce my focal length thereby increasing my FOV but will I still achieve focus by doing this? I haven’t tried doing this but I thought you might have insights to the optimal spacing between the focus of the scope and the reducer/flattener ( I have my reducer/flattener screwed into the hypercam just like you). Again thanks for all the great job you’ve been doing!
Jirair
Hey Trevor, how does this camera compare to the ZWO ASI071MC-Cool? Can you please share some information on the differences?
Hi Erin. There is a BIG difference between the two cameras – and thats TEC (thermoelectric cooling) in the ZWO camera – The difference this makes in terms of noise in your images is drastic. The ASI071MC-Cool also has a larger sensor also. I have enjoyed using both cameras but the 071MC-Cool outperforms the 183C for deep-sky astrophotography which should not come as a surprise with the steeper price tag!
Thanks for your trailblazing work with this new camera!
I’m thinking of this camera but I’m a bit worried about amp glow.
How critical is matching the temperature of the darks? Could I get away with darks taken at similar temp another (cloudy) night?
Can you show a hard stretched dark frame of 60s?
Thanks,
Per
Hi Per – The amp glow is removed when using darks of a “similar” temperature (I know, real technical!) I haven’t tested the limits of this – but I shot in temps with up to about 10C variation and the darks ALWAYS completely removed the amp glow. Id say shooting on a different night should be fine if you stay within that 10 degree window (ideally smaller). Cheers
Hello Trever 🙂
You mentioned in the review that you had to use an extension tube to reach focus. May I ask you which extension tube and config did you have to use to achieve focus with this set-up ? Is it an Altair 35mm, 50mm extension tube ? I have an Esprit 100ED and I am also about to purchase the 183C v2. Thank you in advance for your help!
André 🙂
Hi Andre! I used a threaded tube (about 50mm) to extend my focuser draw tube, and then another 35mm astro-tech extension adapter. You may not need as much – but there are many inexpensive extension tubes on the market – probably best to get 2 lengths for future configurations. Cheers!
Hello Trevor:
Your videos are truly, most helpful !! I went and bought the hypercam 183c since you gave it such a high rating. I can’t get it to work with APT. When I shift click on connect, it says at the bottom that the connection was aborted. I think it’s because I don’t know how to use ASCOM connect and install the new drivers. Could you give me a short step by step process of installing the drivers, etc? I’m using windows 8.1.
I’m like you, I’ve used APT for my DSLR and “know” the program, so I would like to keep using it.
Thanks in advance for any help you can give me.
PS: The camera works, using Altair Capture, so it’s not a defective camera.
Hey you mentioned that this camera has potential to outperform DSLR. How did it actually turn out to be? I am using Sony a6000 right now and considering an upgrade in the future. Will this be a big upgrade? Thanks.
Hi James. It certainly did outperform the DSLR. Just having a cooler sensor alone was a HUGE upgrade (the open design with fan). It opened the doors to long exposure narrowband imaging as well. (6-minute+ subs were simply not possible on a hot night with my DSLR) If you’re willing to make the switch from a camera with a live display screen to something that relies on software to use – it’s a big leap forward. A cooled camera is next – so it’s worth thinking about jumping on a camera with TEC from a DSLR. Cheers
Hi Trevor
I have a svr102t with F/R I’m using t2i dslr . I’m getting elongated stars on left and right bottom of my images .
Please help
Thx Raj
Hi Raj – that’s a really nice telescope! It’s odd that you are getting elongated stars at the edges of the frame with an APS-C sensor DSLR using a FF. Is it the Stellarvue flattener that matches that scope or a different one?
Hello,
What cams would you recommend to use on AT65EDQ & WO 81GT & AT8 CF.
Mount CGE with Bennett mods.
Altair:
ASI:
Hi Trevor, what offset do you use with this camera?
I se eyou typically use a gain of between 50% and 70 %.
Hi Trevor,
Just ordered the 183C Pro from Ontario Telescope. Looking forward to see how it compares against my old Rebel T4i.
Hi Trevor, great review and some good pointers for beginners starting out in the trade, how would this camera fare on an esprit 100 with field flattener?